Radish and Arugula Salad

Even though it’s raining here in NY today I wanted to post this perfectly refreshing summer salad. Using some of those beautiful radishes out there in the market. I love radishes and eat them freshly scrubbed and raw with a little coarse salt. I also love them sliced thinly on toast with some smashed avocado. Countless possibilities with radishes. This salad is just perfect for all you radish lovers out there. Enjoy!

cookingwithcandi's avatarCooking with Candi

photo (11)photo (12)Beautiful radishes at the Farmer’s Market and beautiful arugula from local farms.  I made this salad from radishes and arugula with Parmesan cheese, olive oil  and lemons. This is light and our friends loved it, so here it is. Whenever I make something new I need honest opinions and I got them from our friends because you know by now that Joel wouldn’t like it , since there was parmesan cheese he did take a bite but definitely not his thing. It is so my thing though and thanks Bob and Michele for your honest opinions.

This is super easy and not a lot of ingredients or special tools.

Ingredients:

2 tbsp. grated parmesan or pecorino cheese plus up to 3 tablespoons cheese ( 5 all together to have on hand)

2 tbsp. lemon juice , freshly squeezed ( 1 small lemon )

Kosher or Sea Salt

Freshly ground black pepper

1/4 cup…

View original post 169 more words

Blackberry Cake (more things to do with berries)

Monday morning re-blog of a most delicious cake. Original post was June ’11. If you missed this you might want to give it a try. Perfect cake for the summer when the blackberries are in season. Enjoy!

cookingwithcandi's avatarCooking with Candi

more things to do with berries

This cake is not too sweet, makes a lovely presentation, and is just awesome for breakfast the next morning with a cup of coffee! I made one yesterday and of course, I will have to freeze it soon because it’s just awesome for a late morning snack, an after-hiking snack, a late afternoon snack, etc, etc. It also helps to give it away to your guests as a care package since then you don’t end up finishing the whole cake yourself! 

Serves 8-10

INGREDIENTS:

Use a 9 or 10-inch diameter springform cake pan

3/4 cup (1 1/2 sticks) unsalted butter, room temperature (plus more for pan and parchment paper)

2 1/3 cups cake flour (sifted) plus a little more to sprinkle in pan

2 pints blackberries

1/4 cup sugar to sprinkle on blackberries

1 1/3 cup sugar for batter

1 1/2 tsp. baking powder

3/4 tsp. salt

1/2 tsp. baking…

View original post 314 more words

Michele’s Ramen Noodle Salad – Perfect Summer Salad

This is an amazing Summer Salad given to me by my friend Michele. I originally posted it last summer and am re-posting for all of you who may have missed it. This one is worth looking into . I have other Ramon Noodle Salads on my blog that are vegetarian this one is not. Enjoy!

cookingwithcandi's avatarCooking with Candi

photoI have already posted my version of a Napa Noodle Salad, which we all love and totally enjoy all summer long. Here is a new spin on it. We went to our friend’s house for dinner and Michele served this delicious noodle salad with just a little bit of a difference from mine but different and delicious enough that it’s worth the post for sure. So whether you love the other one or never even tried it this one is definitely worthy and will be a part of my Summer Salad Repertoire.  Michele is a wonderful entertainer and she did an amazing job that night and my parting gift was this recipe. Thanks again Michele! And by the way Joel loved it, and it contains Broccoli Slaw!!!! this was a major shock for sure. Maybe the tide is turning? This is not vegetarian but my Napa Noodle Salad is so just substitute…

View original post 182 more words

Link

Chicken Salad–a different spin

Continue reading

Link

Salad Dressing with Roasted Garlic

photo 1 photo 4 (2) photo 5 (2)photo 1 (78)photo 2 (62)photo 1 (2)Yes, I read and subscribe to Gwyneth Paltrow’s website Goop and when she’s not explaining her “conscious uncoupling” the website is actually very informative and worthwhile. In any event her suggestions for recipes are very worthwhile. This recipe was on the Goop website and even though you have to roast the garlic which is a little time-consuming it was a super delicious dressing and I actually put it on Salmon before I broiled it and it was really tasty.  The recipe is from Roberta’s Cookbook which actually looks pretty amazing. I always have all these ingredients in the house and they are simple ingredients .  I have to admit the first time I read it I was thinking of omitting the roasted garlic but it wouldn’t have been as deeply layered a flavor. I highly recommend this recipe and roasting the garlic , we fully enjoyed our salad. I used plain Romaine this time out but this would be amazing on any greens. I also used it on my broiled salmon a few days later and it was amazing. I broiled the salmon on lemon and thyme  brushed the dressing on it put it back in broiler for about 5 minutes and it was delicious. So not only a great salad dressing but an awesome marinade as well. This was my adaptation.

www.goop.com

Ingredients:

1 head of garlic for roasting

3/4 cup of olive oil, and a little splash for roasting garlic

1 peeled garlic clove

2 Tablespoons Dijon Mustard

1 1/2 Tablespoons white wine vinegar

2 Tablespoons Sherry Vinegar

2 egg yolks

5 anchovy fillets

Juice of 1 small lemon

Kosher Salt and Freshly Ground Black Pepper to taste ( I used a little black pepper and a very small amount of Kosher Salt, it’s your call)

Directions:

To Roast Garlic:

Preheat the oven to 350 degrees. Cut about a quarter of an inch off the head of the garlic and place the head cut side up on a piece of aluminum foil large enough to cover garlic.  Splash a little water and a splash of olive oil over the whole head of garlic.  Make a loosely wrapped little package with the tin foil. I baked for one hour. Remove the garlic from the oven and let it cool down. Squeeze out 4 – 5 cloves depending on how large they are you’ll use less or more. Set aside extra garlic to use as a spread if you like. Your house will smell amazing.

Dressing:

Place roasted garlic cloves, the raw clove of garlic, mustard, vinegars, egg yolks, anchovies and lemon juice into a blender or food processor ( I used a mini food processor) Blend till well combined.

While blending, add the olive oil in a slow steady stream until it’s incorporated and dressing looks smooth and creamy. Taste for salt and pepper .

Dressing will keep in refrigerator for a week. Because of raw eggs I wouldn’t keep much longer than that.


Broccoli Slaw and Bowties — Vegan Style

Great Salad from June ’13. If you are looking for a new summer salad this could be it. It’s vegan and it’s delicious. Enjoy! Happy Memorial Day from my kitchen to yours.

cookingwithcandi's avatarCooking with Candi

DSCN0239DSCN0243DSCN0247DSCN0241DSCN0261My new obsession seems to be this broccoli slaw. It is so easy to use, has a lot of crunch and tastes delicious in different ways with different dressings. This one is super easy to put together, and I used Vegenaise but you can clearly use Mayonnaise if you don’t care , either or. Ingredients are easy to obtain in almost any supermarket today. I used 1/4 teaspoon of cayenne and it had a bit of kick, if you don’t like the kick take it down a notch or omit it entirely and it will be just fine. This is a great raw summer slaw/pasta salad packing nutrients, crunch and sugar and spice. I used about 6 oz. of farfalle ( bowtie pasta) and again you could probably make this and leave out the pasta entirely if that’s the way you’d like it. I would then double the slaw. I bought the broccoli slaw…

View original post 269 more words

A Real Deal Blueberry Cobbler

Blueberries are so delicious now that you must bake something with them even if you freeze it for another time. The other day I posted a Blackberry Cobbler and here is a Blueberry Cobbler. They are both wonderful and worthwhile. Original post was Sept’12. This is a definite winner and will impress your guests. Enjoy the holiday weekend. Happy Memorial Day.

cookingwithcandi's avatarCooking with Candi

Last summer I posted a few things to do with blueberries. I recently found this recipe and realized it was a combination of 2 separate recipes–one for the blueberry filling and one for biscuits. When combined, this is a true cobbler and not a crisp. Yum! The thing of it is that you really don’t want this hanging around in the fridge for too long, because it is that
good. You will keep eating it and I promise you that. So make it for company and at least six people so you have a teensy bit left over. Use the fresh blueberries which are in abundance now. It’s almost a must to serve this with vanilla ice cream, as it complements it so well! If you’d like, you can make this a day ahead for sure, I’ve even frozen it. It comes out perfectly. Now is the time to try…

View original post 257 more words

Easy Peasy Chicken Caprese

This is such an awesome recipe for the summer. It is a re-blog from Sept. ’12 . I make it all summer time now. Light and Delicious, easy peasy for sure. I made it last night and as you can tell from photo of the platters it was all eaten , not a piece left. Can’t think of a better recommendation than that. Enjoy and Happy Memorial Day !

cookingwithcandi's avatarCooking with Candi

This is one of those recipes that I make that is so super easy. Very few ingredients and other than cutting tomatoes and mozzarella balls, there is very little prep. You gotta love meals like this, especially in the summer when these beautiful heirloom tomatoes are abundant. I really only make this in the summer and it is light and delicious. It makes for a beautiful salad as well and you can serve it at room temperature. I made this tonite since I was tired, and had already bought the bocconcini (mozzarella balls) and chicken. I picked up the heirloom tomatoes today at our new beautiful Whole Foods here in El Jebel. Yeah, welcome  Whole Foods to our hood. You’re not going to believe how easy this is.

Ingredients:

1 container marinated bocconcini ( mozzarella balls) you will need the oil from the container to marinate chicken ( it comes in an…

View original post 206 more words

Happy Memorial Day Blackberry Cobbler

Almost Memorial Day already and here is my post from May ’13. Re-blog of a beautiful cobbler that I made last year and will definitely be making again this summer. Enjoy the Holiday Weekend. Happy Cooking from my kitchen to yours.

cookingwithcandi's avatarCooking with Candi

before cobbler gets baked , with biscuit topping before cobbler gets baked , with biscuit topping

finished product - Yum finished product – Yum

photo (3)photoIt’s Memorial Day weekend and I wish someone would have informed the weather powers that be that they ordered the wrong weather. None the less it’s time to go visit out at the beach and barbecue at friends. I am bringing a cobbler to our friend’s bbq and decided to go with this one. Hope you all had a lovely weekend in spite and despite the weather. Always great to be with friends and enjoy some good food. Happy to report that it did at least dry up here in NY and today looks like the nicest day of all.

I saw these amazing blackberries at Whole Foods and had to buy them. They are nothing short of amazing right now. I have posted numerous blueberry cobblers , etc. Today is a version of my blueberry cobbler made with blackberries, and…

View original post 342 more words

Chicken Corleone aka Chicken Parmigiana or Chicken Godfather

photo 3 (2)

photo 5 (43) photo 5 (44) photo 5 (45) photo 2 (57) photo 4 (50) photo 4 (51) photo 4 (52)
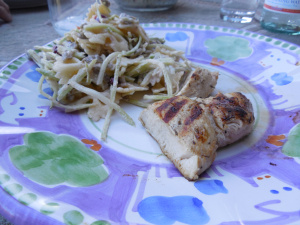
Beautiful Sunday in New York and in need of some real deal Italian Food. Sure I can call in to any number of qualified Italian restaurants but I like to cook especially on Sunday nights. We were watching Godfather 2 and it was all the inspiration I needed. A friend of mine saw my post on FB and suggested I call it Chicken Corleone and I totally agreed , so it shall be re-named Chicken Corleone. It’s our favorite movie and probably one of our favorite foods. I made a quick red sauce ( in 1/2 hour) and cooked the chicken the old-fashioned way with flour, egg and bread crumbs. No shortcuts here and it is so worth the effort. I haven’t made it in a while and it was just delicious. It’s coming back into the rotation in our house for sure. It’s really not a lot of ingredients and probably whole recipe took about an hour to prepare. I made with fettucine because it’s what I had in the house , I actually prefer thin spaghetti with this but didn’t have this time. You don’t really need the pasta but what’s chicken parm without the pasta? So enjoy this delicious recipe for my now re-named Chicken Parmigiana or Chicken Godfather or its new name Chicken Corleone.

Ingredients:

4 chicken cutlets– I like my cutlets thin. I buy the thin ones. You can also pound your chicken cutlets with a meat pounder (mallet) or a rolling-pin will work.

1/4 – 1/2 cup flour ( you can use whole wheat flour if you like)

2 large eggs

3/4 cup dried bread crumbs ( I used Italian Flavored Bread Crumbs) or Panko – if you use flavored crumbs be careful of additional salt.

1/4 – 1/2 tsp. kosher salt ( not too much because I used flavored bread crumbs, more if you don’t)

a few grinds of the pepper mill

3 tbsp. olive oil

Marinara Sauce –see recipe below

grated Parmesan–to taste , I like a lot (for this recipe I use app. 1/4 cup freshly grated Parmesan)

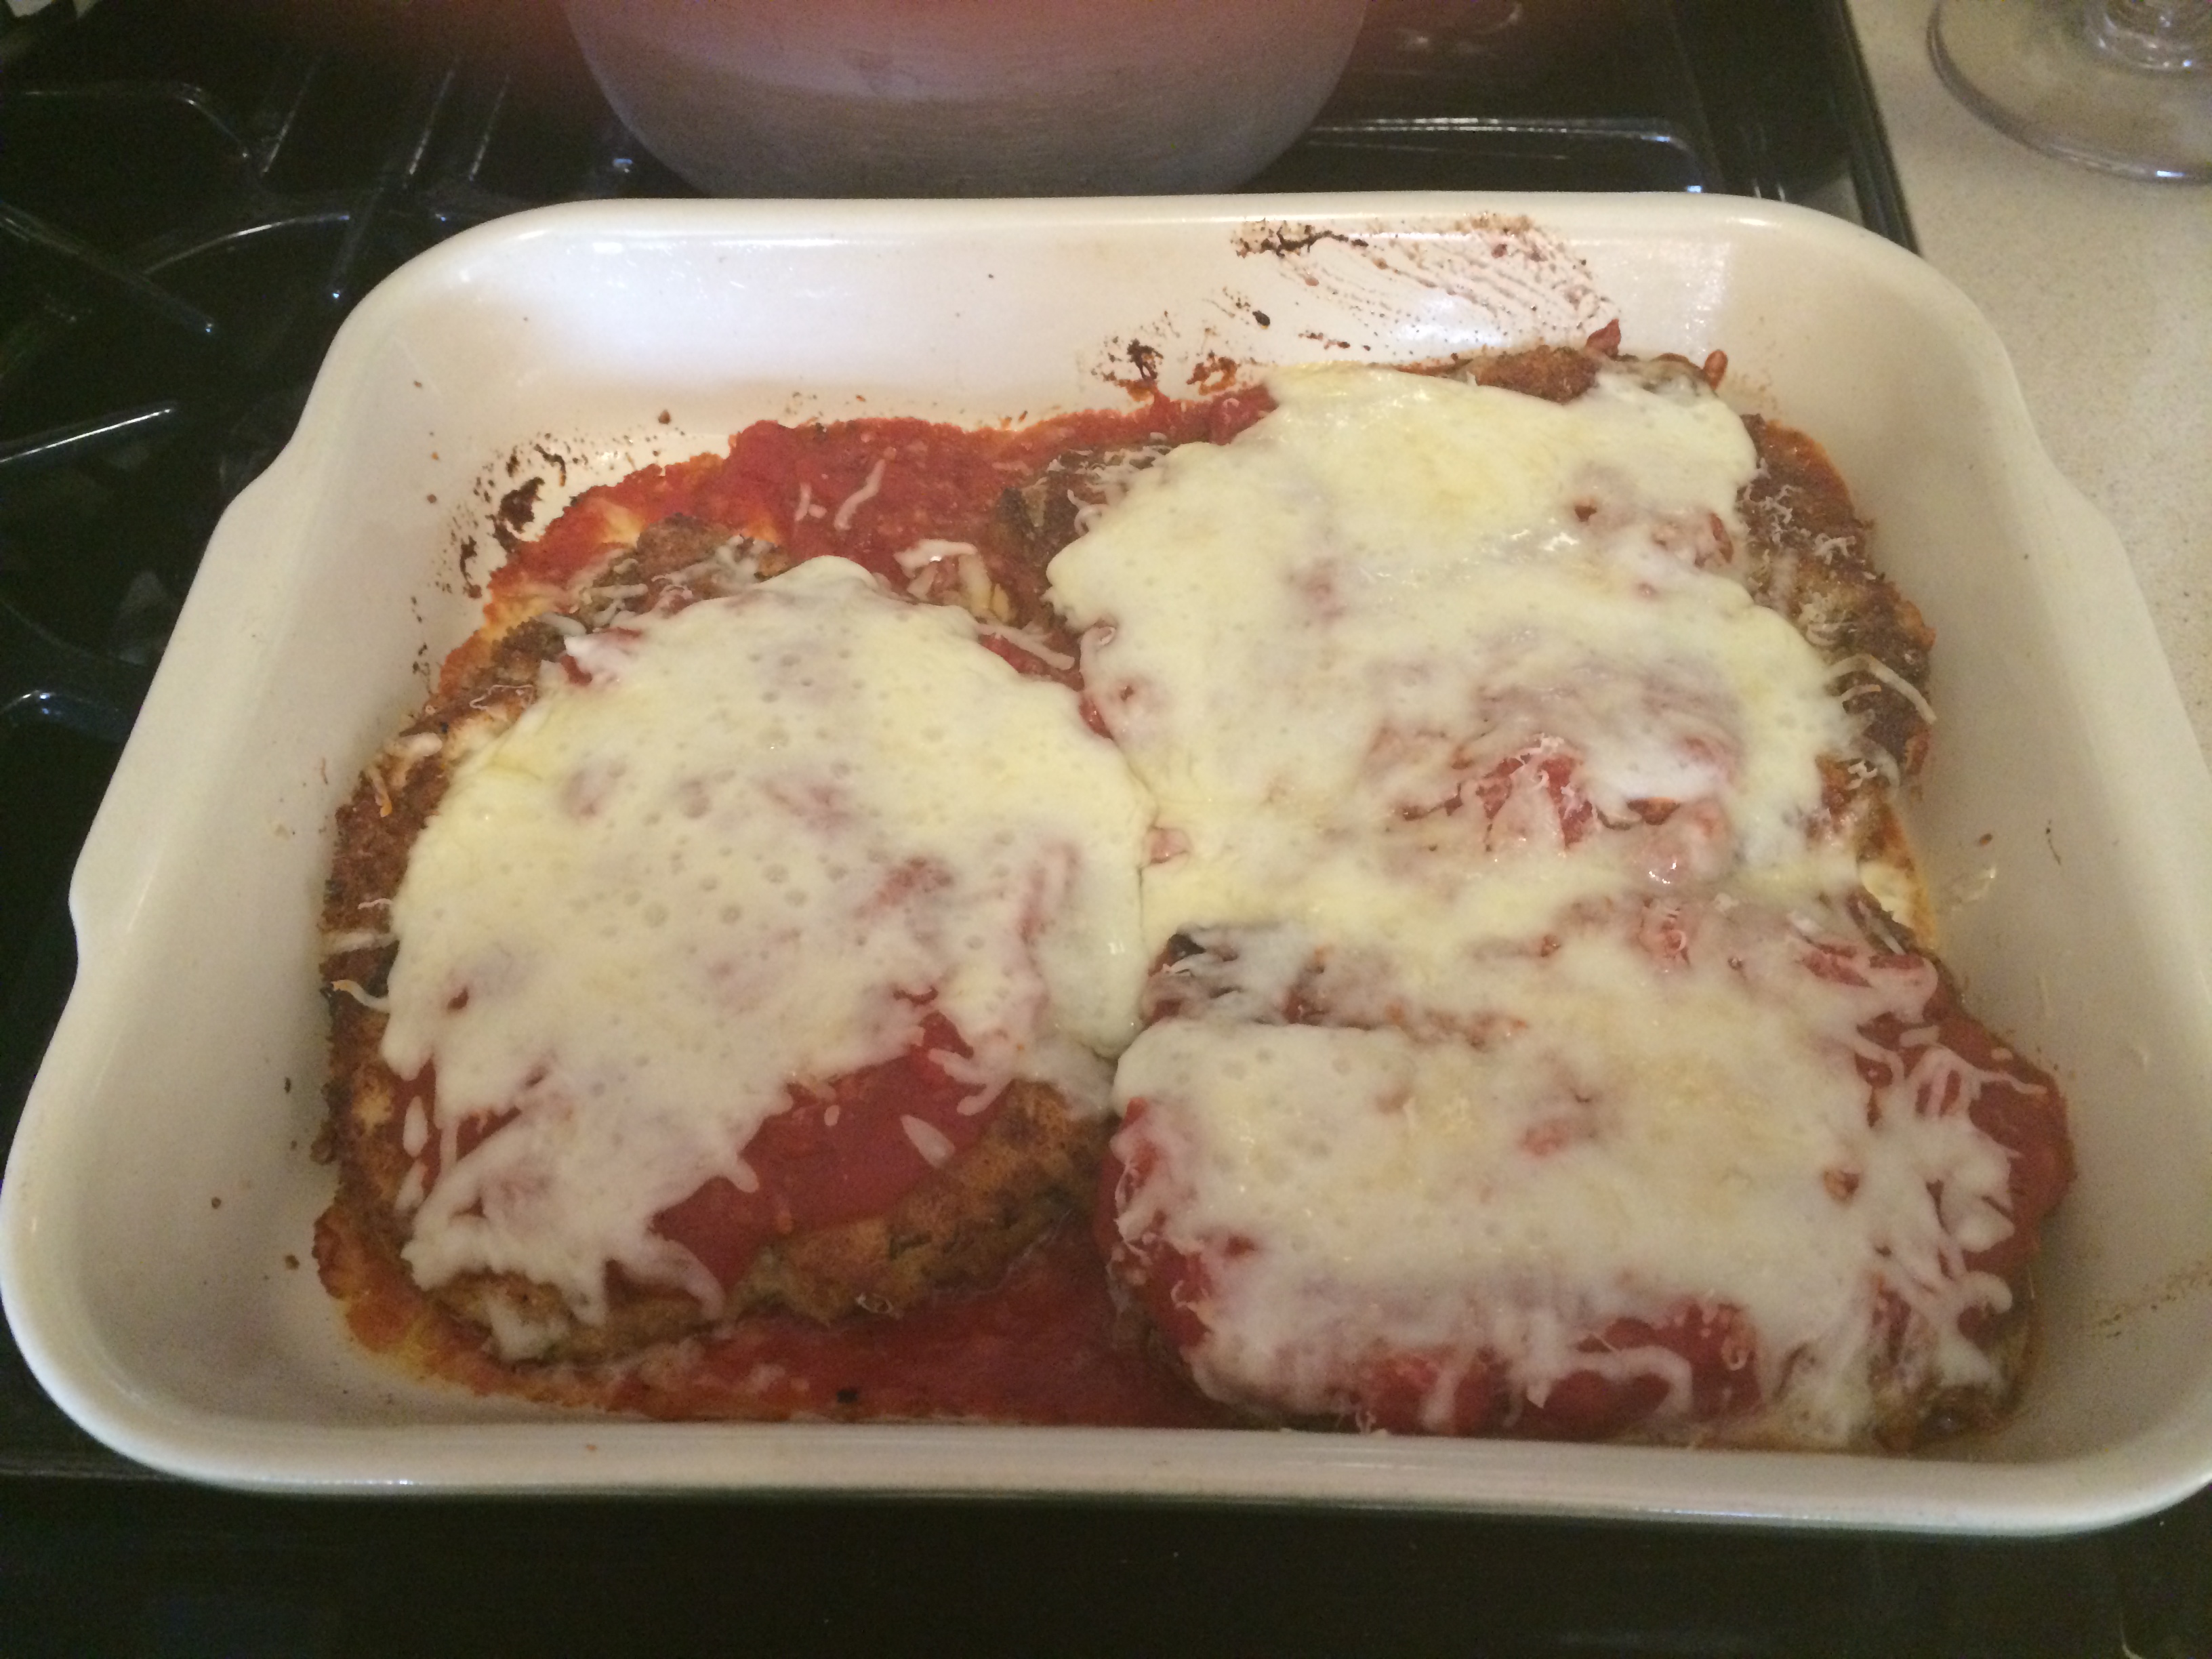
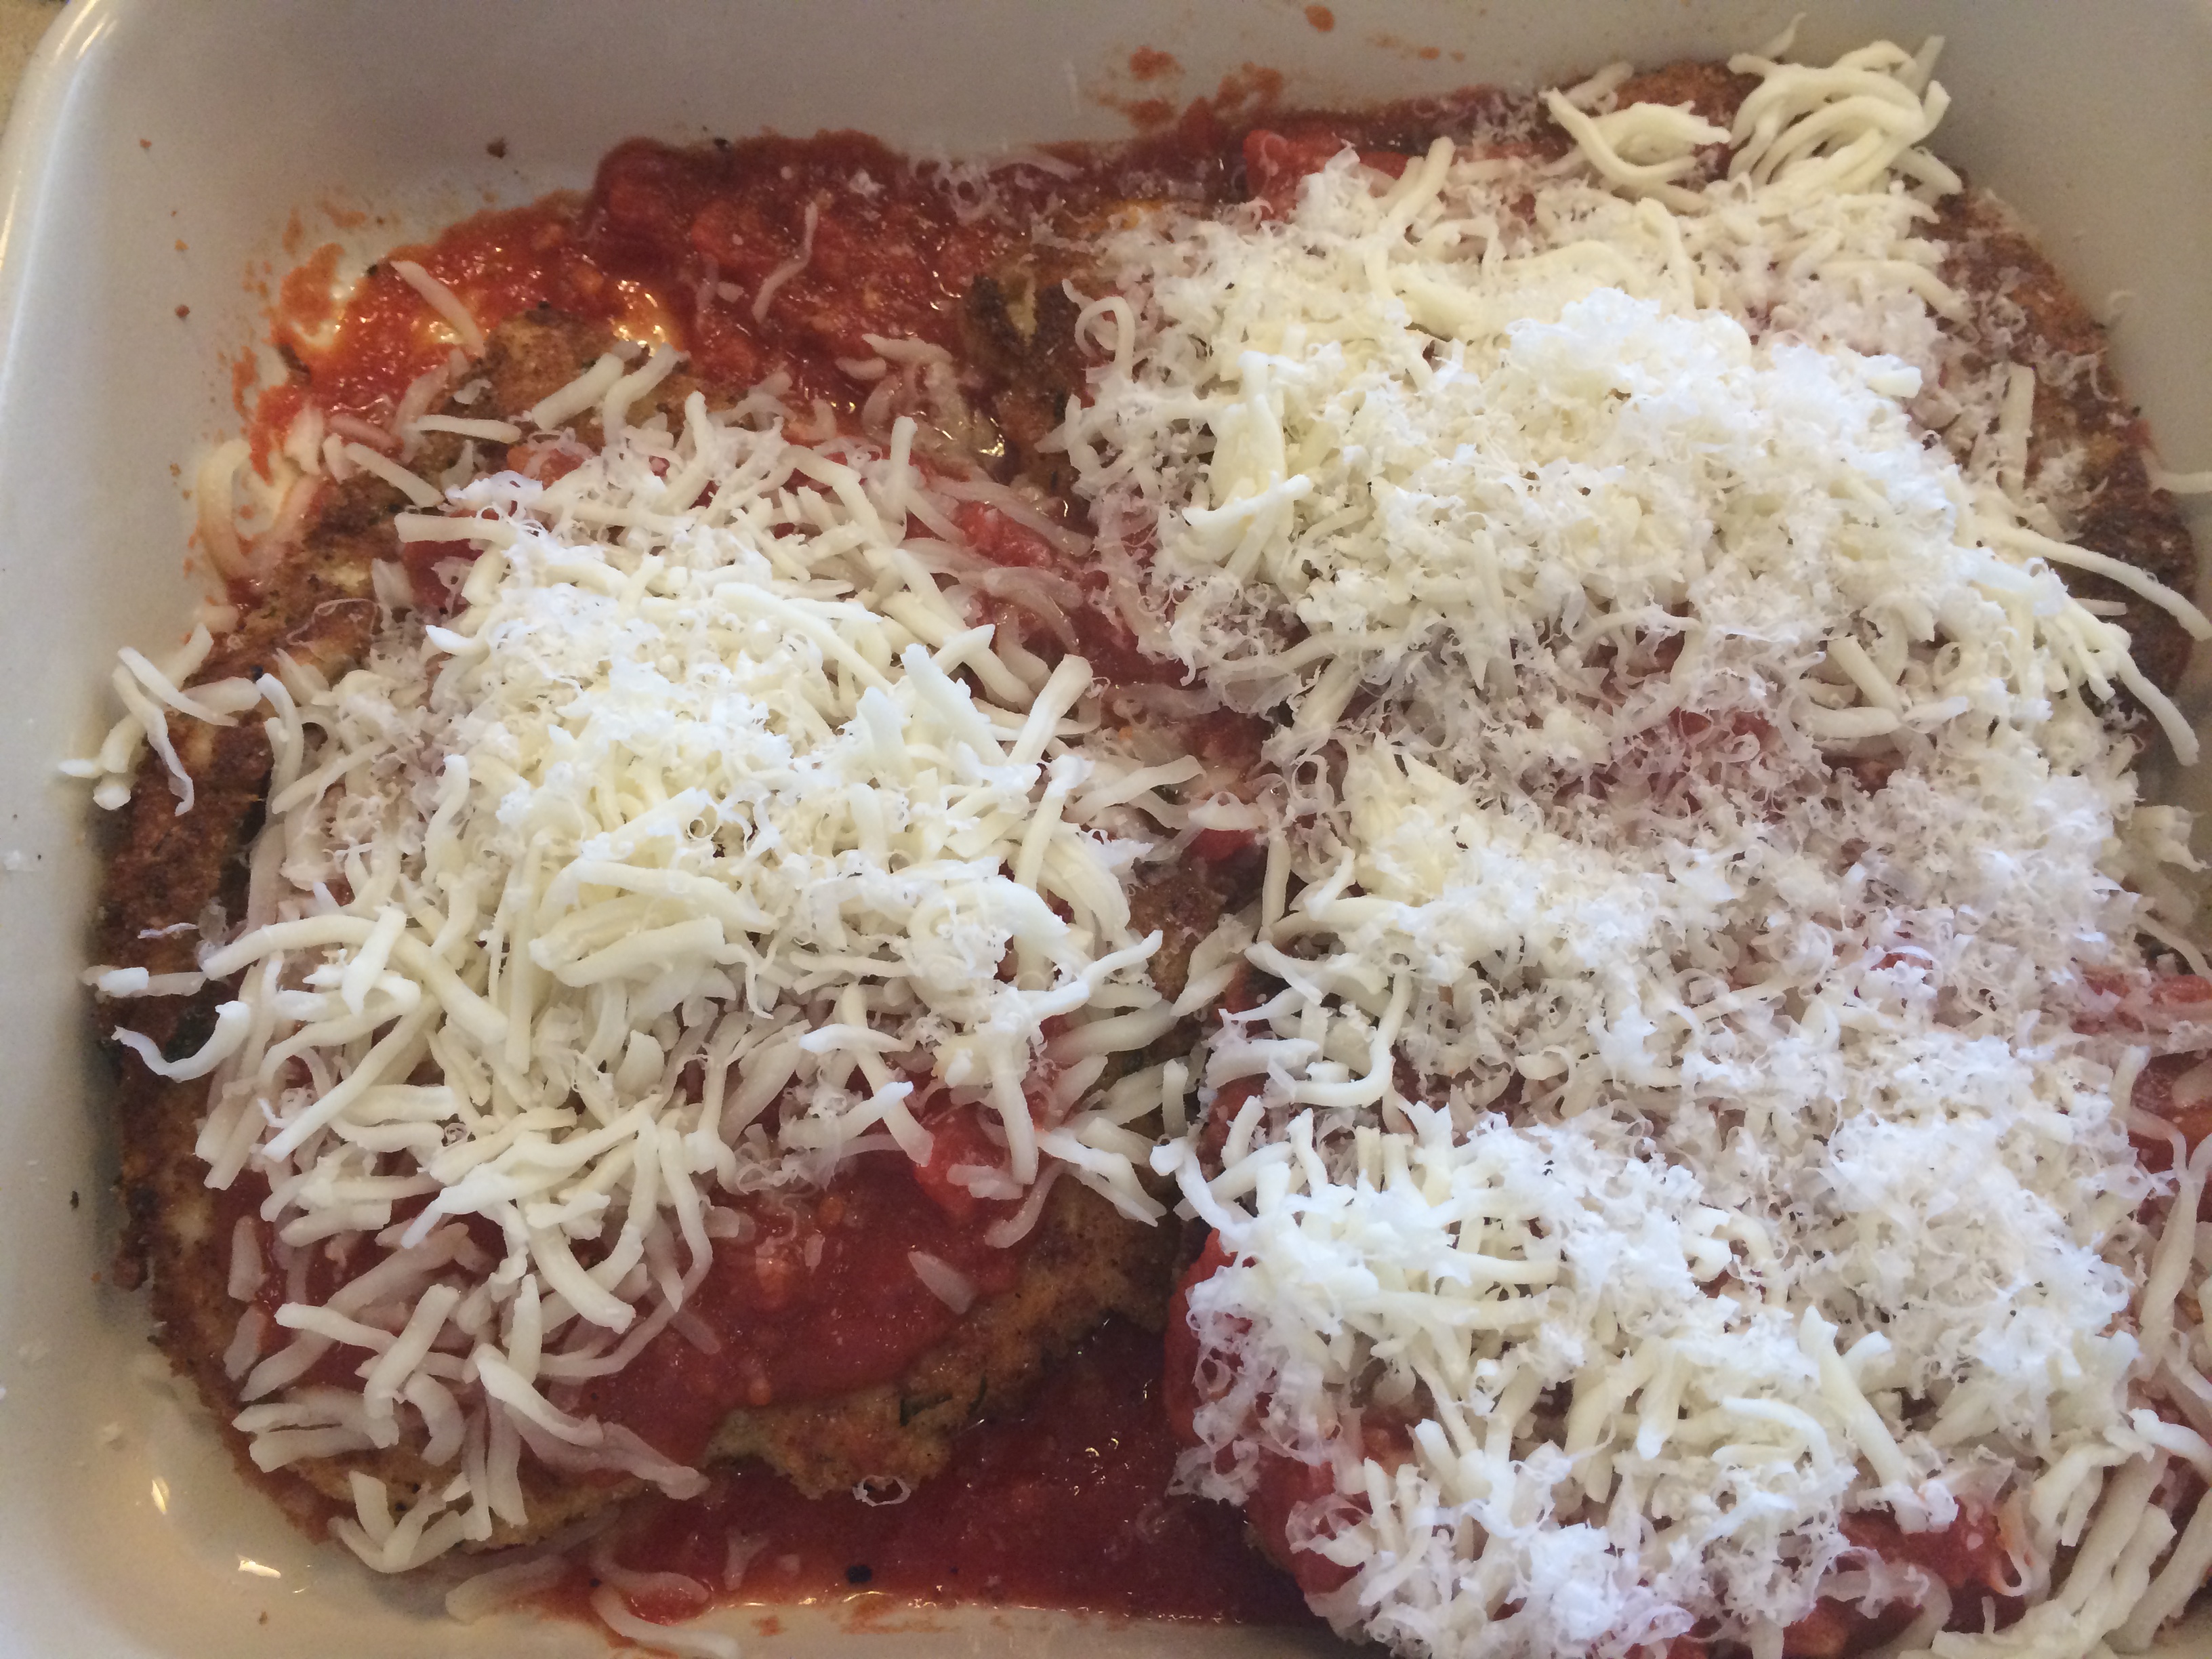
shredded or sliced mozzarella cheese–to taste but I like to cover my chicken completely with cheese ( see pic) just saying……. you use as much or as little as you personally like

I set up 3 dinner  plates and 1 bowl. I place the flour on one plate, in the bowl I place the beaten eggs. On the second plate, I combine the bread crumbs, some grated parmesan cheese,  salt and pepper to taste. Keep a clean plate nearby to place breaded cutlets on.

Dip each cutlet first in the flour, then in the beaten egg. Let the excess egg drop off before dipping in the bread crumb mixture, you may have to press it a little to adhere better. Place the cutlets on a clean plate. Now what I do when I have extra time is I put the plate in the fridge till I’m ready to fry. Sometimes for a few hours, depending on my timing.  It helps the bread crumbs to stick better. Now this is just my theory but I really believe it works. When I’m ready to fry I remove my fridge and let sit out a little to bring to room temp. and fry away.

To fry: place a large skillet on the stove and turn the heat to medium-high. Measure out 3 tablespoons of the olive oil and heat until it shimmers. I use tongs and add 2 cutlets and cook for about 4 minutes per side. Check them by just turning the edge after a few mins. to make sure they are golden brown. Usually 4 minutes per side is enough depending on size of cutlets. (If you need more oil while frying extra cutlets add a little .)

I spray a baking dish with cooking spray and ladle out one large ladle of sauce and thinly spread around the bottom  of baking dish. I place the crisp chicken in the baking dish on top of the little bit of sauce. Cover with marinara (recipe below) top with parmesan and mozzarella . Bake for app. 15 – 20 minutes in a 350 degree pre-heated oven. Serve immediately with spaghetti or vegetable or both!

Quickie Marinara Sauce:

1 28 ounce can of crushed tomatoes

3 cloves garlic, chopped

2 tbsp. olive oil

1/2 tsp. salt to taste

1/4 tsp. crushed red pepper to taste

1/4 tsp. freshly ground black pepper to taste

In a large saucepan on the stove turn the heat to medium. Measure and put in the olive oil and heat to simmer , about 2 minutes. Place the chopped garlic into the pot being careful never to burn your garlic, sometimes to prevent it from burning I will remove hot pot from heat for a minute and add my garlic just till it softens down. You’ll want the garlic golden brown.

Remove the pan from heat again and add the tomatoes. Then stir in the seasoning. Tasting for salt , pepper and crushed red pepper. If you don’t like the crushed red pepper you can omit. We love it!

Return the pot to the heat and bring to a boil, once it boils lower the heat to medium-low and simmer . Stir often and taste for seasonings. If sauce becomes too thick add water up to 1/2 cup till it is desired consistency. Allow to cook for at least an hour, I try to cook for 1 – 1 1/2 hours.

Enjoy! I like to  make extra sauce to freeze, so I will sometimes double this recipe.
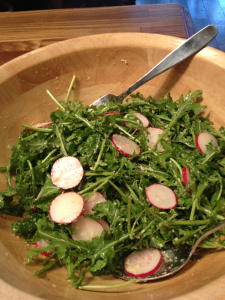