

Many years ago I made this recipe and it was so awesome that it’s been part of our Seder ever since. It’s easy to make and really delicious to eat. Marcy who is a great cook and gave me this recipe says she must always supply it for her kids, and she keeps in containers in the refrigerator and sends them home with it ( even better) this is the stuff that I find deadly to keep around. It’s candy, and fun to make with your kids or grandkids. You can use white chocolate, M & M’s , or toasted almonds/pecans /walnuts etc. or stick with recipe as it is.
Thanks for sharing the recipe Marcy.
Happy Passover!
Ingredients:
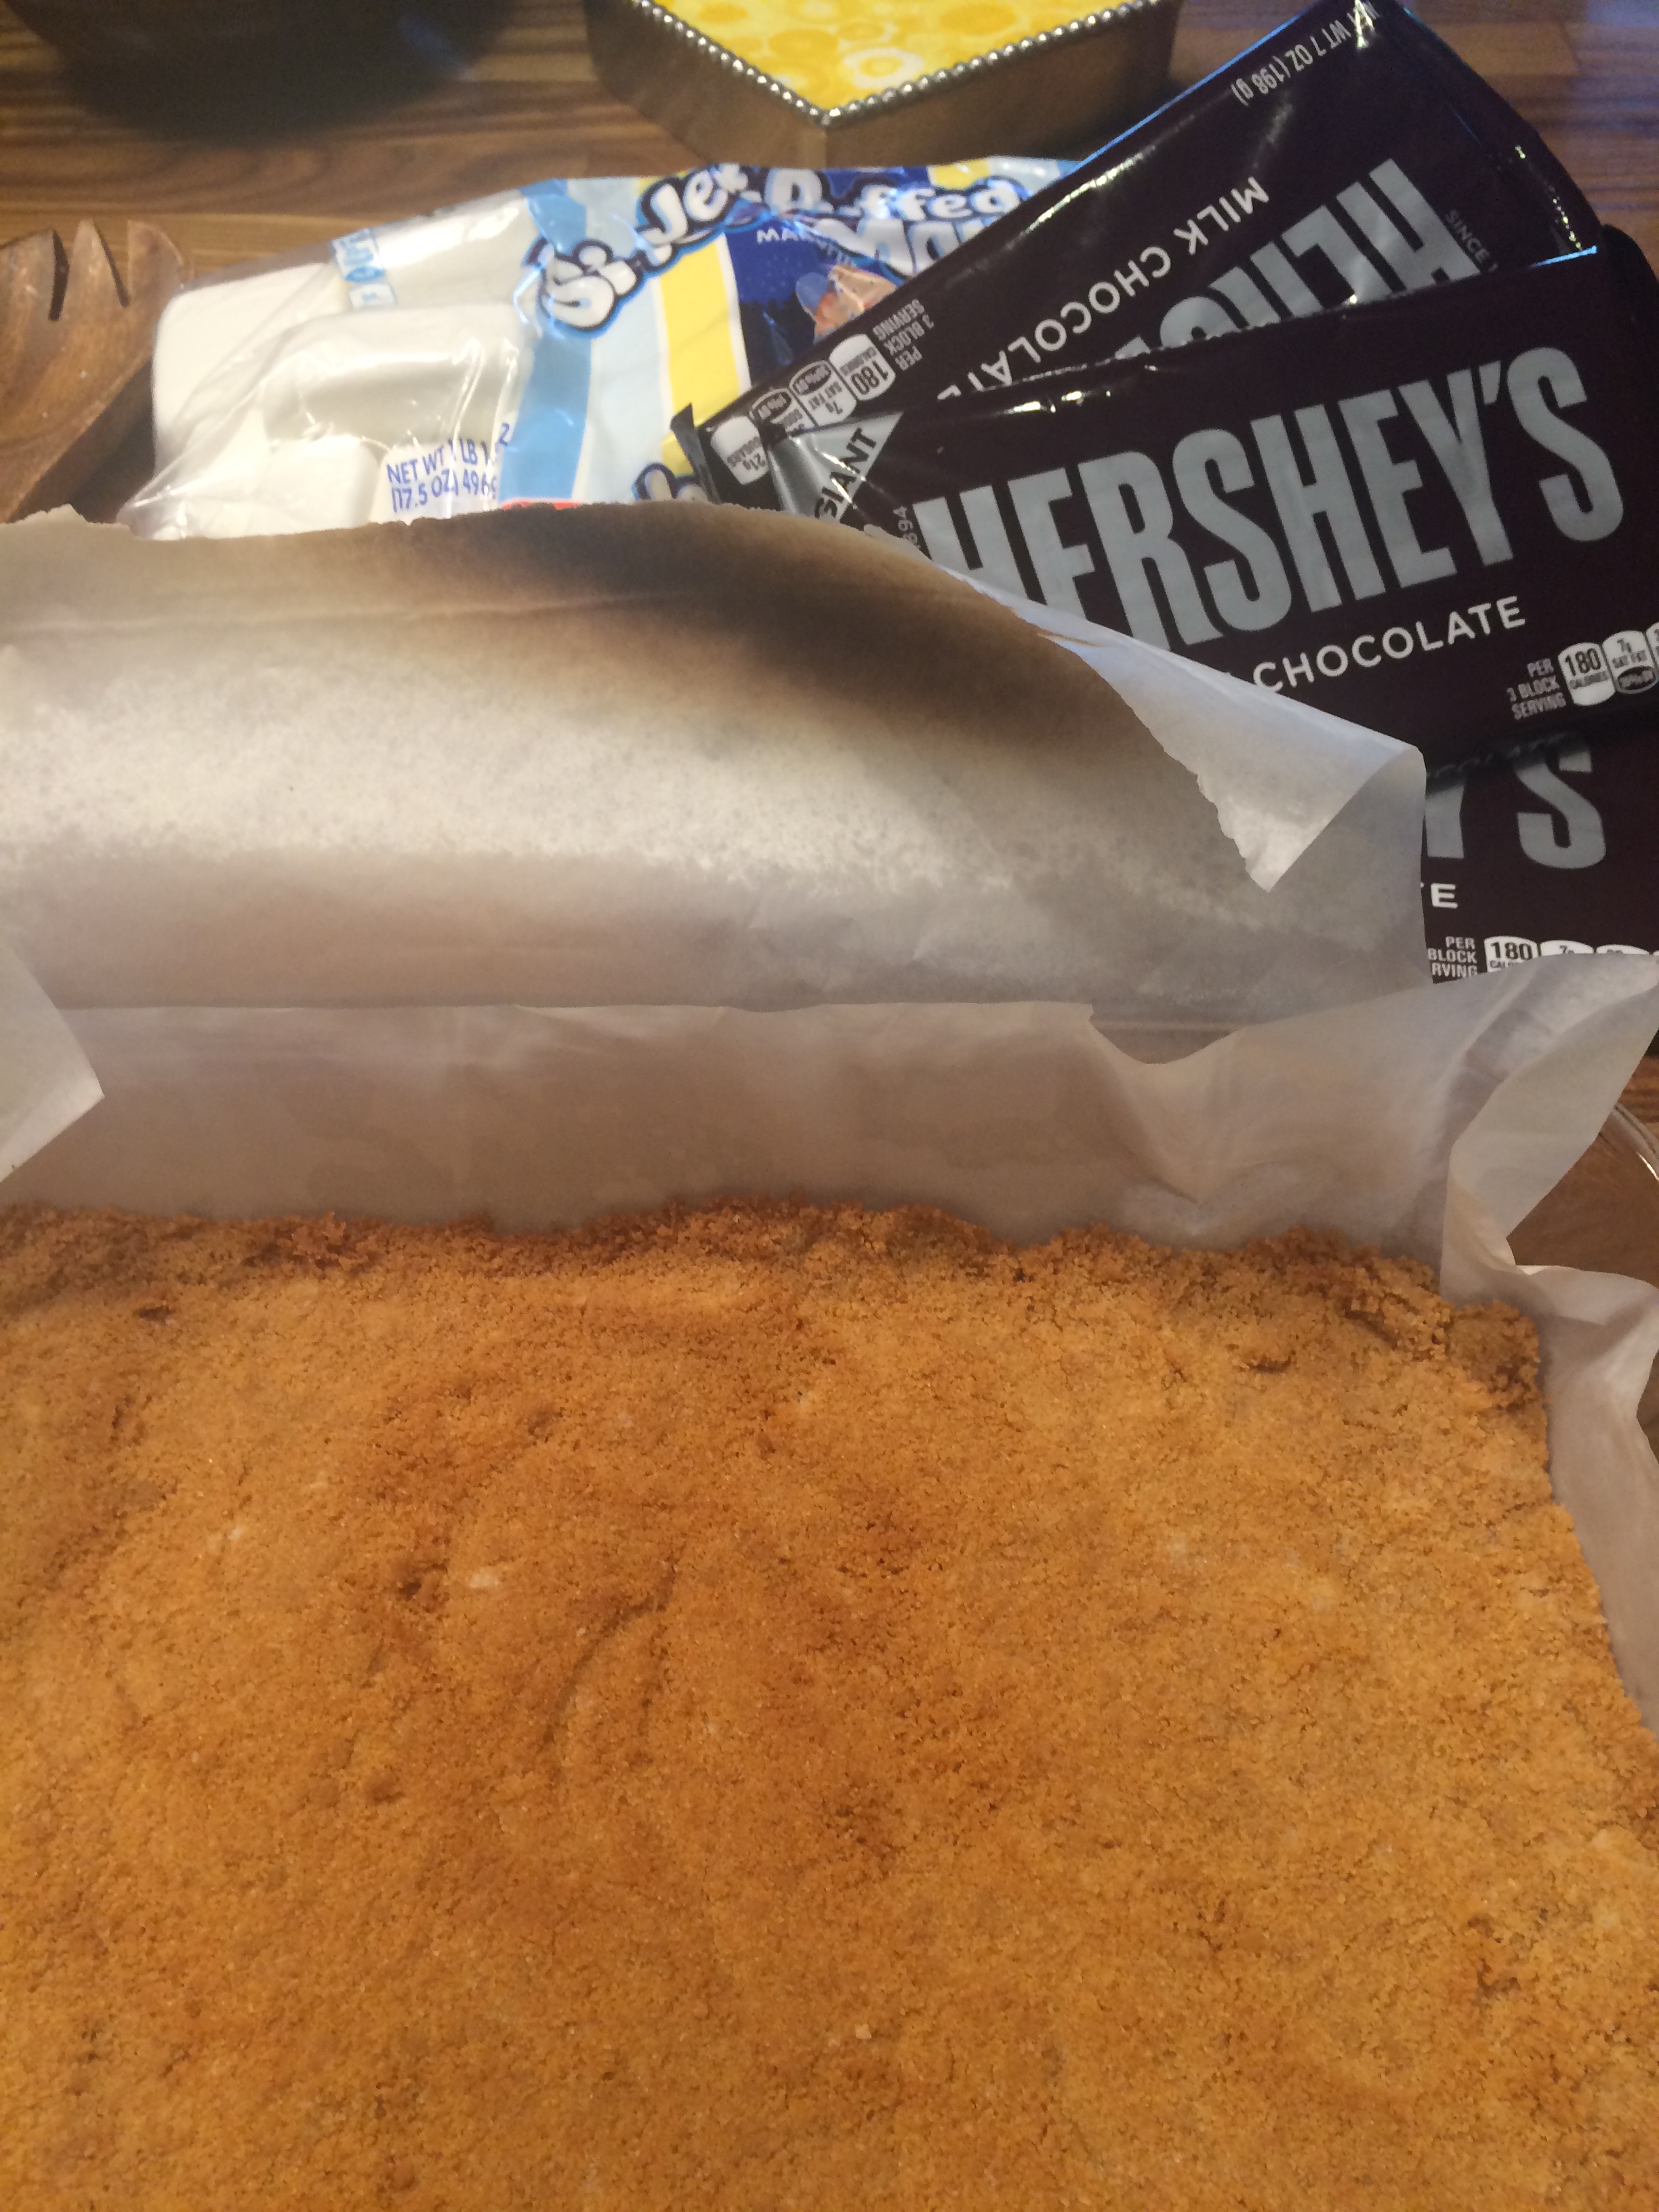
4 – 6 unsalted matzoh sheets
1 cup unsalted butter or margarine
1 cup brown sugar, firmly packed
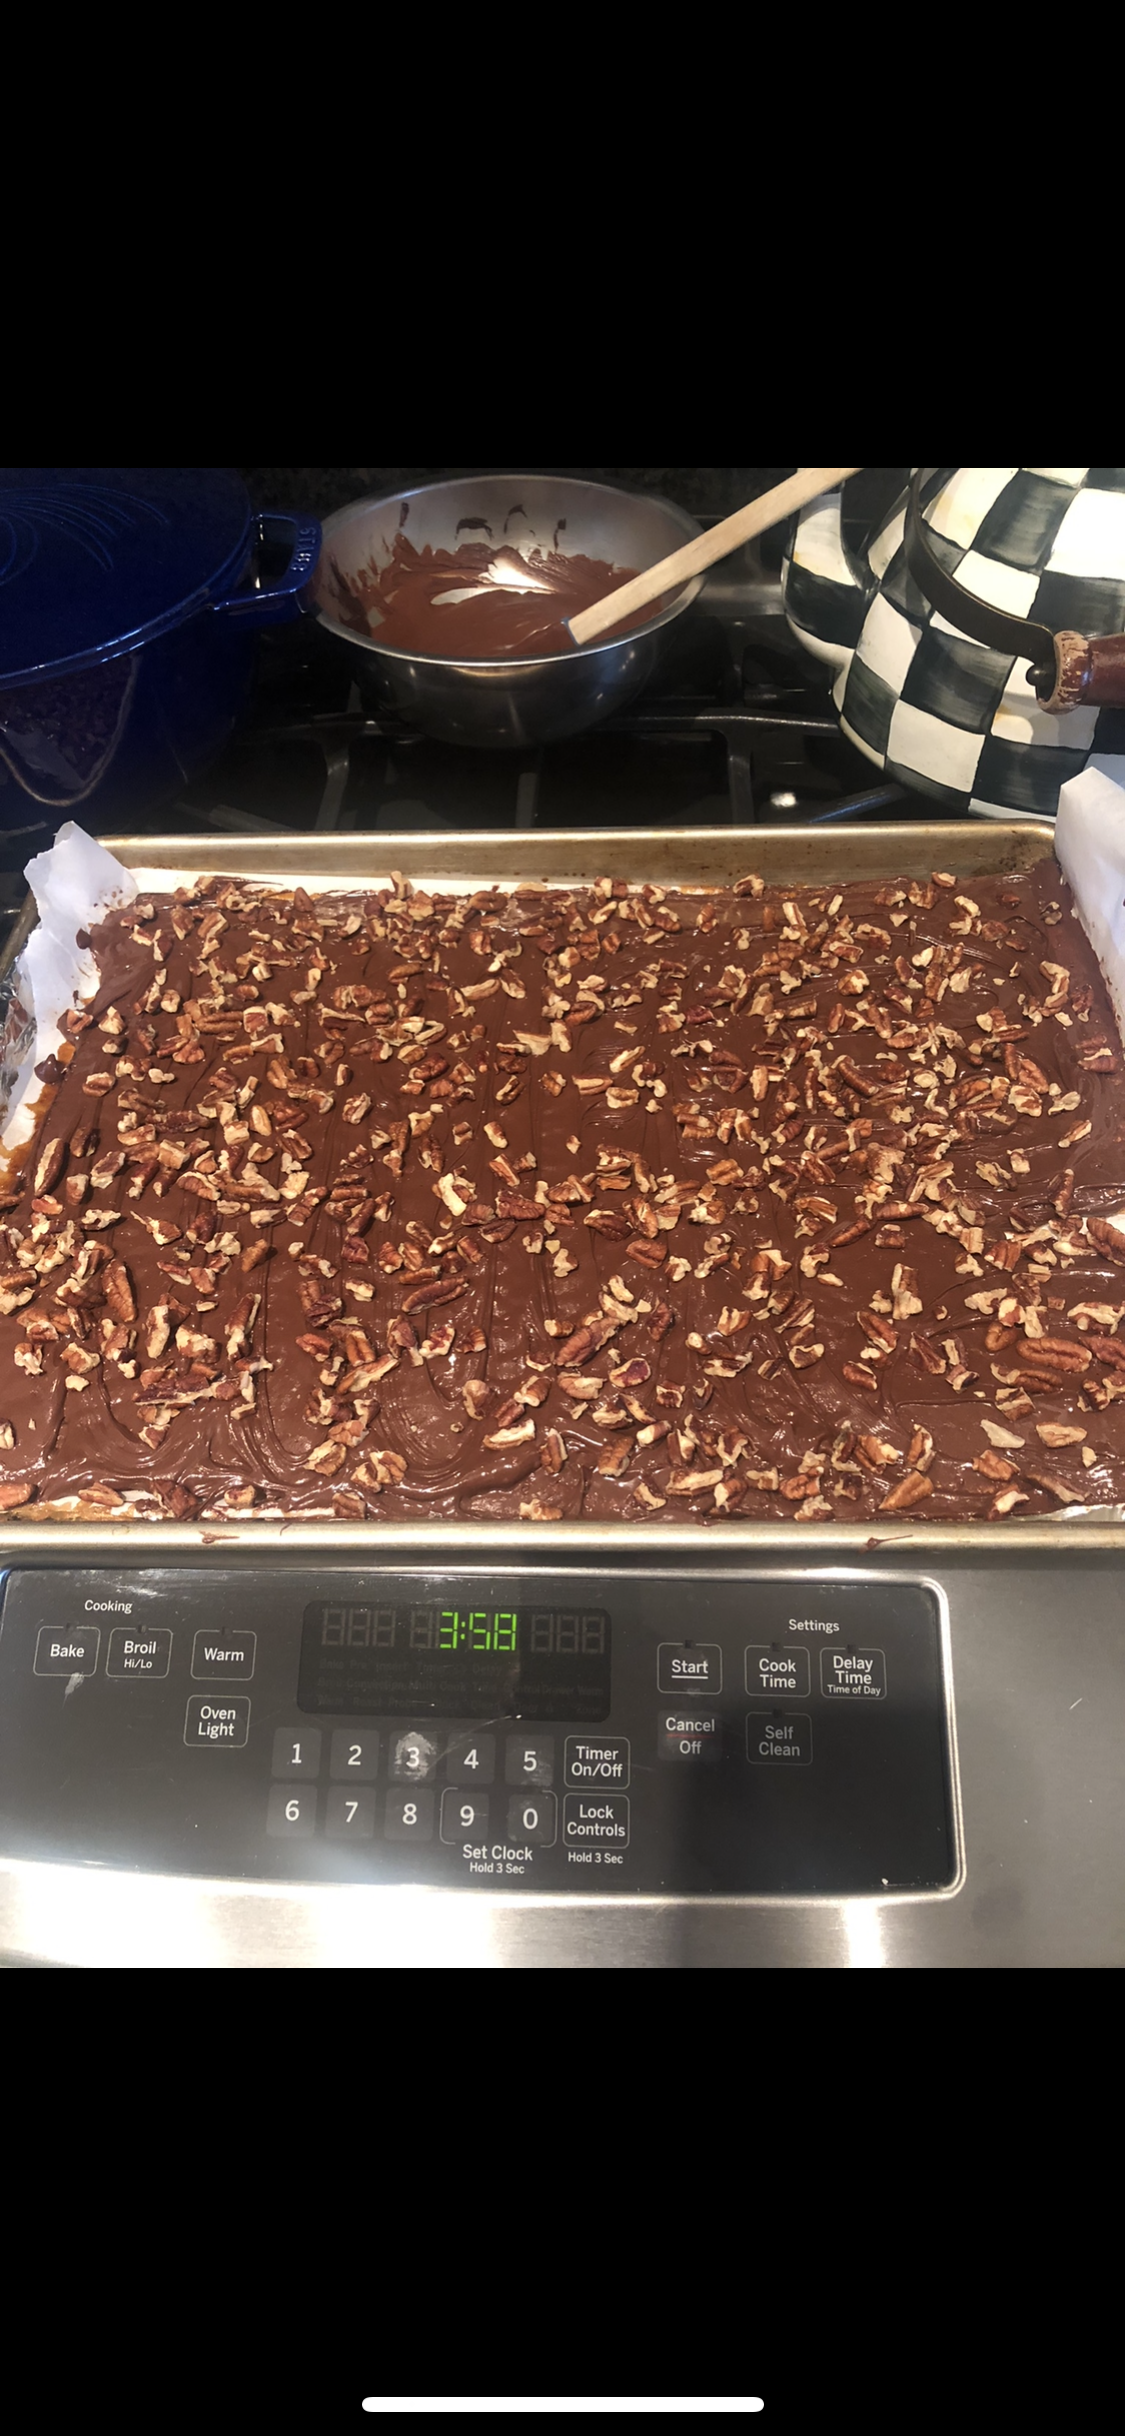
3/4 cup chocolate chips or semi-sweet chips you can use white chips as well
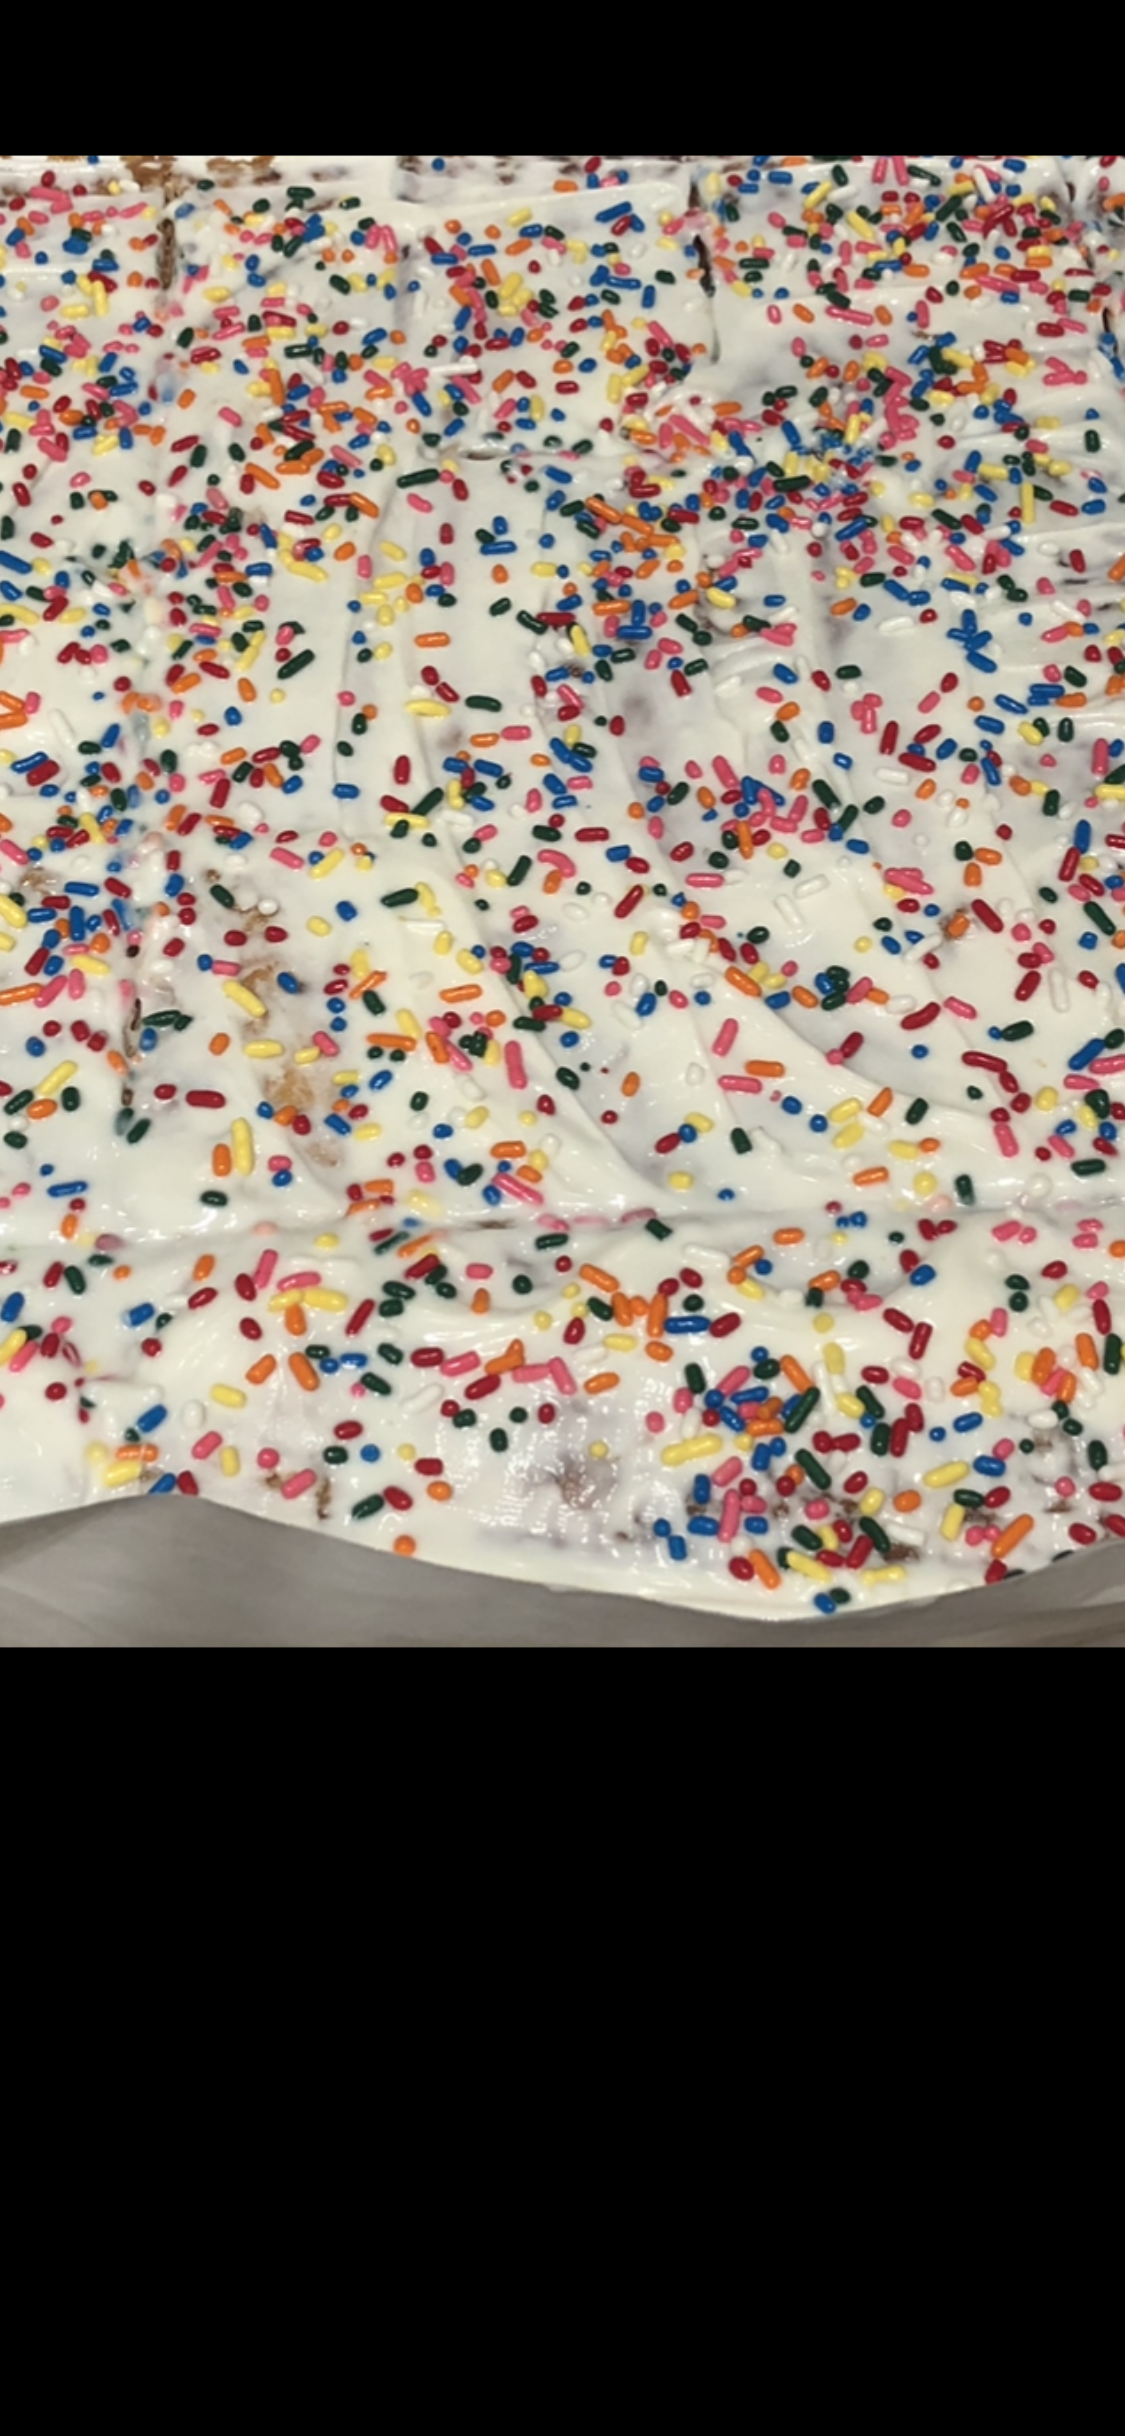
*nuts if you’d like sprinkled on top (almonds/walnuts etc.) or colored sprinkles are fun !
Directions:
Preheat oven to 375 degrees
Line a cookie sheet with foil and cover bottom of pan with baking parchment on top of foil. ( this is important b/c mixture is very very sticky) Line bottom of pan evenly with matzoh sheets, cutting extra pieces of matzoh to fit on the cookie sheet as even as possible. Combine margarine/butter and brown sugar in a heavy bottomed saucepan. Cook over medium heat, stirring constantly. Remove from heat and pour over matzoh. Place in oven and reduce heat to 350 degrees. Bake for 15 minutes watching to make sure the mixture is not burning. Remove from oven and sprinkle chocolate chips on top. Let stand 5 minutes, then spread melted chocolate over matzoh after you spread melted chocolate sprinkle with whatever toppings you like — I like colored sprinkles and chopped pecans . While still warm, cut into squares or odd shapes and put in refrigerator until set. Chocolate will get hard. I think it’s better to go with the “odd shapes” as it may be hard to cut perfectly square. You can use white chocolate, and if you’d like sprinkle nuts on top as I mentioned above.
Once it’s completely cooled down you can put into containers and store it will keep for a while. So you can definitely make this recipe ahead of time.


 I posted