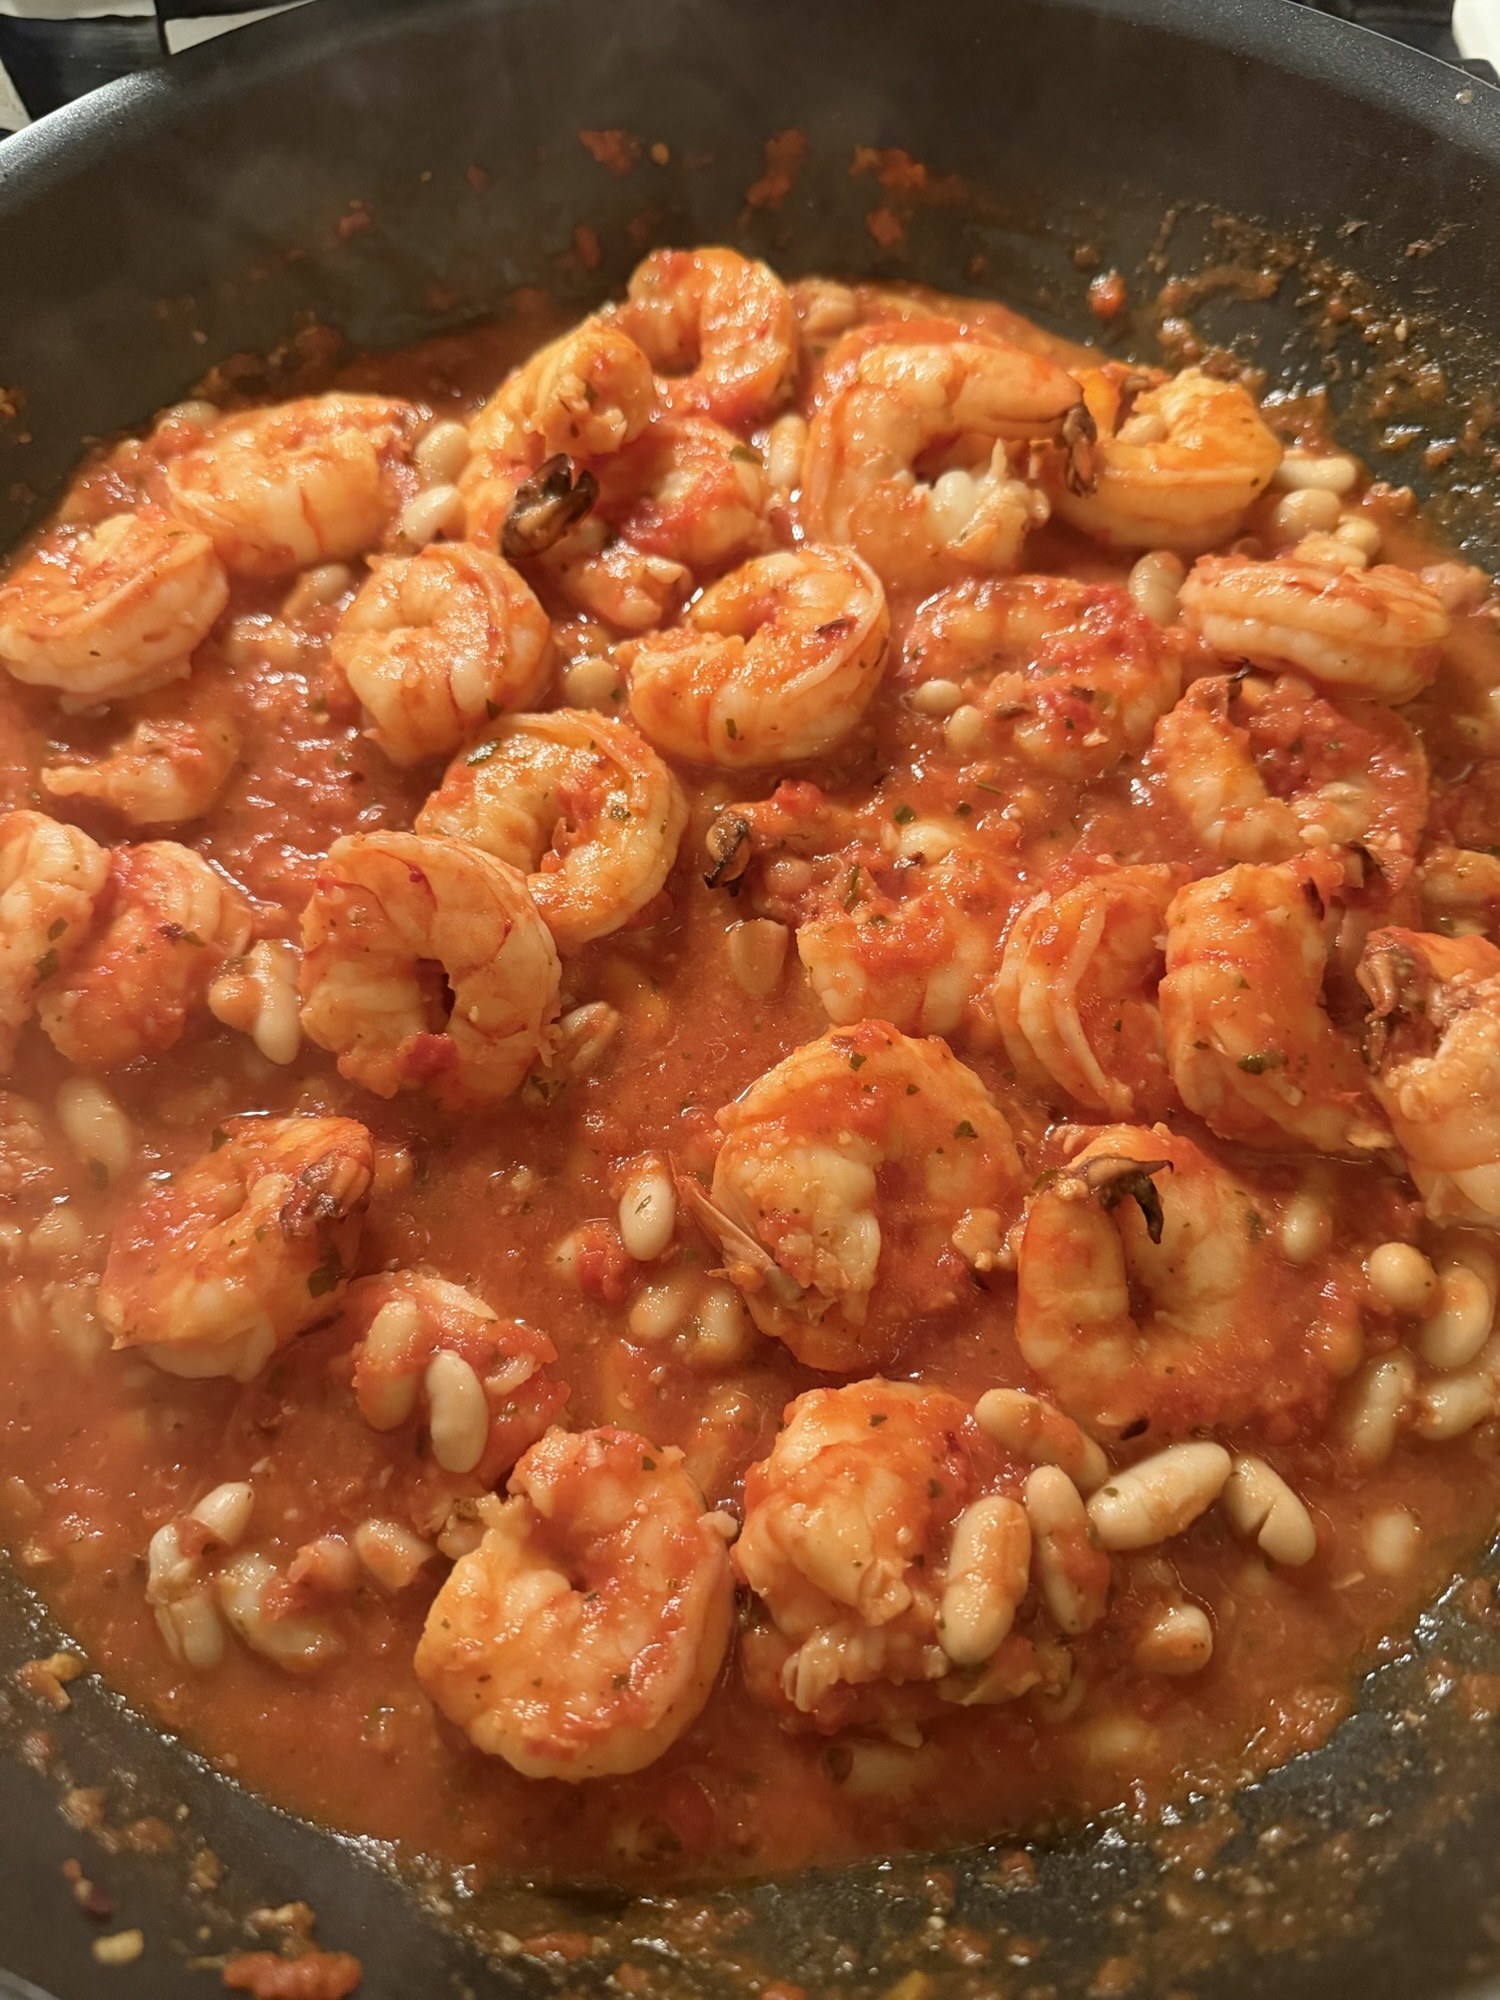
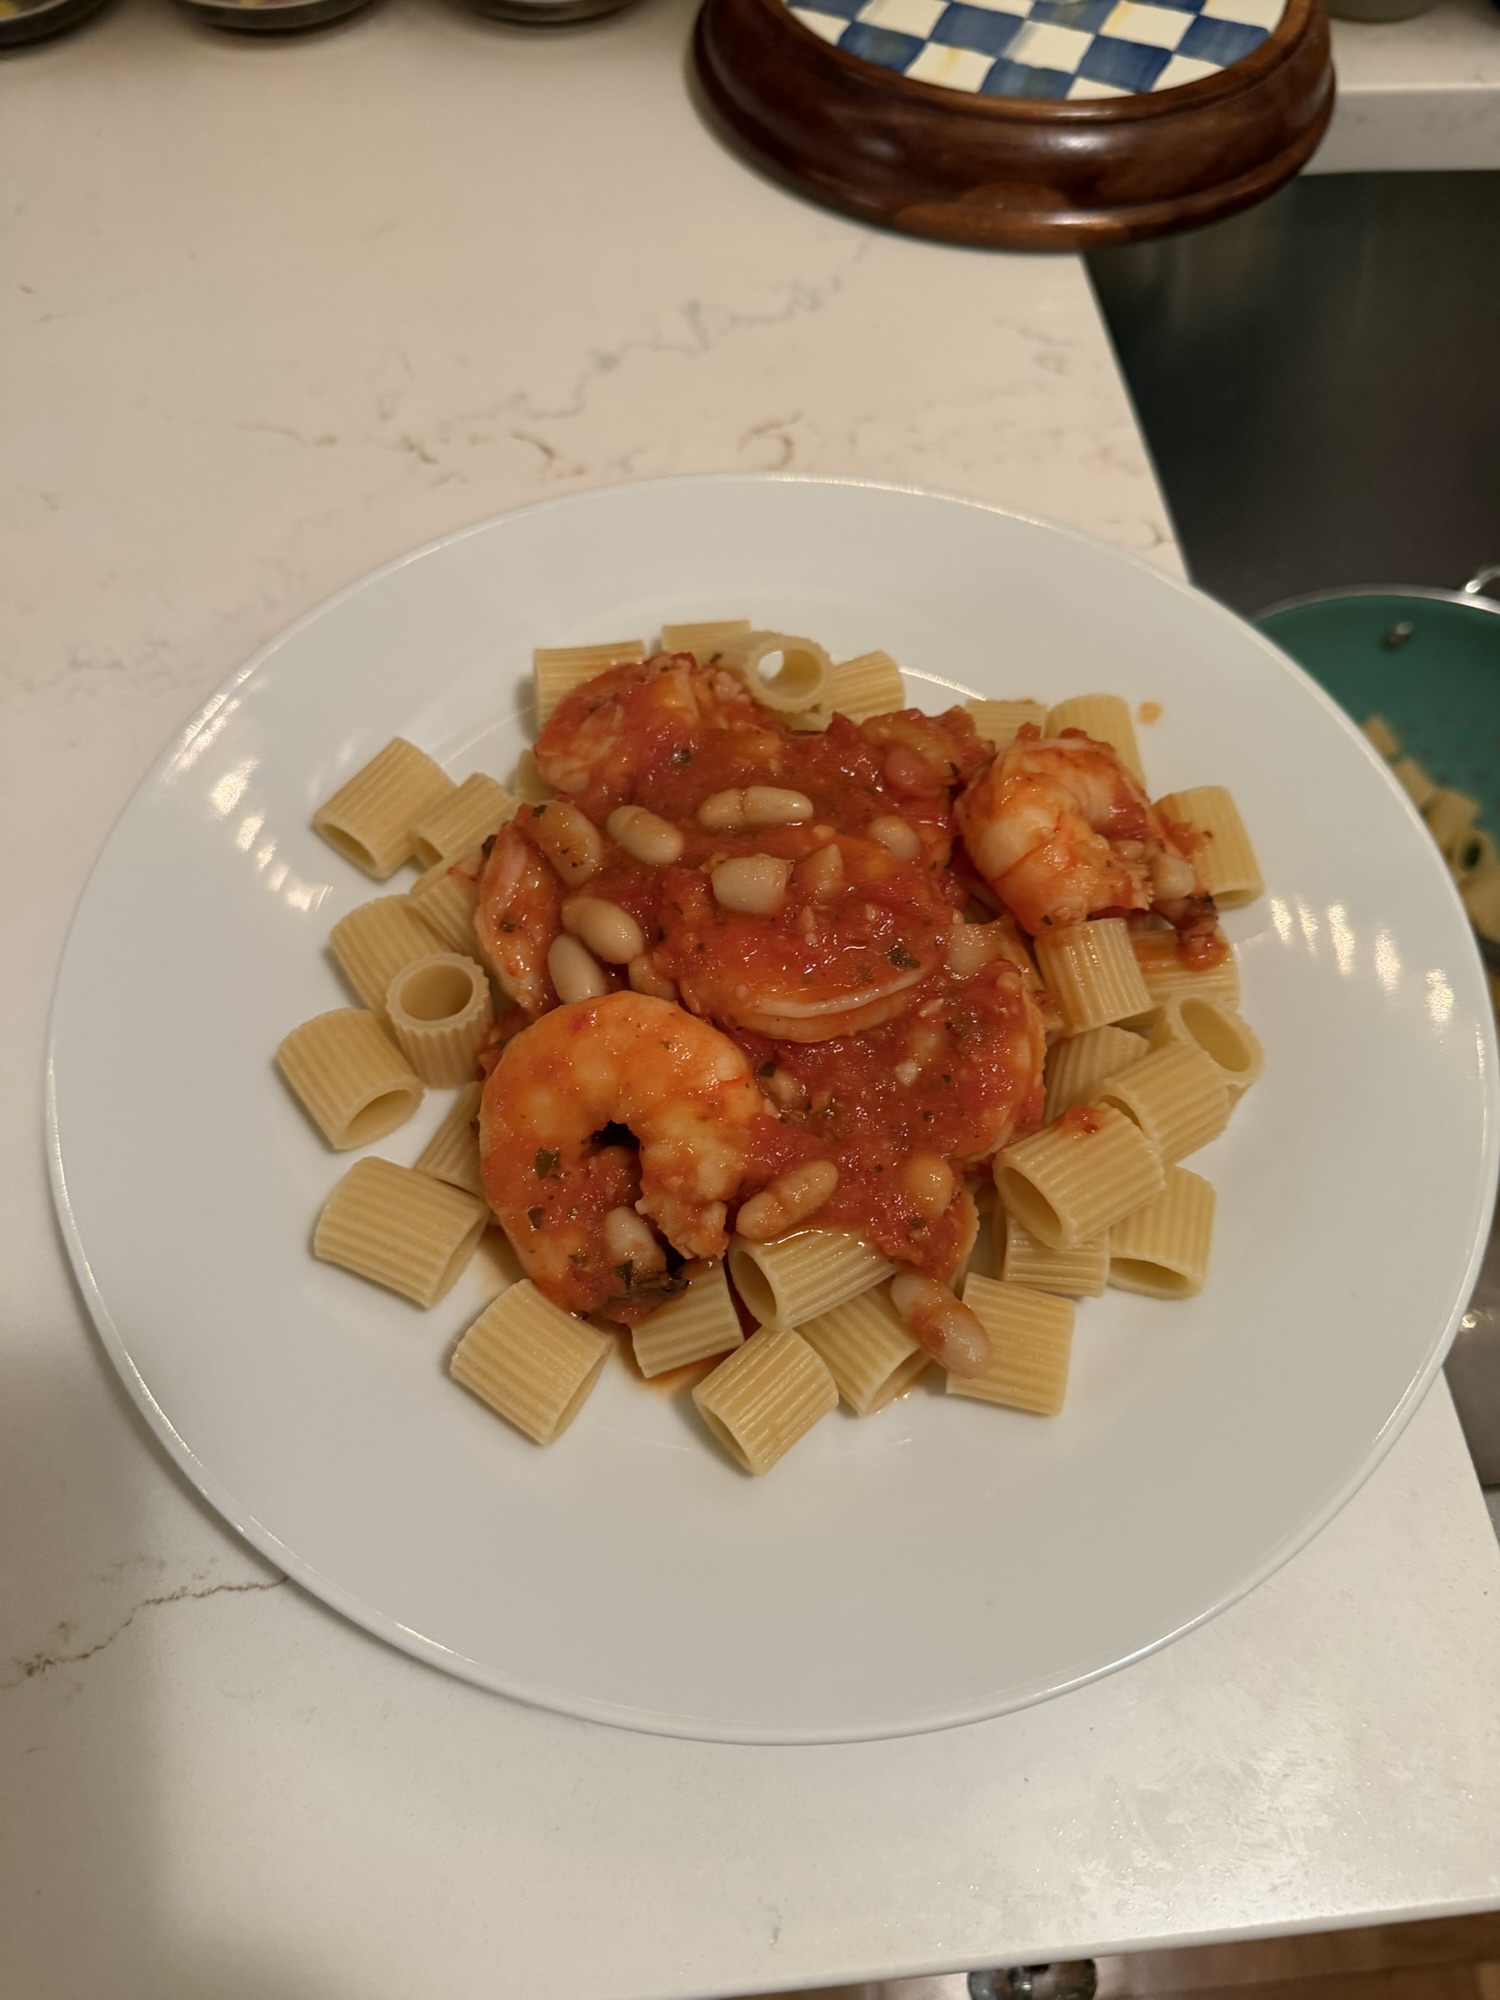
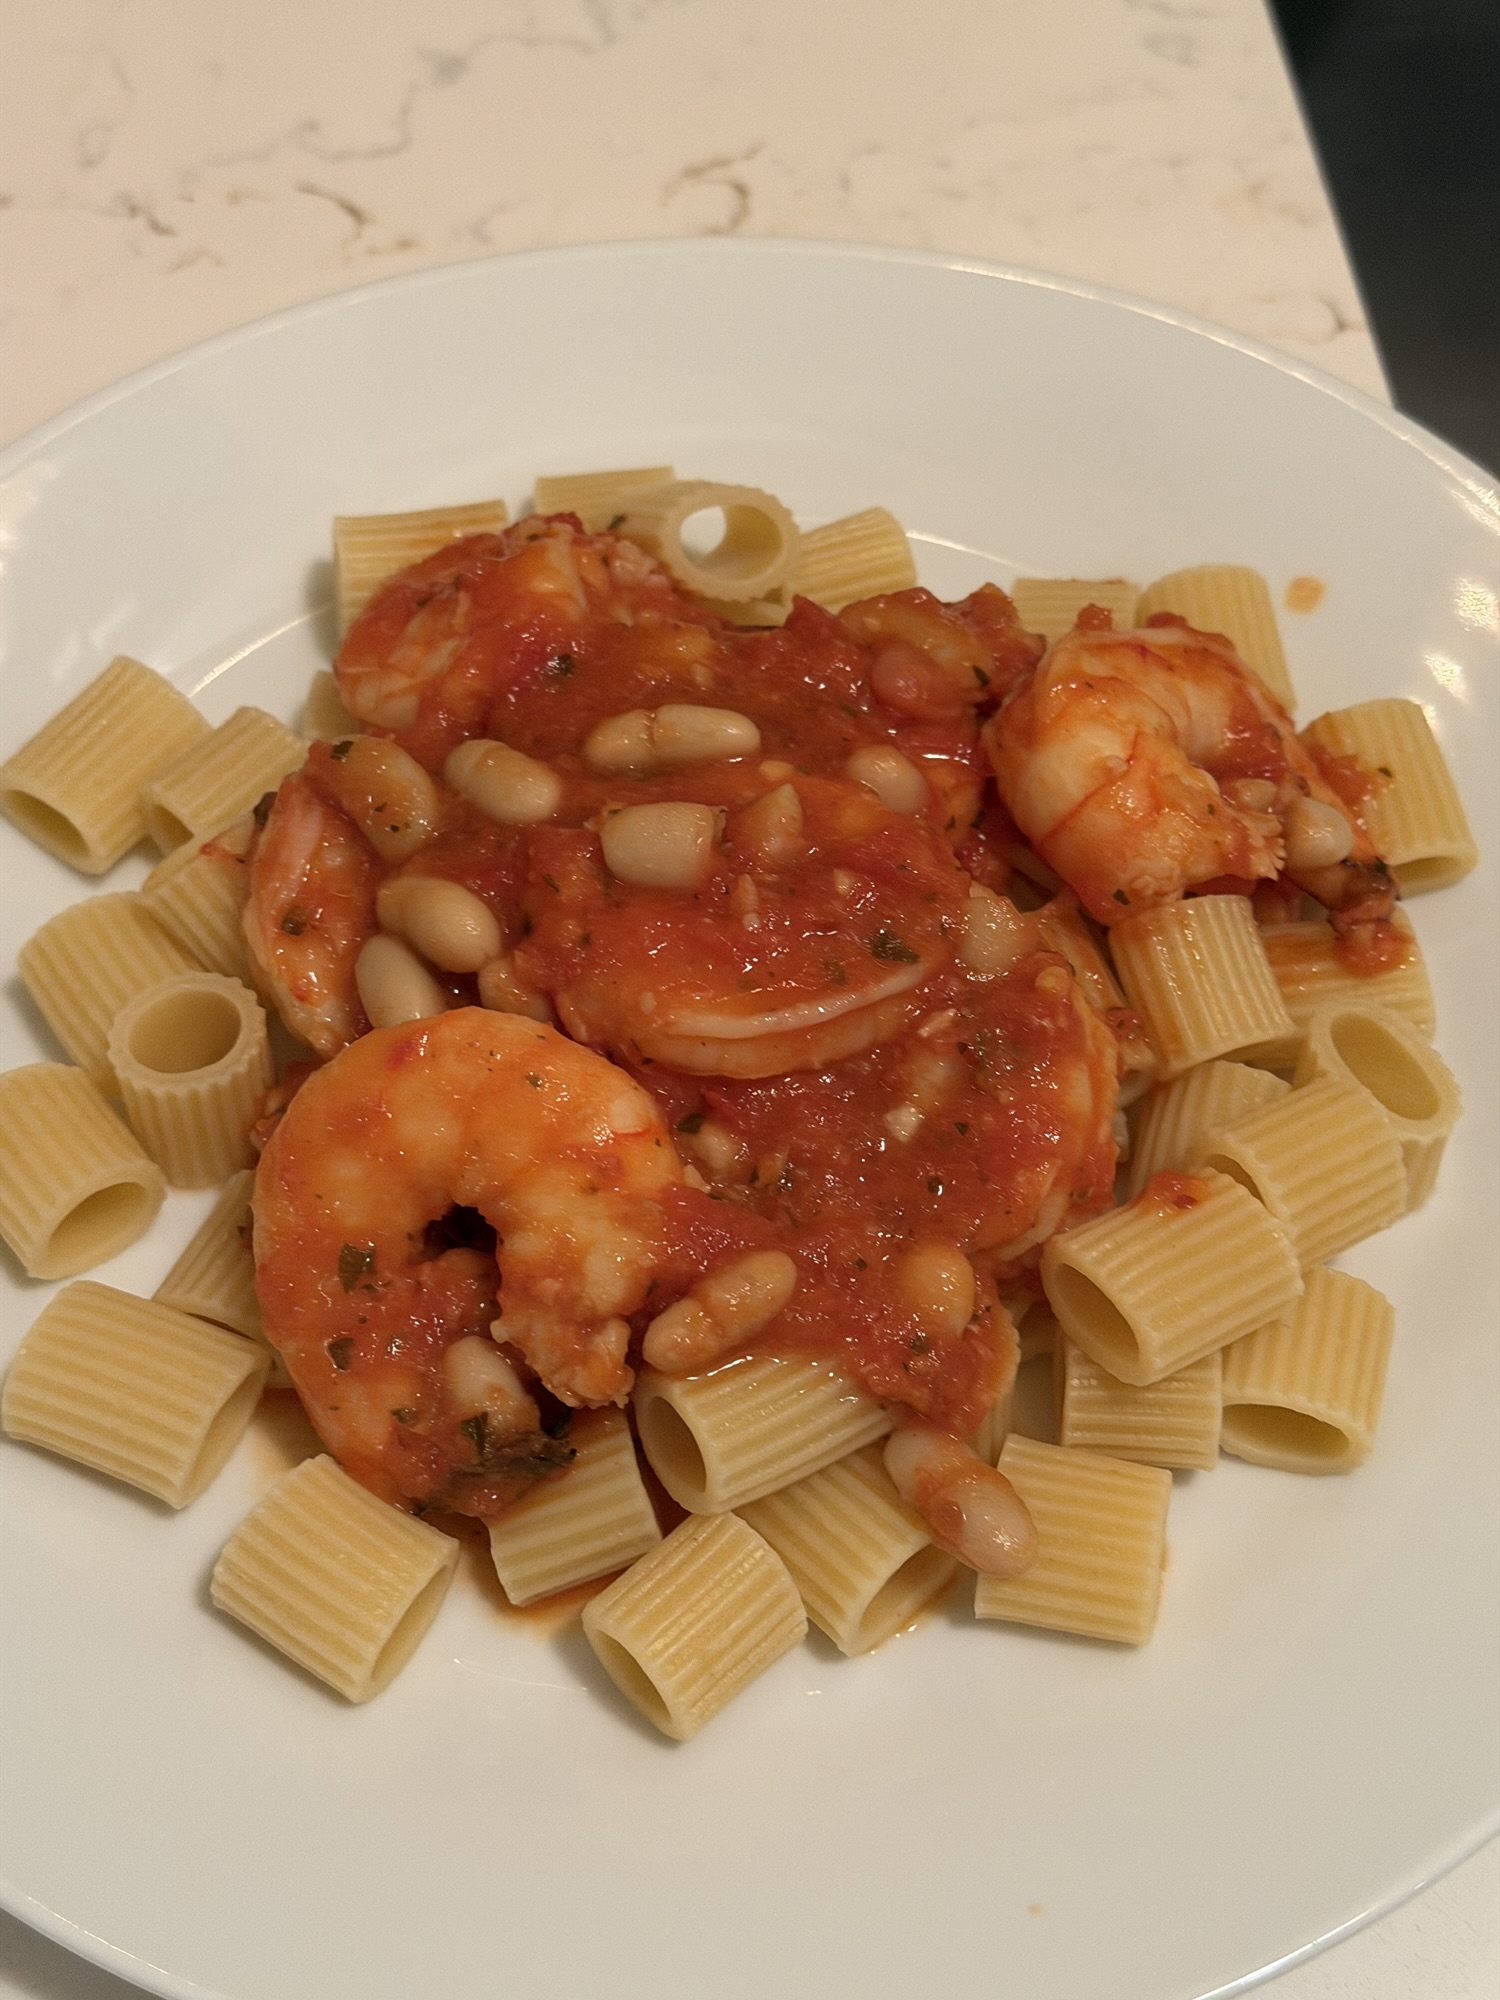
This recipe takes about 30 minutes from start to finish. It’s a saucy tomato shrimp and white bean sauce. Of course I always prefer my sauces to sit a little longer, but it’s ready to eat rather quickly. Simply delicious! and simple is the key word here. Perfect Sunday night dinner at home.
I served over mezze rigatoni, but any pasta, spinach, rice, spaghetti squash will do. Or just eat it as is.
Obviously if you don’t like spicy cut back on the crushed red pepper or omit all together.
Enjoy!
*should serve 4 with pasta ( use 1 1/2 lbs of shrimp for 4 people)
Ingredients:
1 – 1/2 lbs 16-20 shrimp peeled and deveined
1 tablespoon crushed garlic
1/2 – 1 teaspoon crushed red pepper , obviously to your own taste
1/2 teaspoon kosher salt — and taste once sauce is cooked I didn’t add any more
2 Tablespoons olive oil
1 15 oz can cannellini beans , washed and drained
13.8 oz. or 14 oz. crushed tomatoes or tomato puree
2 Tablespoons butter — it def adds a layer of richness, I used it but if you don’t want to you don’t have to
Pasta, spinach, rice whatever you’d like
Directions:
In a bowl toss the shrimp with garlic, oil, 1/2 teaspoon kosher salt and olive oil
I actually let this sit for about 30 minutes before cooking , you don’t have to
Heat a large skillet over medium high heat, when the pan is hot, add the shrimp mixture in one layer if you can, cook for about 1 minute then turn shrimp over and cook for another minute, stir in the drained beans
Add the crushed tomatoes and 1/4 cup water , bring to a simmer and cook for about 5 minutes, shrimp should be curled and opaque and the sauce thickens slightly
Add the butter and stir until it melts into the sauce, taste for seasoning and add salt if needed
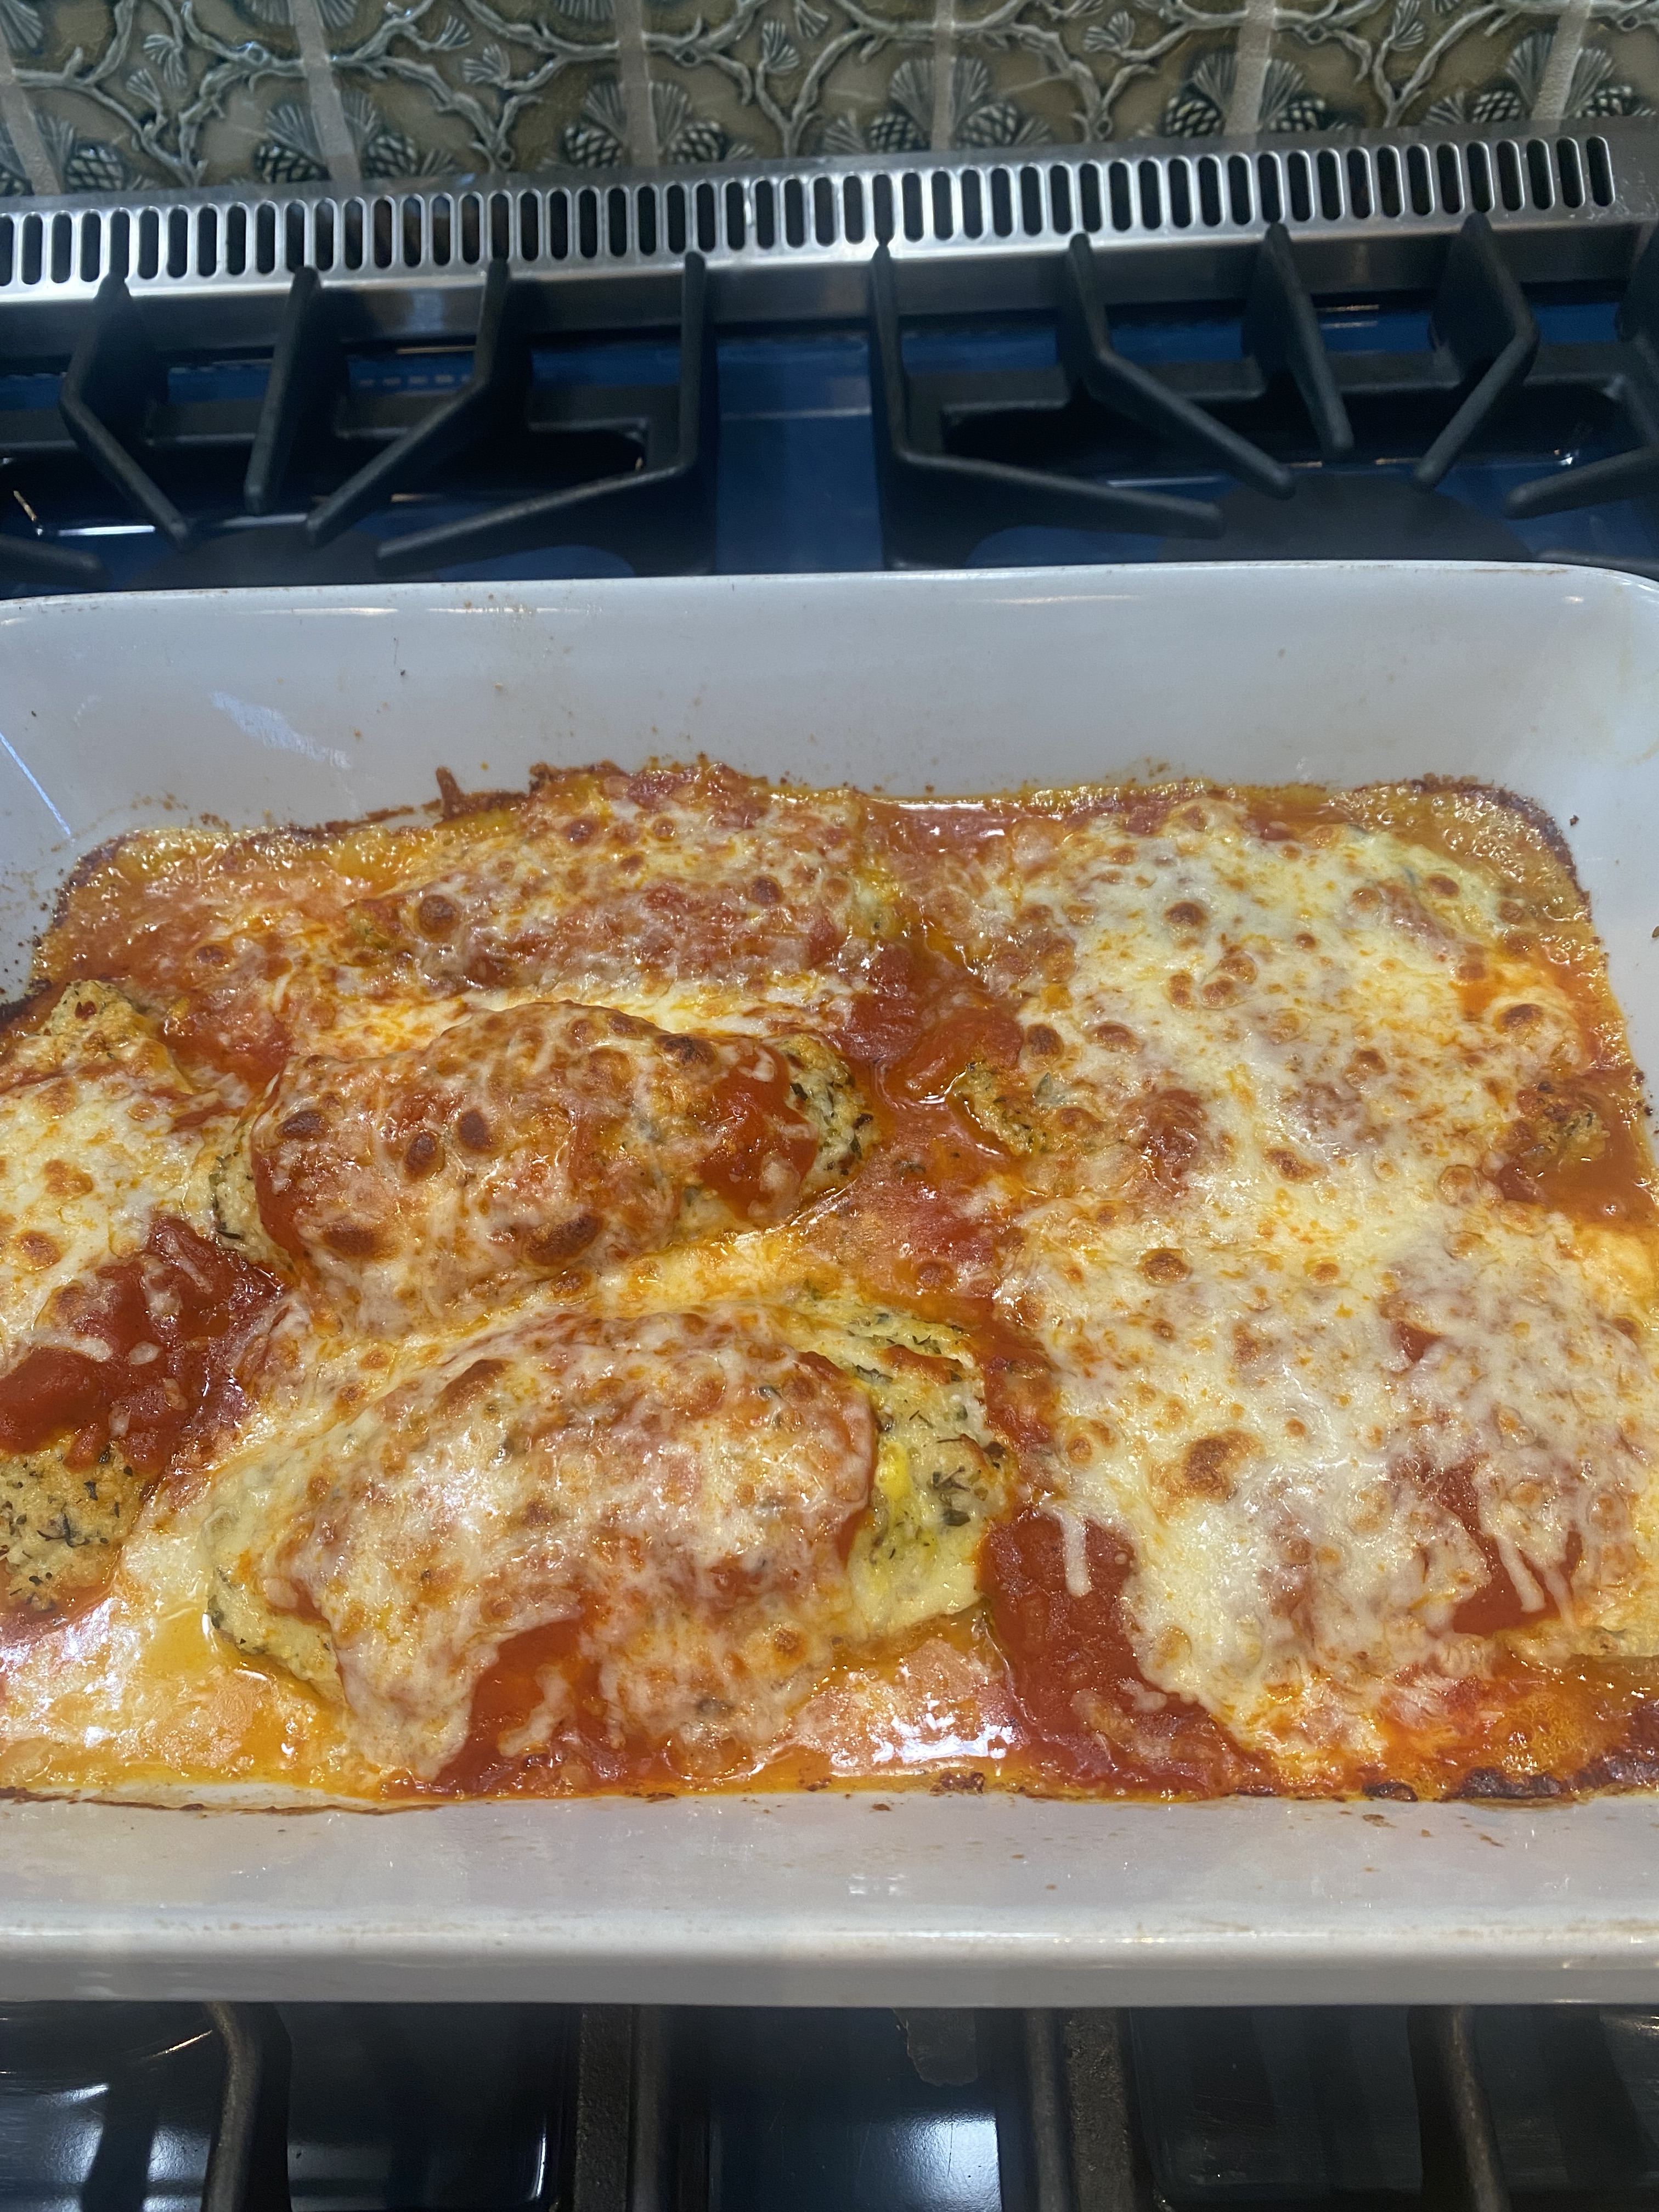
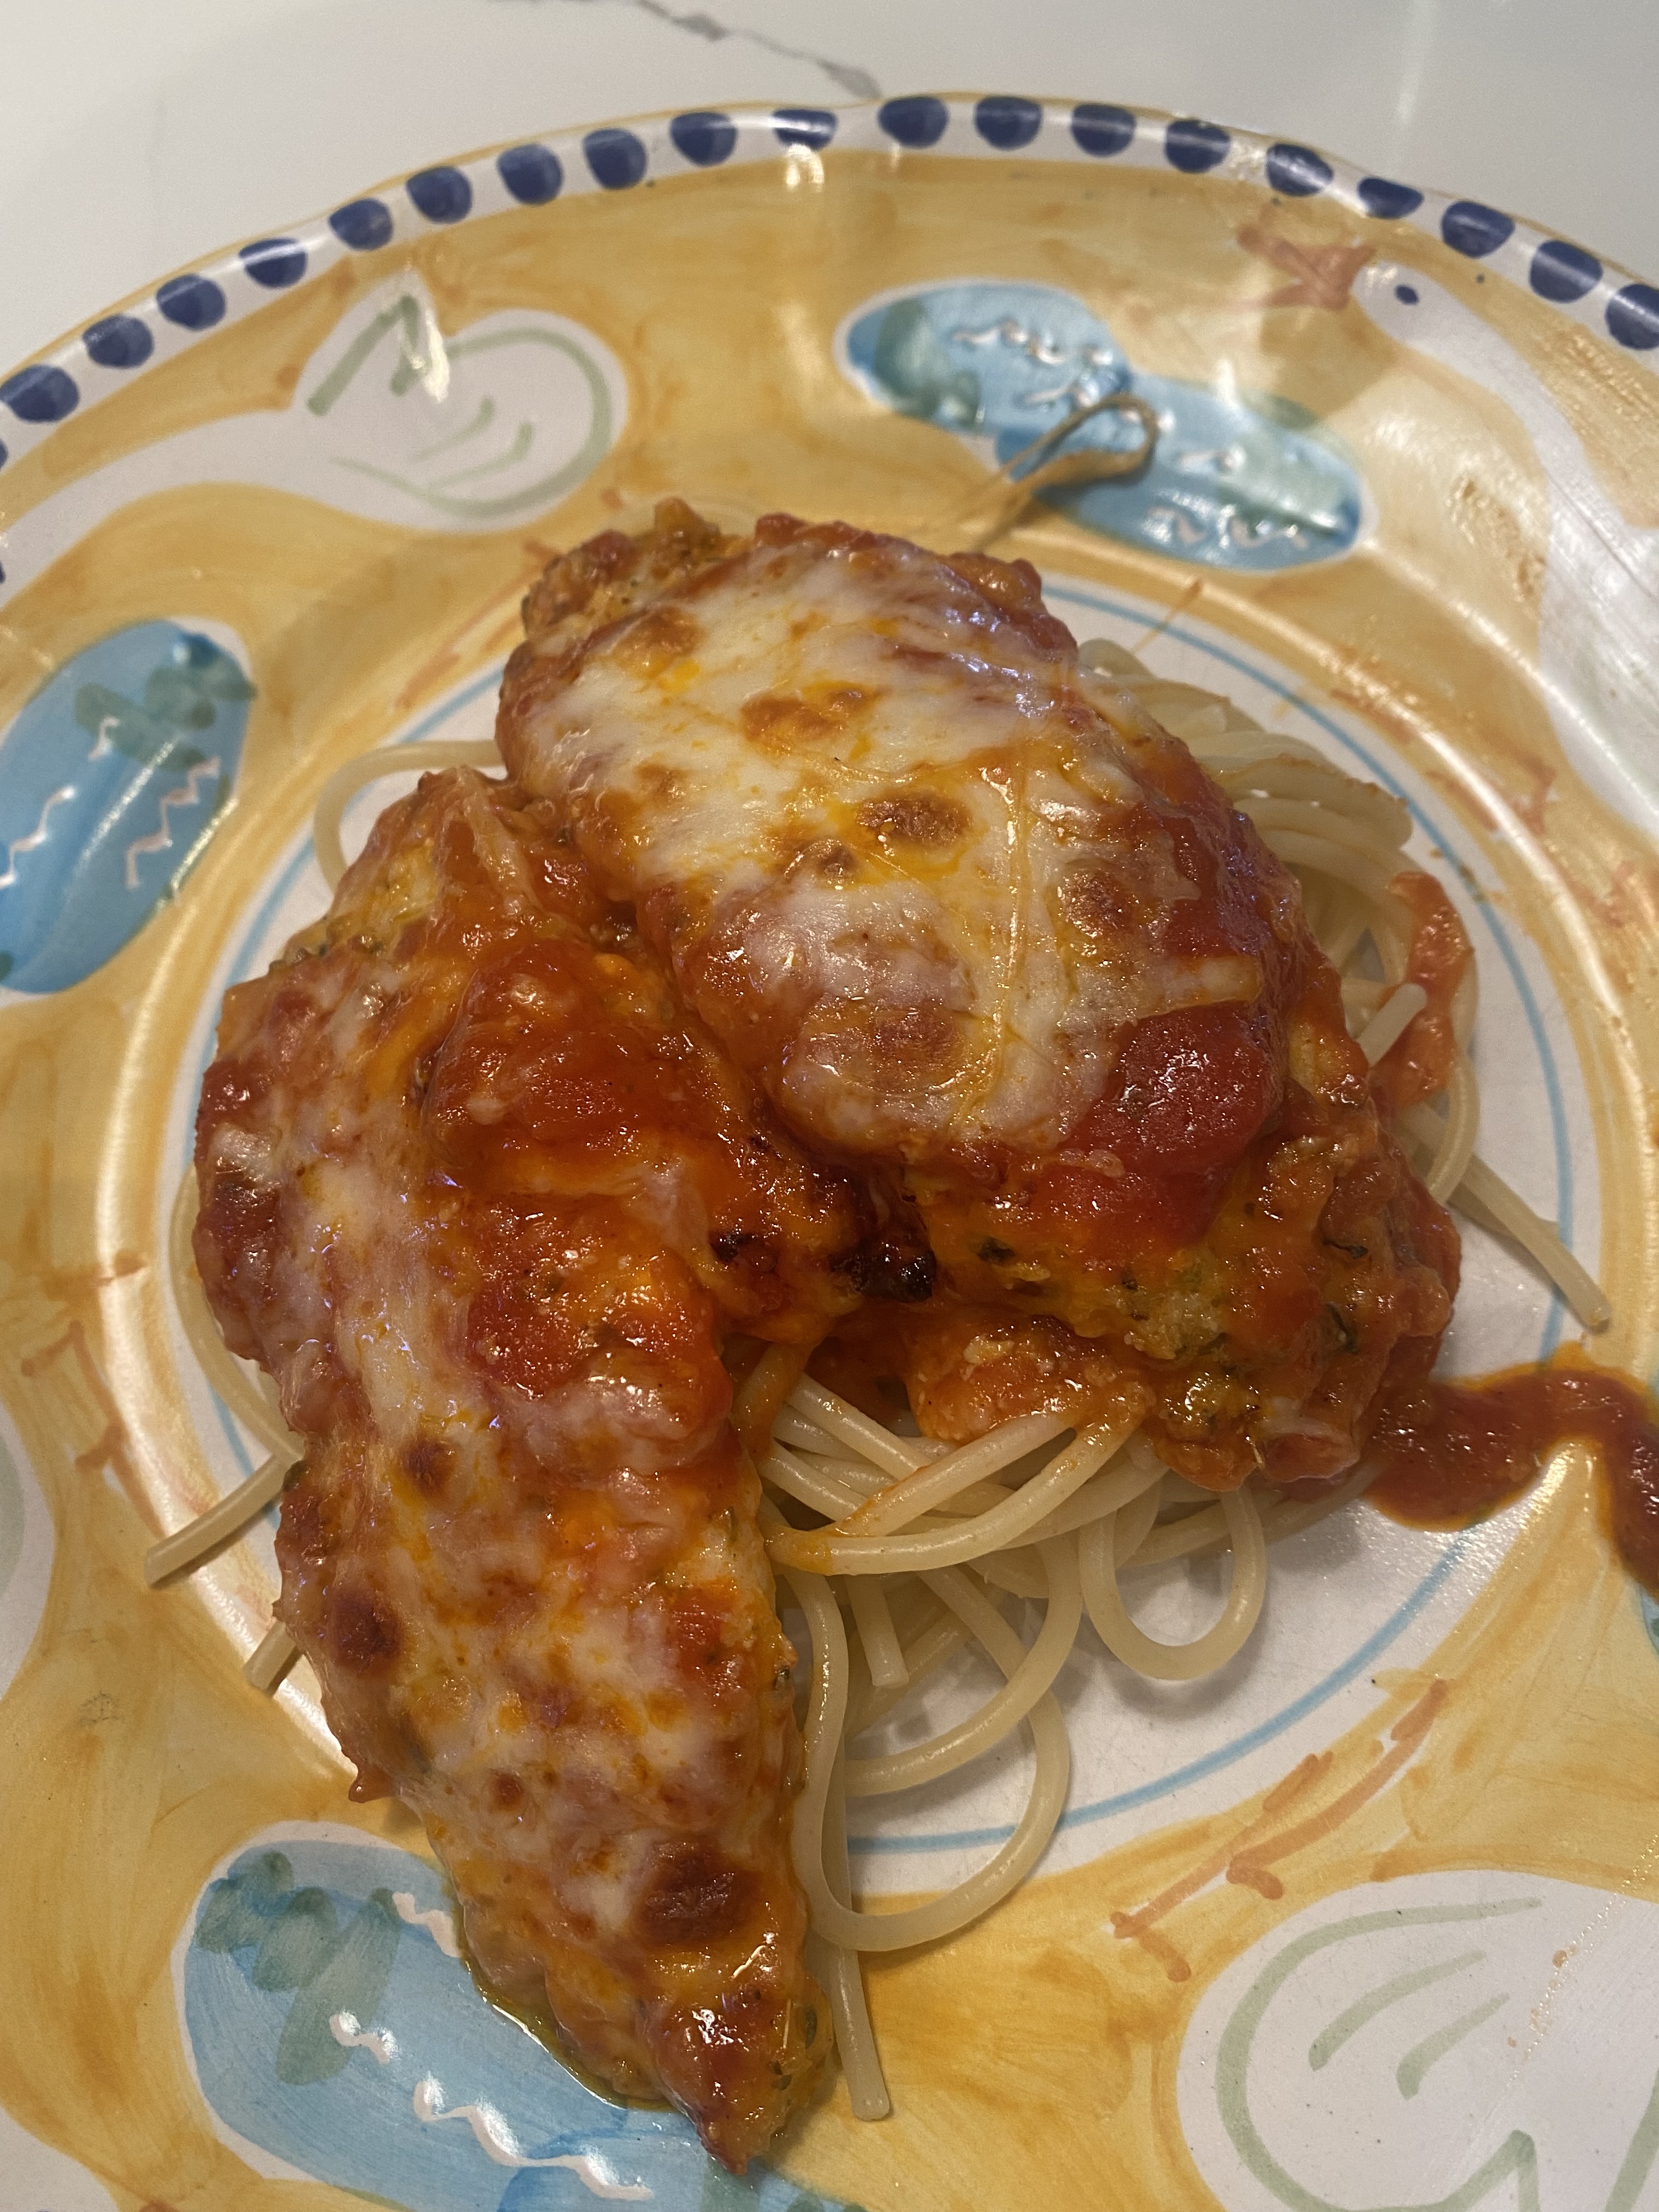
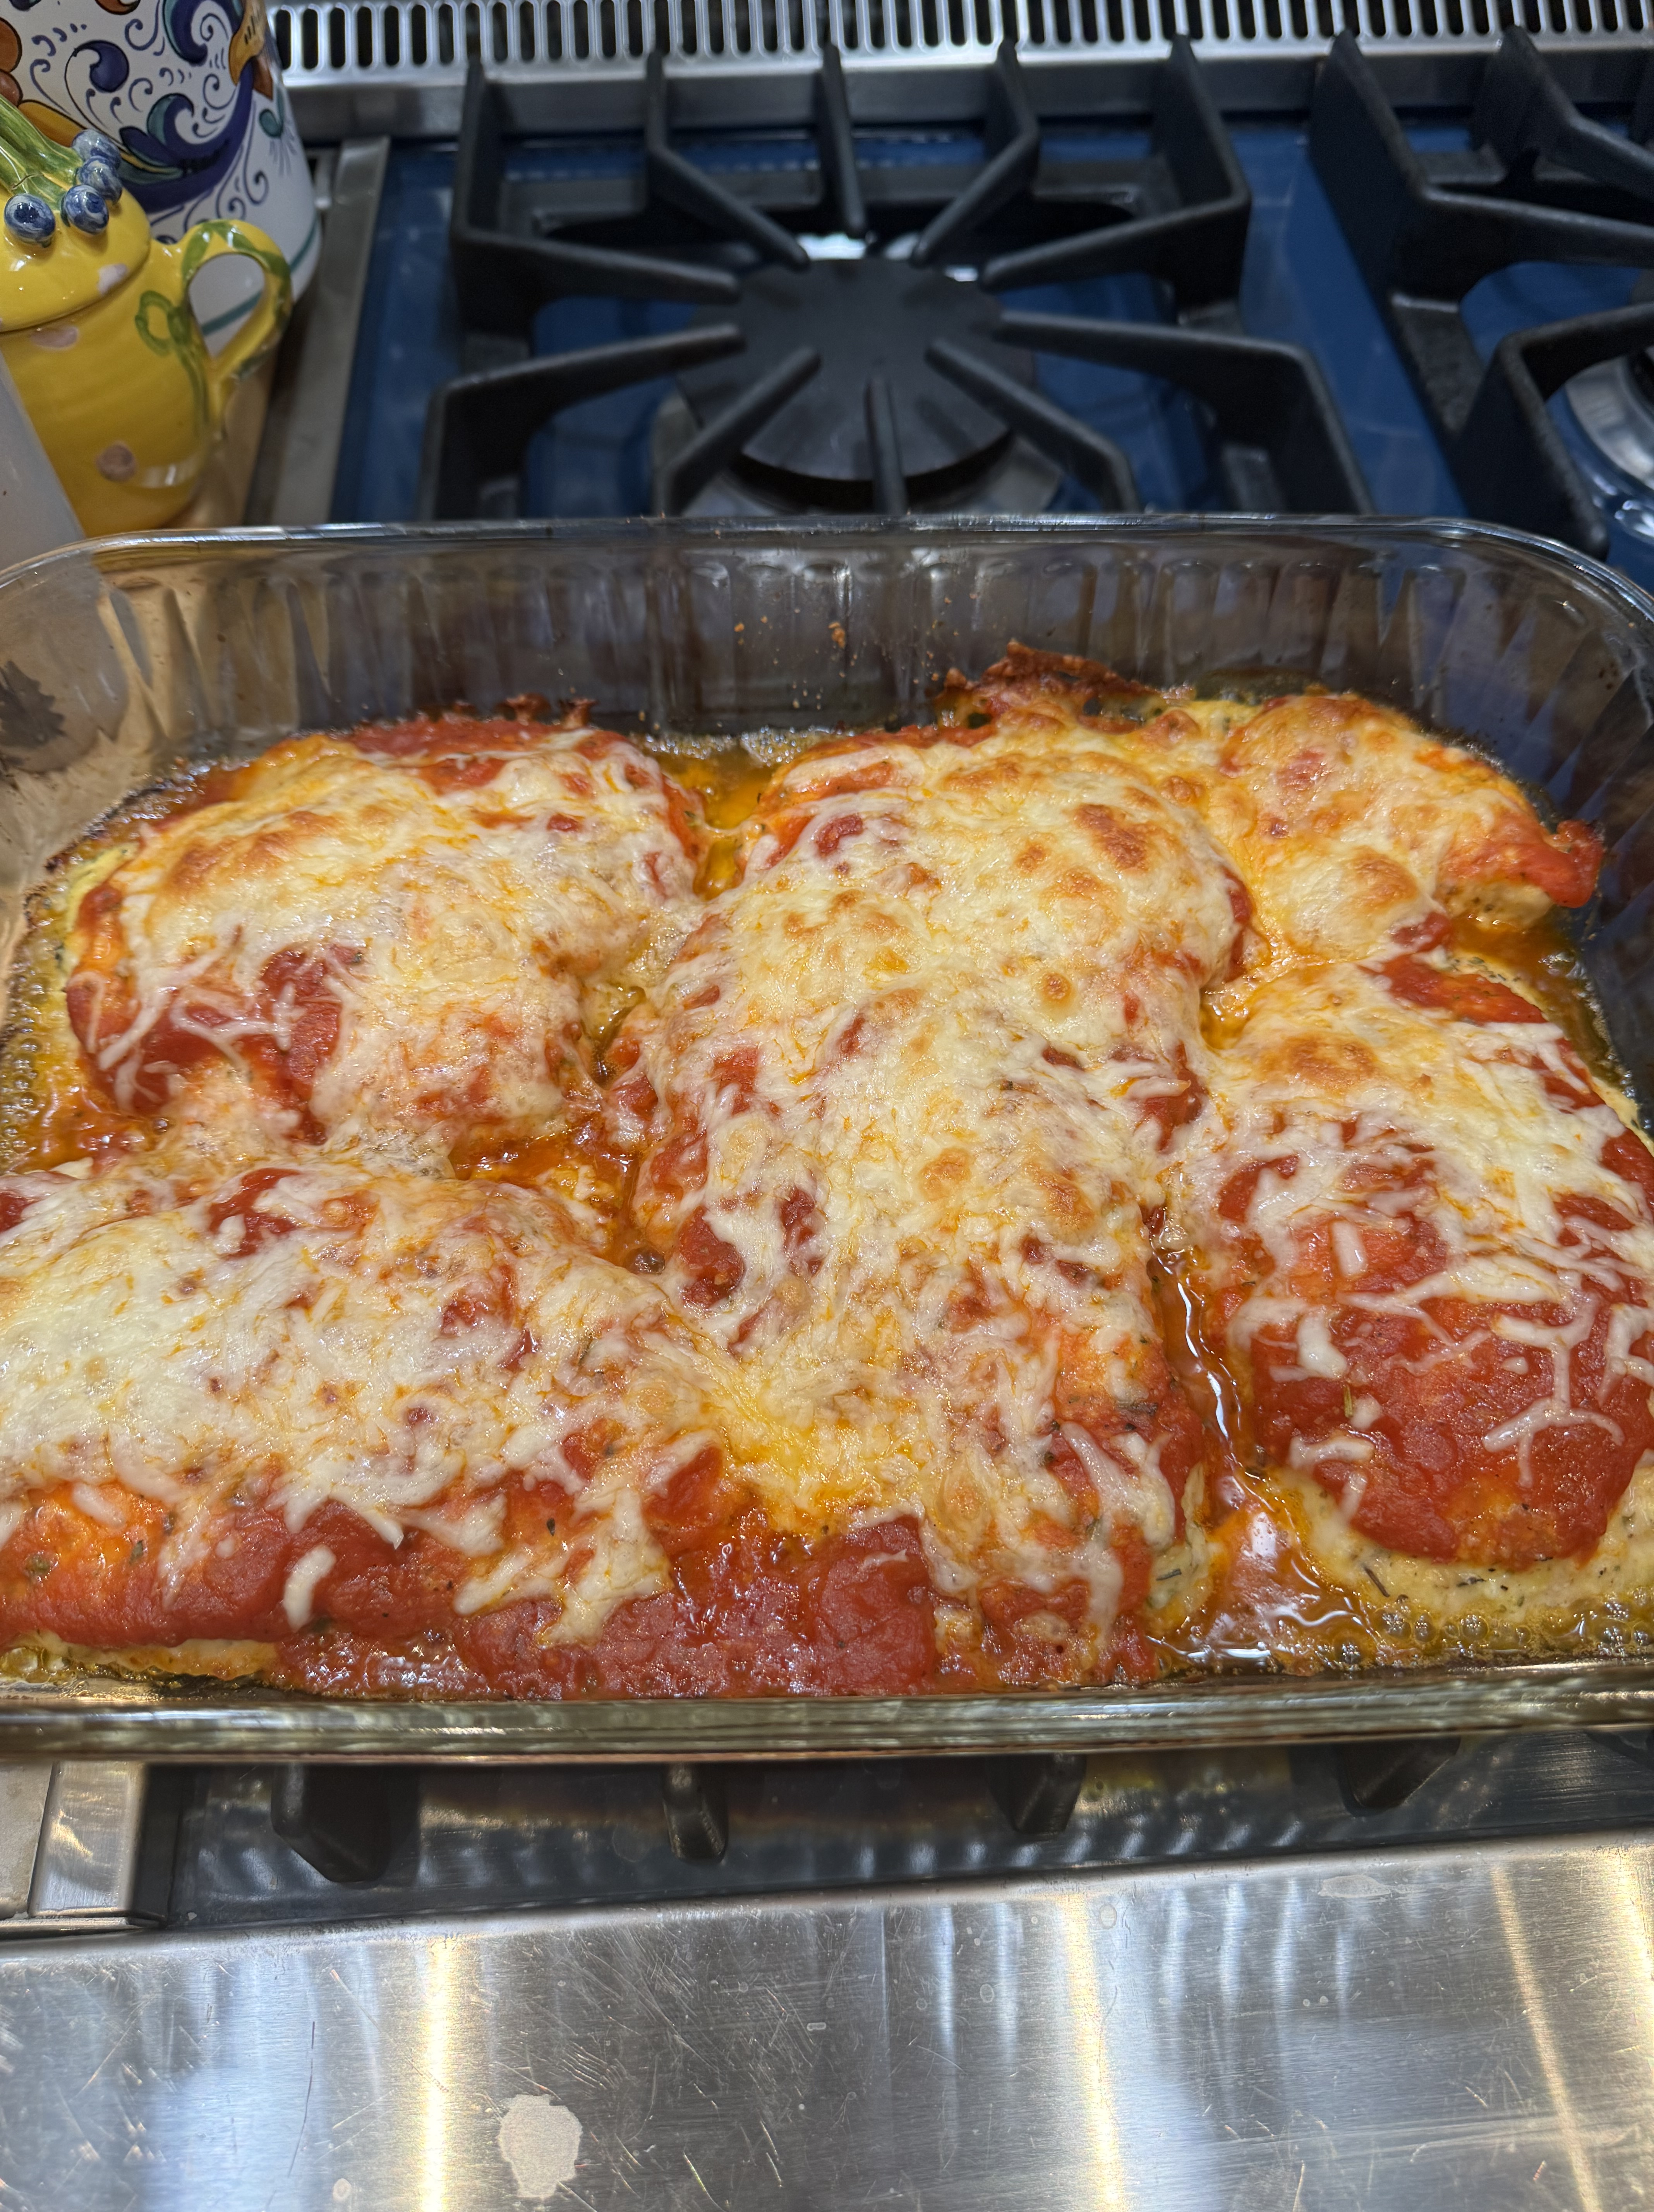
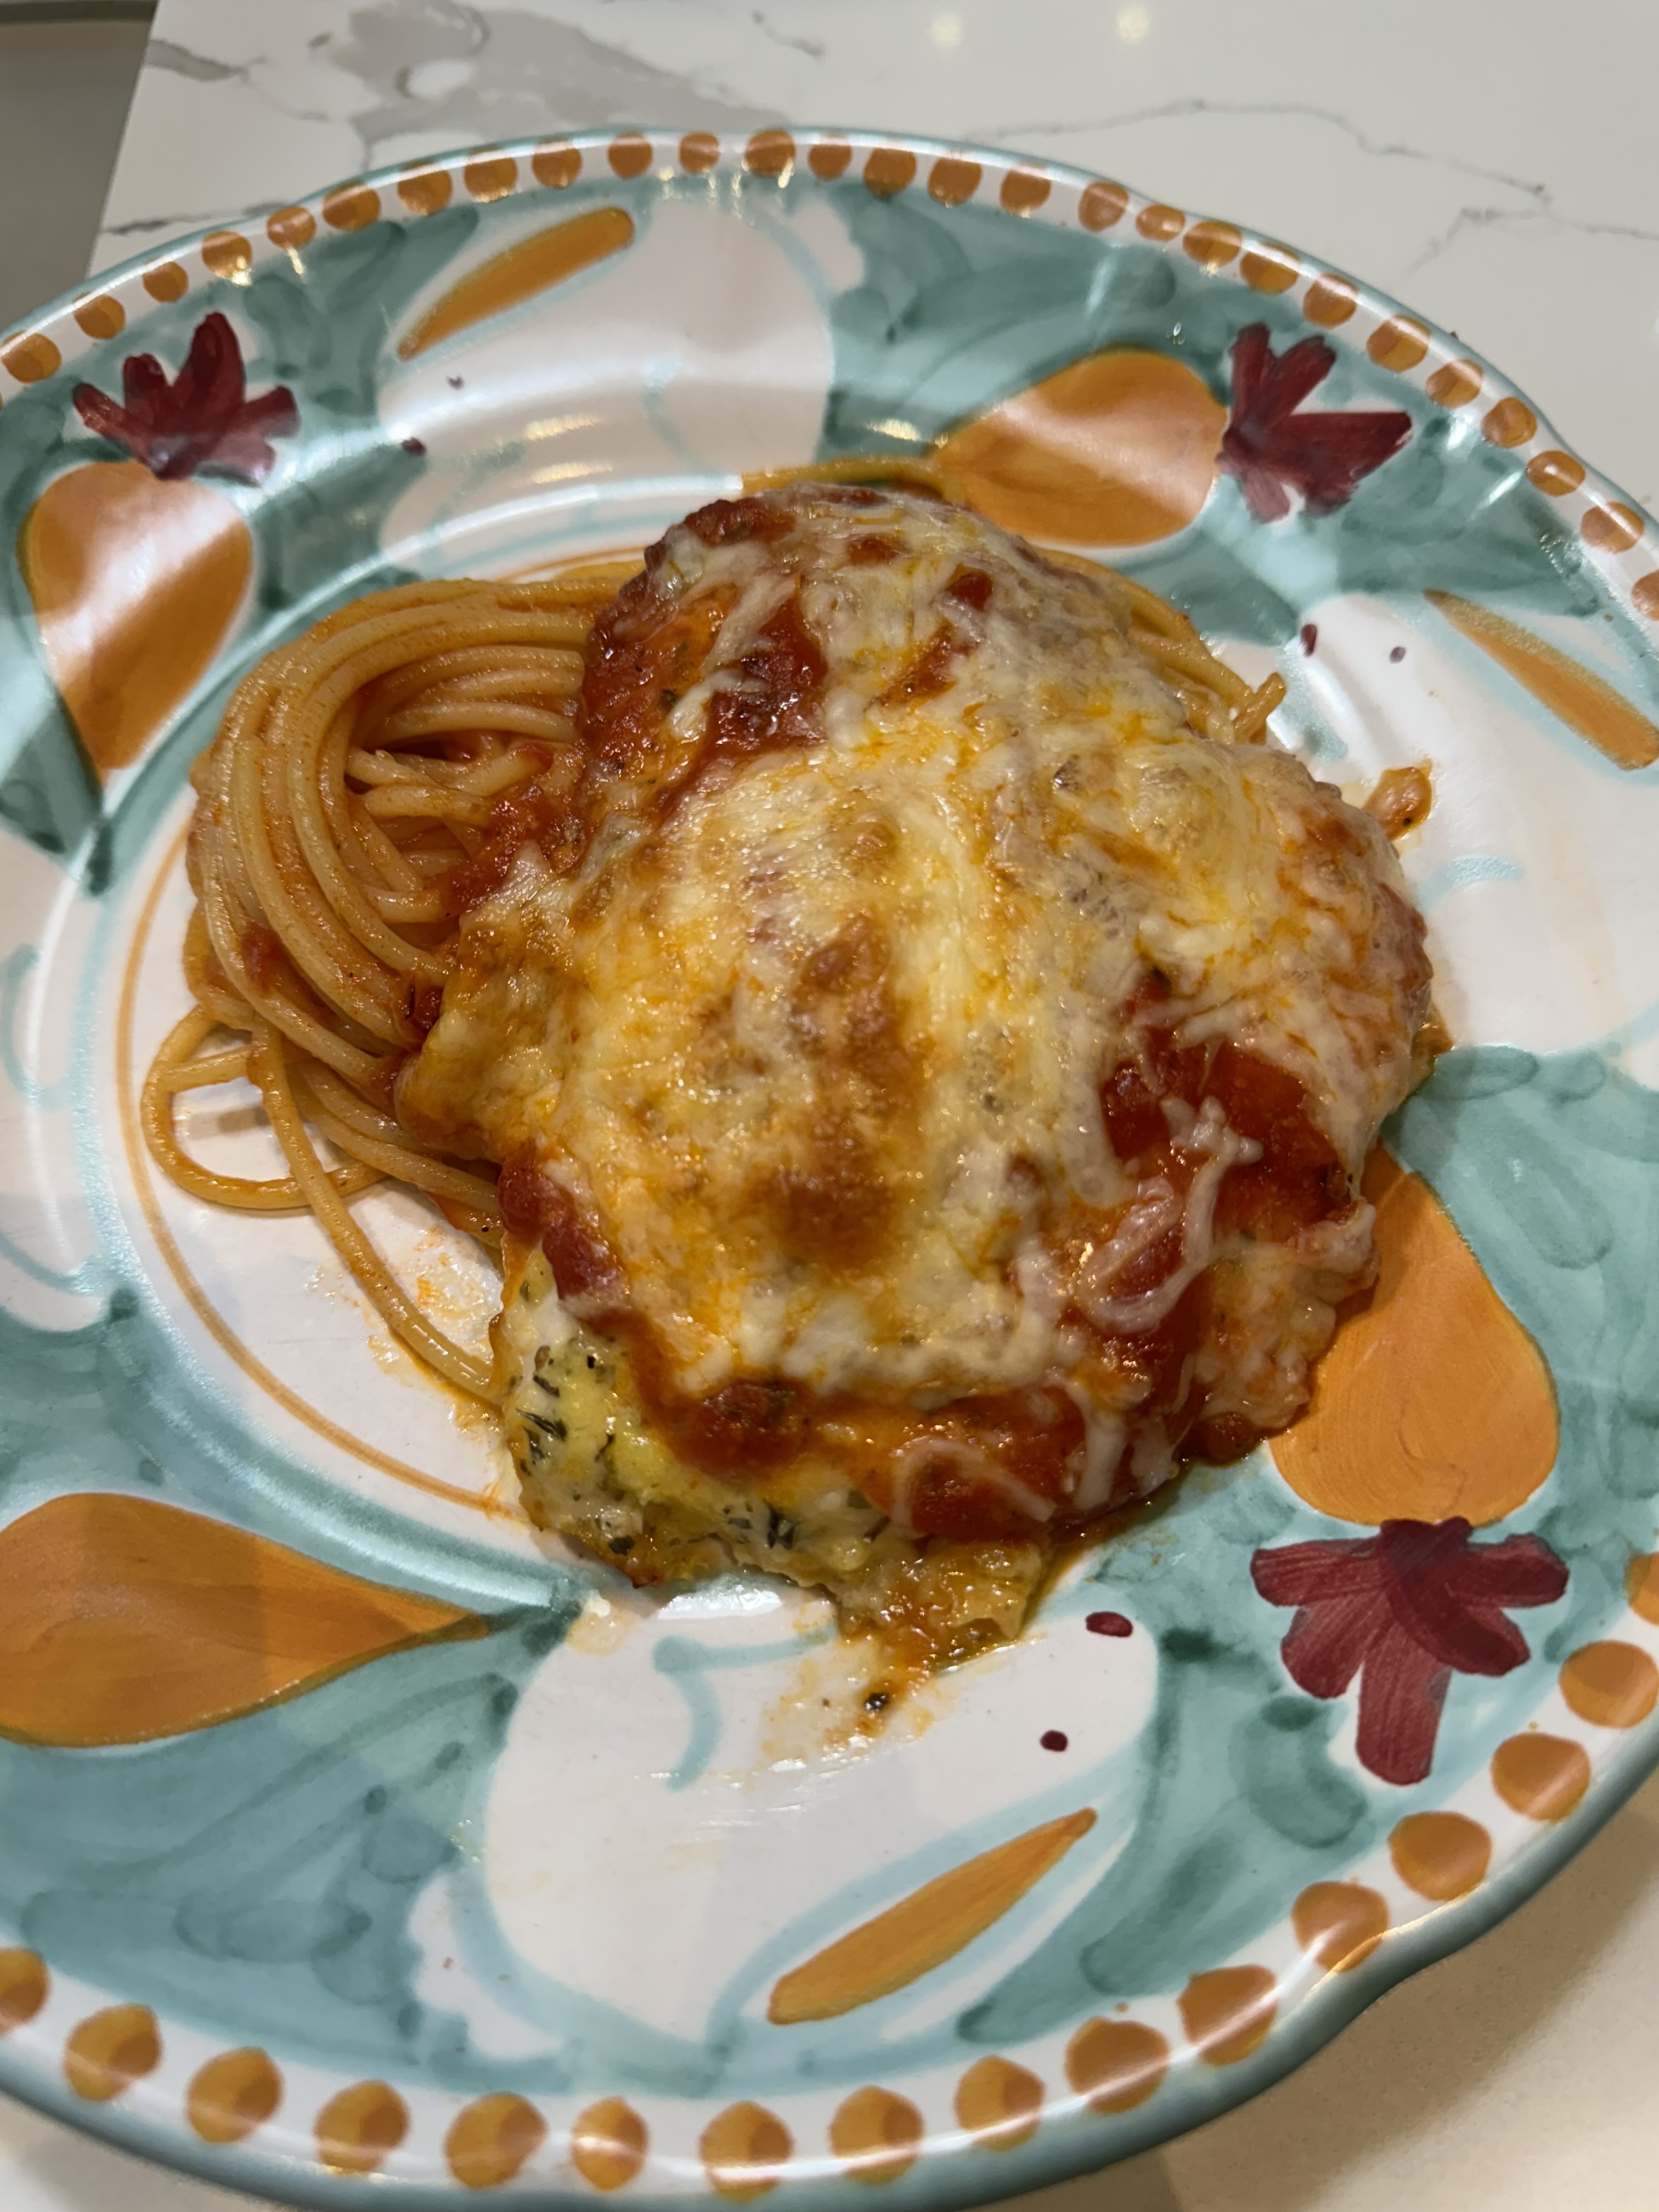
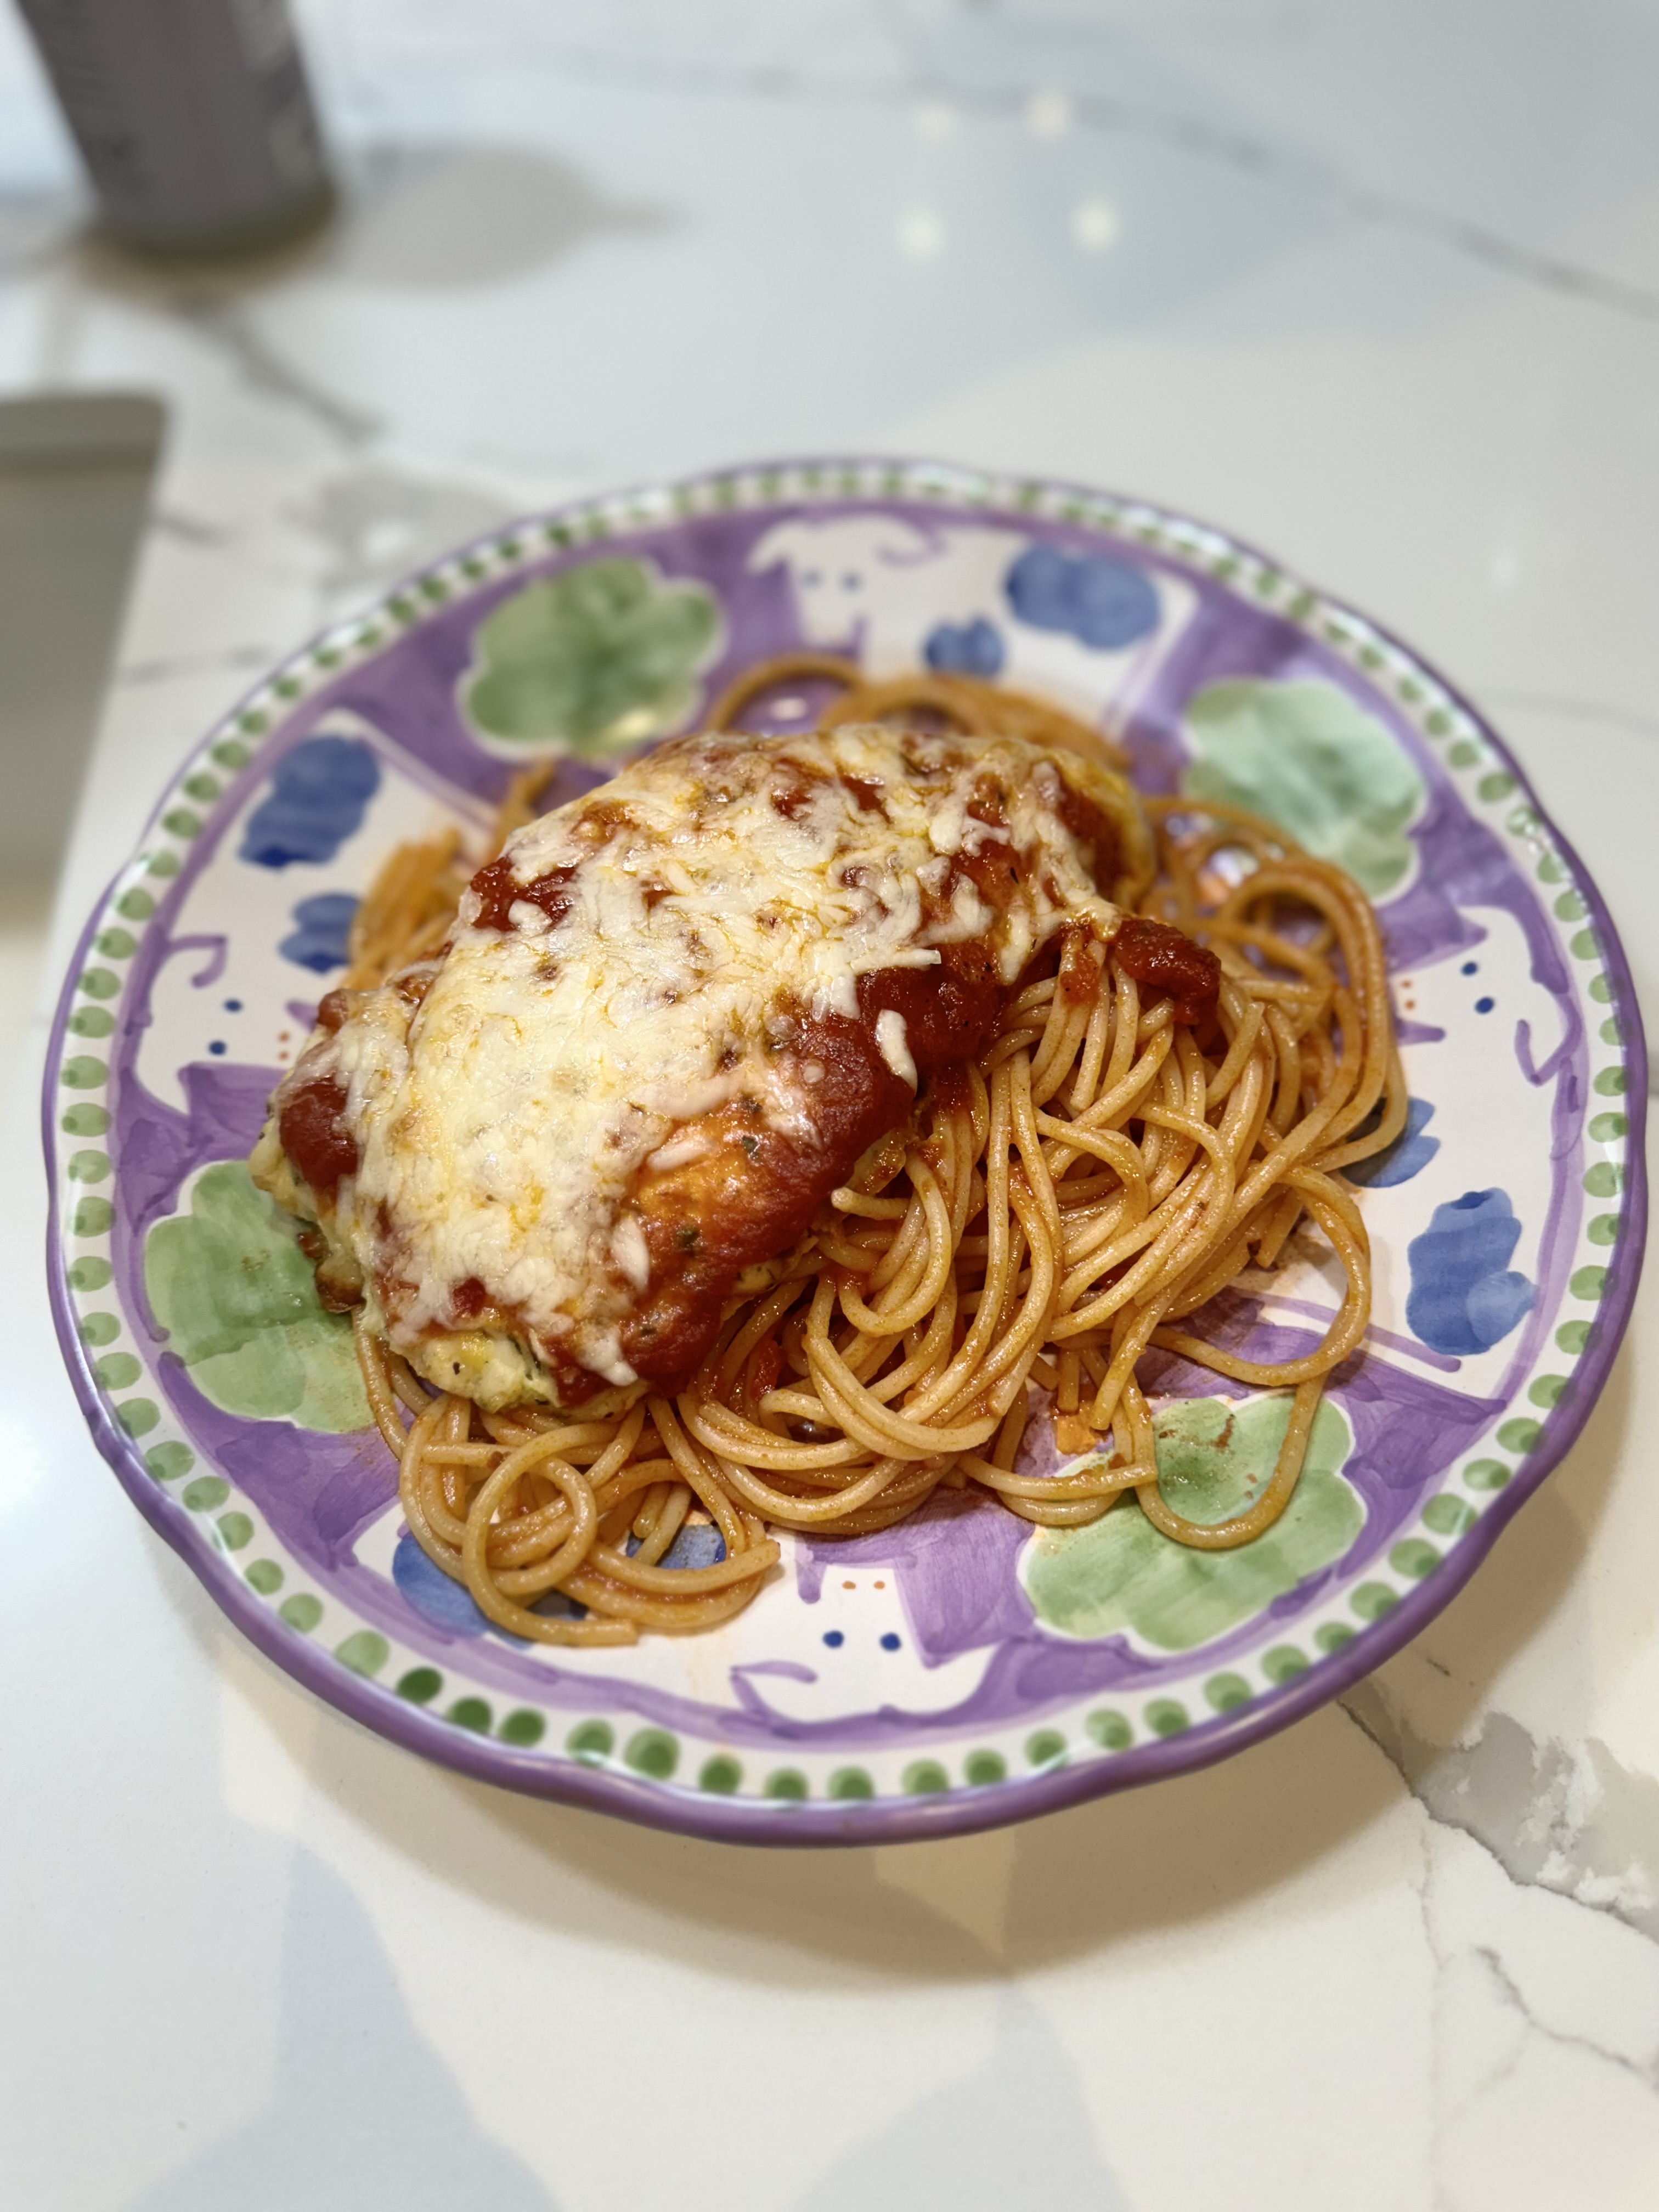
So delicious and so perfect. I used thin chicken breasts to start , if you’re using thicker ones you’ll have to monitor the timing of them a bit more and you can just use a meat thermometer to do so. This really couldn’t be easier and it was super tasty and is a cheese lovers delight. It’s lightened up from traditional breaded and fried chicken parm. *if you’re chicken breasts are too thick you can pound them with a meat mallet to the desired thickness — this is a very useful tool. Just place chicken cutlet between 2 pieces of parchment paper or plastic wrap and pound to desired thickness.
If you’re using over 2 lbs I double dry ingredients and egg
Prep and ingredients are super easy .
This recipe is for 4.
Ingredients:
1 1/2 – 2 pounds of thin chicken breasts — you can use thicker ones –read directions above for pounding chicken breasts
1 egg
3/4 cup grated Parmesan Cheese
1/2 tbsp. garlic powder
1/2 tbsp. onion powder
1 Tablespoon Italian Seasonings — It comes in one jar and is available in most spice sections in supermarkets —
pinch kosher salt
1/4 tbsp. freshly ground black pepper
and because we like a little extra kick I add a sprinkle of crushed red pepper flakes
3/4 -1 cup Jarred Marinara or if you have home made that’s good too . I prefer Raos Arabiata or Marinara for jarred sauce.
Shredded Mozzarella — probably 1/2 cup to 1 cup depending on how much cheese you like — I like a good sprinkle of cheese — see pics.
A little olive oil for drizzle in pan before cooking
Directions:
Pre heat oven to 400 degrees
I used a large baking dish and sprayed with cooking spray and drizzled a bit of olive oil to bottom of pan — just a little
Beat egg in a wide enough bowl for dipping chicken
In a second wide bowl combine the parm cheese and spices and mix
Dip each piece of chicken in the egg and then the cheese, coating both sides. Place in prepared baking dish.
Bake for 20 minutes — since cutlets are thin this should be fine because you’ll be cooking more with sauce and cheese. If thicker cutlets you may need a bit more time.
Top each piece with sauce and shredded mozzarella. ( you can spread a little sauce in between chicken as well . I served over spaghetti and needed a little more sauce so this was enough. If you want you can heat up extra sauce in a small saucepan for spaghetti. Bake for another 10-20 minutes till chicken is 160 degrees when checked with meat thermometer and cheese is melted and bubbly. I like my cheese just slightly browned so you can turn to broil for a minute or so depending on your broiler but be careful you don’t want to burn the whole thing.
This is by far one of my most favorite recipes ever! Super Easy and Super Delicious ! If you’ve been following me since the early days you’ve probably made this recipe by now. It’s perfection in a bowl . I’ve simplified the recipe along the way so that now it is just the way Joel and I like it. it’s pretty easy as long as you buy the squash pre – cut (available in every supermarket, and corner produce store). I just made my first batch of the season, and the squash is sweet and delicious. It tastes so creamy you’ll swear there’s cream in it, but really, there is none. I love a little freshly grated nutmeg in it too, but you can certainly just sprinkle in a very little bit of already grated nutmeg. I hope your family and friends enjoy this as much as my family does! It’s always on my table for Thanksgiving. A delightful way to start a dinner, or a delicious main dish served alongside a beautiful salad and bread. This can easily be made vegetarian by substituting vegetable broth for chicken broth which is how I make it on Thanksgiving for Kerri (our daughter) who is a vegetarian.
*This can be made without cream so easily–but if you want a touch of richness you can add a little heavy cream into soup and mix in before serving or a Tbsp. of unsalted butter and swirl it in. Totally not necessary but just saying.
And clearly this recipe can be cut in 1/2 for a smaller group– I usually use 2 packages of squash for 6 servings.
*feel free to put croutons on top or sprinkle some pepitas on top . It’s delicious just the way it is!! and wonderful for lunch the next day and will freeze beautifully and may just need a little broth or water upon heating up.
4 pkgs. (approx. 4 lbs.) butternut squash (it’s doesn’t have to be exact)
3 tablespoons olive oil
1 large spanish onion, chopped
8 – 10 cups chicken or vegetable broth and you may need more
*1 -2 tablespoons unsalted butter (for this serving size, I use 2 but it’s totally optional)
Kosher salt and freshly ground black pepper
*use whole nutmeg – you just grate a little in for flavor. I always tend to use whole, but grated will do. It’s just a touch of it–if I had to guess, I’d say 1/4 teaspoon to 1/2 teaspoon depending on your taste
*if you really want to top it off with a touch of cream you can . Just add a little heavy cream to the soup and blend it right in at the end. Honestly it’s not necessary but it def adds a a layer of richness!
Directions:
In a heavy Le Creuset (or any other ample size large pot), I heat 3 tablespoons of olive oil. When oil is heated, put in onion and about 1/2 tablespoon of kosher salt. Sweat out the onions until they are translucent (approx. 5 – 8 minutes). If you’re using the butter, add it now too. I then add all of the butternut squash and mix the onions, oil and butter as best I can all over the squash. Next, add enough broth to cover the squash (I used approx. 10 cups of chicken broth to cover). I keep the remaining half a box of broth in case I need it later. Return to a low boil, then bring to a simmer. I let it cook a very long time–at least an hour until soft–and then I turn off the heat and let it sit for a while. I like to make it early and let it sit for as long as possible, because the squash gets very soft. Then right before I am about to serve, I use an immersion blender and blend it into a beautiful smooth soup. If you need more broth, add it as you blend. This is also your salt, pepper and nutmeg moment. Season to taste and blend just until smooth. I leave it in the pot until I need it and then gently warm it up. This soup will keep in the fridge for a few days. It can be frozen as well. Upon defrosting you may need to add more broth. Sometimes I serve this soup with beautiful croutons if I can find them in specialty stores, but it is delicious and beautiful on its own, and very good for you! My family loves it , and I hope yours does too.
It is most definitely soup season again. the chill in the air makes it the most perfect time of year to start making soup for dinner again. even if you live in a warmer climate this is a most wonderful meal. Paired with a salad and some crusty bread you have a very heartwarming meal.
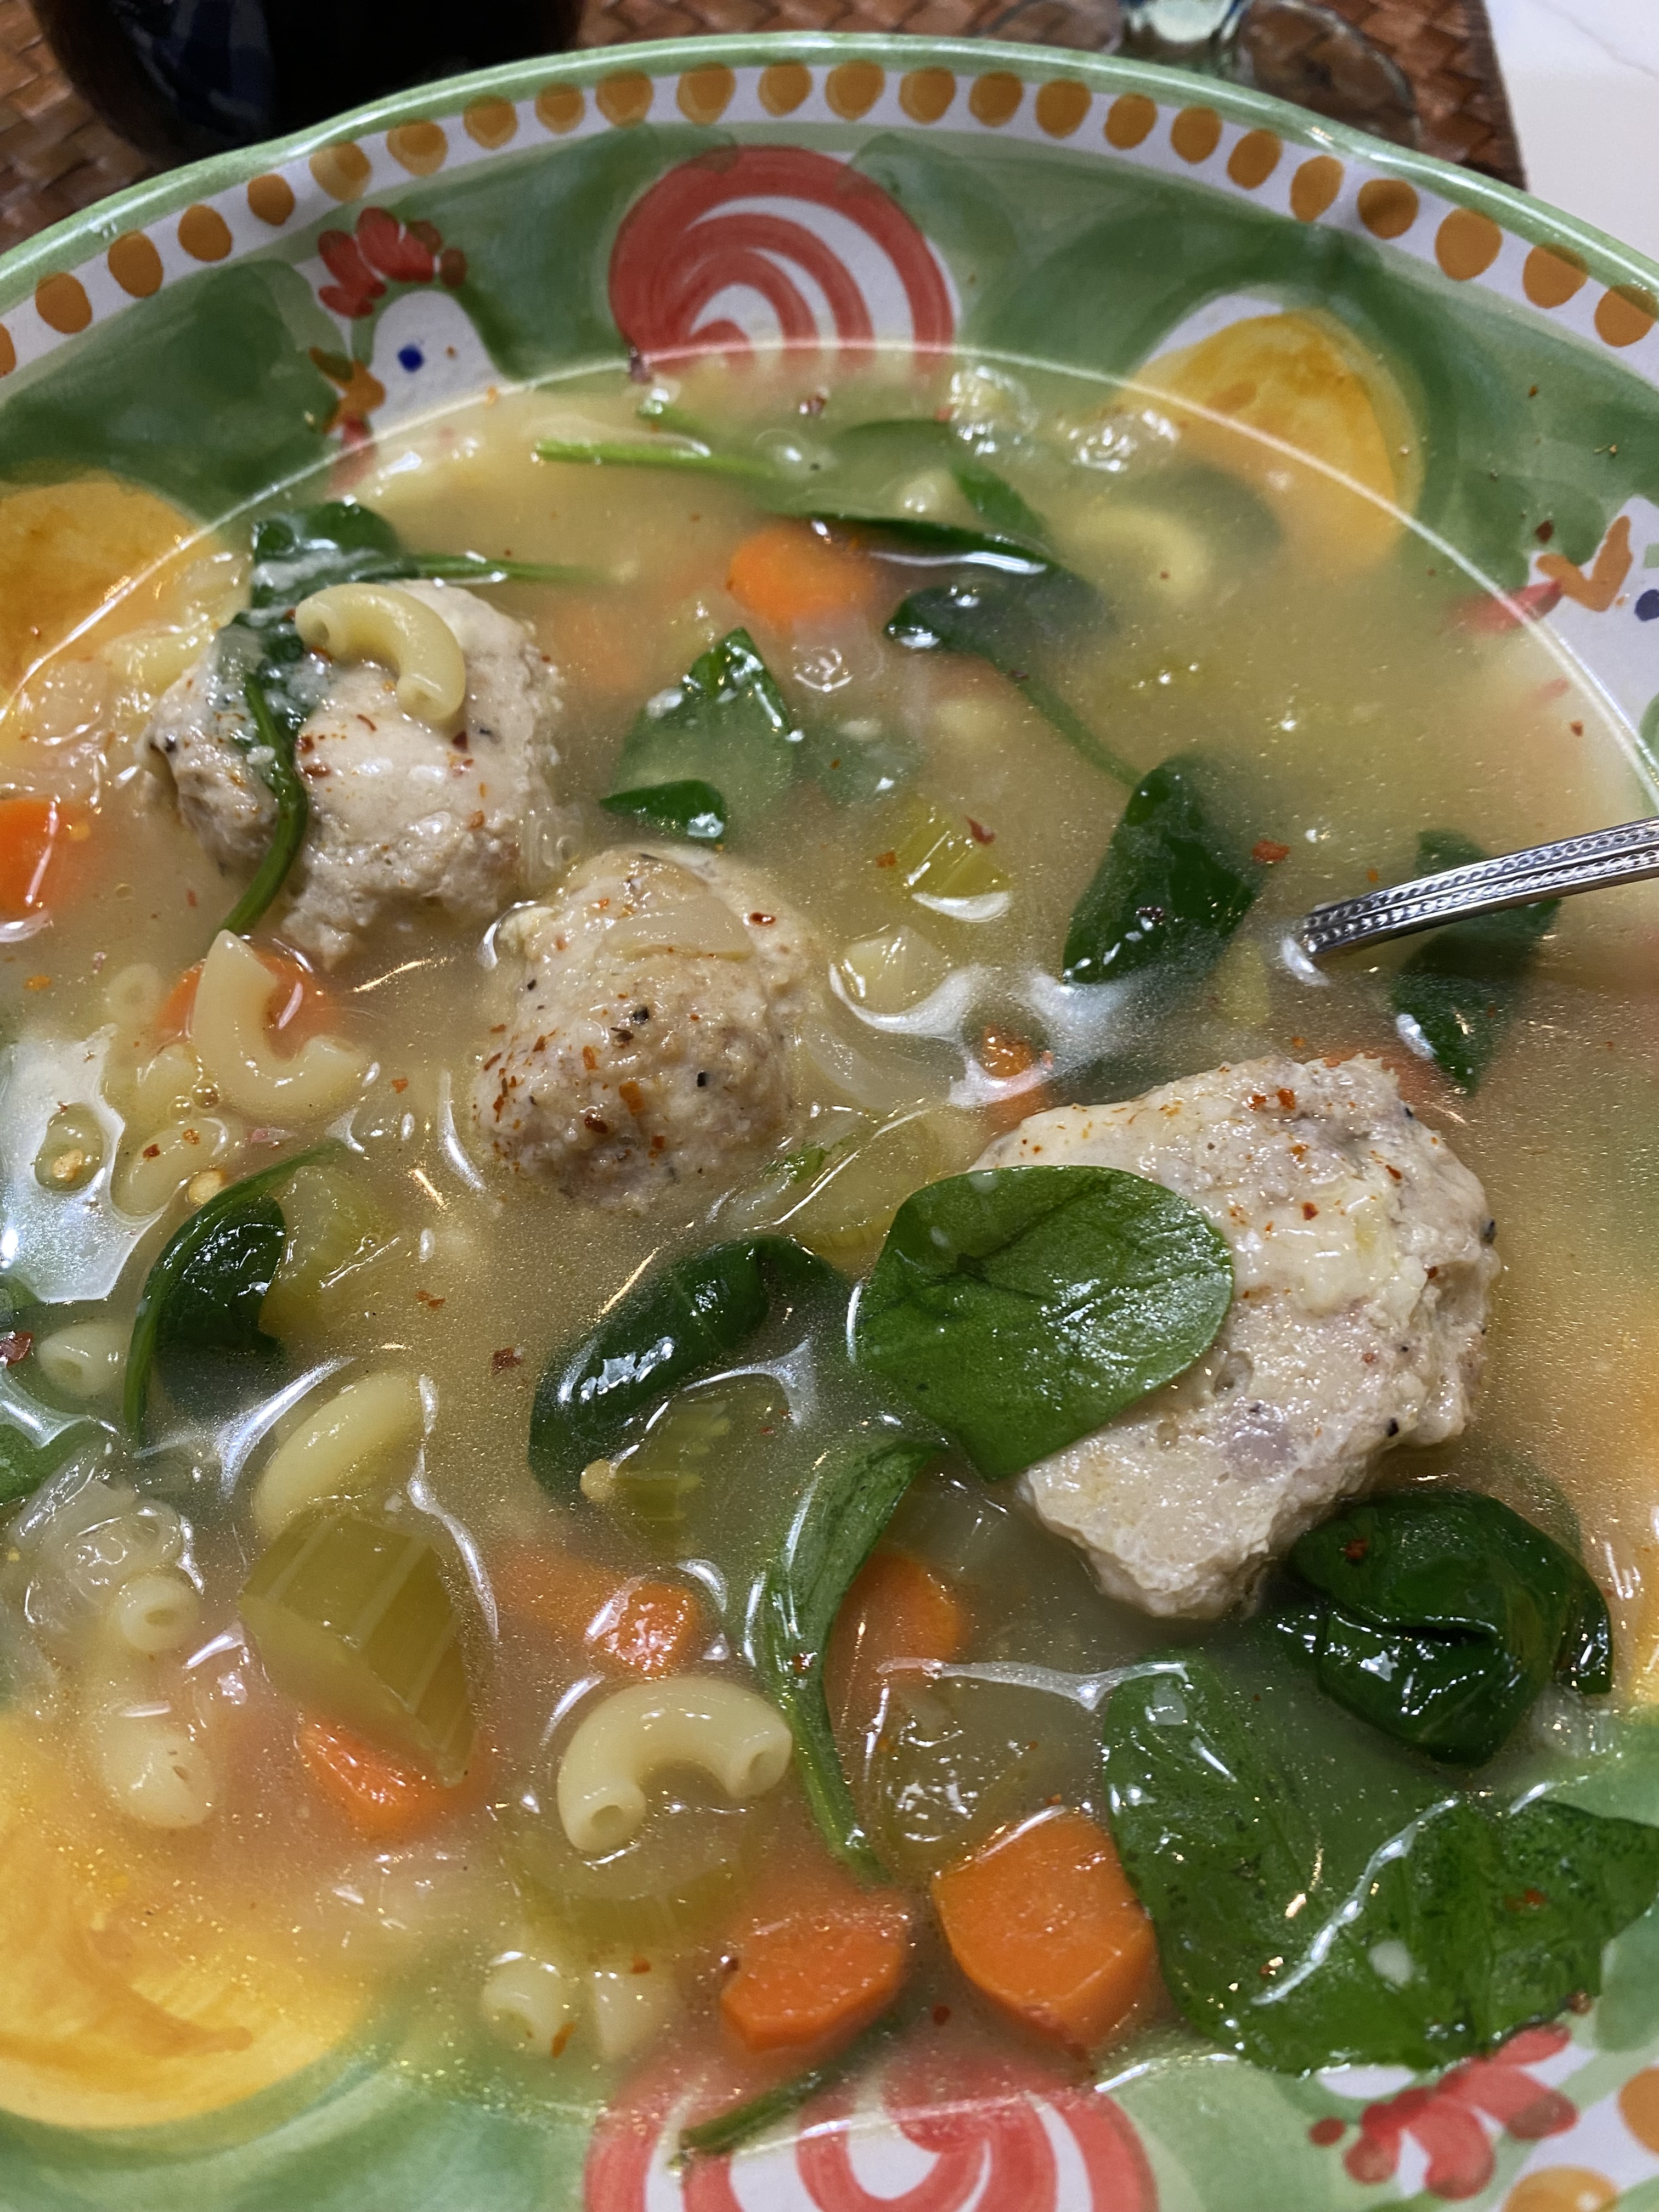
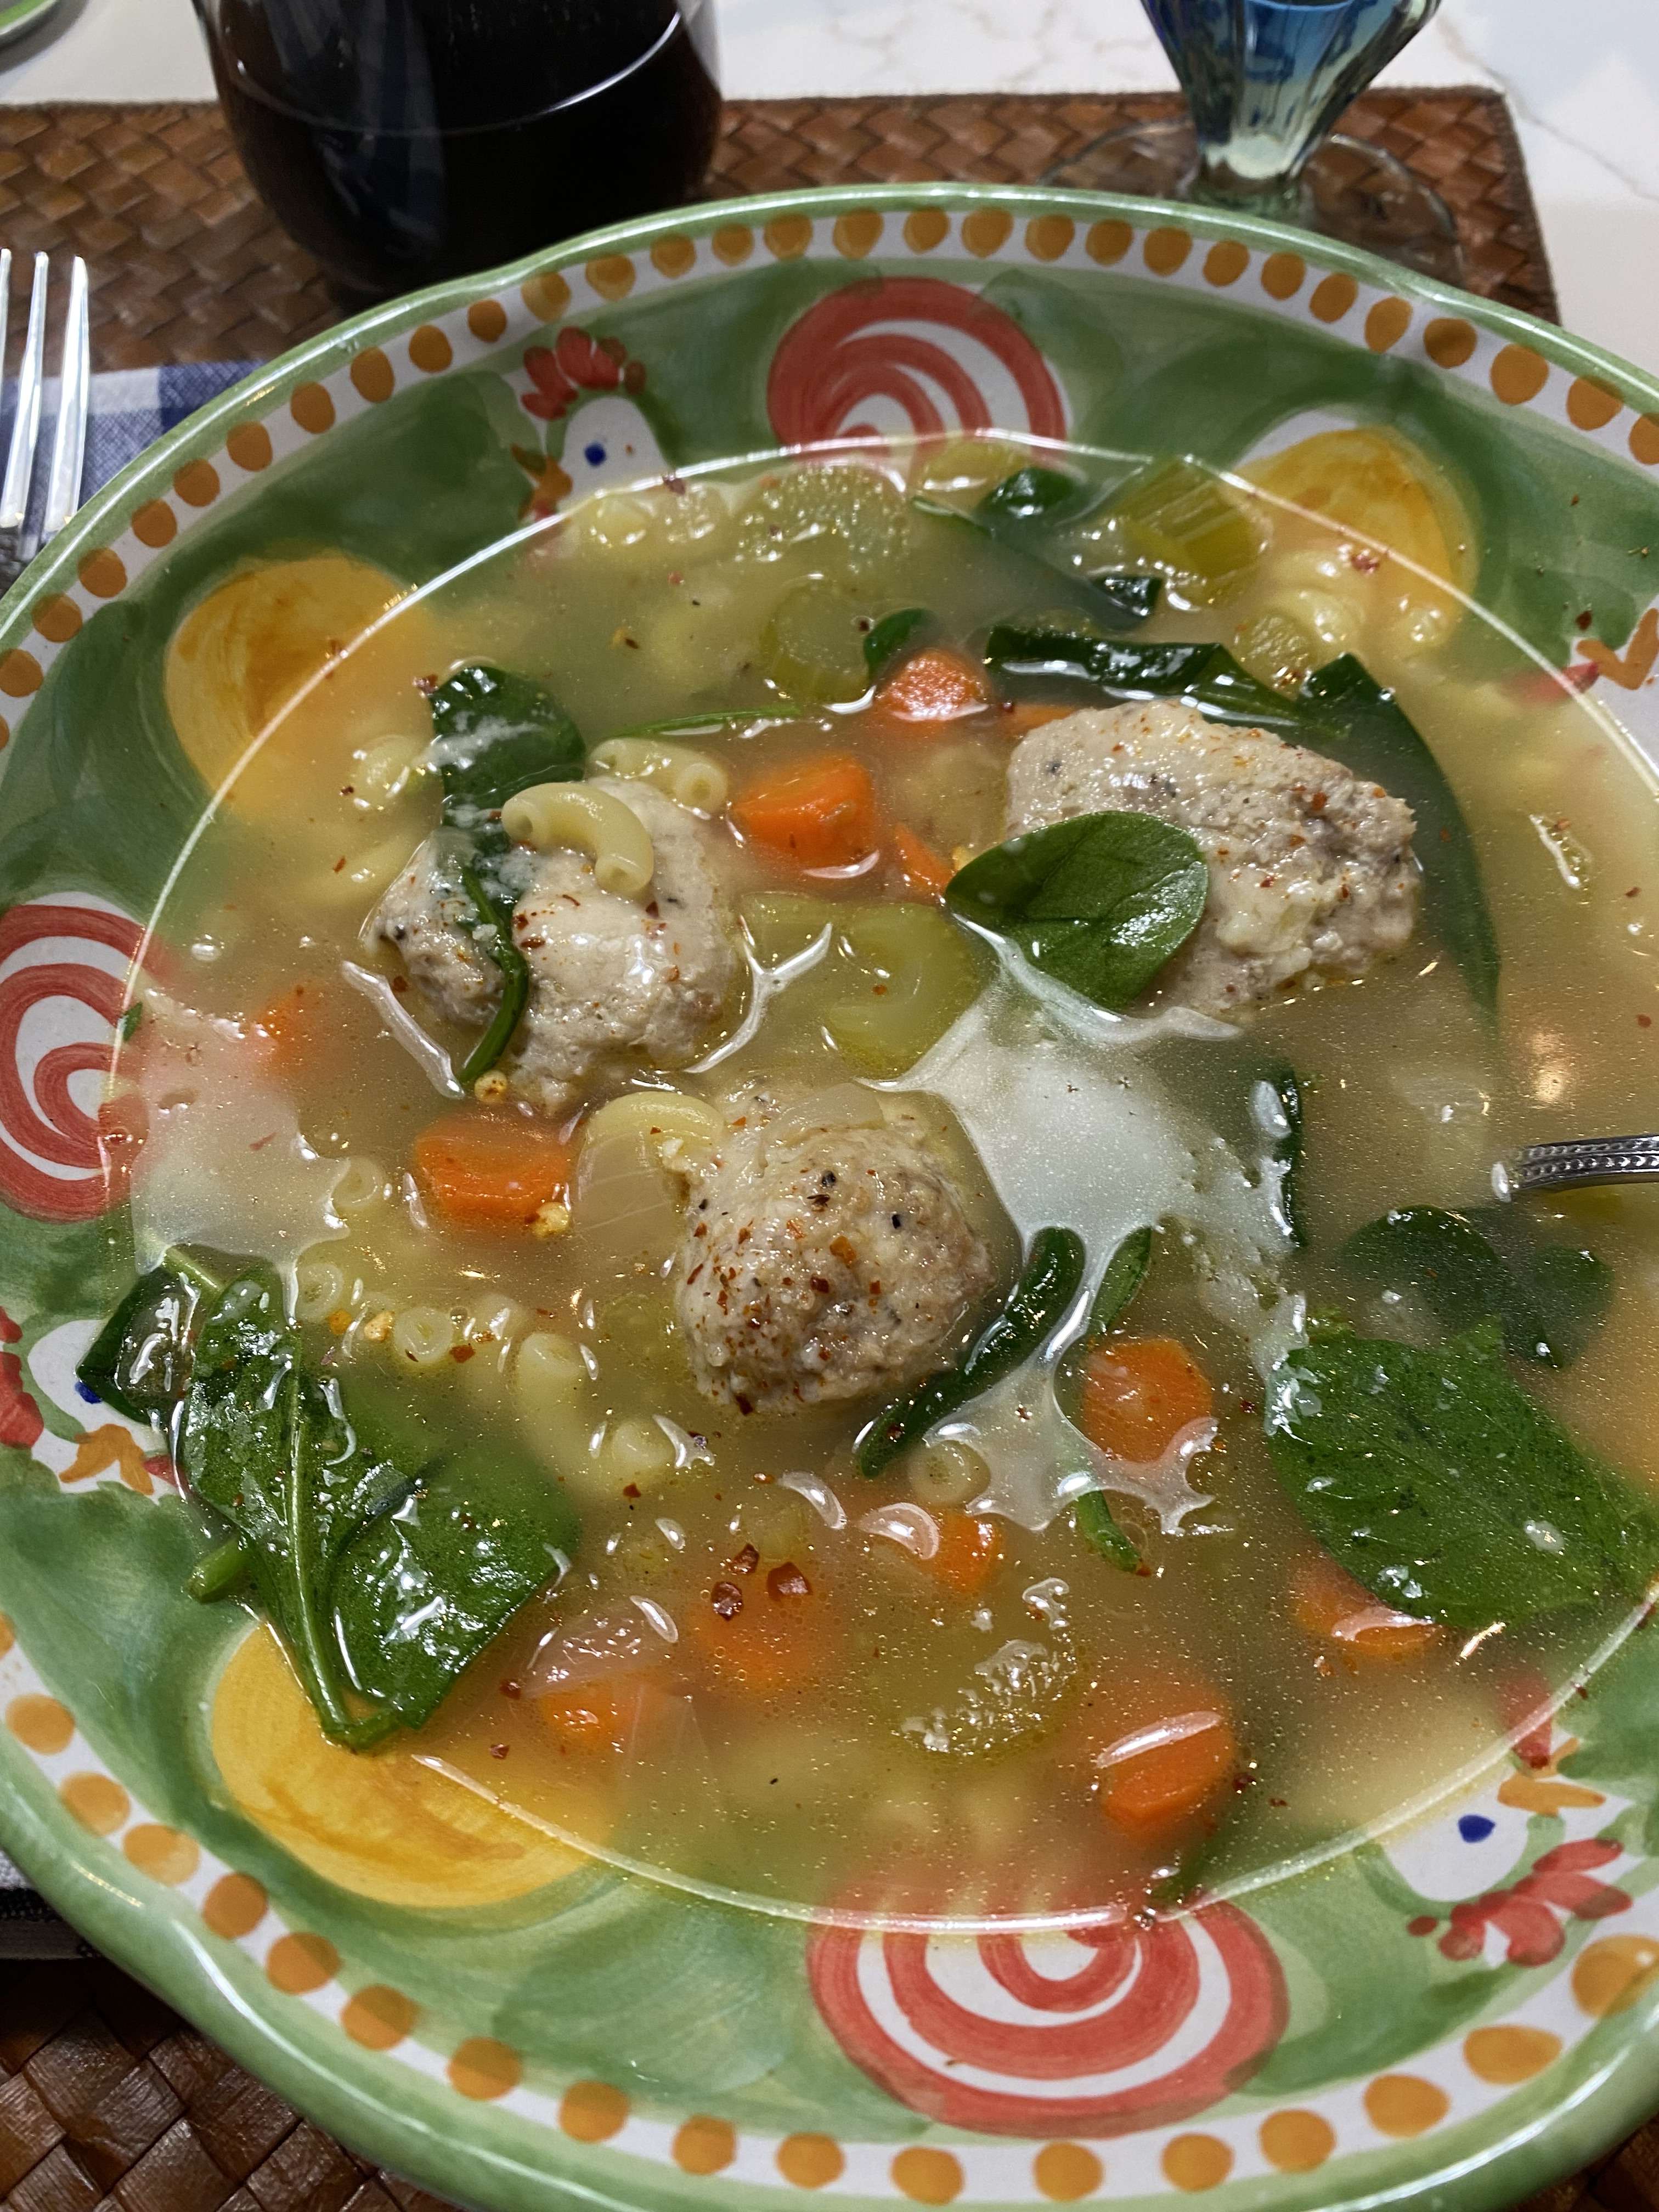
Italian Wedding Soup with Chicken Balls
This is one of my absolute favorite recipes. It is a soup , which is also a full meal. It is hearty and pretty healthy. It is one of my staples from September through April. It freezes well and you can just take it out of the freezer the night before, and you’ll have a wonderful meal the next evening. When you defrost it you will probably want to add broth/water to it. add a little at a time till you get the consisitency you like. Enjoy:) and these meatballs are delicious on their own with pasta/sauce or just on their own.
Ingredients: chicken meatballs
1 lb. ground chicken–I prefer chicken to turkey but you can use turkey as well!
1/2 lb chicken sausage, casings removed–if you can’t find chicken sausage use pork sausage it’s delicious!
3 slices whole wheat bread for bread crumbs ( I put into food proccesor with steel blade for crumbs) I remove crusts it should be app. 1 cup of bread crumbs or if you’re feeling lazy try Panko or regular plain bread crumbs
2 teaspoons minced garlic ( 2 – 3 cloves)
1/4 cup grated Pecorino Romano ( fresh is best) but whatever you have will do
1/4 cup grated Parmesan ( again nothing beats fresh) but whatever you have will do here as well
3 tablespoons milk
1 extra large egg, lightly beaten
1 teaspoon kosher salt
1/2 teaspoon freshly ground black pepper
Soup Ingredients:
2 tablespoons olive oil
1 small -medium yellow onion minced
1 cup diced carrots ( 3 )
1 cup diced celery (2 stalks)
10 cups chicken stock
1/2 cup dry white wine( use whatever you have open)
1 cup small pasta tubetini, ditalini, stars, elbows etc.
5 ounces fresh spinach, washed and trimmed
*fresh dill ( I love the flavor) add at your own discretion about 1/4 cup minced fresh dill.
Directions:
preheat the oven to 350 degrees put parchment paper on a cookie sheet.
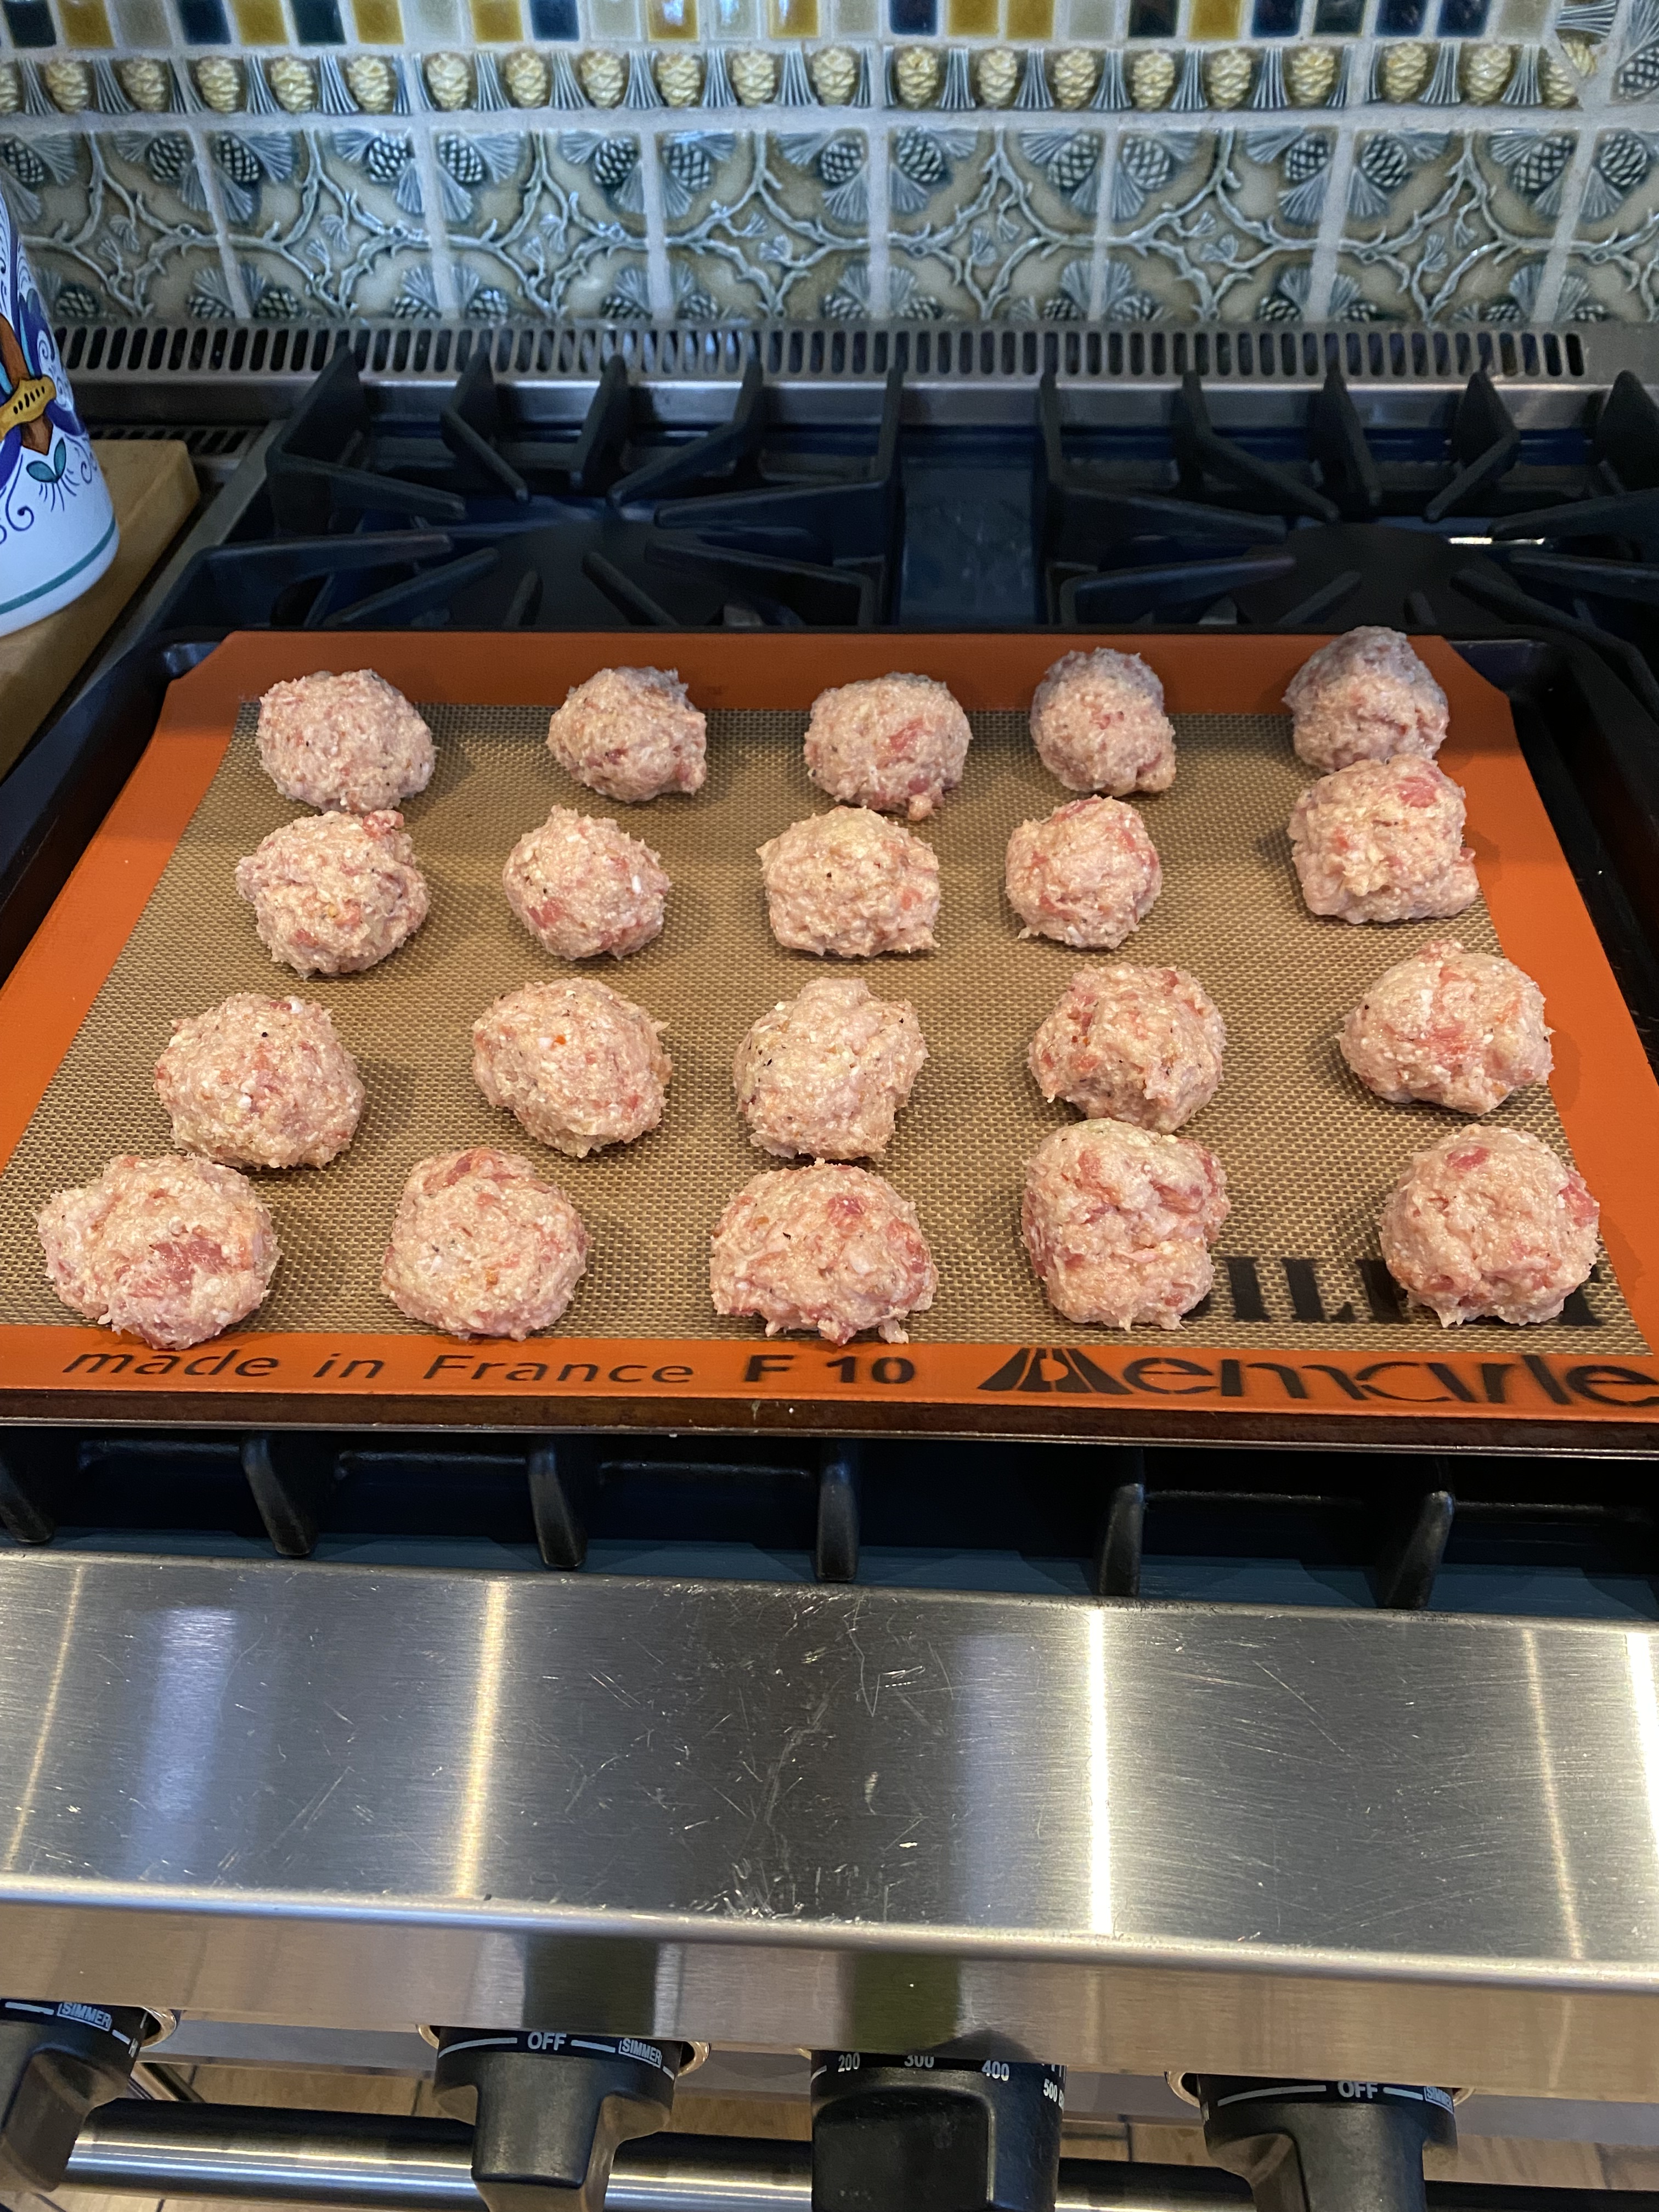
for the meatballs, place the ground chicken, sausage,bread crumbs, garlic, Pecorino, Parmesan, milk, egg, salt and pepper all in a bowl and mix well with a fork. I use a teaspoon, and make 1 to 1 1/2 inch balls and drop onto parchment paper lined cookie sheet. you should have about 30 to 40 small balls. bake for 25 – 30 minutes, until cooked through and lightly browned. set them aside. (I made about 30 balls, they were a little larger this time out)
For the Soup:
heat the olive oil over medium – low heat in a large heavy bottomed soup pot ( Le Creuset type pot) Add the onion, carrots, and celery and saute until softened, about 10 minutes, don’t brown. Add the chicken stock and wine and bring to a boil, at this point I let soup cook a while to soften the vegetables, app. 1 hour. ( a low simmer) if you’re in a hurry you can probably do the whole soup in 1/2 hour , veggies will be soft enough to eat. if some of the liquid evaporates you can always add a little more broth.
chicken balls out of the ovenItalian Wedding Soup cooking
Add the pasta to the simmering broth and cook another 6 – 8 minutes, until the pasta is tender. Sometimes I just cook the pasta up in a separate little pot and pour the soup over the pasta when I plate it up, this helps with the freezing just the soup and meatballs and the pasta stays al dente. Add the meatballs and simmer for another minute or so. taste for salt and pepper. Stir in the fresh spinach and cook for another minute or so, the spinach will just wilt. Ladle into soup bowls and serve with freshly grated Parmesan cheese.
Chicken Scarpariello could easily be one of my most favorite dishes to order in an Italian Restaurant. The translation is Shoemaker’s chicken and it is a classic Italian-American dish of chicken, sausage, onions and peppers . The flavors are layered and spicy and sweet and this recipe often has potatoes in it but this time I left them out and we didn’t miss them. I made this for 2 people so used only 1 lb. of chicken. Recipe is for 2 – 3 pounds of bone-in skin-on chicken , you can use whatever pieces you like but if you’re using breasts have them cut in 1/2. I also made whole recipe in my Le Creuset Stockpot because I cut recipe for just the two of us. If you make whole recipe you’ll want to transfer to a large roasting pan before putting in the oven. I didn’t because I only used 3 pieces of chicken and 2 sausage links so I kept it all in the Le Creuset dutch oven .
Enjoy this hearty recipe and if I were making potatoes I might just roast some on the side and add in when I serve. Potatoes are totally optional.
Serve with some good bread to soak up this delicious sauce.
Ingredients:
3 lbs. bone-in , skin-on Chicken I used thighs only this time,, use what you like but keep breasts small and cut in 1/2 and this recipe can be easily cut in 1/2
Kosher salt and freshly ground black pepper ( or coarse black pepper)
2 Tablespoons Olive Oil ( if you’re cooking up chicken and oil disappears add a little at a time)
4 links Italian Sausage — you can use 1/2 mild and 1/2 spicy whatever you’d like
2 large Bell Peppers and if you’re making for more people and transferring to large roasting pan you can use 3 Bell peppers — seeded and cut into thin strips
1 large sweet onion, cut in half lengthwise and sliced
1 teaspoon minced garlic — probably 2 small cloves
4-8 hot vinegar cherry peppers or pepperoncini, left whole If you don’t like hot you can substitute with sweet cherry peppers in vinegar or peppadew peppers in vinegar( I know Trader Joes has these) Use what you like and what you can find.
1/2 cup chicken broth
1/2 cup dry white wine
1/4 cup red wine vinegar
1 Tablespoon dried oregano
Directions:
Pre-heat the oven to 400 degrees. season chicken pieces with kosher salt and pepper. Heat the oil in a large Dutch oven style pot or use a large pot/pan for sautéing . In batches, ( don’t over crowd pot) brown the chicken , skin side down to start, you’ll probably want to sauté for at least 5 minutes or more per side and using tongs check for skin color to be golden brown, this may take longer or shorter and be careful not to burn the oil. I used a medium flame but if it starts to burn lower immediately . Remove the chicken to a plate when finished. Add the sausage to same pot and sauté until brown, about 3 -4 minutes per side. ( they will not be cooked through at this point– just browned. Remove with tongs , cut into 1″ slices and set aside along with chicken.
Now into the same pot sauté the bell peppers, onion and garlic until soft and beginning to brown , probably another 5 minutes or so. I sprinkled a little salt and pepper here while it was sautéing
Return the sausage to pot, add the cherry peppers or pepperoncini, chicken broth , wine, vinegar, oregano . Gently mix together, then transfer everything in the pot ( all liquid as well) to a large roasting pan. ( I always spray first for easy clean-up and easy removal of cooked food) use an olive oil spray if you have it and spray lightly) Nestle the chicken in the vegetables (skin side up) with sausage and roast in the oven until chicken is cooked through and sauce has reduced slightly, probably 30 minutes . If you are halving this recipe for 2 people you can put Le Creuset in the oven which is what I did but for larger amounts use roasting pan.
I served on plate and spooned a little of the sauce on top of chicken and vegetables.
Hope you enjoy as much as we did.
You can test done-ness of chicken with a meat thermometer.
*I prefer using dark meat here but that’s totally up to you
This is probably one of the oldest recipes on my blog. I remember my Mother making it and always loving it. Along with the baked French toast this is a wonderful break fast and brunch staple. This dish can be assembled ahead of time, kept in the refrigerator and baked right before eating. This is a keeper and a tradition in our house. Always delicious and the ultimate in comfort food. You can buy almost any of the frozen blintzes, homemade ones are great but it doesn’t really make that big of a difference with this recipe. This is super easy with excellent results.
Unfortunately my photos of this are not so great so unable to post them. I do have a post on Instagram with a photo however . Not a good photo of it but next time I make I will take much better pics.
Good easy Fast for those who do — Good Yontif
Ingredients:
6 blintzes ( you can use cheese or fruit filled, whichever you like) . Depending on how many people I’m feeding, I usually make 1 fruit and 1 cheese tray. Blintzes can be found frozen in many supermarkets or specialty stores.
2 eggs
1/4 cup sugar
1/8 unsalted butter or margarine –that’s 1/8 or 1 Tablespoon of butter
3/4 cup sour cream (lite is fine)
1 tsp. vanilla
Dash of cinnamon
Directions:
Preheat oven to 350 degrees.
Melt butter or margarine in saucepan. Spray baking dish with Pam Spray. Mix remaining ingredients in a bowl together. Place frozen blintzes in baking dish. I usually use 9×13 size baking dish but anything close to that will work. You can double the recipe, in which case you’ll obviously need a larger baking dish. You need room for the blintzes to expand a little and for the egg mixture (custard) to rise around it. Don’t spread it too thin.
Pour the melted butter on top of the frozen blintzes, followed by the sour cream mixture.
Bake at 350 degrees for approximately 30-40 minutes. Let it sit for a few minutes out of the oven before cutting into it.
I posted this recipe back in October 2011 for Yom Kippur break fast and every Break Fast it is on the table, it’s practically a law in our family now! It is truly one of the best French toast recipes I’ve ever made. I include it every year since my friend Ilene Stern gave it to me. I never have a single piece left. Delicious and decadent, perfect brunch and breakfast food. I almost always include it in my Mother’s Day Brunch as well. Once you’ve made this recipe there is no turning back your whole family will love it and you’ll have to make it every time.
The only downside is that you must prepare and refrigerate the night before without cooking it, you cannot cook this dish till you’re ready to eat it, the bottom will get hard like a caramel candy would. So cook right before you’re going to serve. Enjoy!
*recipe as is should serve 6- 8 if you have more people make 2 trays!
Yom Kippur begins at sundown on Sunday September 20 and ends at sundown Monday September 21 2026.
For those of you who fast — have a good fast.
Ingredients:
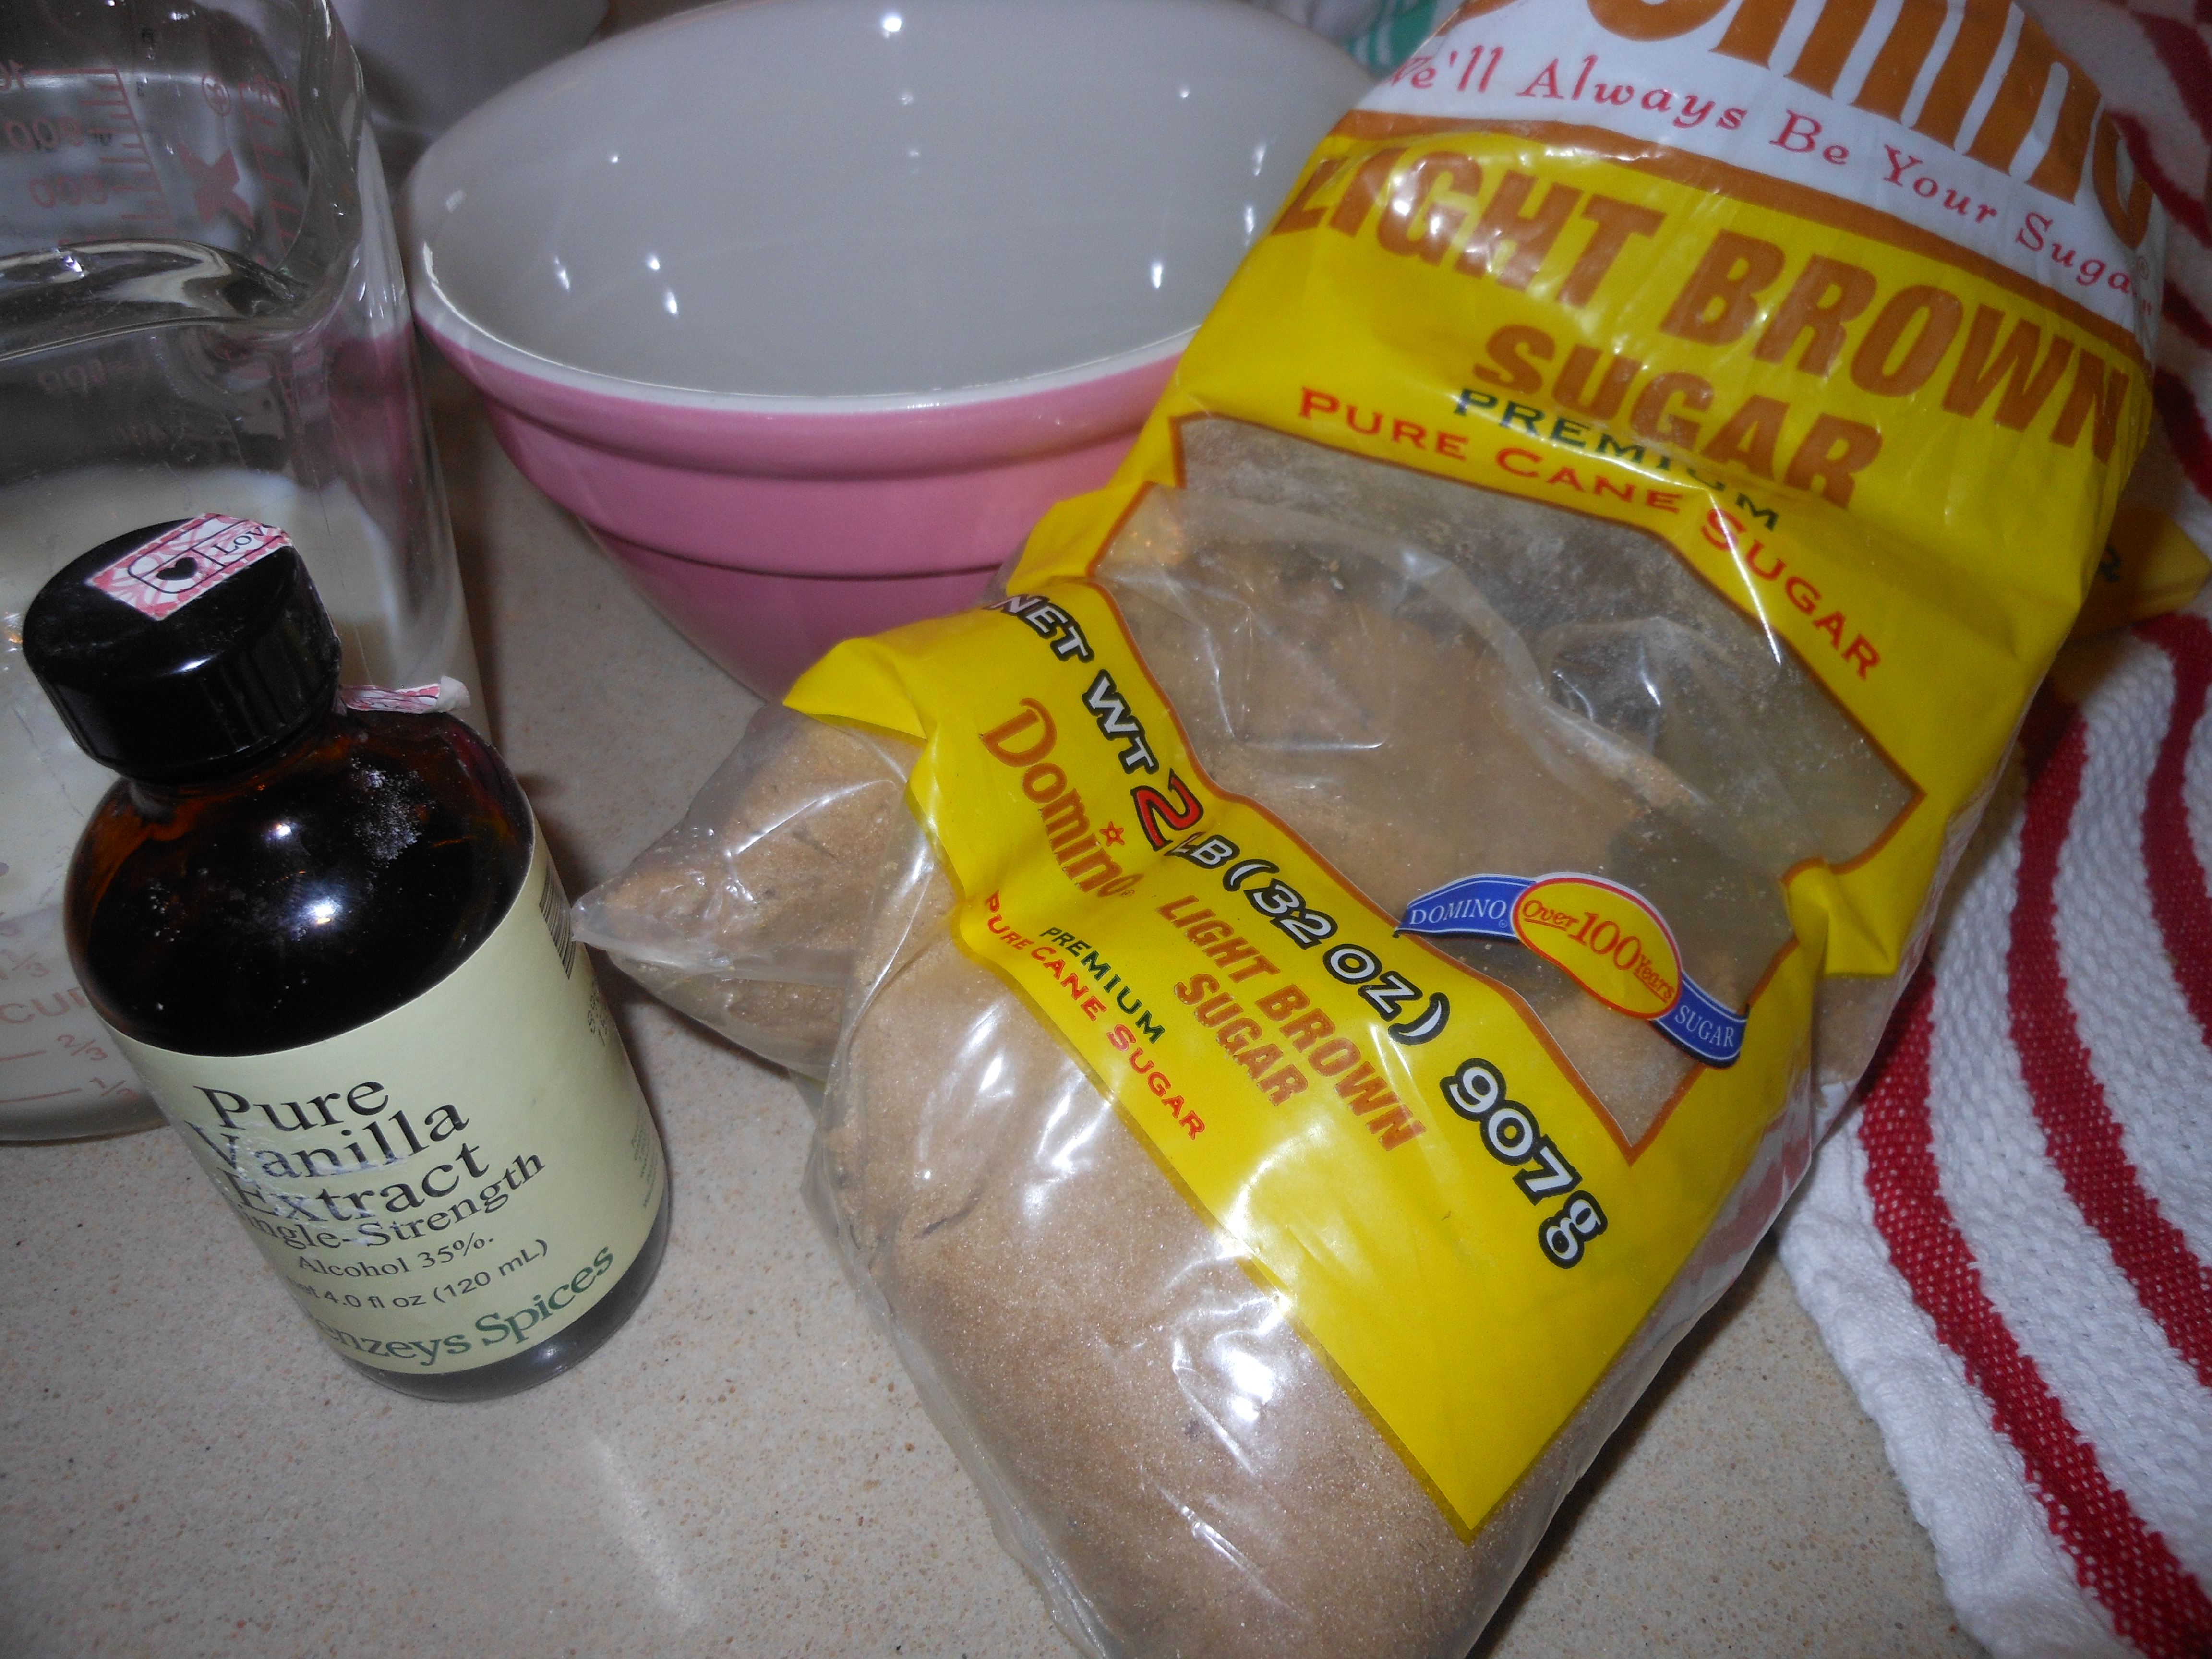
1 cup packed light brown sugar
1 stick unsalted butter
2 tbsp. corn syrup ( I use Karo Original light corn syrup)
5 eggs (room temperature please)
1 1/2 cups milk ( you can use low-fat, I use Skim Plus)
1 tbsp. vanilla
1 package of sliced cinnamon bread. ( Pepperidge Farm is fine) if you can get thick slices it’s great , but the thin kind will work just double stack them it will be fine) You probably will use 12 slices of bread per tray. You will have 6 stacks of 2 slices each, 12 slices total, or 6 thick slices of cinnamon bread. If you can’t find just cinnamon bread use raisin cinnamon bread it’s easier to find .
Directions:
Melt butter, add brown sugar and corn syrup and combine well. Spray a 9×13 baking dish, Pyrex works well here. Pour butter mixture into baking dish and arrange bread slices flat in the mixture ( you will double stack the thin sliced bread) Unless the bread is 1″thick you will be doubling the standard sliced bread. Squeeze the bread to fit–it should hold 12 slices ( 6 double stacks), 3 on each side of a 9×13 baking dish.
In a blender mix the eggs, milk and vanilla and pour over the bread slices, covering them completely. Cover and refrigerate overnight. The bread will absorb all the liquid by the morning, so if you need to travel with it will be fine.
Uncover and bake in a preheated 350 degree oven for 30 minutes. Once it’s out of the oven you can dust with powdered sugar, but not necessary. Serve right from the baking dish.
*if you let this sit out too long before serving, the bottom may get hard like a praline candy. It never ever lasts long enough for this to happen at my table.
Brisket can definitely be an intimidating thing to make. I once made it as a young cook, and it was perfectly inedible. Back then, I couldn’t believe how long it took to cook, but it does take very long. Now I usually make it in the slow cooker which is an awesome way to go but this time I used my trusty Le Creuset, which worked out beautifully. A lot of people have some pretty awesome brisket recipes and I welcome you to send me yours. This really couldn’t be any easier and it’s super tasty. This original recipe came from my friend, Michele (with a few comments from Karyn too.) I did change a few things to the original recipe, but not a lot and I thank Michele for the recipe.
INGREDIENTS:
4 lb. brisket (I didn’t need larger but you can adjust this recipe for whatever size brisket you use)
Lawry’s seasoned salt available in the spice aisle
2 large Spanish onions (Karyn uses Vidalia, which is also good), sliced thickly
2 cans of tomato sauce , I used the 16 oz. size. You can also use the 1 can of 28 oz. size. It depends on you and how much sauce you like.
2 tbsp. brown sugar (this is my addition. It doesn’t really change the flavor so much as cut the salt a bit)
DIRECTIONS:
Preheat oven to 350 degrees.
I sprinkled Lawry’s seasoned salt on both sides of the brisket (generously) then seared it in the Le Creuset pot with a little vegetable oil–probably about a tablespoon. (After the meat was seared, it shrunk to fit perfectly in my pot but I don’t think that a larger brisket would have fit.) Next, I added the tomato sauce and onions, covered the pot and put it in the oven. I cooked it for a total of 3 hours. I checked on it after each hour, which probably wasn’t even necessary. I then let it cool, off of the heat, for about an hour. Next, I sliced it with an electric knife, which came out beautifully. The meat was soft, but not falling apart at all. I then added the brown sugar to the gravy, put the brisket in a container with the gravy and froze it. I’ll take it out the night before I serve. Karyn pulses her gravy with an immersion blender. I didn’t do this but I think it makes for a good suggestion. In fact, I might still do it next time I make this recipe. I’ll let you know. Thanks again Michele and Karyn!
I also use an electric knife to cut my brisket –I find it works best (worth the investment and a rather inexpensive one at that–you’ll have it for years)
this is an old recipe of mine that I’ve played around with and it makes a perfect side dish anytime of the year. not too difficult to make , takes a little playing around but pretty easy . I used Manischewitz egg noodles in a toasted barley shape this time. you can use pearl barley which is available in almost every supermarket out there. i have to say this product worked very well. Not exactly Mushroom and Barley?? but barley shape egg noodles
Great for Rosh Hashana and actually any other time for dinner as well. It’s delicious!
Ingredients:
1/4 cup butter or margarine
1 3/4 cup Pearl Barley or any kind you can find ( I used Manischewitz egg noodles in a toasted barley shape) it doesn’t have to be toasted it can just be regular barley shape noodles. I love to use this product , it’s usually found in kosher section.
1 lb. fresh mushrooms sliced
1/2 spanish onion chopped
2 – 3 cups chicken stock
1 tablespoon vegetable oil
Kosher Salt
Freshly Ground Black Pepper
Directions:
I use a very little bit of vegetable oil ( maybe 1 tablespoon) and saute onions, then mushrooms till cooked down. I salt and pepper generously here. I remove the mushroom/onion mixture from saute pan, wipe the pan clean with a paper towel . melt butter or margarine in pan, brown the barley/noodles for about 4 – 5 minutes, move it around as you brown it. in the meantime transfer mushroom/ onion mixture to a 9 x 13 baking dish (spray with pam) when barley/noodles is browned place in dish with mushrooms and onions and mix well. add 2 cups of chicken broth. cover with aluminum foil, and bake in oven covered at 350 degrees for app. 45 minutes. remove from oven, and add a little broth, depending on how dry it is, i would say i added about 1/2 cup , you may need to add more, add the 1/2 cup and mix well and see if you need more, not too watery, keep it dryer. cover, and i put it back in oven for 10 to 15 minutes. taste for salt and pepper. and there it is. very delicious.
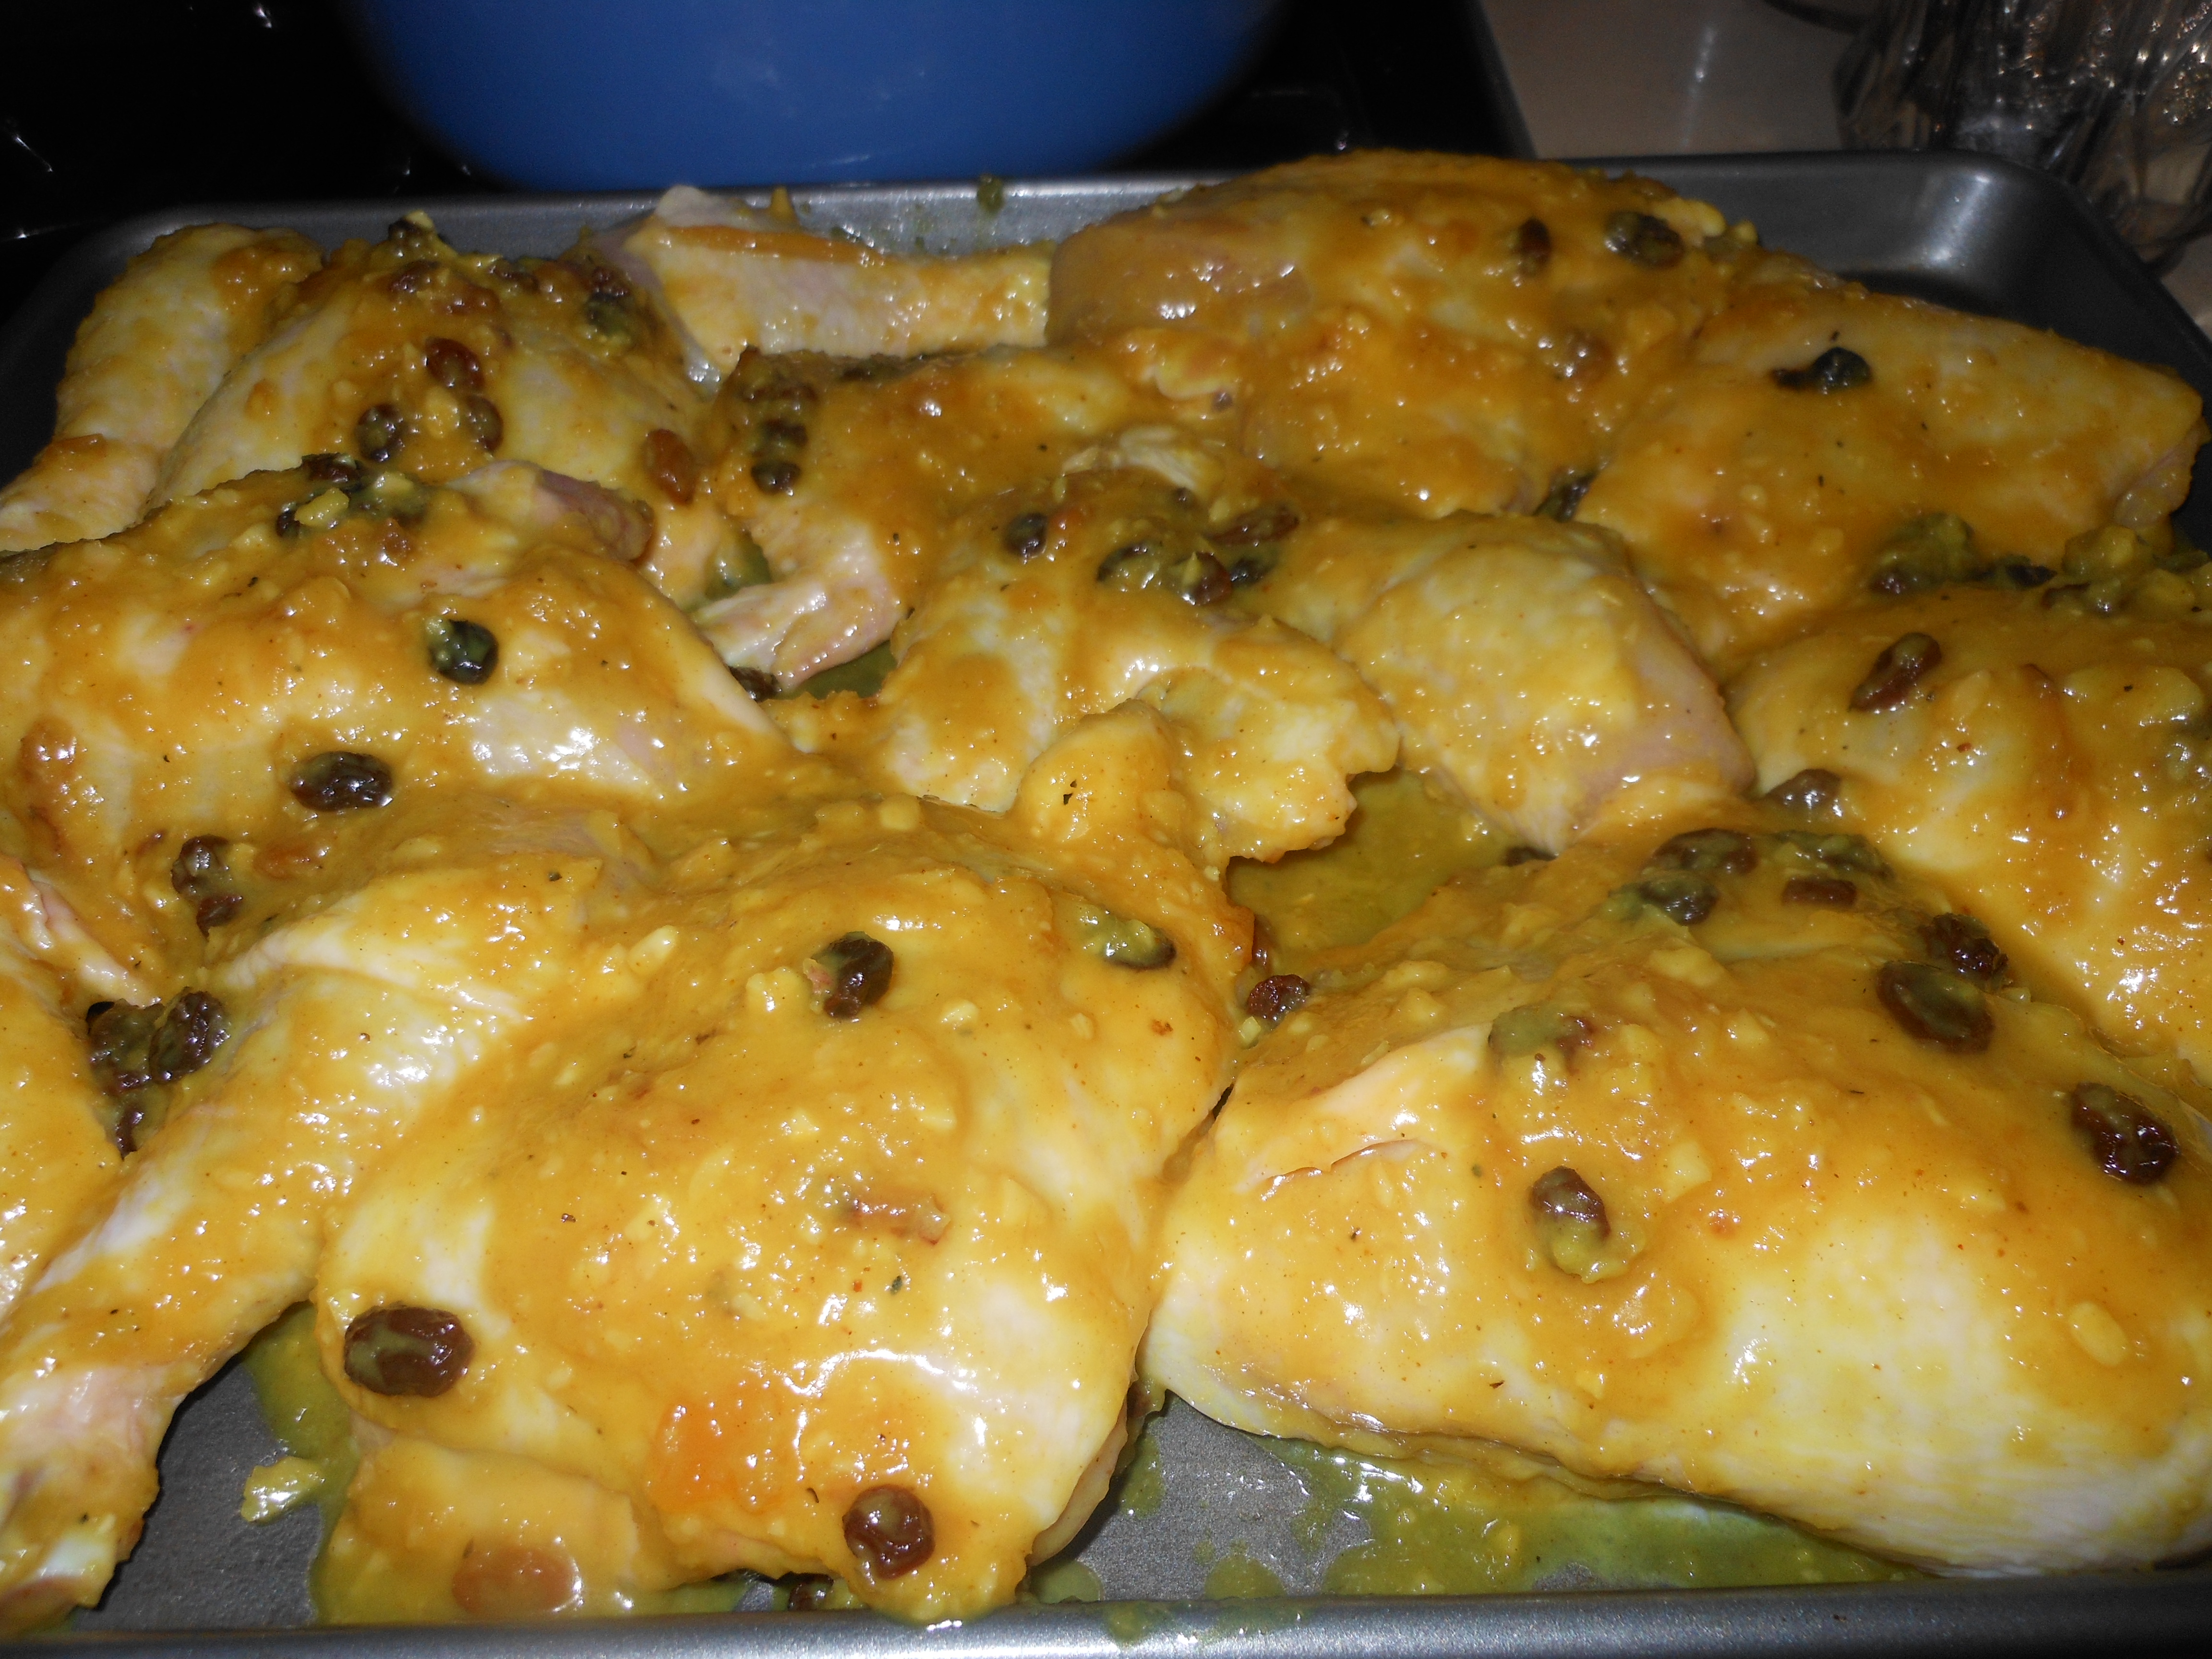
This recipe was actually given to me by my daughter Jennifer. She has made it numerous times. always to raves from the family. It is a delicious chicken dish and it perfect for the Jewish new year and for Passover. It’s sweet and savory and has a wonderful blend of flavors.
Remember to pay attention to cooking directions as you will not be preheating oven!!!!!!
Obviously this recipe can be cut in 1/2 for a smaller group.
Ingredients:
1 stick butter or margarine
1/2 cup minced yellow onion
2 large cloves garlic, minced
1/4 cup Dijon Mustard
1/2 cup mild honey
1 teaspoon kosher salt
a rounded teaspoon curry powder
2 tablespoons peach or mango chutney ( available in most supermarkets)
small handful of dried currants or chopped dark raisins
2 roasting chickens cut up in 8’s or you can cut recipe in 1/2 and use 1 chicken and 1 roasting pan
Directions:
you will need 2 shallow baking sheets with 1 inch rims ( you may be able to get it on 1 large sheet)Spray baking sheets well with cooking spray.
to make sauce:
Melt butter/margarine in a heavy 2 quart saucepan over medium heat. while it is bubbling, saute onion and garlic until softened, about 3 – 5 minutes. add remaining ingredients except for chicken and stir until well combined. heat until warm throughout and set aside to cool slightly.
to prepeare chicken:
I would spray each baking sheet with pam cooking spray first
Rinse and pat chicken dry . (each piece) dip each piece in honey mixture, coating chicken completely. lay chicken pieces ( skin side up) on baking sheets. spoon any remaining sauce over chicken.
To Bake Chicken:
place chicken in a cold oven, turn heat to 400 degrees and bake for one hour. if you are using 2 baking sheets , roast in the upper and lower thirds of the oven and switch shelf positions 1/2 way through the cooking time.
to serve:
Transfer chicken to a warmed serving platter and serve . this chicken is good hot, at room temp. and cold out of fridge the next day.
*if you cannot find peach or mango chutney ( I found it at Whole Foods) Stonewall Kitchen Brand , you can use Peach Jam, Apricot Jam, etc. Probably Saucy Susan would work. Use your imagination and don’t kill yourself trying to find the chutney. I think the chutney would give it a bit more kick, and cut the sweet, but either one will be fine.







 I posted