Category Archives: dessert

Applesauce and Raisin Cake – an Homage to the Bundt Queen

I always call my friend Susan the Queen of the Bundt Cake. It certainly seems to be her calling, as she is always coming up with new and delicious Bundt Cakes for all of us to try. I just hope I do her justice in trying to duplicate it. She made this cake for everyone last New Years  and I have been wanting to try it ever since.  I had to change one of the ingredients because I bought chunky applesauce instead of plain applesauce. Of course, if you’re so inclined you can make your own applesauce (I wasn’t so inclined today!).  The original recipe hails from The Silver Palate, and I have to say this is one cookbook you don’t want to be without. There are so very many wonderful recipes in it. This cake has a slightly spicy flavoring, and is just so darn good. I am very happy to report that this cake came out awesome! Super Delicious with the chunky applesauce. Very moist and delicious, cooked perfectly at 1 hour and 10 minutes. Thanks Suki and the Silver Palate!

This cake can be a wonderful addition to your holiday table, applesauce and raisins just so perfect for Rosh Hashana.

Ingredients:

1 cup (2 sticks) unsalted butter, plus a little extra for greasing the pan (Butter should be at room temperature.  I woke up early and didn’t have time to let it sit so I just put it in microwave to soften for 15 seconds.)

*if baking for the Jewish Holidays and don’t want to use butter you can use margarine

3 cups all-purpose flour

2 cups sugar

2 eggs (at room temperature)

2 cups applesauce (I used Chunky because probably didn’t have reading glasses in market and grabbed it.)

1 teaspoon vanilla extract

1 teaspoon ground cinnamon

1/2 teaspoon ground nutmeg, or 1 teaspoon freshly grated

2 teaspoons baking soda

1 cup raisins

Lemon/Orange Icing ingredients:

1 cup confectioner’s sugar

1/2 teaspoon ground cinnamon

1 1/2 tablespoons fresh lemon juice

1 1/2 tablespoons fresh orange juice

Directions:

Preheat oven to 350 degrees.

In a mixing bowl (electric mixer), cream together the butter and sugar until light and fluffy. Add the eggs, one at a time, beating well after each addition. Stir in the applesauce and vanilla.

Sift the flour, cinnamon, nutmeg and baking soda together then add to applesauce mixture. Next, sprinkle in the raisins, and blend gently but thoroughly.

Pour the batter into the tube pan and set on a rack in the center of the oven. Bake until a cake tester inserted into the cake comes out clean. 1 hour and 10 – 15 minutes. I cooked it 1 hour and 10 minutes.

Cool in the pan for at least 15 minutes (I will leave it all day as I go out hiking, and turn it over when it is completely cool when I return.)  When it is completely cool, I will make the icing and drizzle over the top. A little trick is to poke little holes in the cake (on top, with cake tester or toothpick) and pour icing over the cake and it will go into cake and infuse some of the lemon/orange directly into cake.

Instructions for icing:

Sift the confectioner’s sugar and cinnamon into a small bowl.

Dribble in the juices, stirring constantly until the icing is smooth. Drizzle over completely cooled cake.

*should be enough icing for 1 Applesauce Raisin Cake

Don’t Let the Apples Go Bad Cake

Apples are the kind of fruit we eat all year round. They are always in the fridge and if they don’t get eaten, I  feel guilty that they’re just sitting there and going to go bad.  I saw this recipe on Smitten Kitchen and decided since we were leaving for Colorado and I was not ditching perfectly good apples, I would make it and freeze it for when we come back.  (The cake would freeze well…the apples, not so much.) You’ll need a tube pan. You don’t need an electric mixer, so it’s pretty easy on the special equipment. Use those leftover apples–dont’ let them go bad. No butter in this recipe, lots of sugar though.  My house smelled divine.

*you can see in photos that I use a melon baller to get the pits out of the middle of the apple. I prefer this technique over the corer thingys which never really work. The melon baller works perfectly: first cut apple in half, then scoop out just the pits.

Ingredients:

6 apples (I used what I had in the house: a combo of Granny Smith and Honey Crisp. Good old Macintosh will work, too.)

1 tablespoon cinnamon

5 tablespoons sugar

2 3/4 cups flour, sifted

1 tablespoon baking powder

1 teaspoon salt

1 cup vegetable oil

2 cups sugar

1/4 cup orange juice (try to use fresh but if not, Tropicana will do)

2 1/2 teaspoons vanilla

4 eggs

1 cup walnuts, chopped (this is optional; I didn’t use them this time out)

Directions:

Preheat oven to 350 degrees. Grease a tube pan. Peel, core, and chop apples into chunks. Toss with cinnamon and sugar and set aside (I sprayed with a baking spray. There’s no need to add any butter here.)

Stir together flour, baking powder, and salt in a large bowl. In a separate bowl, whisk together oil, orange juice, sugar and vanilla. This mixture will be rather thick.  Mix wet ingredients into the dry ones, then add eggs, one at a time. Scrape down the bowl to make sure all ingredients are incorporated. Use a rubber spatula to get it all out of the bowl.

Pour 1/2 the batter into prepared tube pan. Spread 1/2 the apples over this. Pour the remaining batter over the apples and arrange the remaining apples on top. Use your eye to halve  batter and apples (don’t worry if it’s not perfectly halved.) Bake for about 90 minutes, or until a cake tester (or toothpick) comes out clean. I would check cake after 1 hour 20 minutes. I baked for the full 90 minutes; it’s a rather thick cake.

S’Mores Baked in the Oven

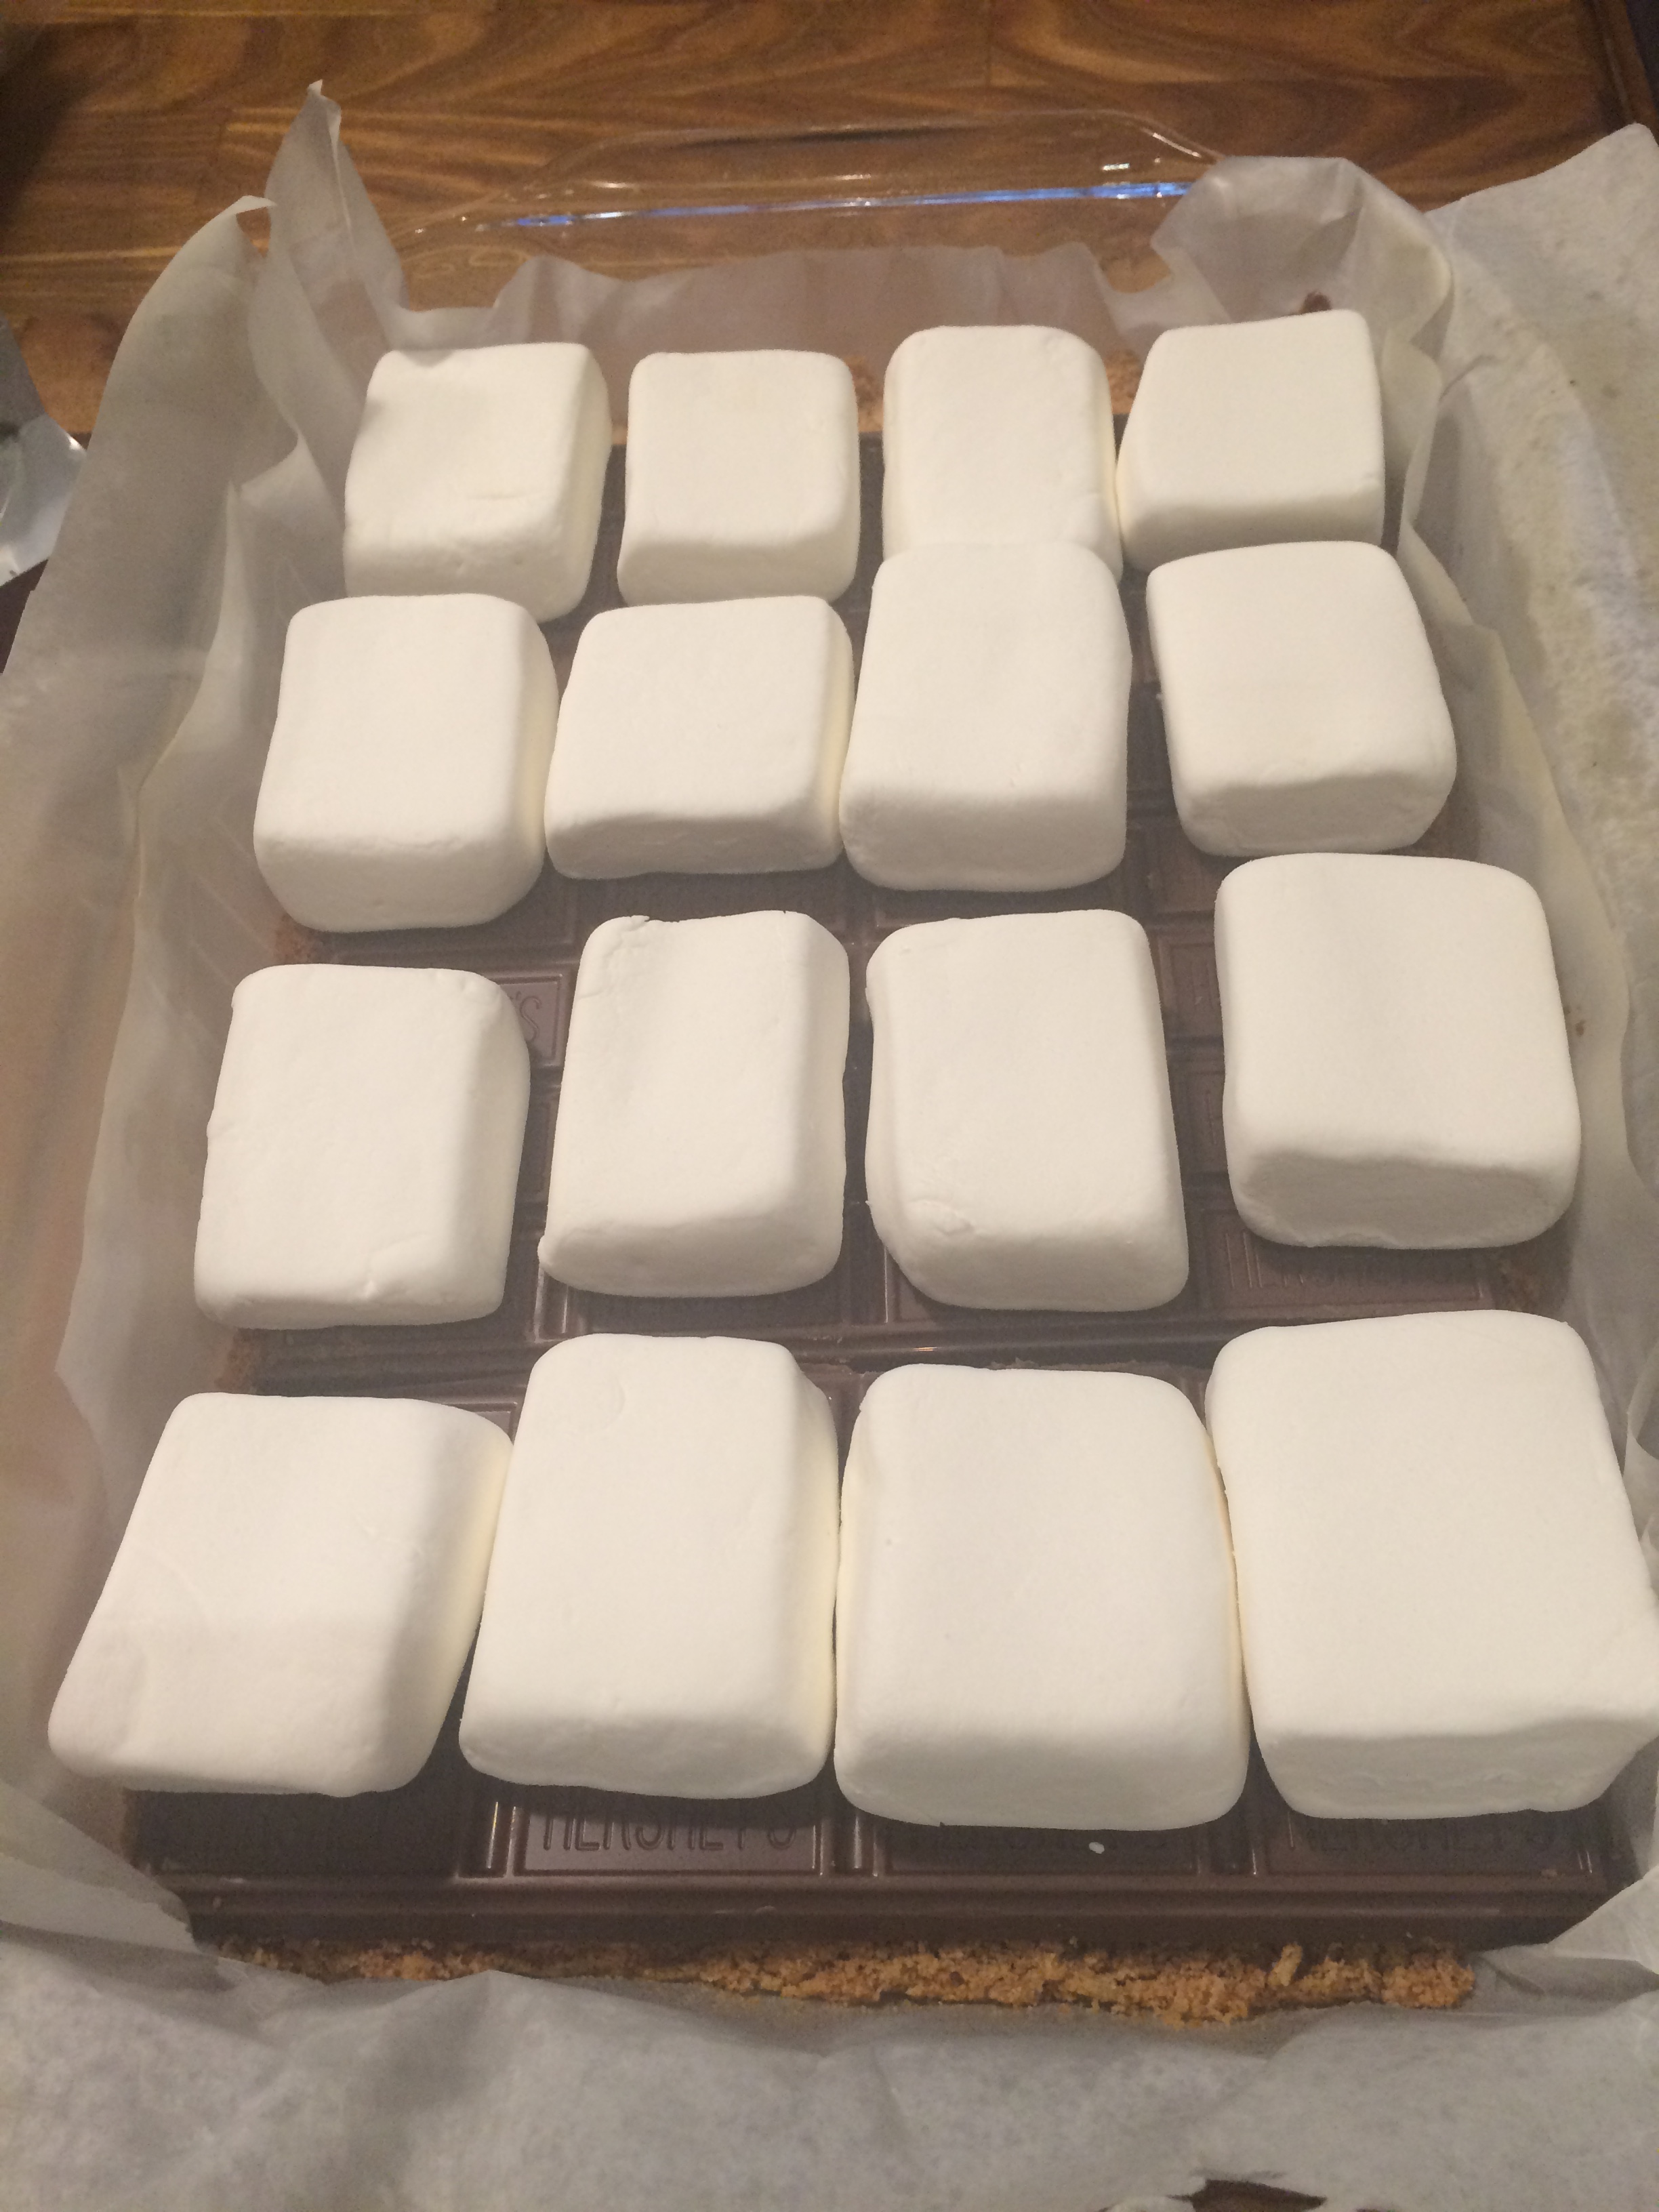
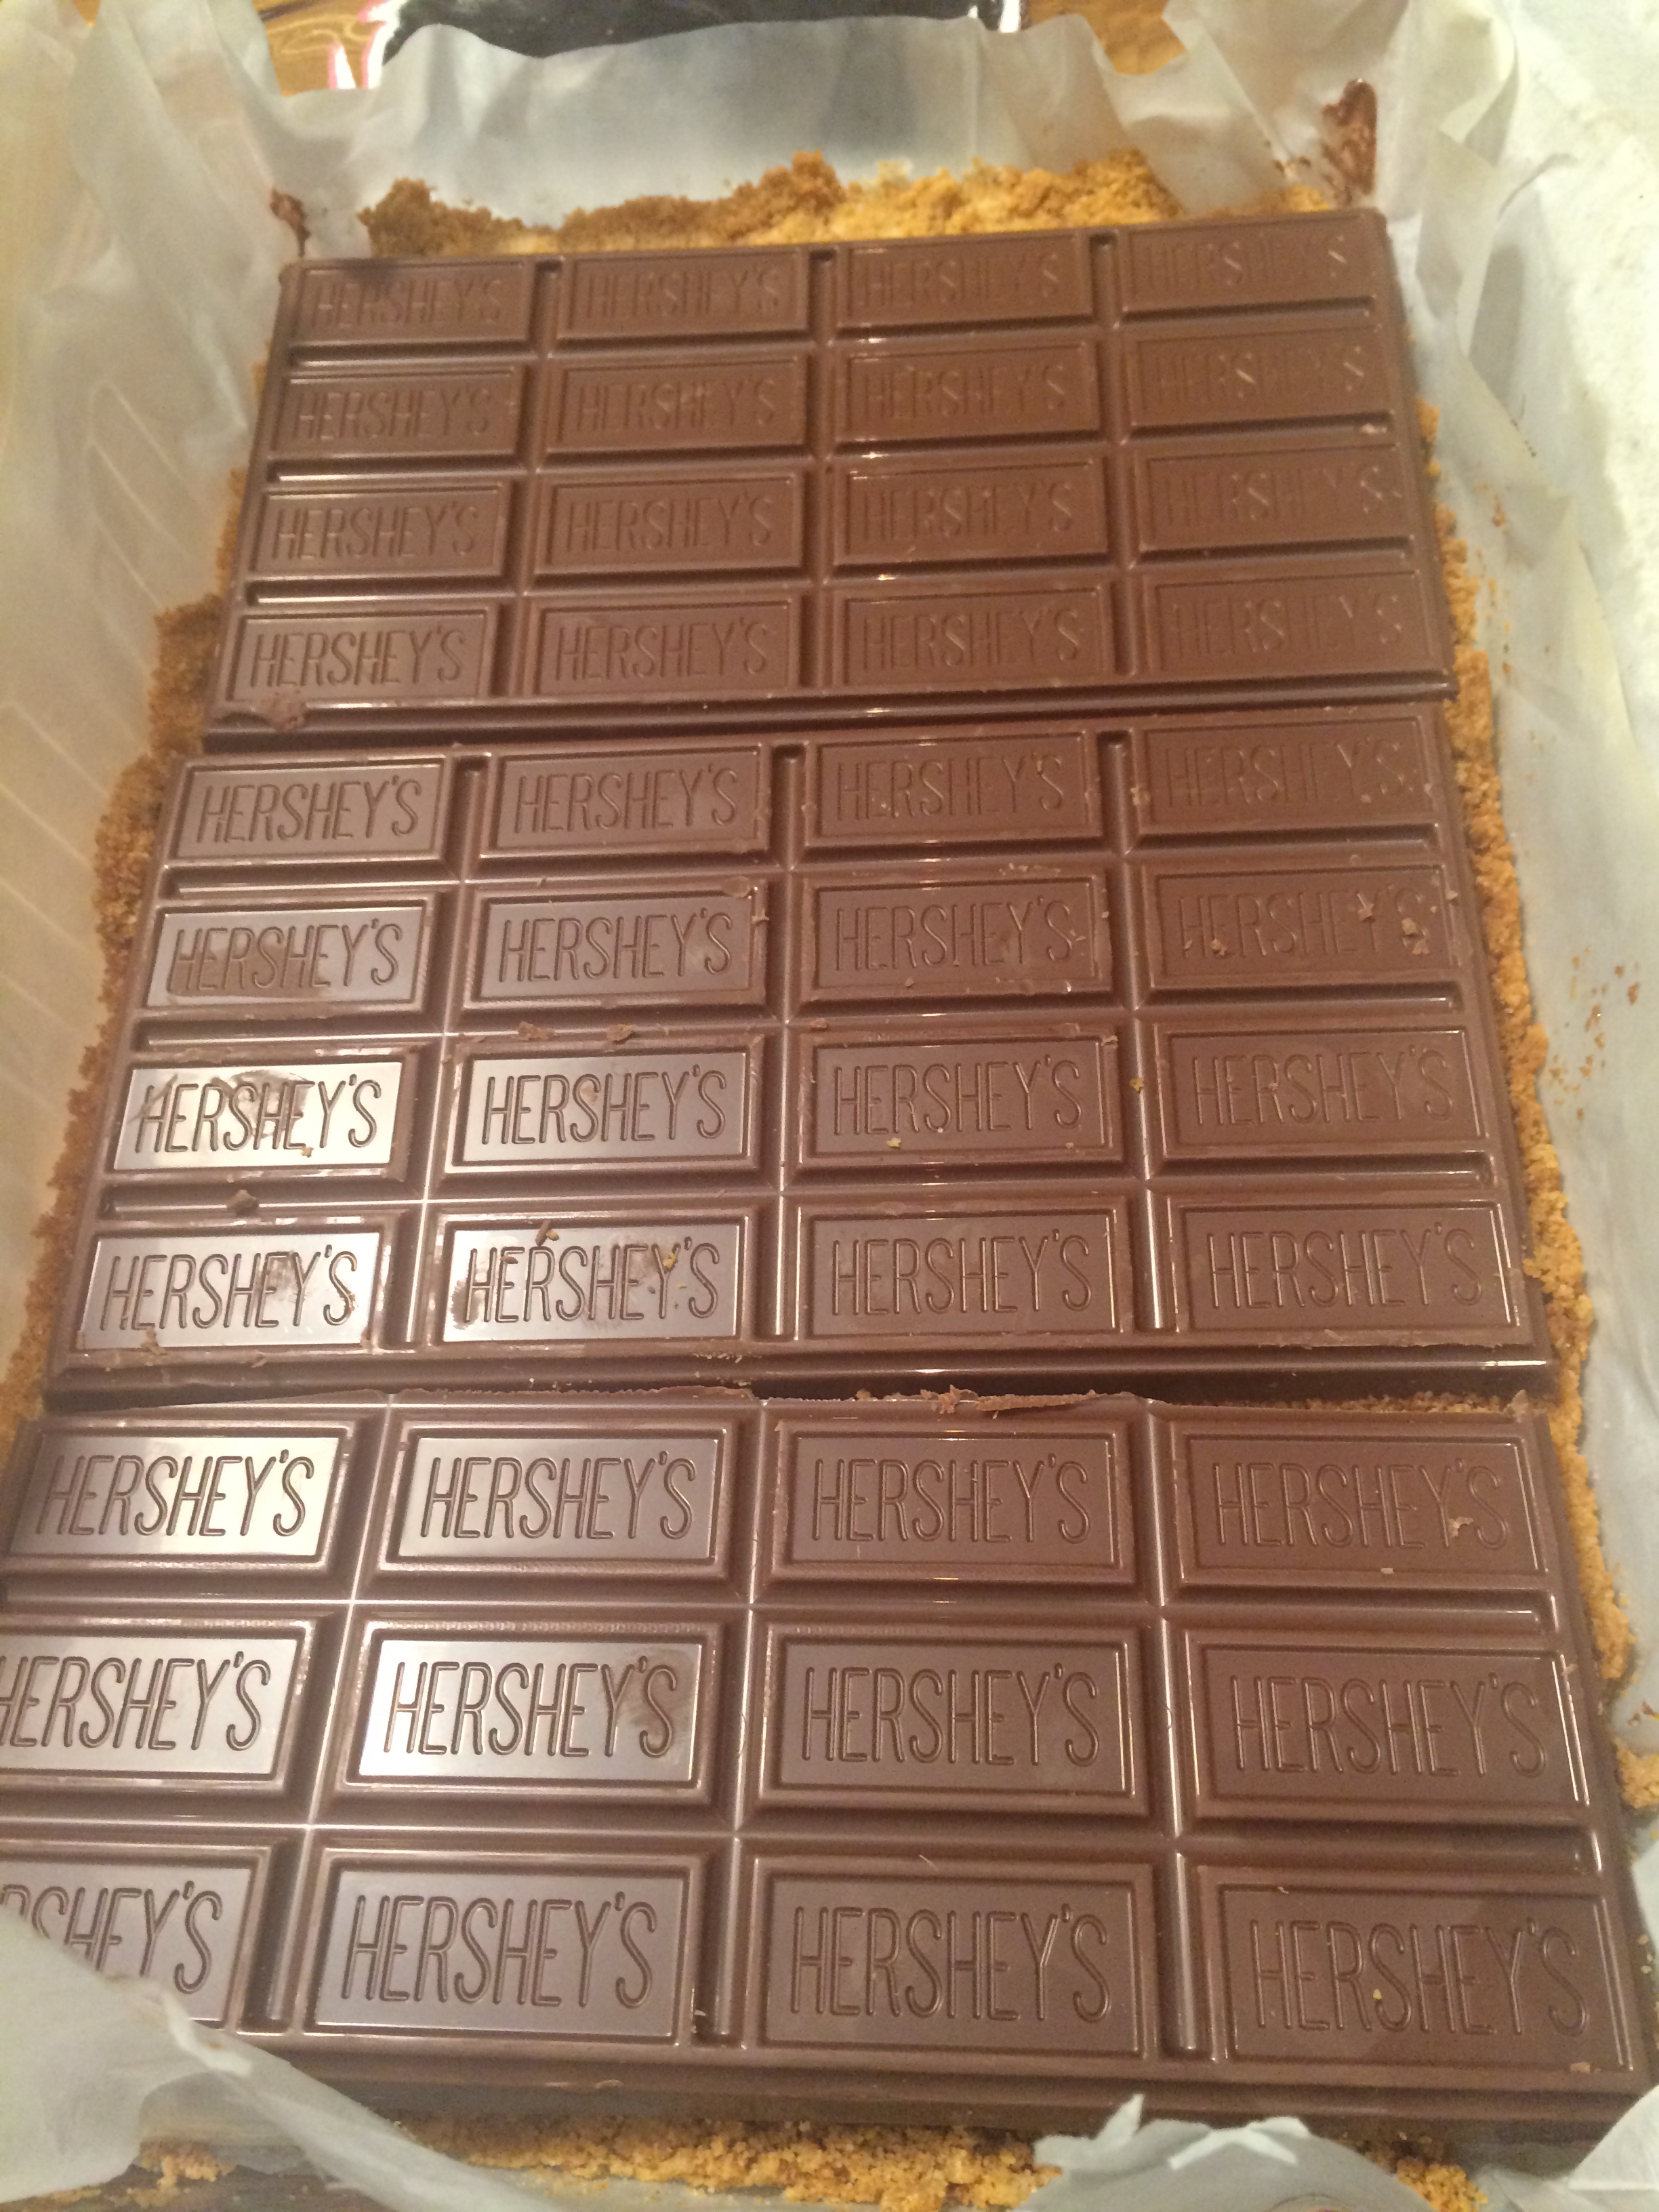
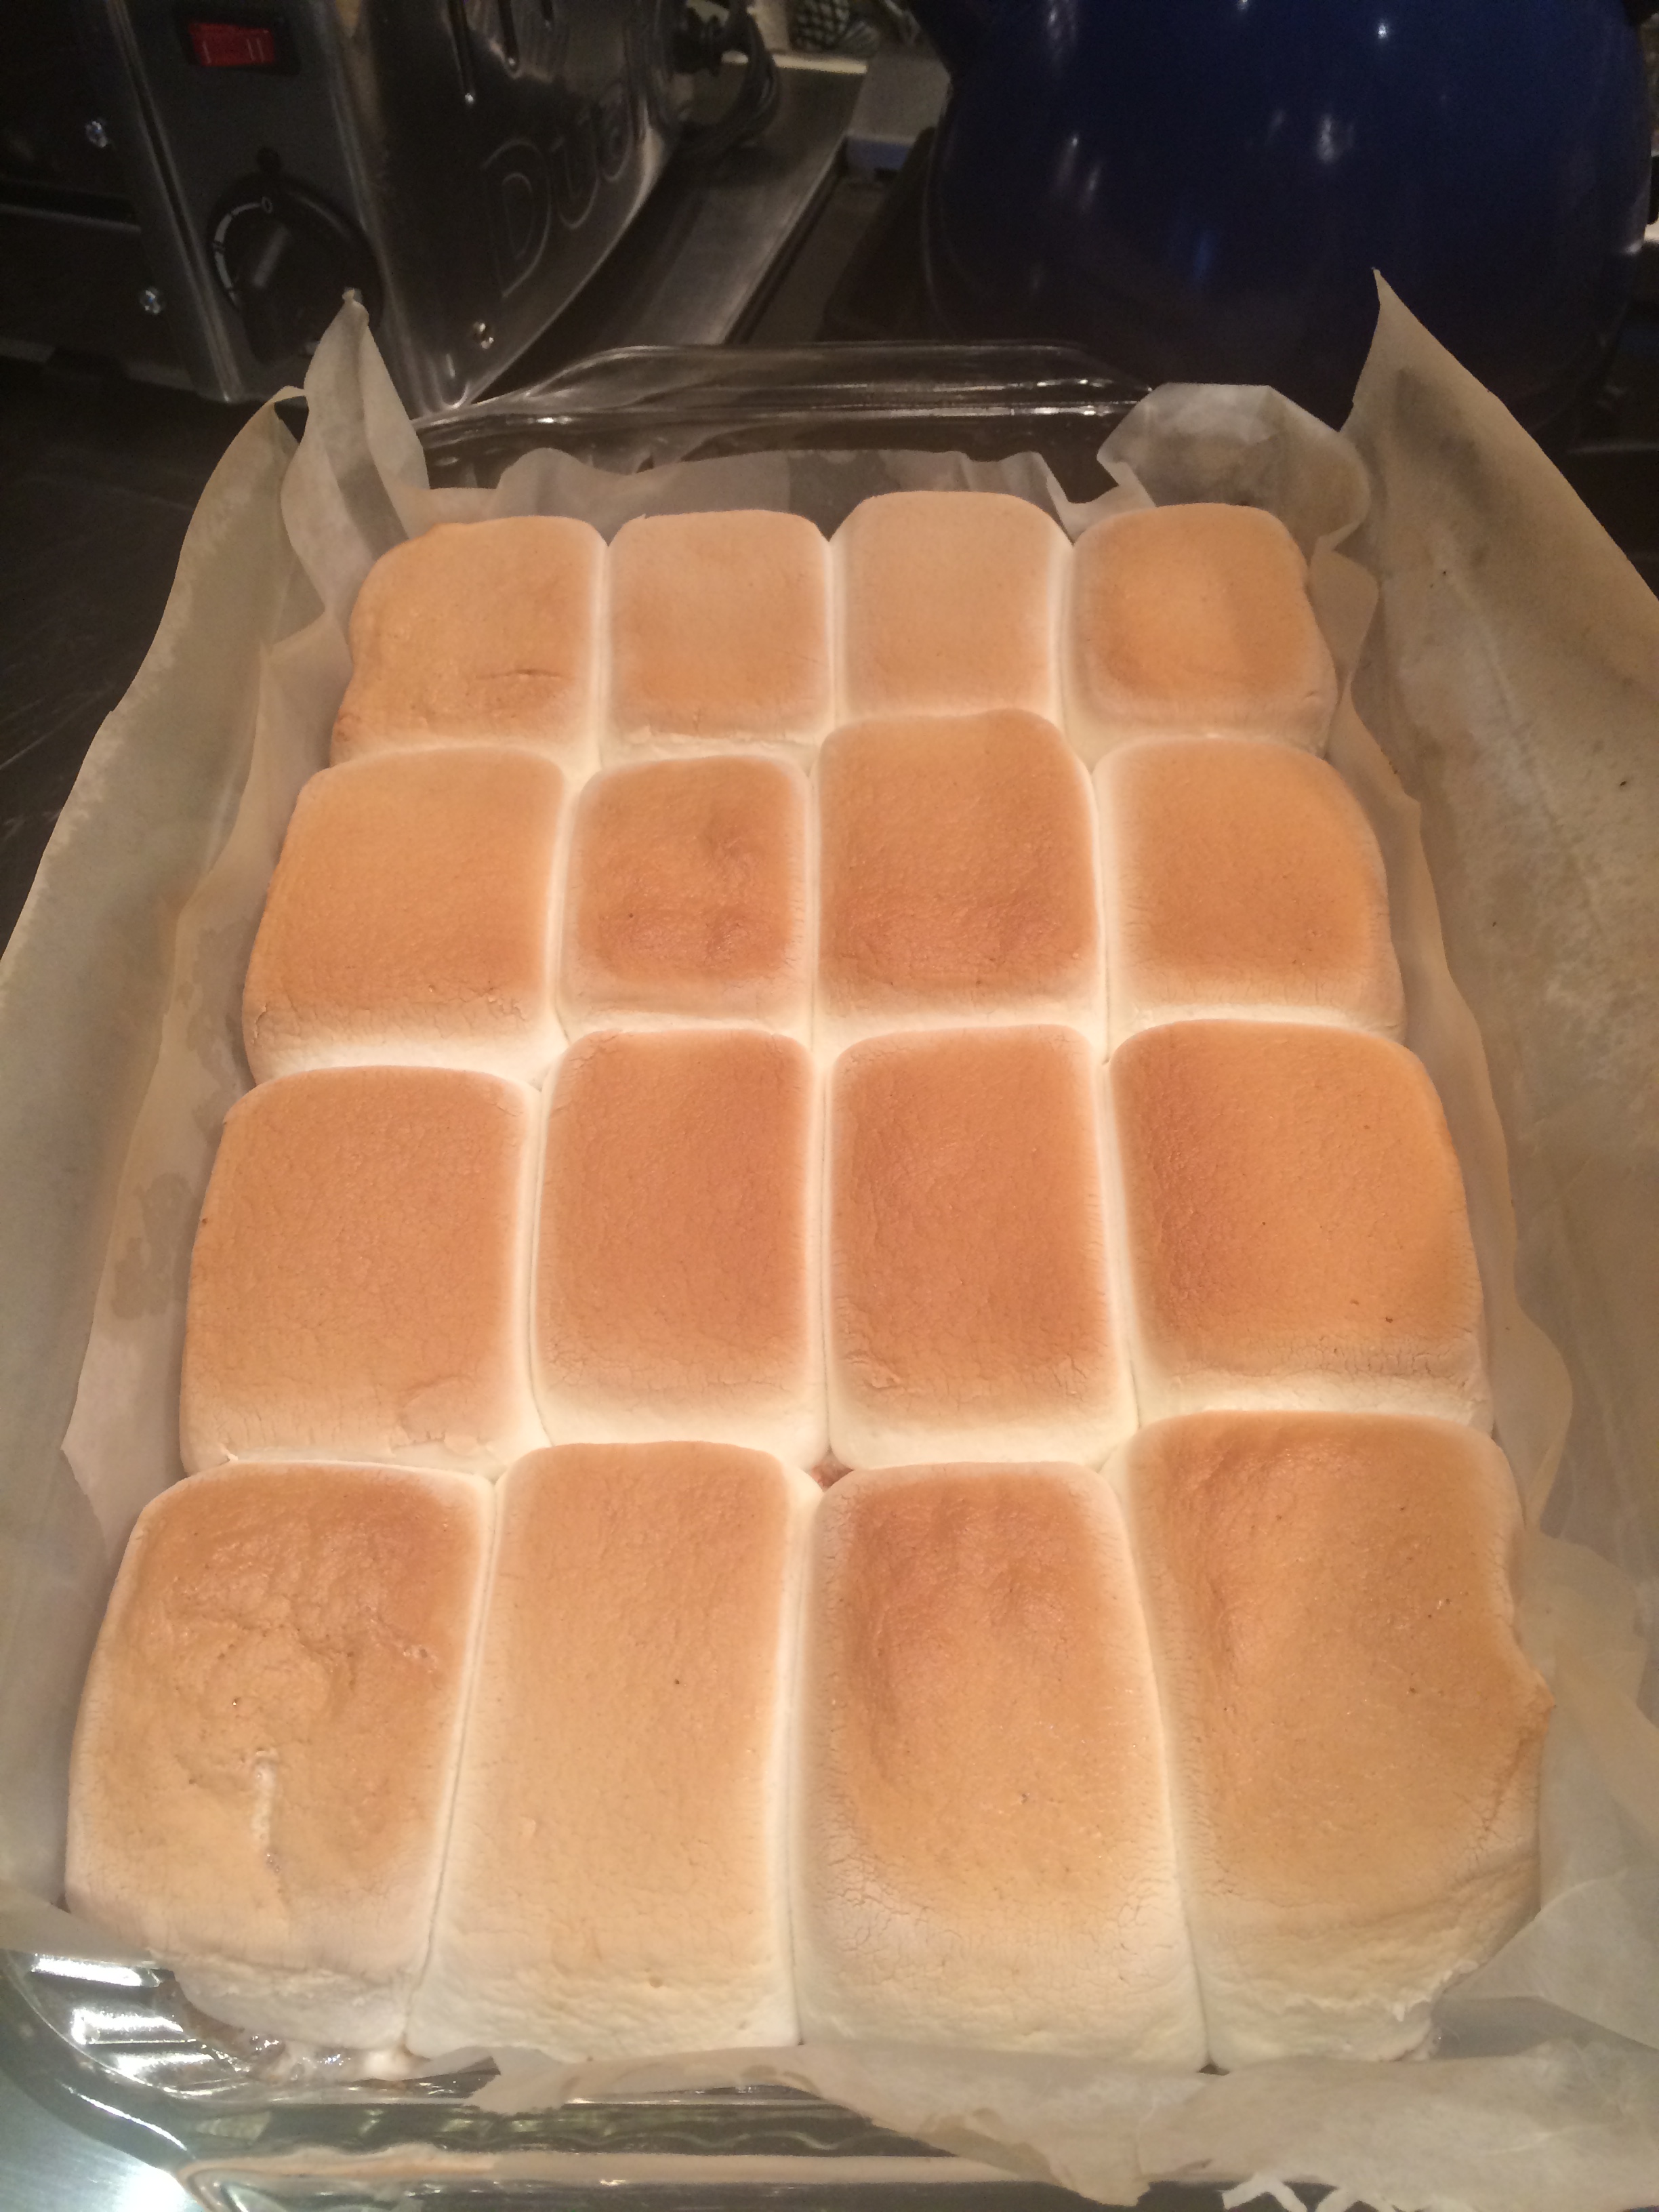
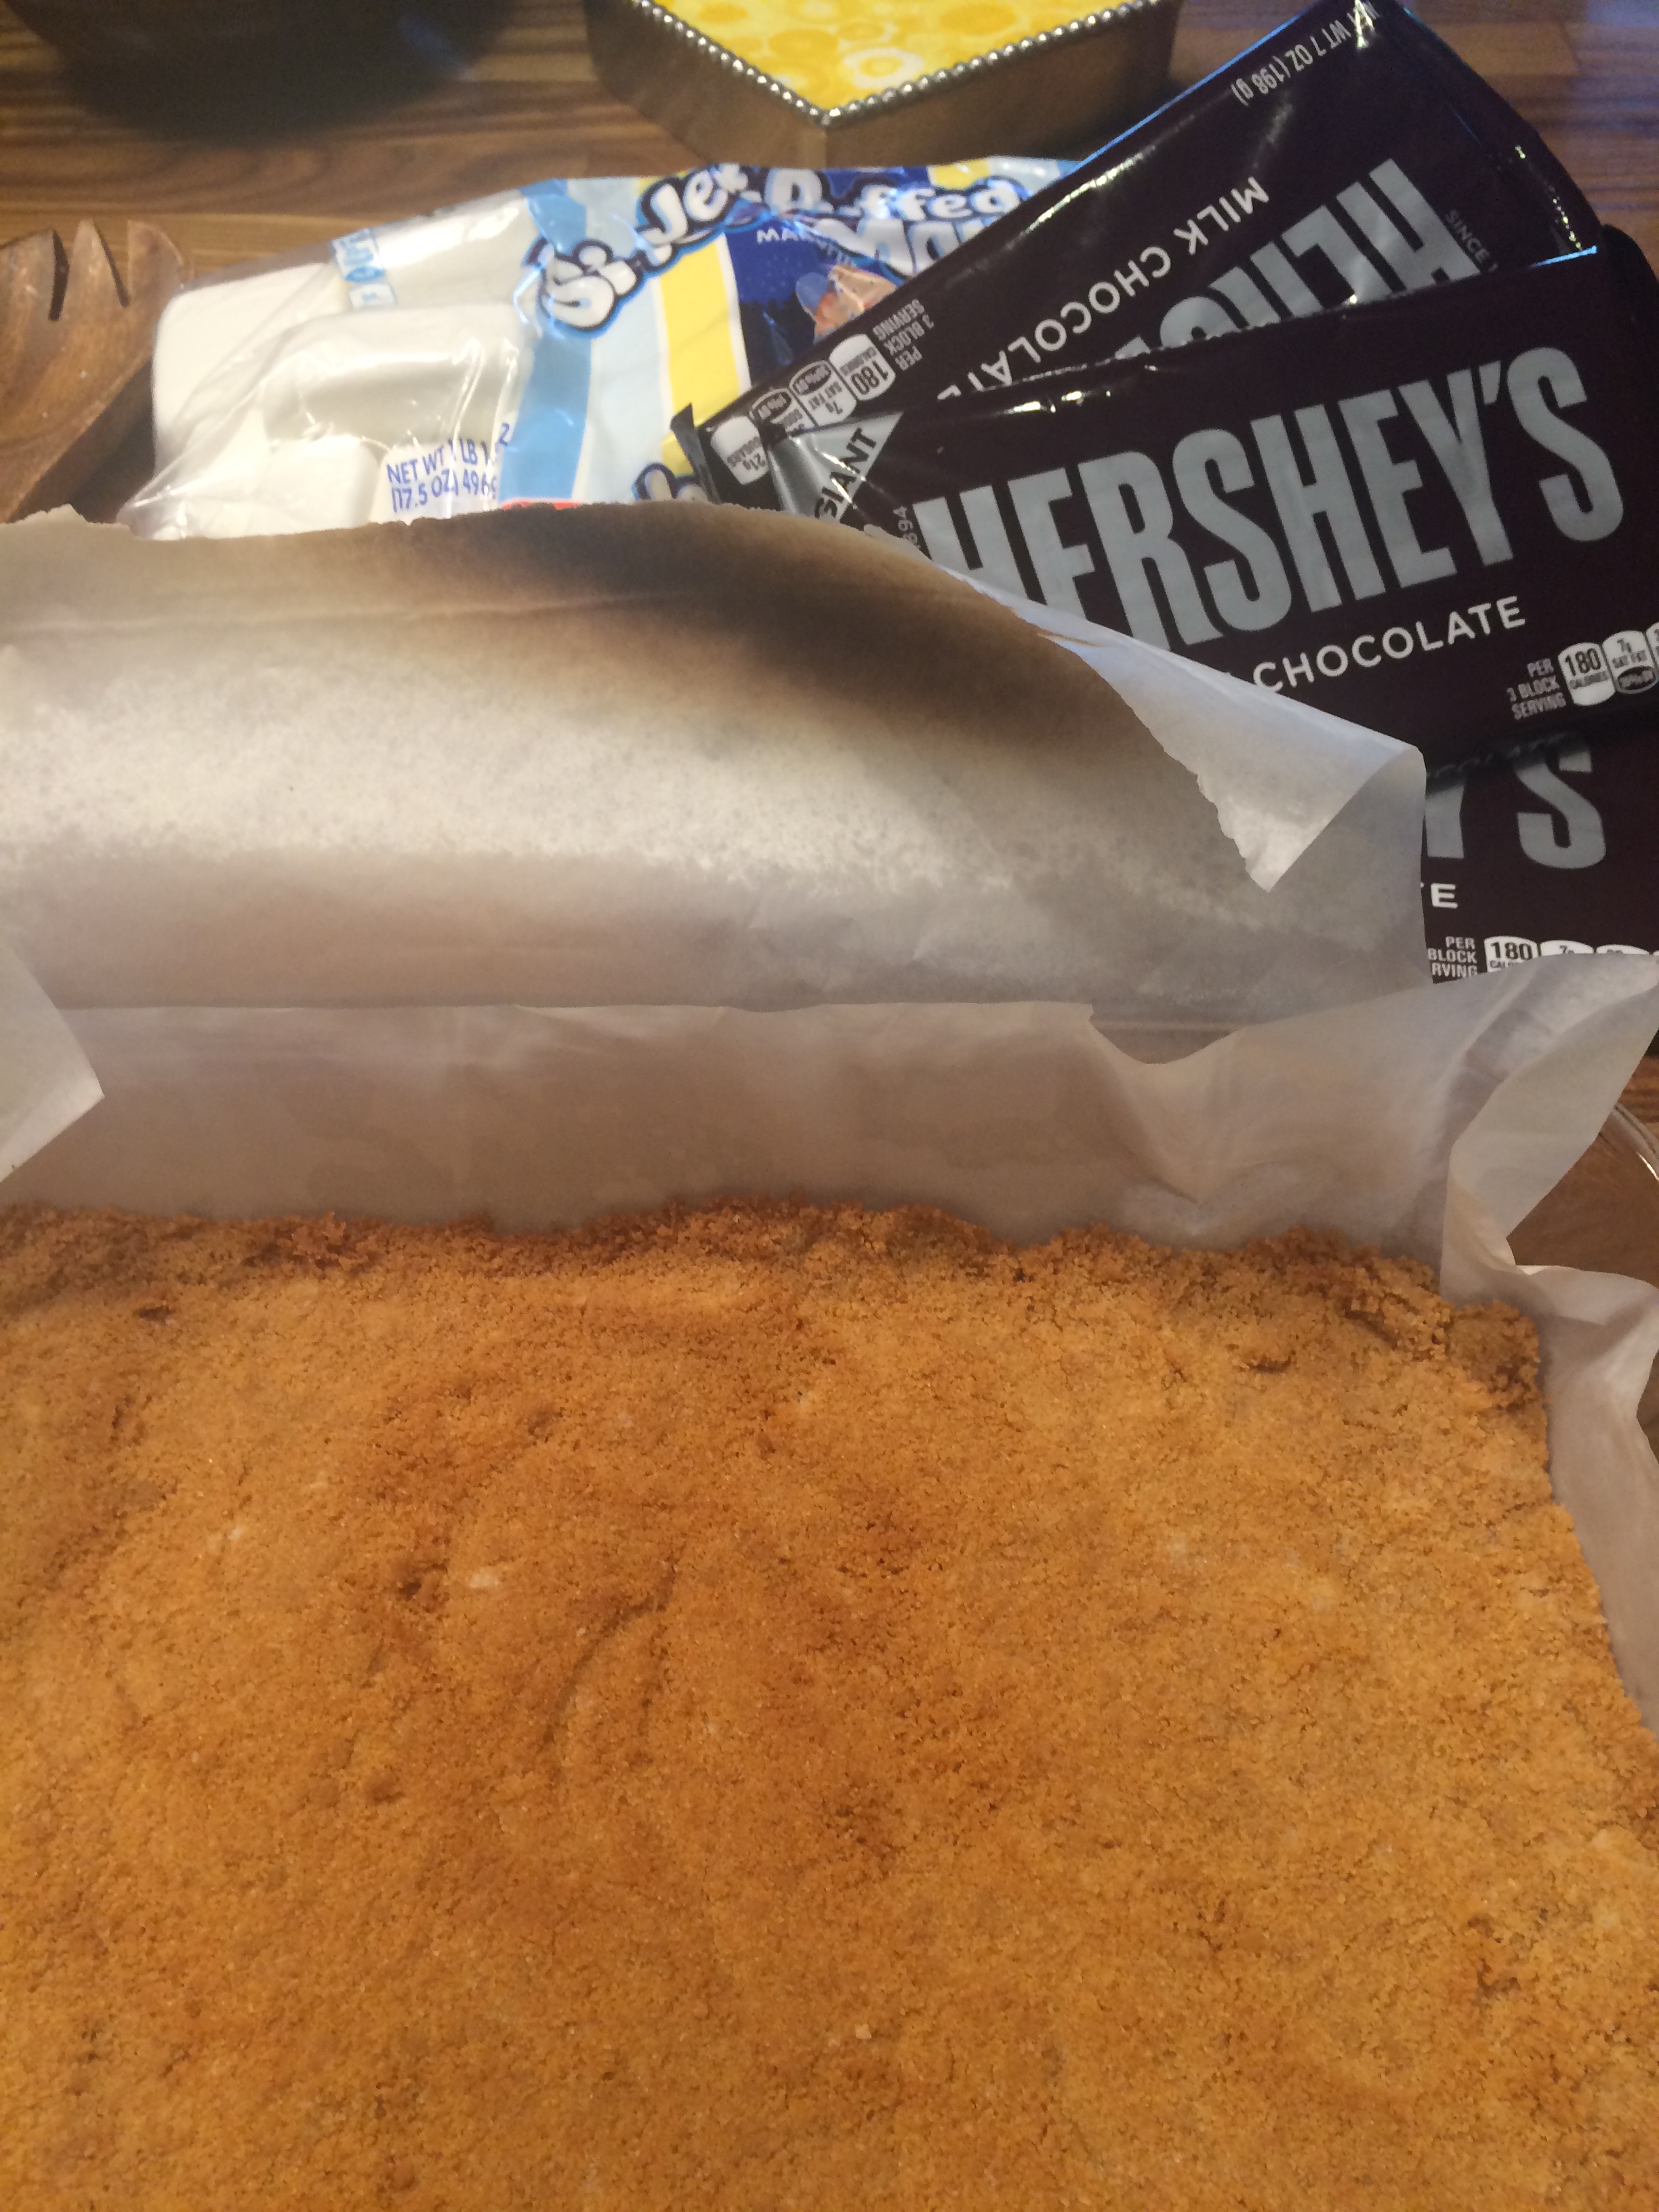
IMG_8638IMG_8636IMG_8639 IMG_8641 IMG_8642IMG_8634 IMG_8633 IMG_8632Oh Wow!!! what could be better??? truly easy and very little fuss , perfect with the kids and perfect for the adults. Very rich and gooey. Whole thing takes about 40 minutes from start to finish and you can re-heat the sliced bars in the microwave for about 30 seconds if you have some left-over. It’s great for a large group and I would say about 12-15 servings here. Let’s hold on to the last few weeks of summer with this delicious dessert.

For a very traditional s’mores taste eat immediately, I think they tasted a little better after they cooled down for a bit. Whichever way you prefer them –this is a great recipe for a crowd. You can prepare first and then pop in the oven while you are having dinner. Enjoy!

*also I was able to obtain these amazing square marshmallows in the supermarket, if you see them –grab them otherwise just regular old marshmallows will do the trick.

Ingredients:

Crust:

18 graham crackers

1/4 cup granulated sugar

pinch of salt

8 Tablespoons unsalted butter-melted

*parchment paper — I think you’ll want to work with it for this recipe–it can get difficult once they harden to get them out of pan. Clean up was a snap with it.

Topping:

3 extra-large Hershey Bars (or 7 regular-size ones)

24 jumbo marshmallows–look for the large square ones

Directions:

Preheat the oven to 400 degrees. Lightly grease a 9×13 Pyrex type baking pan with cooking spray and then line with parchment paper , allow an extra couple of inches of paper to hang over the edge.

In the food processor bowl, pulse the graham crackers until they are finely ground. Transfer the crumbs to a medium-sized bowl.

Add the sugar and salt to the graham crackers and stir to combine. Add the melted butter and stir until the crumbs are moistened. Pour the crumb mixture into the prepared pan and press into an even layer.

Bake the crust for about 10 minutes or until the edges turn lightly golden. Let the crust cool off completely before adding chocolate. I probably let it sit off heat for about 1/2 hour.

Arrange the chocolate bars (see picture) evenly on the top of cooled crust, I had to remove 1 row of chocolate to fit it in pan and left a little uncovered crumbs around edges. Arrange the marshmallows on top of the chocolate, leaving a little space between each one (see photos) Marshmallows will expand slightly.

Bake until the chocolate is soft and beginning to melt, and the marshmallows are evenly toasted on top. Probably about 10-15 minutes depending on your oven.

I couldn’t wait to eat them but I would suggest letting them cool off for  a little bit, cutting was easier when it cooled down ( after 15-20 minutes) I was able to cleanly cut slices. It’s more like campfire s’mores when you eat them hot out of the oven and certainly messier.

You can re-heat the sliced bars in the microwave for about 20-30 seconds. If you are keeping them , cut them and store individual slices.

Frozen Lemonade Pie

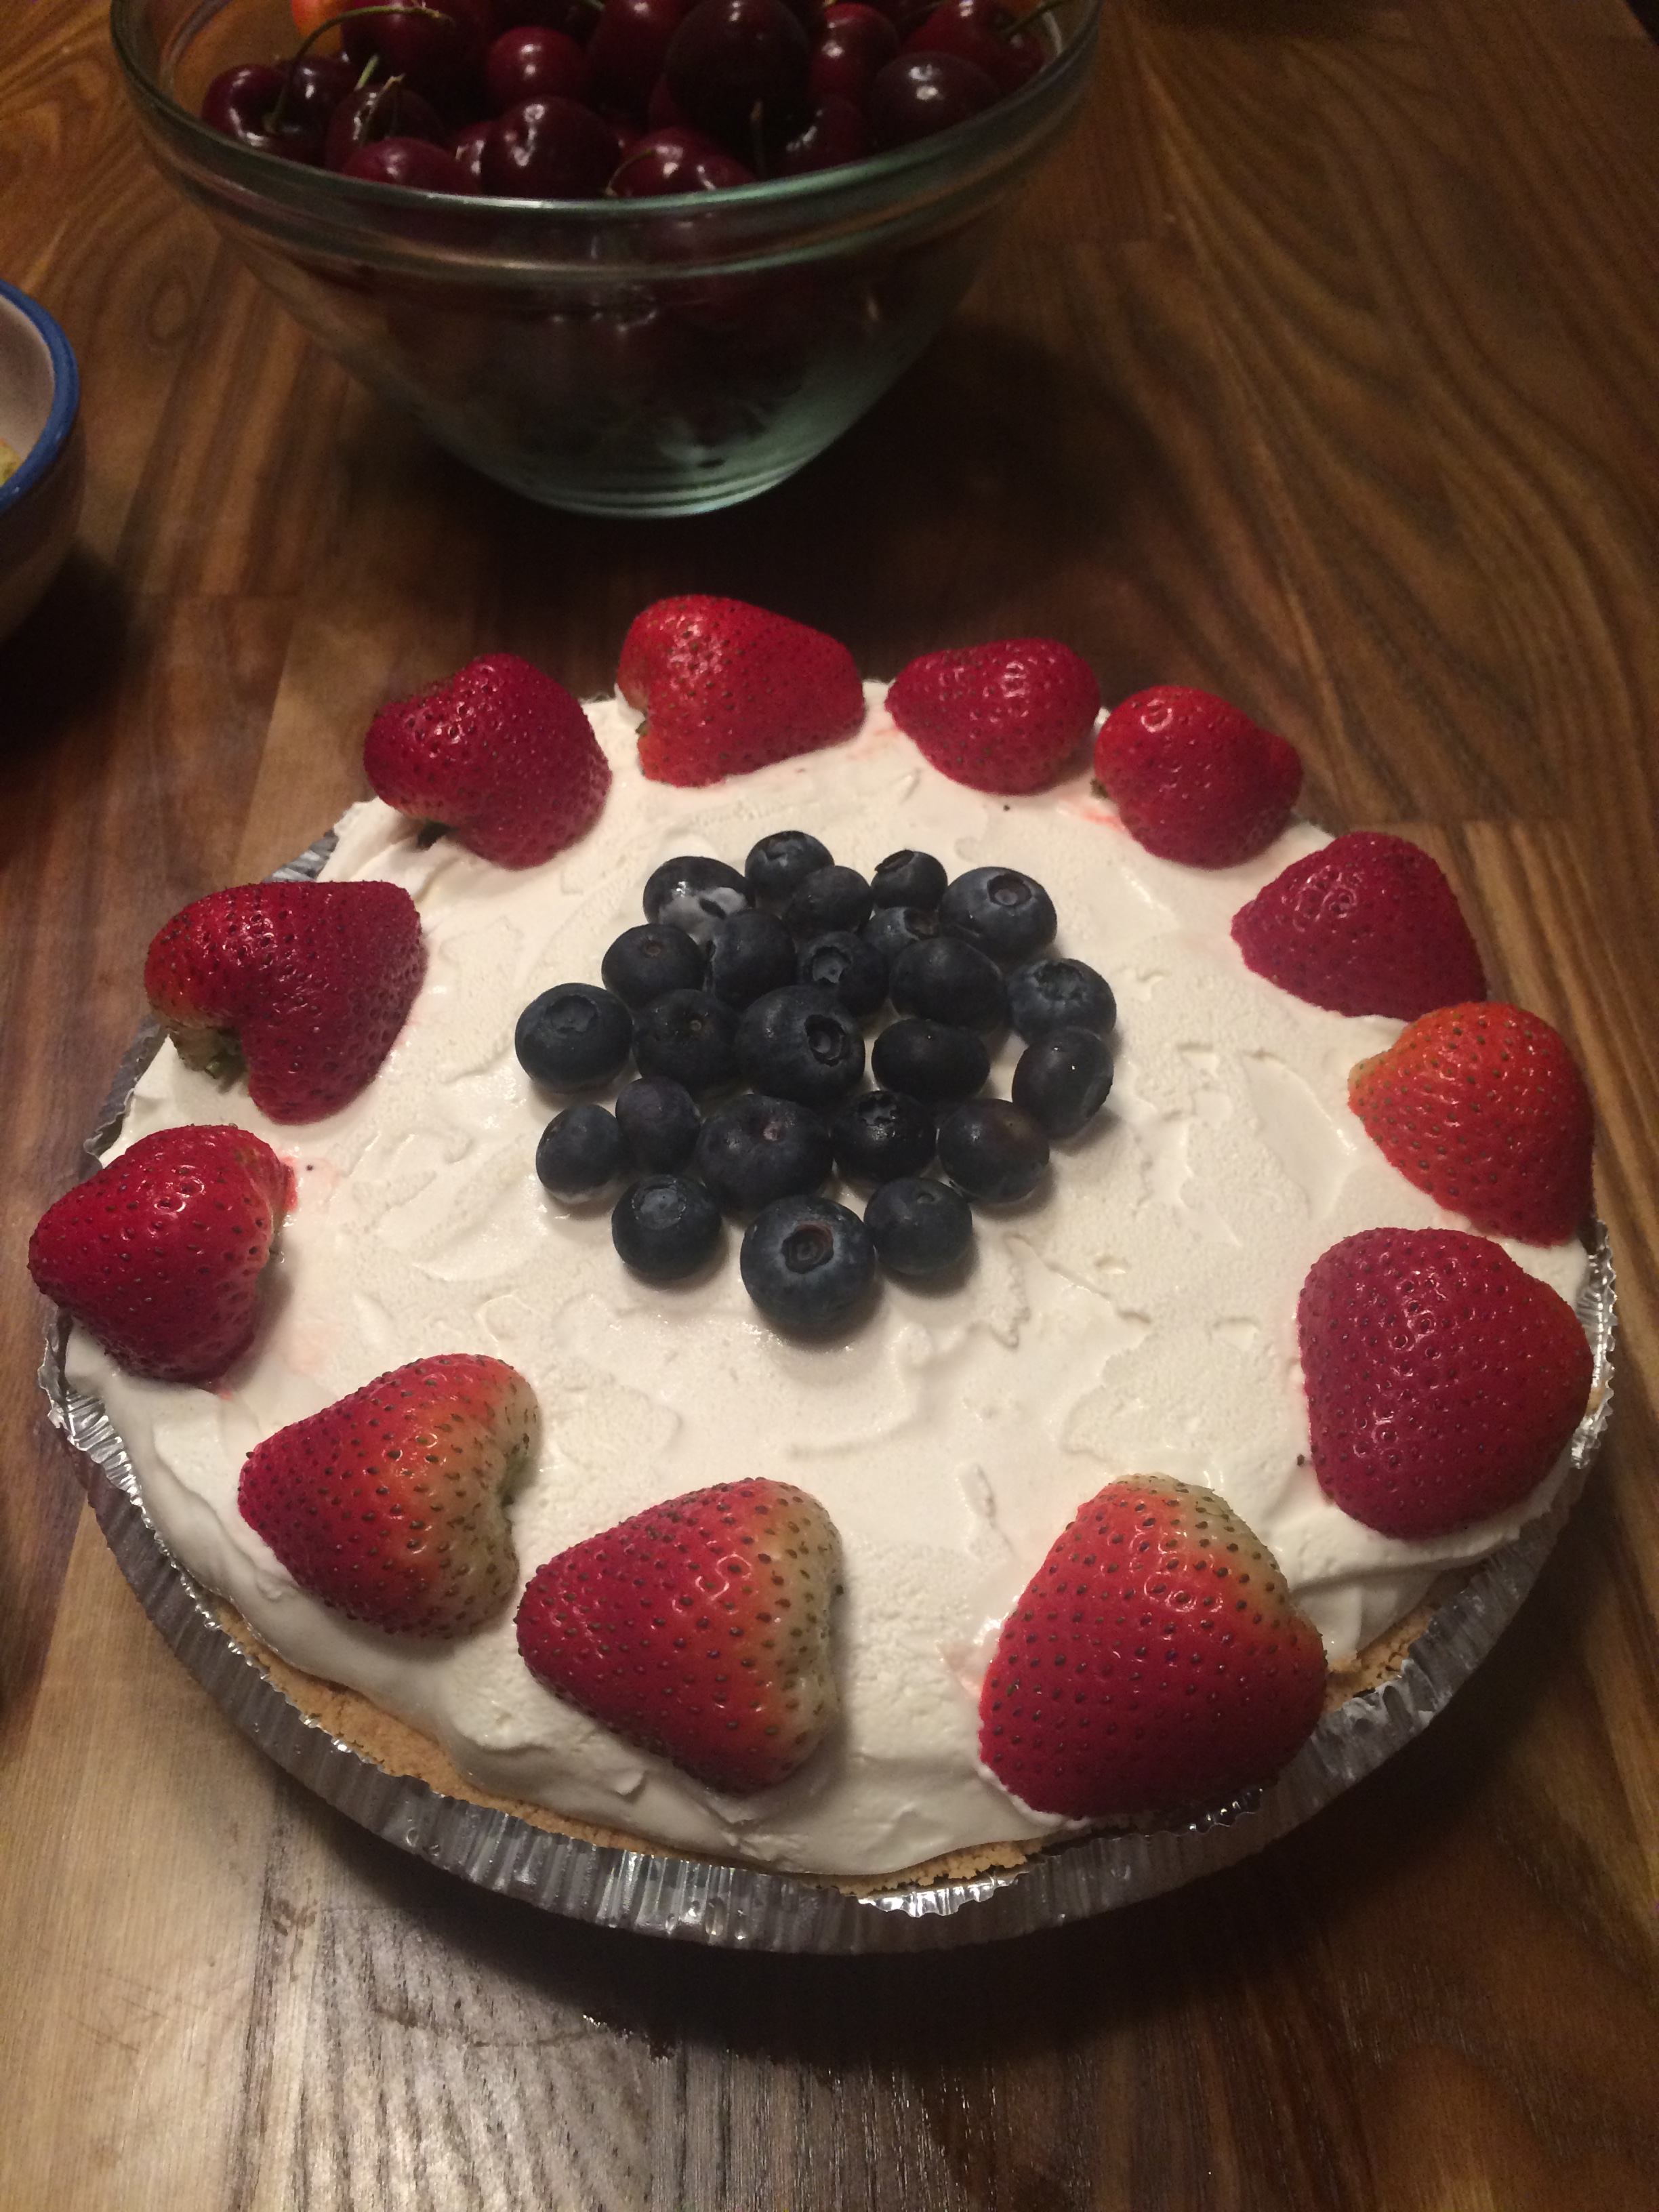
IMG_8219Just to start out with this disclaimer , this could be the most fattening thing I have ever made. Delicious but wow!!!! What the heck it’s dessert right? Dessert could and should be decadent or else you can have a piece of fruit. Well now that I made my disclaimer on to the good news. It’s quick, super-easy , pretty inexpensive and tastes pretty amazing. Just make certain that your ingredients are very cold and the lemonade comes directly out of the freezer. You can buy a prepared graham cracker crust if you don’t want to bother making one–I give you absolute permission to do so. Just make sure that the whole pie gets eaten because you don’t want this pie hanging out in your freezer–it can get dangerous.

And no baking!!!!!!!

Ingredients:

1 14 ounce can sweetened condensed milk, chilled

1 6 ounce can frozen lemonade concentrate (small can)

12 ounce whipped topping, thawed–I guess you can go light with this but giving all the other ingredients you may as well go full throttle.

1 prepared graham cracker crust (available in the baking aisle of almost every supermarket I know)

Directions:

Beat condensed milk with an electric mixer. Add Lemonade directly from freezer and beat until very thick.

Fold in whipped topping with a spatula until just folded in.

Pour into crust and freeze.

Remove from freezer 1/2 hour prior to serving.

I placed some berries on top or you can use a piece of lemon or lime for decoration.

Enjoy this one!!!!

7-UP Bundt Cake

IMG_7176 IMG_7179 IMG_7183IMG_7238 IMG_7237 IMG_7234 IMG_7222Now you have to wonder how a cake like this ever get discovered in the first place? Baking with actual drinking soda sounds both disgusting and intriguing but I was up for the task. I promise you it was delicious. IMG_0563 IMG_0561  I gave up drinking soda a few years ago and now I’m going to put it in a cake? But that’s exactly what I did. I had to wonder how a cake like this came to be,  was someone drinking 7-UP and spilled 3/4 of a cup in by accident? OMG it’s a lot to think about it but all I can say is WOW! I did a little research on the recipes and there are quite a few out there, most of these “soda” cakes seem to hail from the South.  Baking is a little tricky up here at high altitude but it went well. Bundt cakes make you look like a rock-star baker. I made a few changes to recipe adding vanilla extract and lemon extract. Lemon extract was the key for me. I kept the glaze simple but there are some awesome renditions out there.
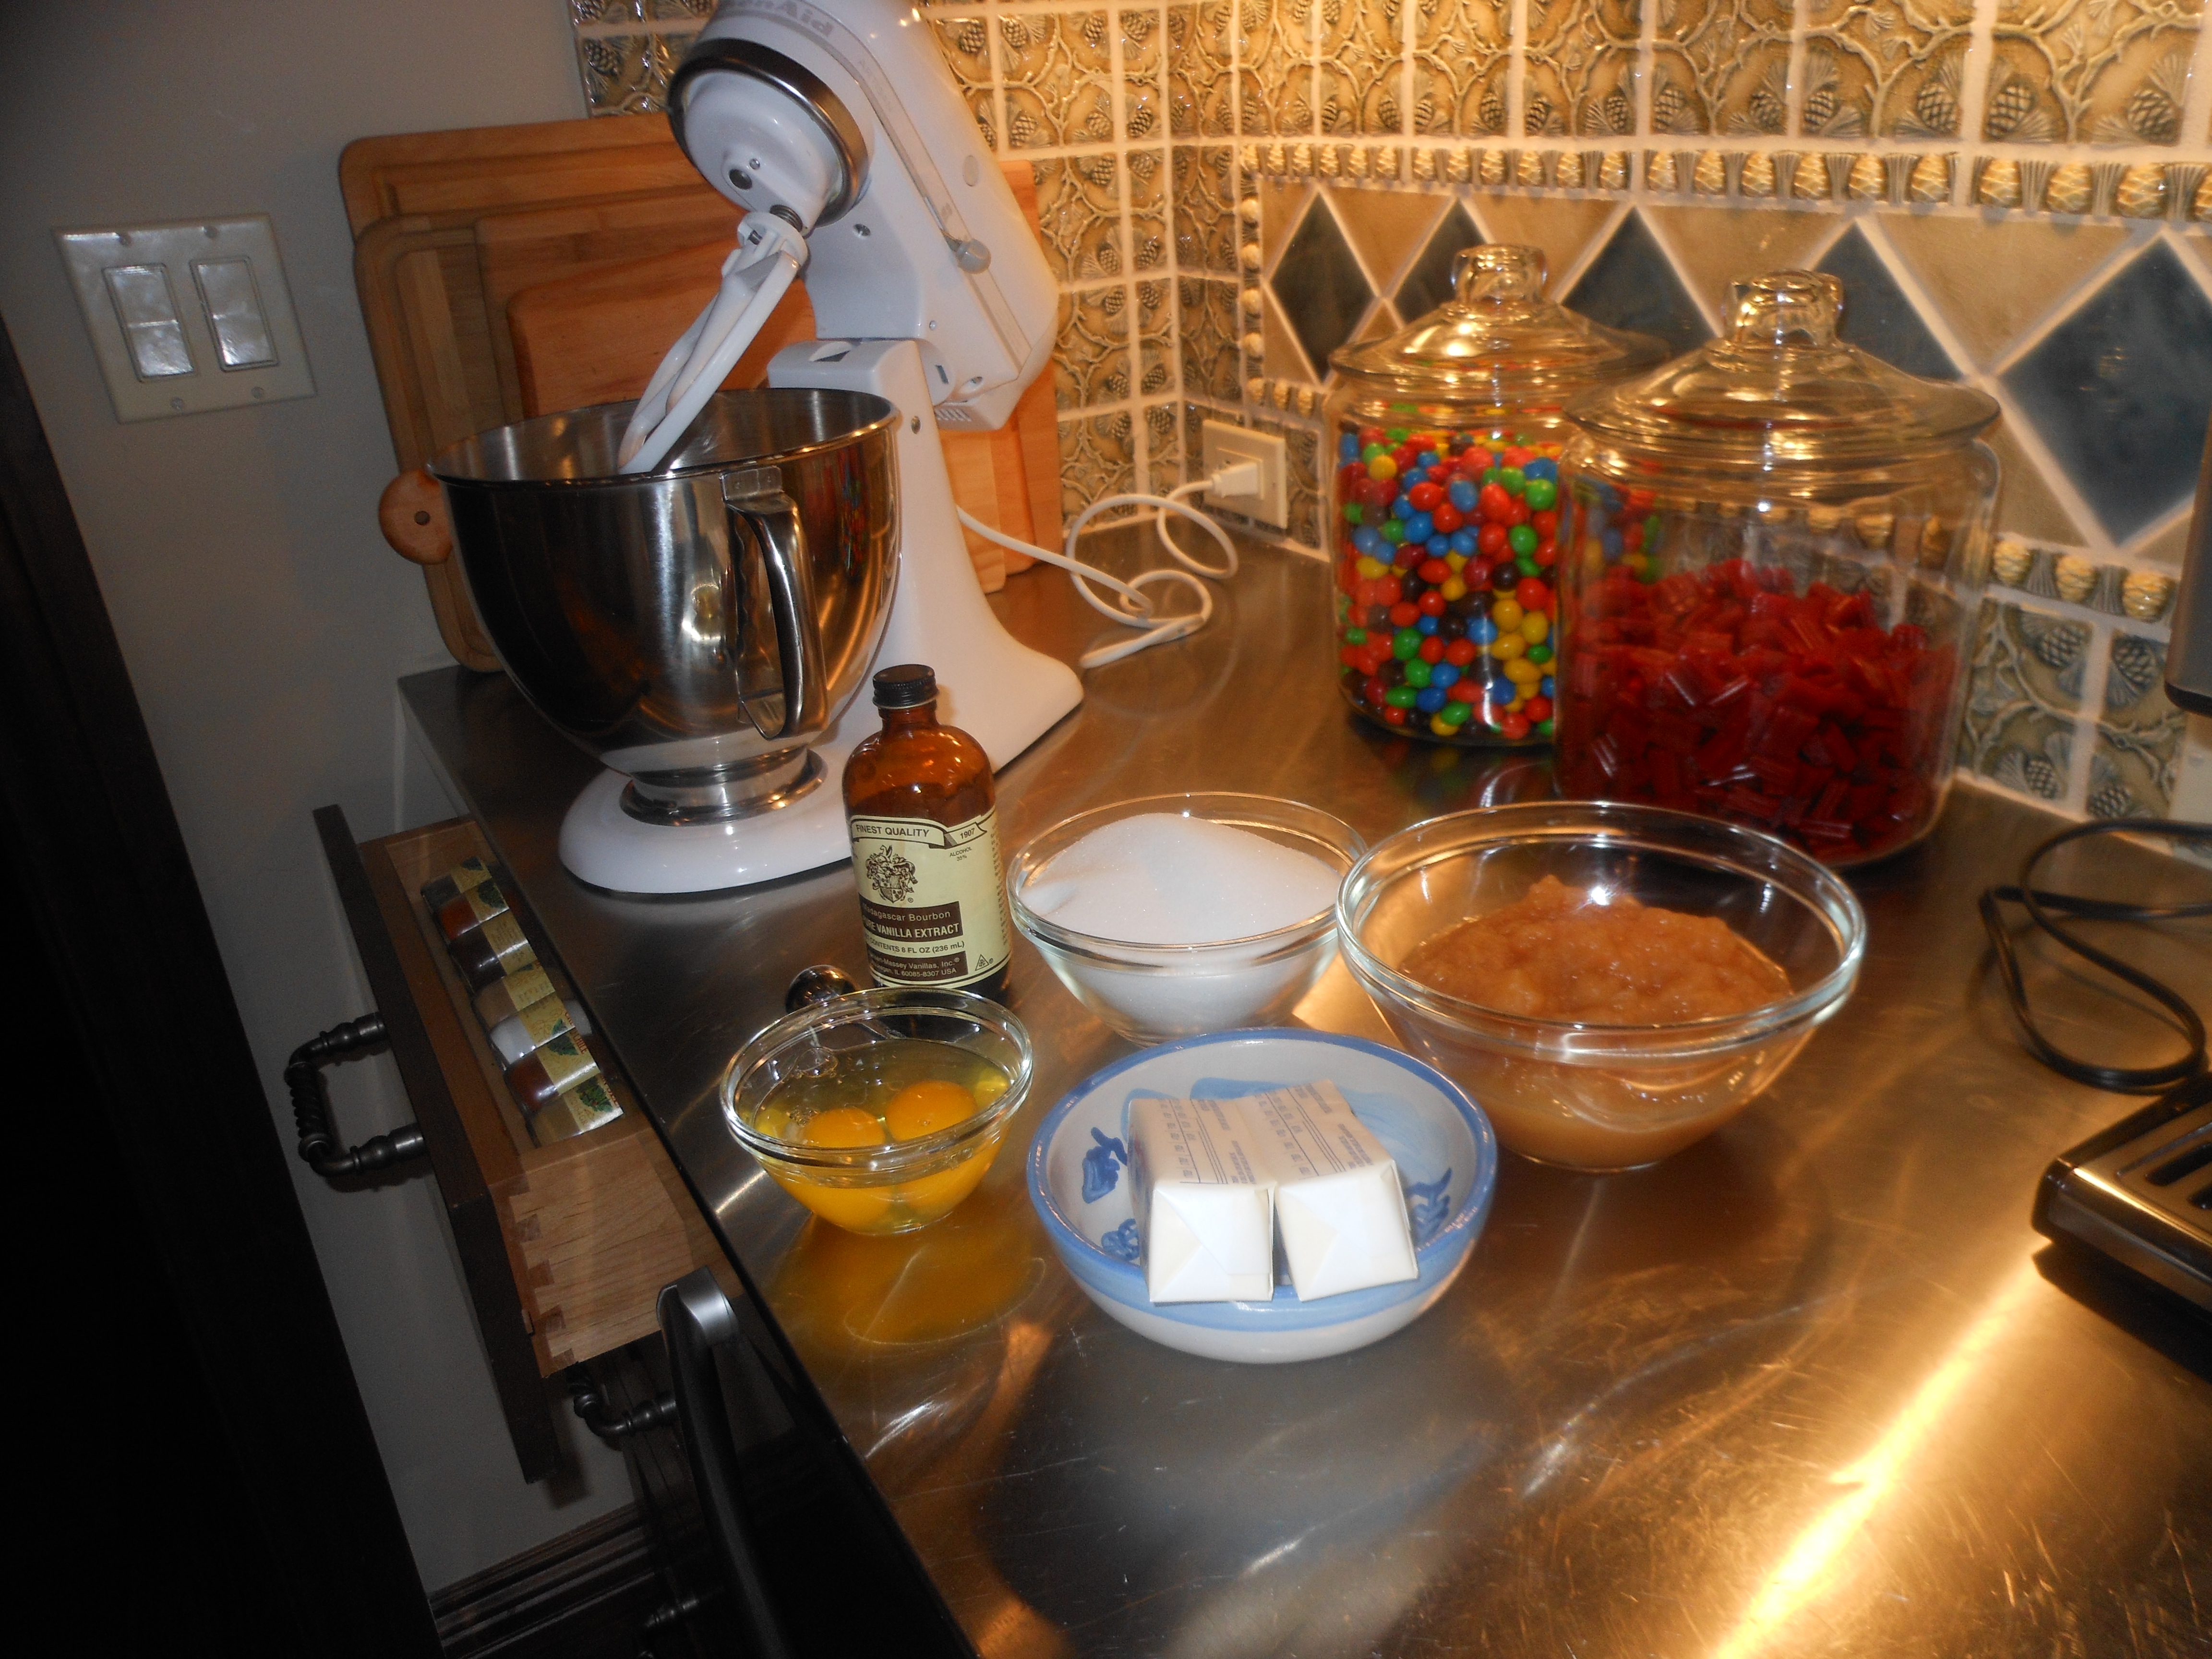
Somehow these ingredients produce a delicious lemony moist cake!

Julia Child once said “A party without cake is just a meeting” my exact sentiment.

Ingredients:

1 1/2 cups butter, softened ( a little trick I discovered is using soft butter spread, easier to measure out and no melting required, just leave it out to really soften before using) if you use regular butter just soften it up in the microwave for a few seconds.

3 cups sugar

5 eggs ( always try to use room temperature eggs)

3 cups flour

2 Tablespoons Lemon Extract

1/2 Teaspoon Vanilla Extract

3/4 cup 7UP or any carbonated lemon-lime beverage of your choice

*optional you can add zest of 1 lemon and 1 lime , I did it without doing this extra step and it was all good. For an extra zing of flavor you can add it.

Lemon Glaze:

2/3 cup powdered sugar ( confectioners sugar)

1 Tablespoon Lemon Juice ( juice of a fresh lemon)

Directions:

Preheat oven to 325 degrees.

You will probably cook cake for about 1 1/4 hours. I would check on cake with a cake tester after the hour.

Cream butter and sugar for about 20 minutes in an electric mixer with paddle attachment, I know this seems like a very long time but according to many different renditions of this recipe I have read it seems that the cake will come out lighter if you do this.

Add eggs one at a time, beating after each egg

Add flour and lemon extract and vanilla extract

Fold in 7UP –meaning simply take bowl off electric mixer stand . Pour soda in slowly and gently fold in with a rubber spatula.

Pour into a well-greased (sprayed with cooking spray) Bundt Pan or Tube Pan, I used a Bundt.

Make Lemon Glaze-mix the powdered sugar and lemon juice together with a whisk.

I removed bundt cake from pan after about 10 minutes, let cool.

When cake is cooled, drizzle with Lemon Glaze

Summer Blueberry Cake

I just keep finding new recipes for blueberries. I love blueberries and they are so abundant right now and in peak season. I love them right out of the containers, and I love them in muffins, pies, cakes and cobblers. Here is another delicious cake which you can freeze and a few months from now when fresh blueberries aren’t really around ,you will bring back that summer day that you baked this. I cut this in 1/2 , 1/2 for now and 1/2 for when I return in the winter. You can always make this with frozen berries but I have never done so. To me it’s all about cooking with fruits and vegetables that are seasonal.  There really is nothing like fresh seasonal fruits and vegetables, and I can’t get enough of them . This is a fairly easy cake to bake. I baked it for 45 minutes, and the tester came out clean. You’ll have to check your own oven for cooking time . It can vary from 40 – 50 minutes depending on your oven.

I found this recipe on one of my favorite cooking blogs , Smitten Kitchen. I may have made a few changes which I often do, but it is pretty much the same.


Ingredients:

2 cups all – purpose flour, plus another tablespoon to dust blueberries with

1 tablespoon baking powder

1 teaspoon table salt

2 sticks unsalted butter ( softened) YIKES

3/4 cup light brown sugar packed

1/2 cup sugar ( regular granulated sugar)

3 large eggs ( room temperature)

1 cup buttermilk ( I used low-fat buttermilk)

1/2 cup fresh blueberries

Topping:

1/2 cup fresh blueberries

1/4 cup granulated sugar

1/2 teaspoon ground cinnamon

Directions:

Adjust oven rack to middle position and preheat oven to 350 degrees. Spray and lightly flour a 9 x 13 baking pan. ( I prefer Pam baking spray)

Whisk 2 cups flour, baking powder, and salt together in a medium size bowl. With electric mixer, beat butter and sugars on medium high-speed until fluffy. Add eggs one at a time, beating until each egg is just incorporated. Don’t overbeat. Reduce speed to medium and beat in 1/3 of the flour mixture, and beat in 1/2 of the buttermilk. Beat in another 1/3 of the flour and the remaining milk, and then the remaining flour mixture. Toss  blueberries with a tablespoon of flour just lightly dust them. Using a rubber spatula, gently fold in 1/2 of the blueberries. Spread batter into prepared dish.( see photo)

For the topping:

Scatter remaining 1/2 of the blueberries over the top of the batter. Stir sugar and cinnamon together in small bowl and sprinkle all over the top of the batter. Bake until cake tester or toothpick comes out clean in center of cake. I cooked for 45 minutes. It should take anywhere between 40 – 50 minutes. Cool in pan for about 1/2 hour, then turn it out of baking dish or cut out pieces. I turned it out, cut in 1/2 and froze 1/2 of it for the cold months. This is a delightful cake served for dessert, and so perfect for breakfast and a great afternoon snack with ice coffee .

I threw in a photo of me and my grandson, Riley who was out here at the time.

Blackberry Clafouti (Blackberry Cake)–Simple and Easy to make

I made this cake because I love blackberries and I had all the ingredients in my house. If you like blackberries, this is a light cake which will be perfect for dessert and not too heavy at all.  Clafouti is actually french for a cake made with cherries. If it’s made with blackberries or other berries it is called a Flaugnarde, which sounds super fancy and difficult to make and this is anything but that so we’ll just call it Clafouti! We aren’t going to get too technical here and I hope I don’t offend the French chefs out there. This is pretty much the same as the cherry Clafouti which I plan on baking soon and will post that once I’ve cooked that, but we have to wait for the cherries to be super ripe.  This cake is so very easy to make, requires no fancy equipment, and you can whisk ingredients in one bowl. Just use a pie baking dish to bake in. I had a glass dish and am happy that I did, because I could see the blackberries in the cake. This cake would be a most amazing breakfast type of cake–not too thick, but sort of like a blackberry muffin flattened out. Blackberries are so plump and delicious right now, you gotta cook this as soon as possible.

*In order for the blackberries not to sink in cake, I made sure they were dry after rinsing and then I put in a bowl with some flour and coated the berries in flour before adding them , not too heavily floured just a dusting.  It came out perfectly. I have made it where I forgot to dust with flour and they did sink. It didn’t look as pretty but it tasted just fine.

Ingredients: 

1 stick unsalted butter

1 cup sugar plus 1/4 cup of sugar for top of cake

1 cup Self-Rising Flour  Presto), sifted

1 cup whole milk

2 cups blackberries, fresh or frozen (I used fresh)

* A little extra flour for dusting the blackberries before baking with them (see note)

Directions:

Preheat oven to 350 degrees. I sprayed the baking dish with baking spray but you can also butter it.

Rinse and pat dry the blackberries. Melt the butter in microwave. Pour 1 cup sugar and flour into a mixing bowl. Slowly whisk in the milk and mix well. Then pour in the melted butter and whisk it all together well.

Dust blackberries with a little bit of flour and mix well. Pour the batter into the prepared baking dish. Sprinkle blackberries over the top of the batter, distributing evenly.  Sprinkle 1/4 cup sugar over the top.

Bake in the oven at 350 degrees for about 1 hour or until golden.  Yum!

A Real Deal Blueberry Cobbler

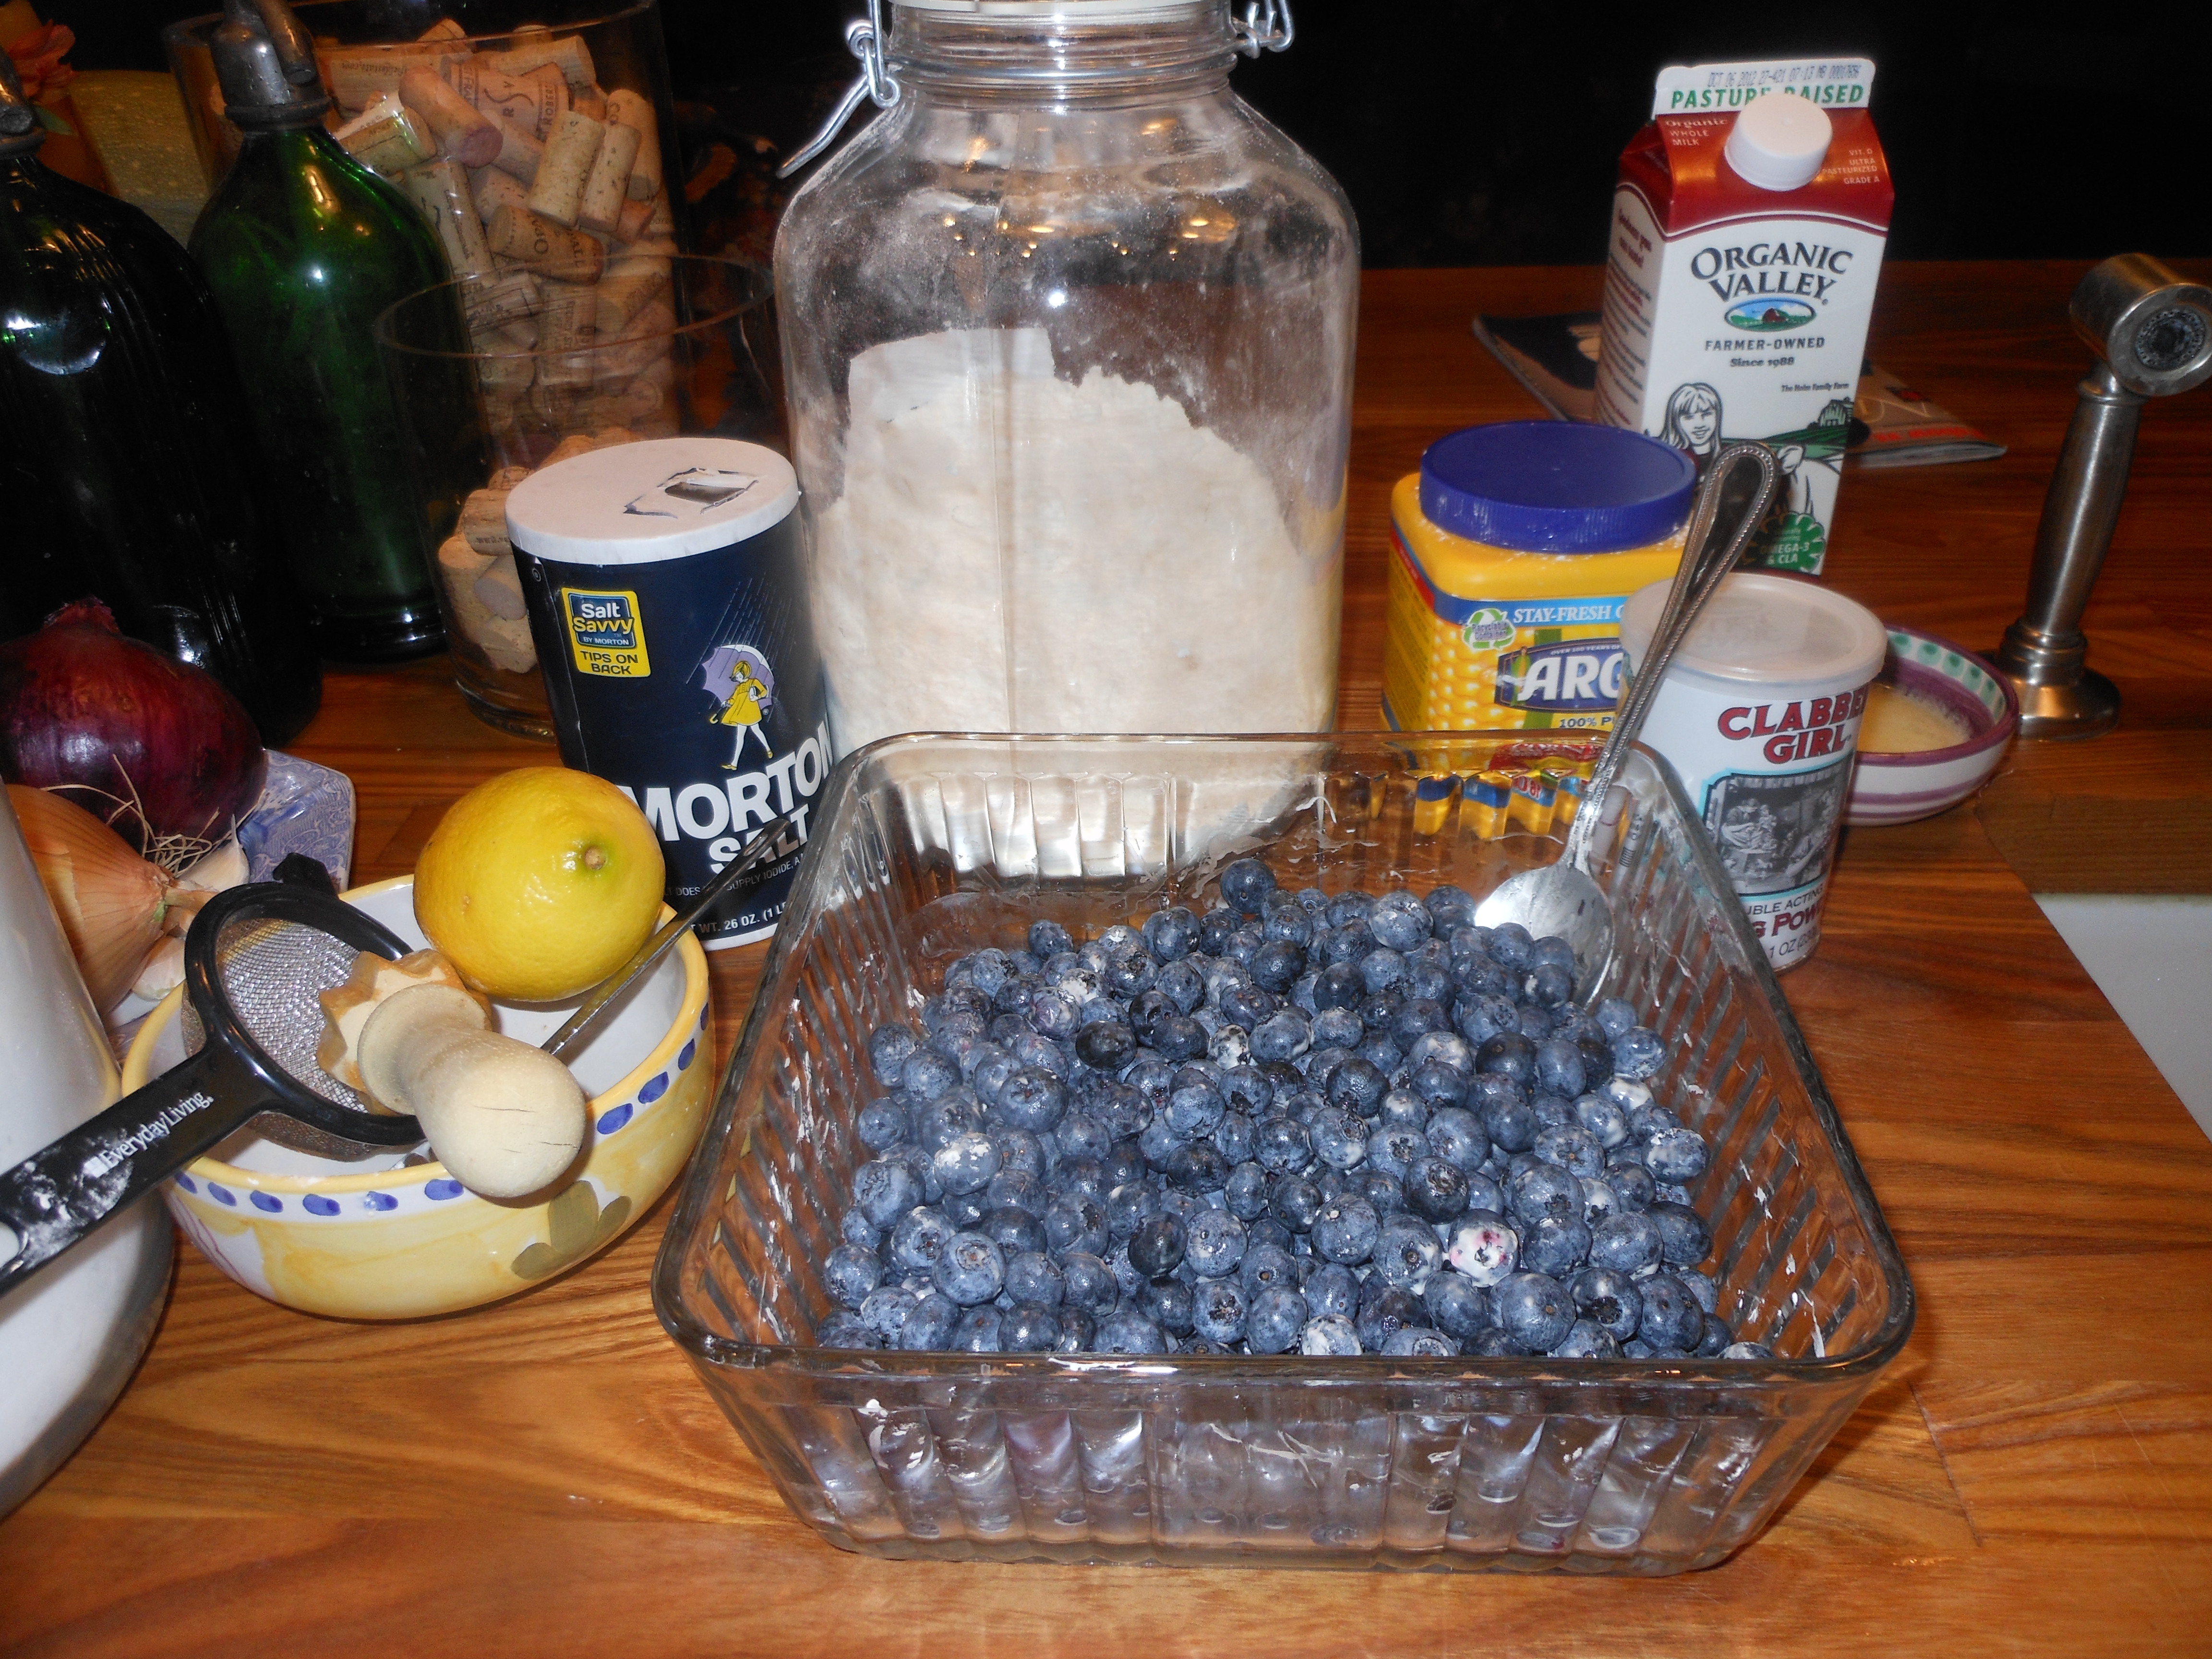
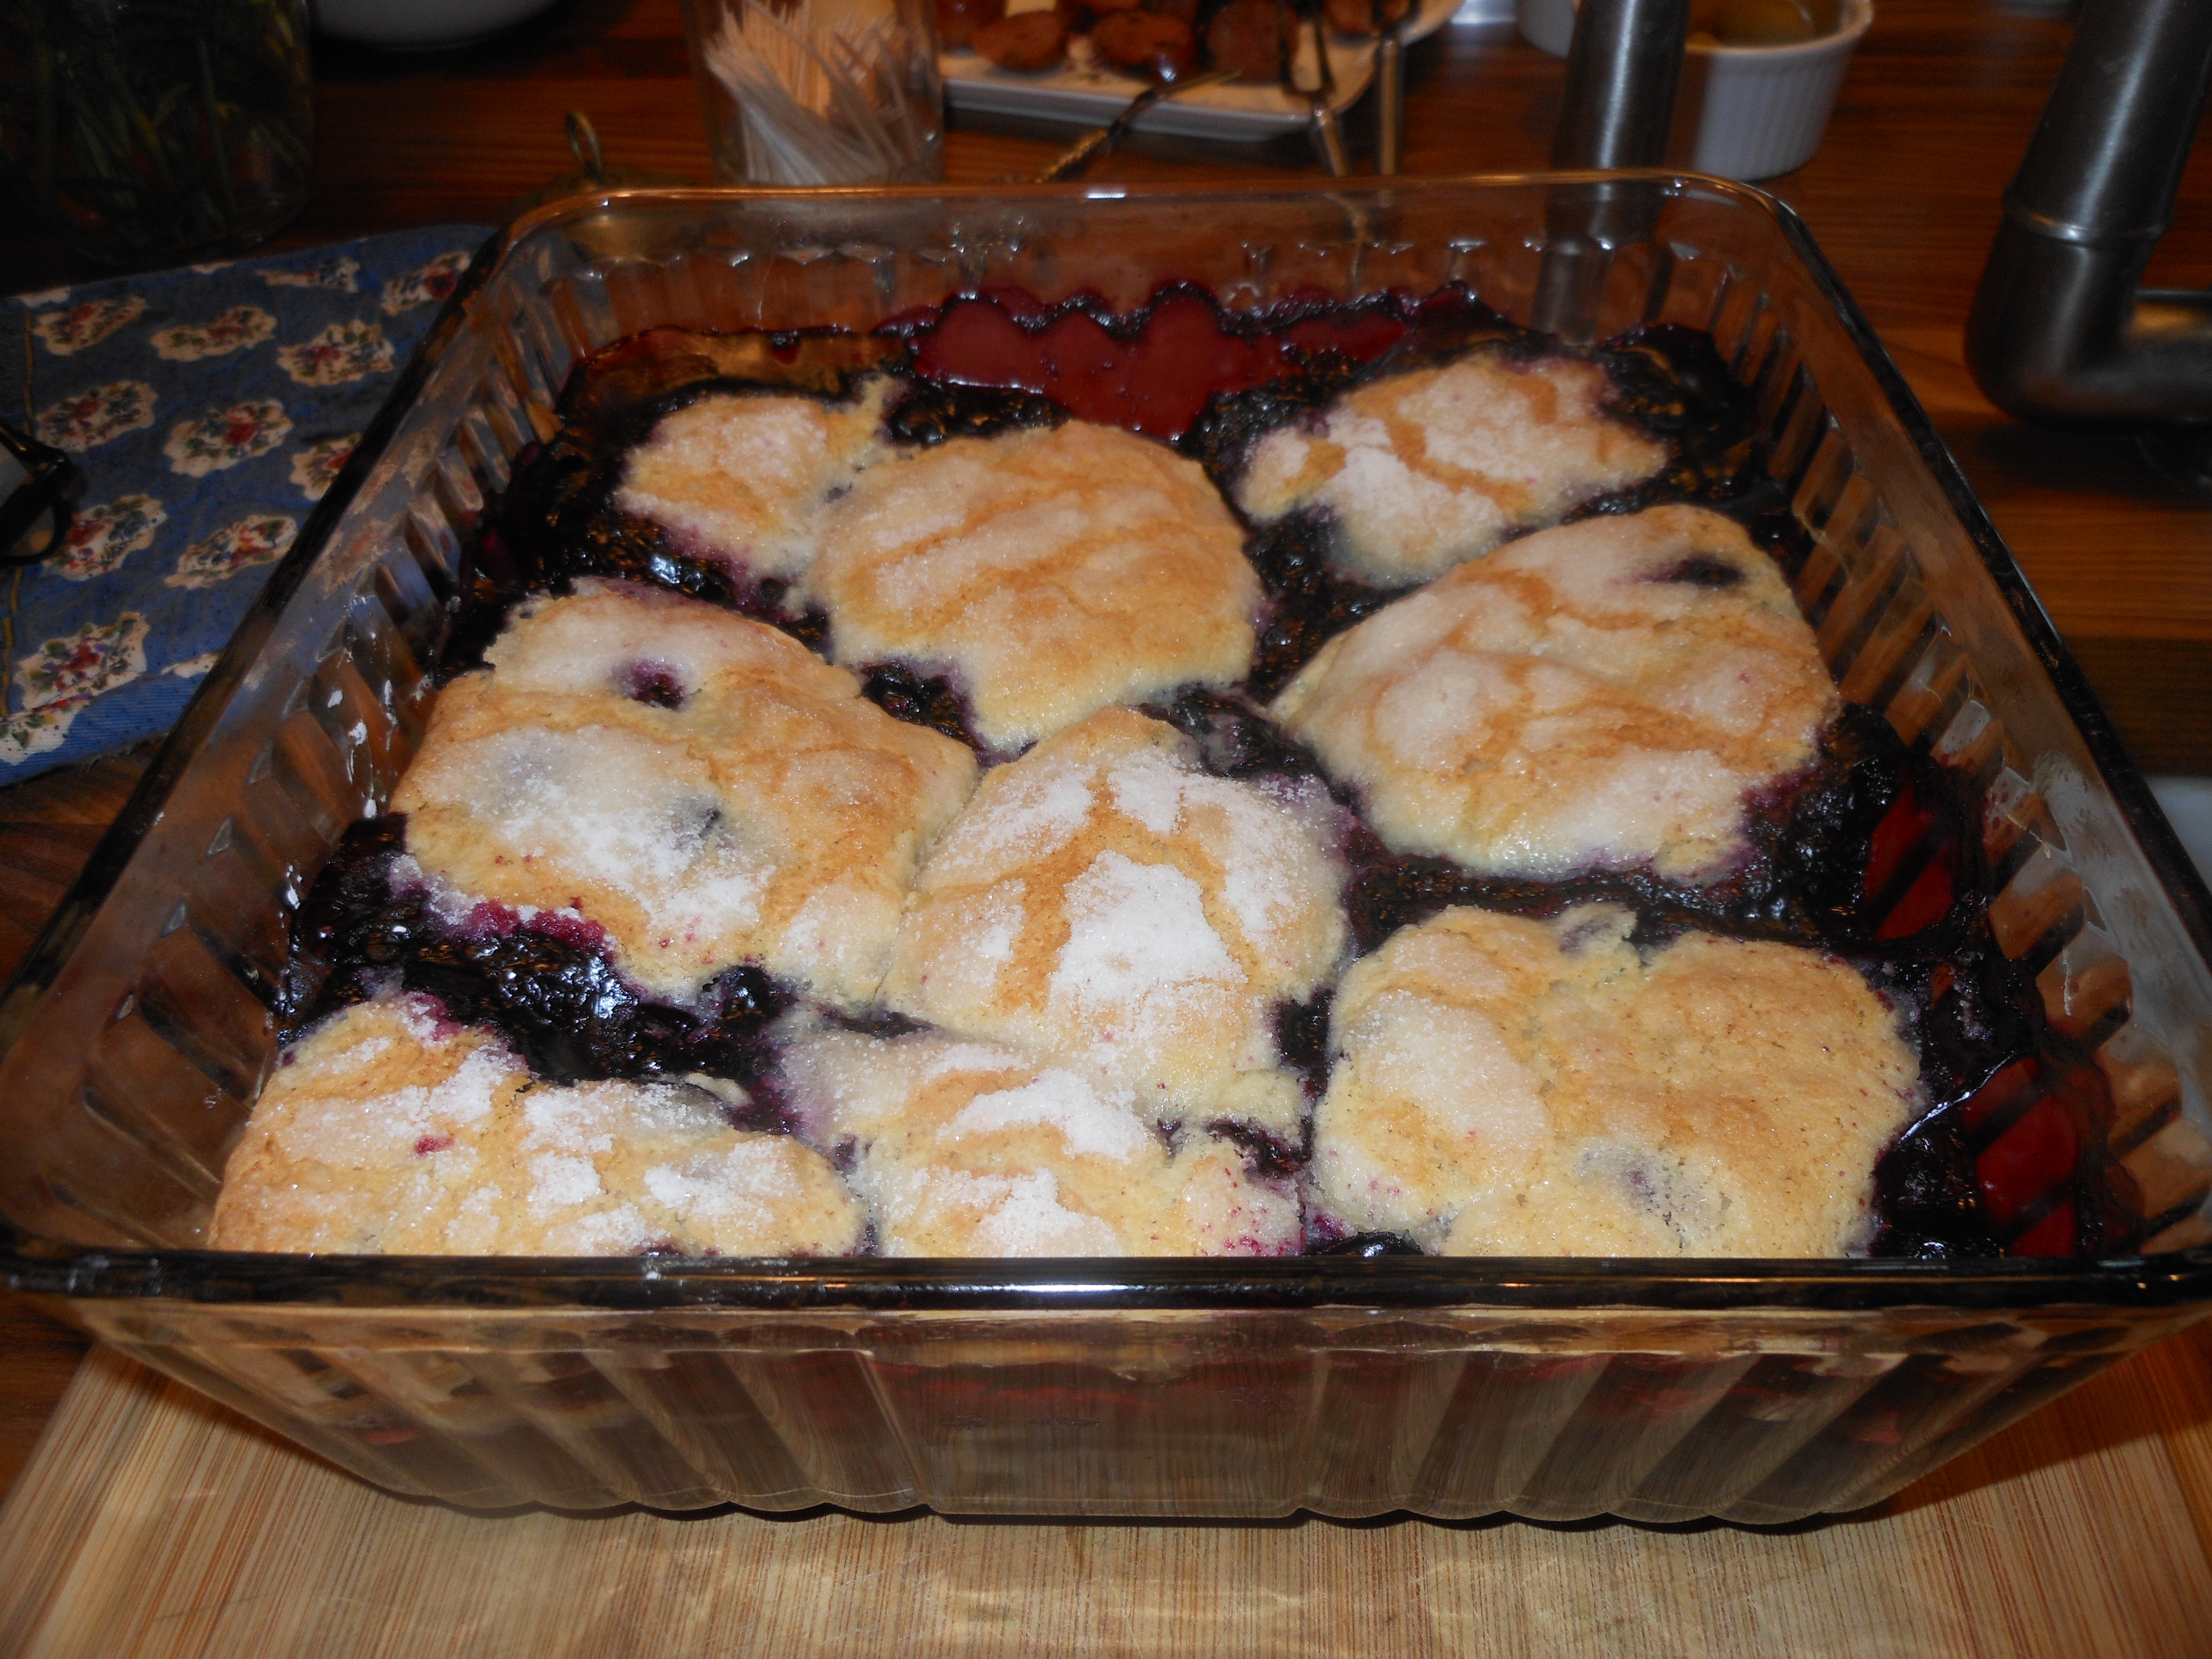
I recently found this recipe and realized it was a combination of 2 separate recipes–one for the blueberry filling and one for biscuits. When combined, this is a true cobbler and not a crisp. Yum!

Make it for company and at least six people so you have a teensy bit left over , these leftovers are just amazing the next day and hard to resist eating !

Use fresh blueberries which are in abundance now and if you want to make this in the winter and blueberries aren’t around you can always use frozen blueberries. It’s almost a must to serve this with vanilla ice cream, as it complements it so well! If you’d like, you can make this a day ahead for sure, I’ve even frozen it. It comes out perfectly. Now is the time to try and bake this delightful dessert with all of the beautiful blueberries out there.

Ingredients:

1 pound blueberries or 3 1/2 cups – obviously fresh is best but if you want you can use frozen blueberries

1 tablespoon cornstarch or arrowroot

2 tablespoons lemon juice (fresh)

1 cup all -purpose flour

3/4 cup sugar ( you can use turbinado (raw ) sugar as well ( divided)

1 teaspoon baking powder

1/4 teaspoon salt

1/2 cup milk ( don’t use fat free, if you must, use 2%) I prefer whole milk in baking or low-fat buttermilk always works.

3 tablespoons butter, melted

3/4 cup boiling water

Directions:

Preheat the oven to 350 degrees. Spread the blueberries in an ungreased but sprayed ( I always use Pam to help with the clean-up) 8 or 9 inch square baking pan. Sprinkle with cornstarch
and drizzle with lemon juice. Set aside.

In a medium size bowl, combine the flour, 1/2 cup sugar, baking powder and salt. Add the milk and the butter.

Stir until just combined ( shouldn’t be smooth) then drop mounds of dough onto the blueberries.

Pour boiling water over the dough and fruit. Sprinkle top with remaining 1/4 cup sugar.

Bake until the biscuits are golden brown and the blueberries are bubbly. 45- 60 minutes.

Serve warm or at room temperature. If you are preparing ahead , either frozen or in fridge, take out of freezer or fridge and bring to room temperature, I then put in oven till it starts to bubble.

Should serve 8

Triple Berry Crisp–Gluten Free

IMG_7716 IMG_7709 (2) IMG_7702 IMG_7698 I love sugar as much if not more than the next guy but this was an opportunity to make a berry crisp without any white sugar or flour.  I stumbled upon this recipe on one of the million blogs, sites and posts I see spouting Paleo and Gluten Free recipes. I am not a paleo eater nor am I gluten free but it can’t hurt to have a recipe that is light on the sugar and fairly healthy to boot. If you would like it a little bit sweeter you can add a tablespoon of coconut sugar or a packet of stevia, I didn’t and I liked it just the way it was.  It intrigued me since I love a crisp but hate the amounts of sugar that go into it, even though I do love eating it.

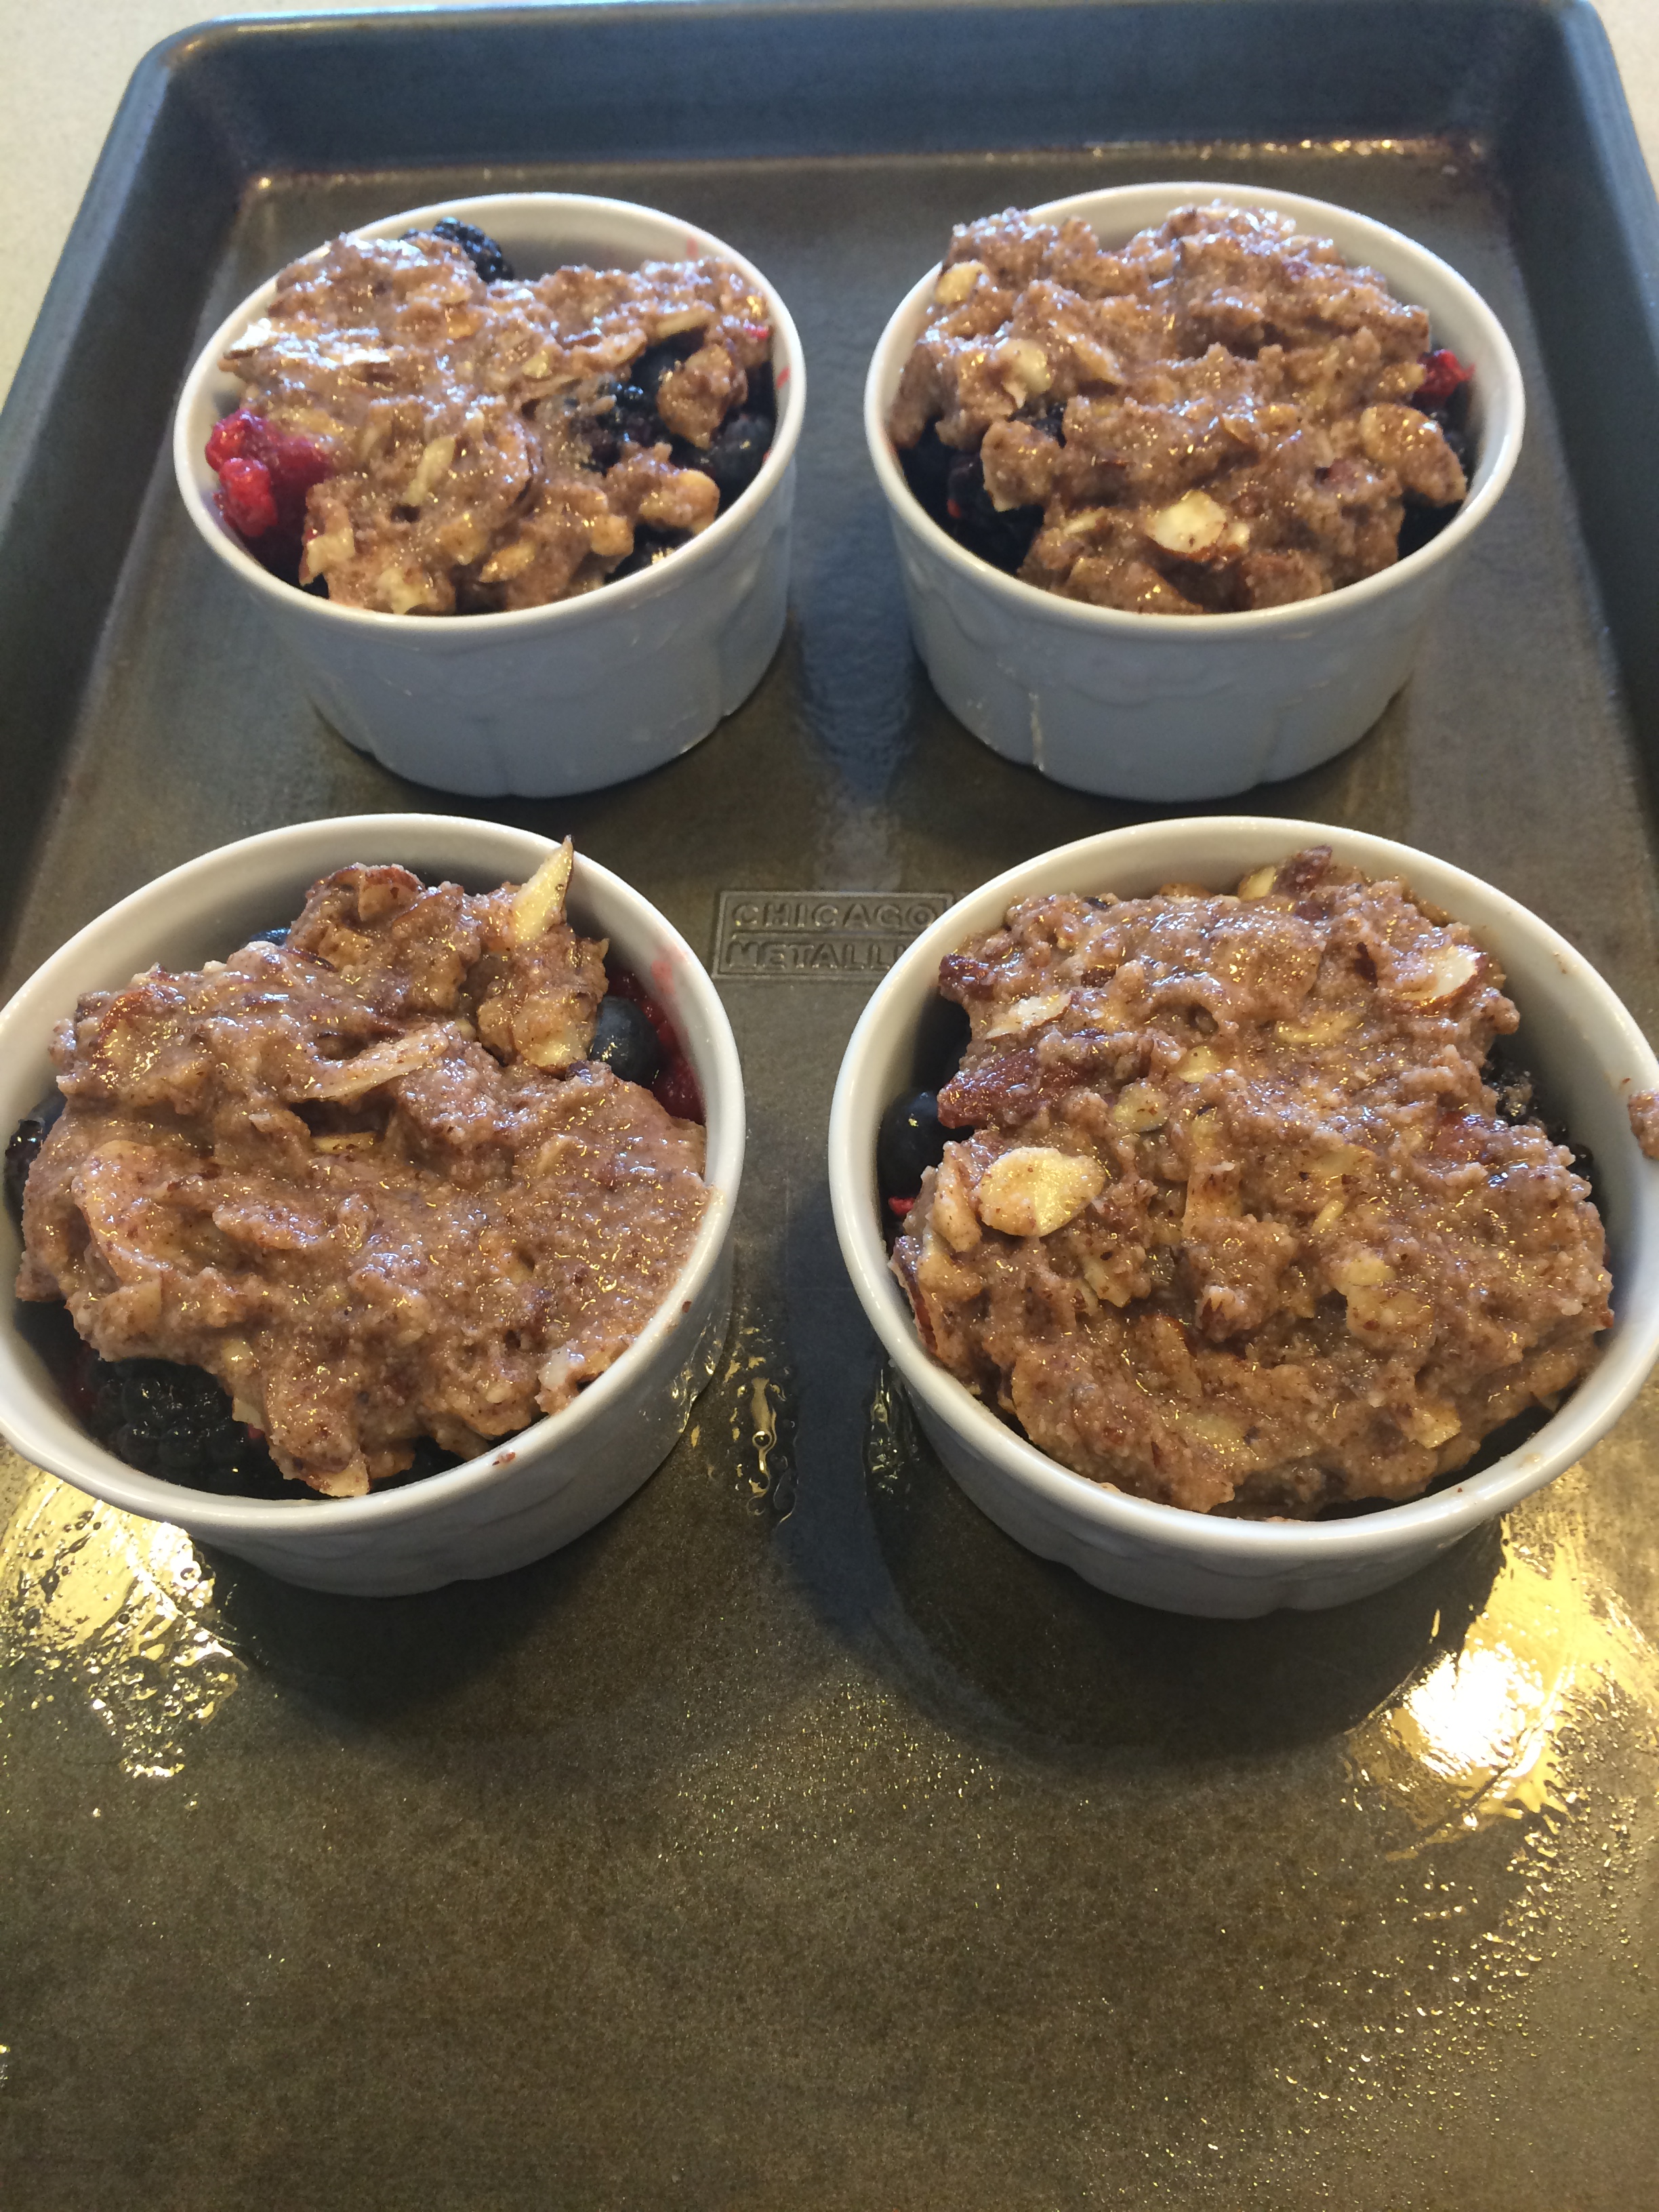
I had some fresh blueberries, some fresh blackberries and a few random raspberries that were going to go uneaten . What better time to try this? You can make this with just blueberries, or any berry or fruit you like. Berries are in abundance now and super delicious. This recipe took me all of 1/2 hour to put together. Use cooking spray on ramekins and baking sheet or use parchment paper for easier clean-up.  I used 4 ramekins but you can stretch this to 6 for sure.

I just sampled and can say that while they are not cloyingly sweet they have a bit of sweetness and crunch and you can really taste the tartness of the berries. I wouldn’t mind topping with some  ice cream or yogurt but I guess that would be defeating the purpose. There are some wonderful dairy-free ice creams out there and I suppose they would work just fine.

Just an addition– I ate it for breakfast this morning!!! with a little greek yogurt!

Ingredients:

app. 2 pints of berries — as I said you can mix them or use any one you like best. I used black, blue and raspberries. This can be made with apples, peaches, strawberries , nectarines and any combination of the above. I like making them in individual ramekins as a way of having portions already prepared which I think is very nice for dessert but equally nice made in a larger baking dish and you may need to double up on ingredients.

Ingredients:

Juice of 1 lemon

1 cup almond flour–available in most supermarkets today ( Whole Foods)

*1/2 cup slivered almonds–obviously can be made without nuts but I love the crunch

1/4 cup coconut oil, melted

2 tbsp. maple syrup ( use pure maple not the artificial one)

1 tsp. cinnamon

pinch of nutmeg

Directions:

Preheat the oven to 375 degrees

In a bowl, mix together the berries with the lemon juice. Divide between the ramekins ( spray ramekins first) you can also bake this in one large baking dish of course.

You can use the same bowl or a new one, and mix together remaining ingredients until combined. Spoon the almond mixture over the berries. Bake for app. 30 minutes , until bubbly and golden brown. Mine were done in 25 minutes so check your oven after 20 minutes to see where they’re at.

Let it cool slightly before serving.

Happy Memorial Day Blackberry Cobbler

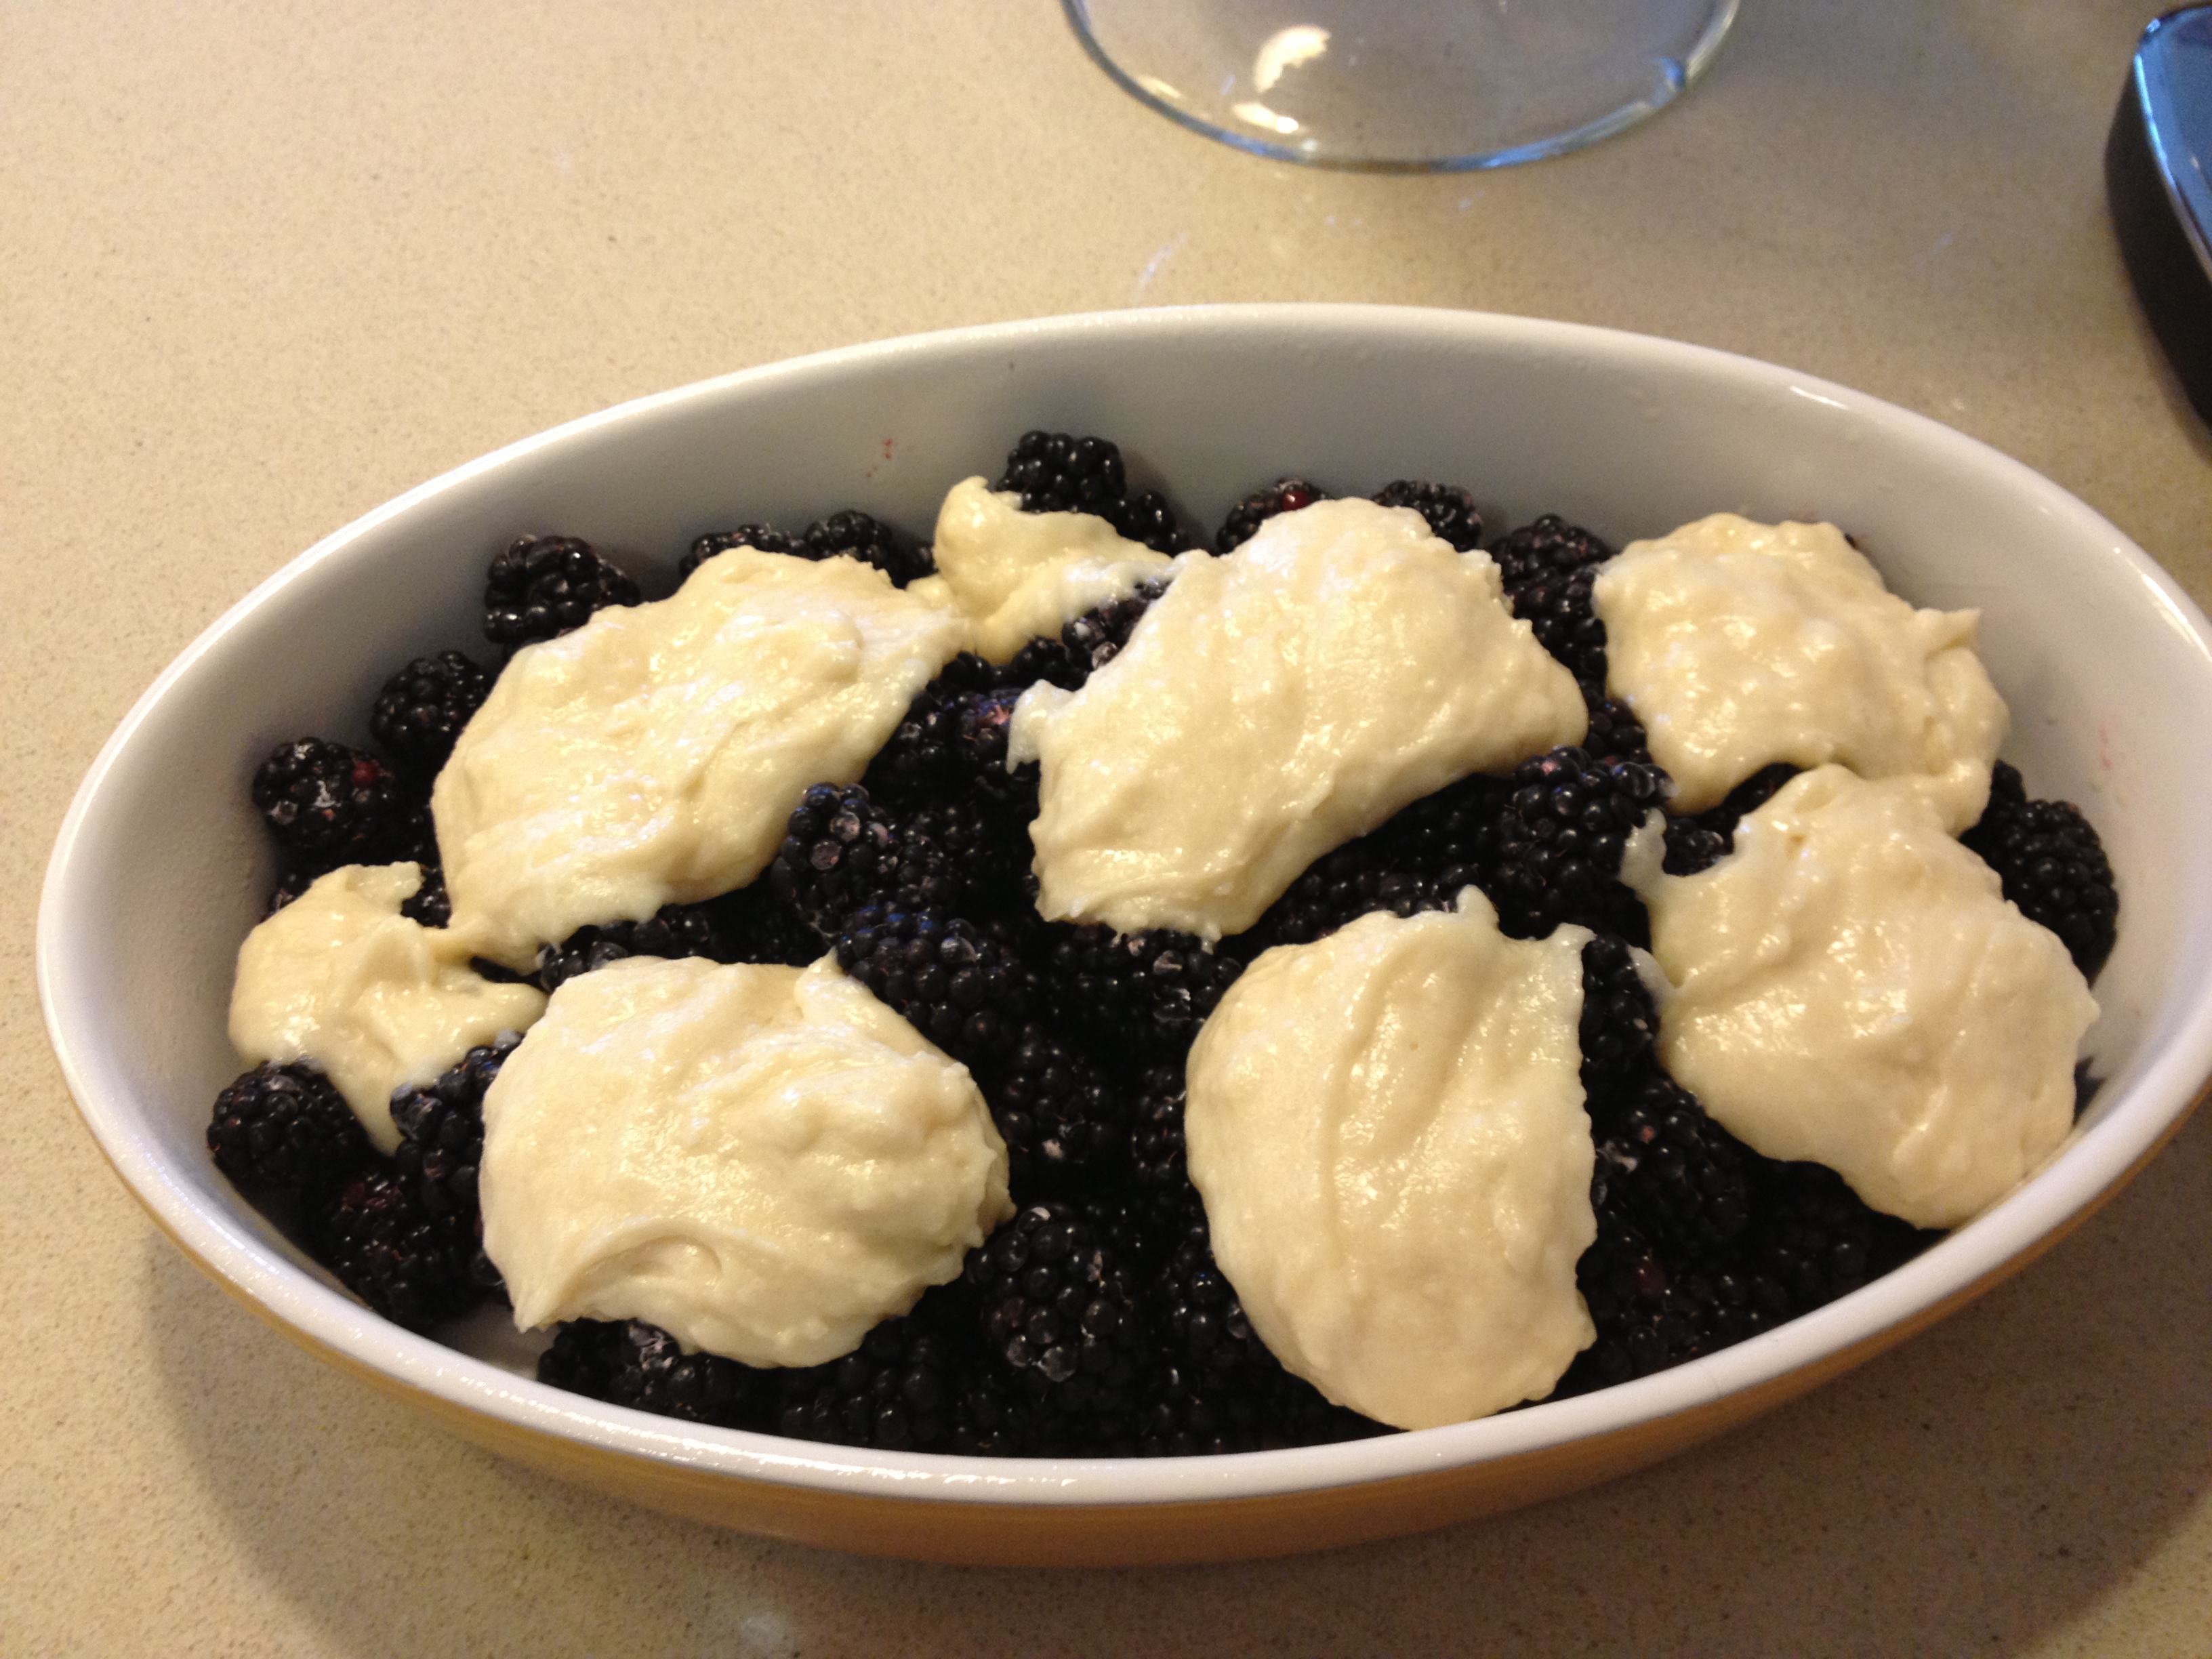
before cobbler gets baked , with biscuit topping

before cobbler gets baked , with biscuit topping

finished product - Yum

finished product – Yum

photo (3)

I saw these amazing blackberries at Whole Foods and had to buy them. They are nothing short of amazing right now. I have posted numerous blueberry cobblers , etc. Today is a version of my blueberry cobbler made with blackberries, and an opportunity to write up another recipe and wish everyone a wonderful Memorial Day weekend. Whatever you have going on  stop and think about all the very brave men and women who have served our wonderful country and continue to serve and protect every single day.

Enjoy the unofficial start of the summer season! We finally made it.

Ingredients:

1 pound or about 3 1/2 – 4 cups blackberries , cleaned , rinsed and dried

1 tablespoon arrowroot or cornstarch

2 tablespoons fresh lemon juice

1 cup all-purpose flour

3/4 cup sugar, I use regular granulated sugar for cobbler inside and on top I use turbinado sugar. 1/2 cup granulated sugar for inside cobbler and 1/4 cup turbinado

1 teaspoon baking powder

1/4 teaspoon salt

1/2 cup whole milk or you can use low-fat buttermilk

3 tablespoons unsalted butter, melted

3/4 cup boiling water

Directions:

Preheat the oven to 350 degrees.

In a bowl I place the clean blackberries that I’ve washed and dried. I sprinkle them with the arrowroot and lemon juice and mix gently  Set aside.

In a medium size bowl, I sift the flour, 1/2 cup sugar, baking powder and salt. Add the milk and butter. Stir until just combined, don’t over stir, it shouldn’t be smooth. Then by the moundful drop dough onto blackberries. I spread around a little bit but don’t completely cover the top of berries. ( see photo) the dough will spread a little once it’s baked.

Pour boiling water over the dough and fruit before you bake it. Sprinkle top with 1/4 turbinado sugar or regular sugar. Raw sugar or turbinado sugar makes it a little crunchier topping. I prefer it to regular sugar for a topping.

*if you are preparing in advance which is what I did today. Prepare up till the boiling water and sugar part. Refrigerate for up to 2 days , bring to room temperature then pour boiling water and top with sugar and bake. I baked for app. 45 minutes till dough gets browned and crackly looking and blackberries are bubbling. ( see photos)

Happy Cooking and Happy Memorial Day from my kitchen to yours.