Category Archives: dessert

My Favorite Macaroons–Traditional Style for Passover

photo 5 (40)I am not sure why I only make these macaroons during Passover. They are definitely my favorites; they are very easy to make, look totally professional, and are the Passover cookie in my book. These can be made ahead of time and stored. I usually make a few days before the Seder because I dip them in melted chocolate (just the tops). You don’t have to dip, you can leave plain. I dip up to 1/2 the macaroon in the chocolate. They are sweet and crunchy on the outside, and moist and chewy on the inside. After Passover, if there are any left over, I freeze them. Cannot have them lying around. Of course you may make these any time of year…they are always welcome on the menu.

*When dipping, just turn macaroon upside down (with peaked part into the chocolate). I usually go just a bit more than the top (probably 1/2 the macaroon into the chocolate). Use as much or as little as you like.

*just a little note, silpat is awesome to use for this recipe instead of parchment paper. You must cool completely before trying to lift off the paper. Also before you dip into chocolate I like to cool down completely.

Ingredients:

3  large egg whites (When I bake, I always leave eggs out so that they are at room temp.)

1/2  cup sugar

1/4 teaspoon salt

1 package (14 oz.) sweetened, flaked coconut ( I like this Angel Flake Baker’s Brand, but they’re all fine)

*1 package semi-sweet chocolate chips (You can really use any semi-sweet chocolate to melt. It’s just easy with the chips.)

Directions:

Preheat oven to 350 degrees. Line a baking sheet with parchment paper (you can use non stick cooking spray, like Pam, but I just line with parchment, which works really well).

In a large bowl, whisk together egg whites, sugar and salt until frothy. With a fork, stir in coconut until moistened.

Using a level tablespoon (measuring ones are perfect), pack the mixture into the spoon, so all macaroons are equal size. Drop mixture onto prepared sheet (cookies will not spread). Bake until golden brown, about 25 – 30 minutes. Towards the end, check on them to be sure they don’t burn. I make a little peak with my fingers on the cookies before I bake them (this makes for easier dipping).

*To melt chocolate on stove top: I bring a small saucepan of water to a rolling boil, and on top of it put a small stainless (oven proof) bowl filled with the chocolate.( works like a double boiler if you don’t have one) When it completely melts, take off heat. Once macaroons are completely cool, you can dip the tops. Just make sure chocolate and macaroons are cooled off first. Just dip top of cookie in chocolate and place on a plate to cool. When I am all done, I refrigerate the macaroons to set the chocolate. You can leave in fridge until you are ready to serve and take out with enough time to bring to room temp. Before serving, I usually use a cool cookie sheet with parchment paper to cool off cookies once they’ve been dipped.

*should yield about 20 – 25 cookies. You can double if you’d like.
Chocolate Banana Bread

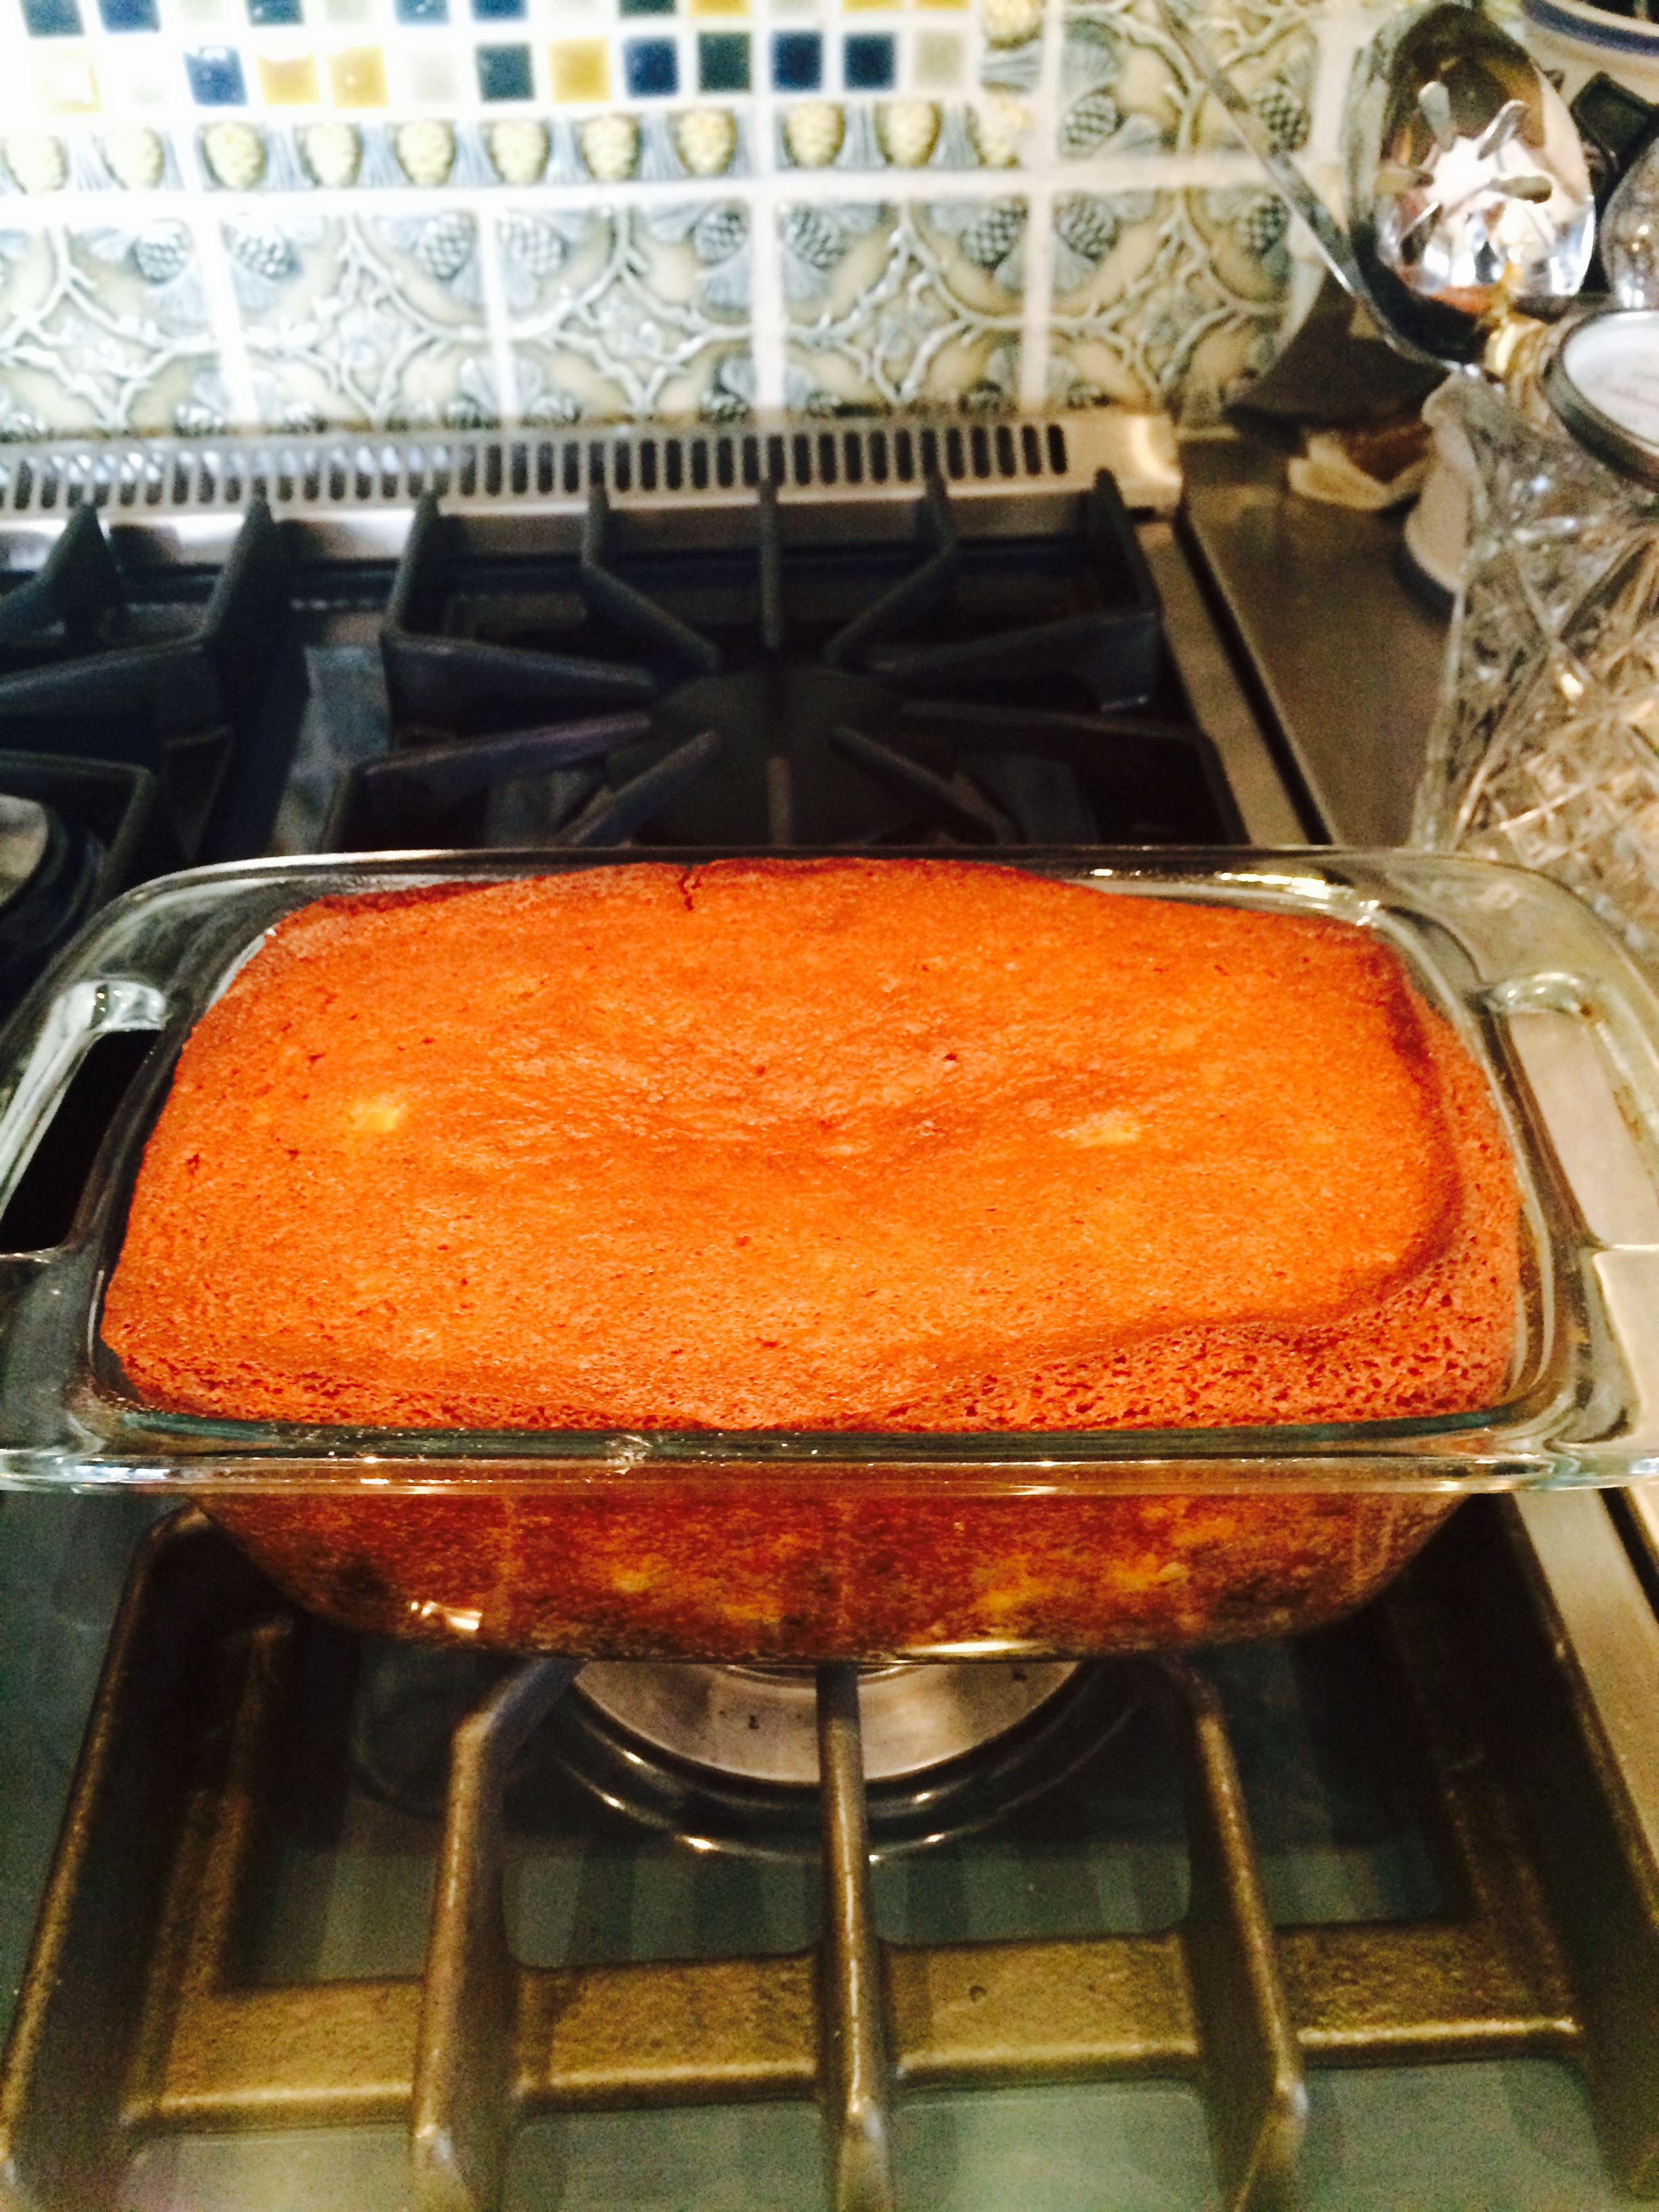
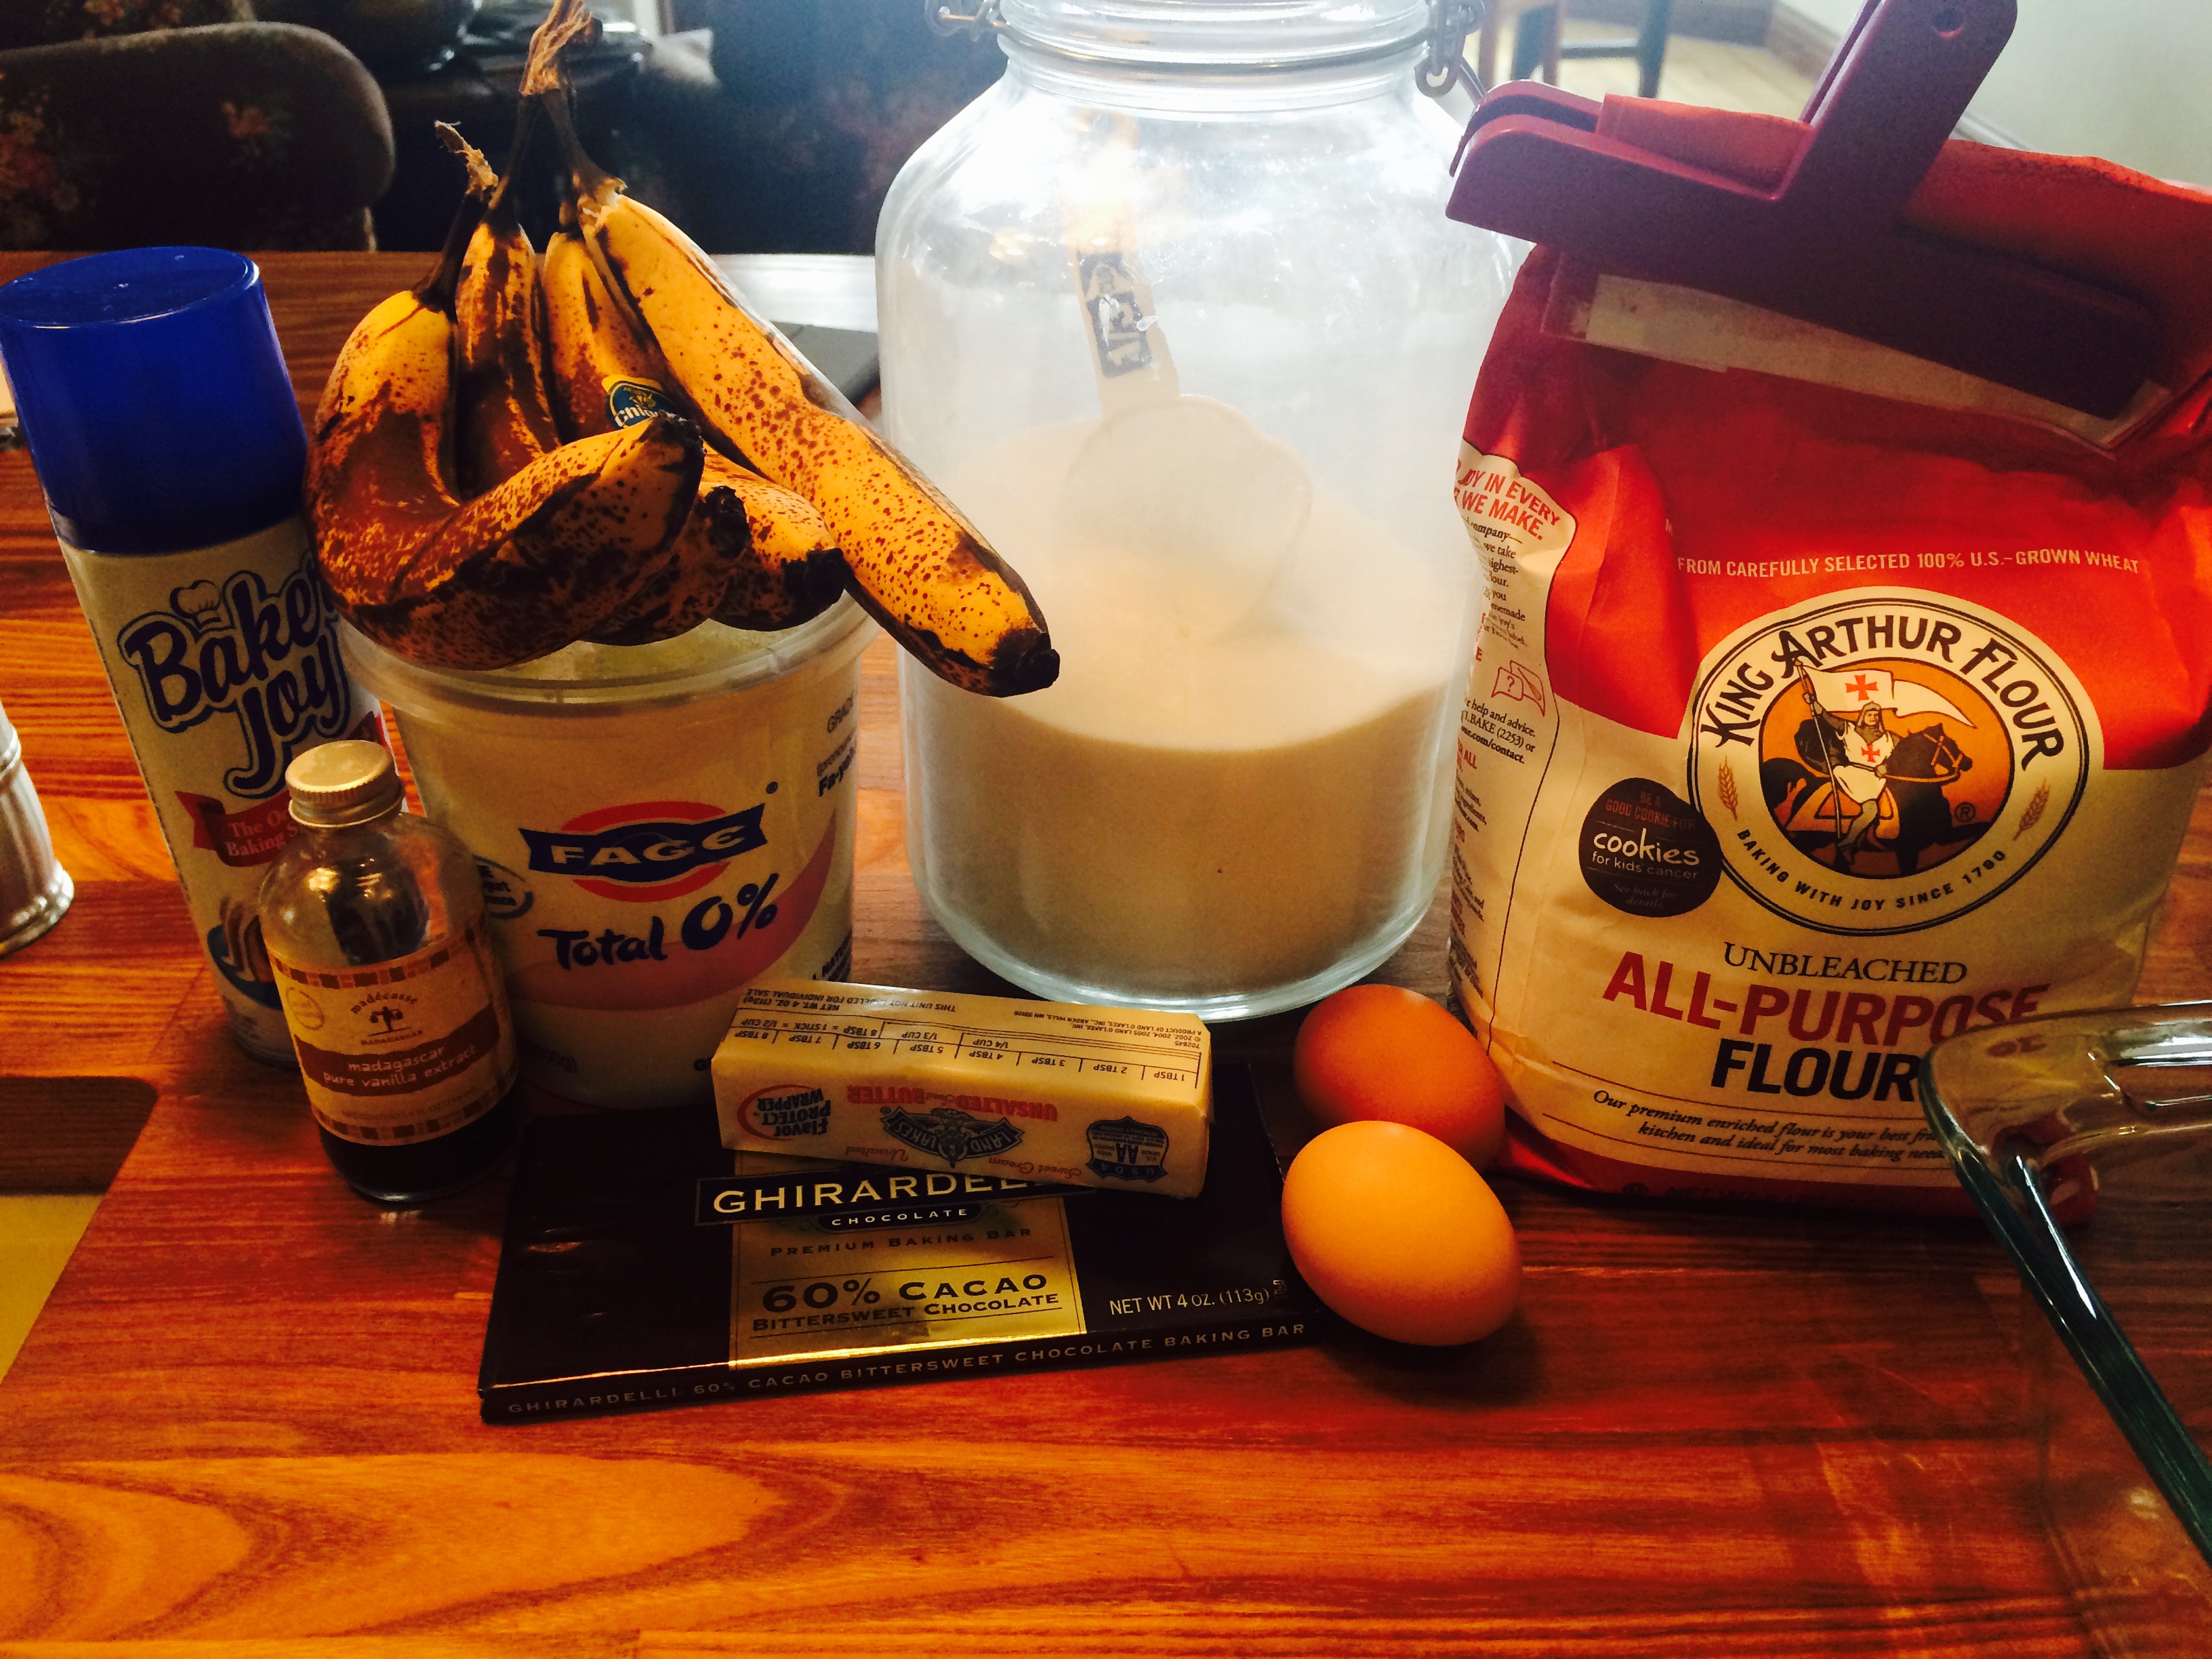
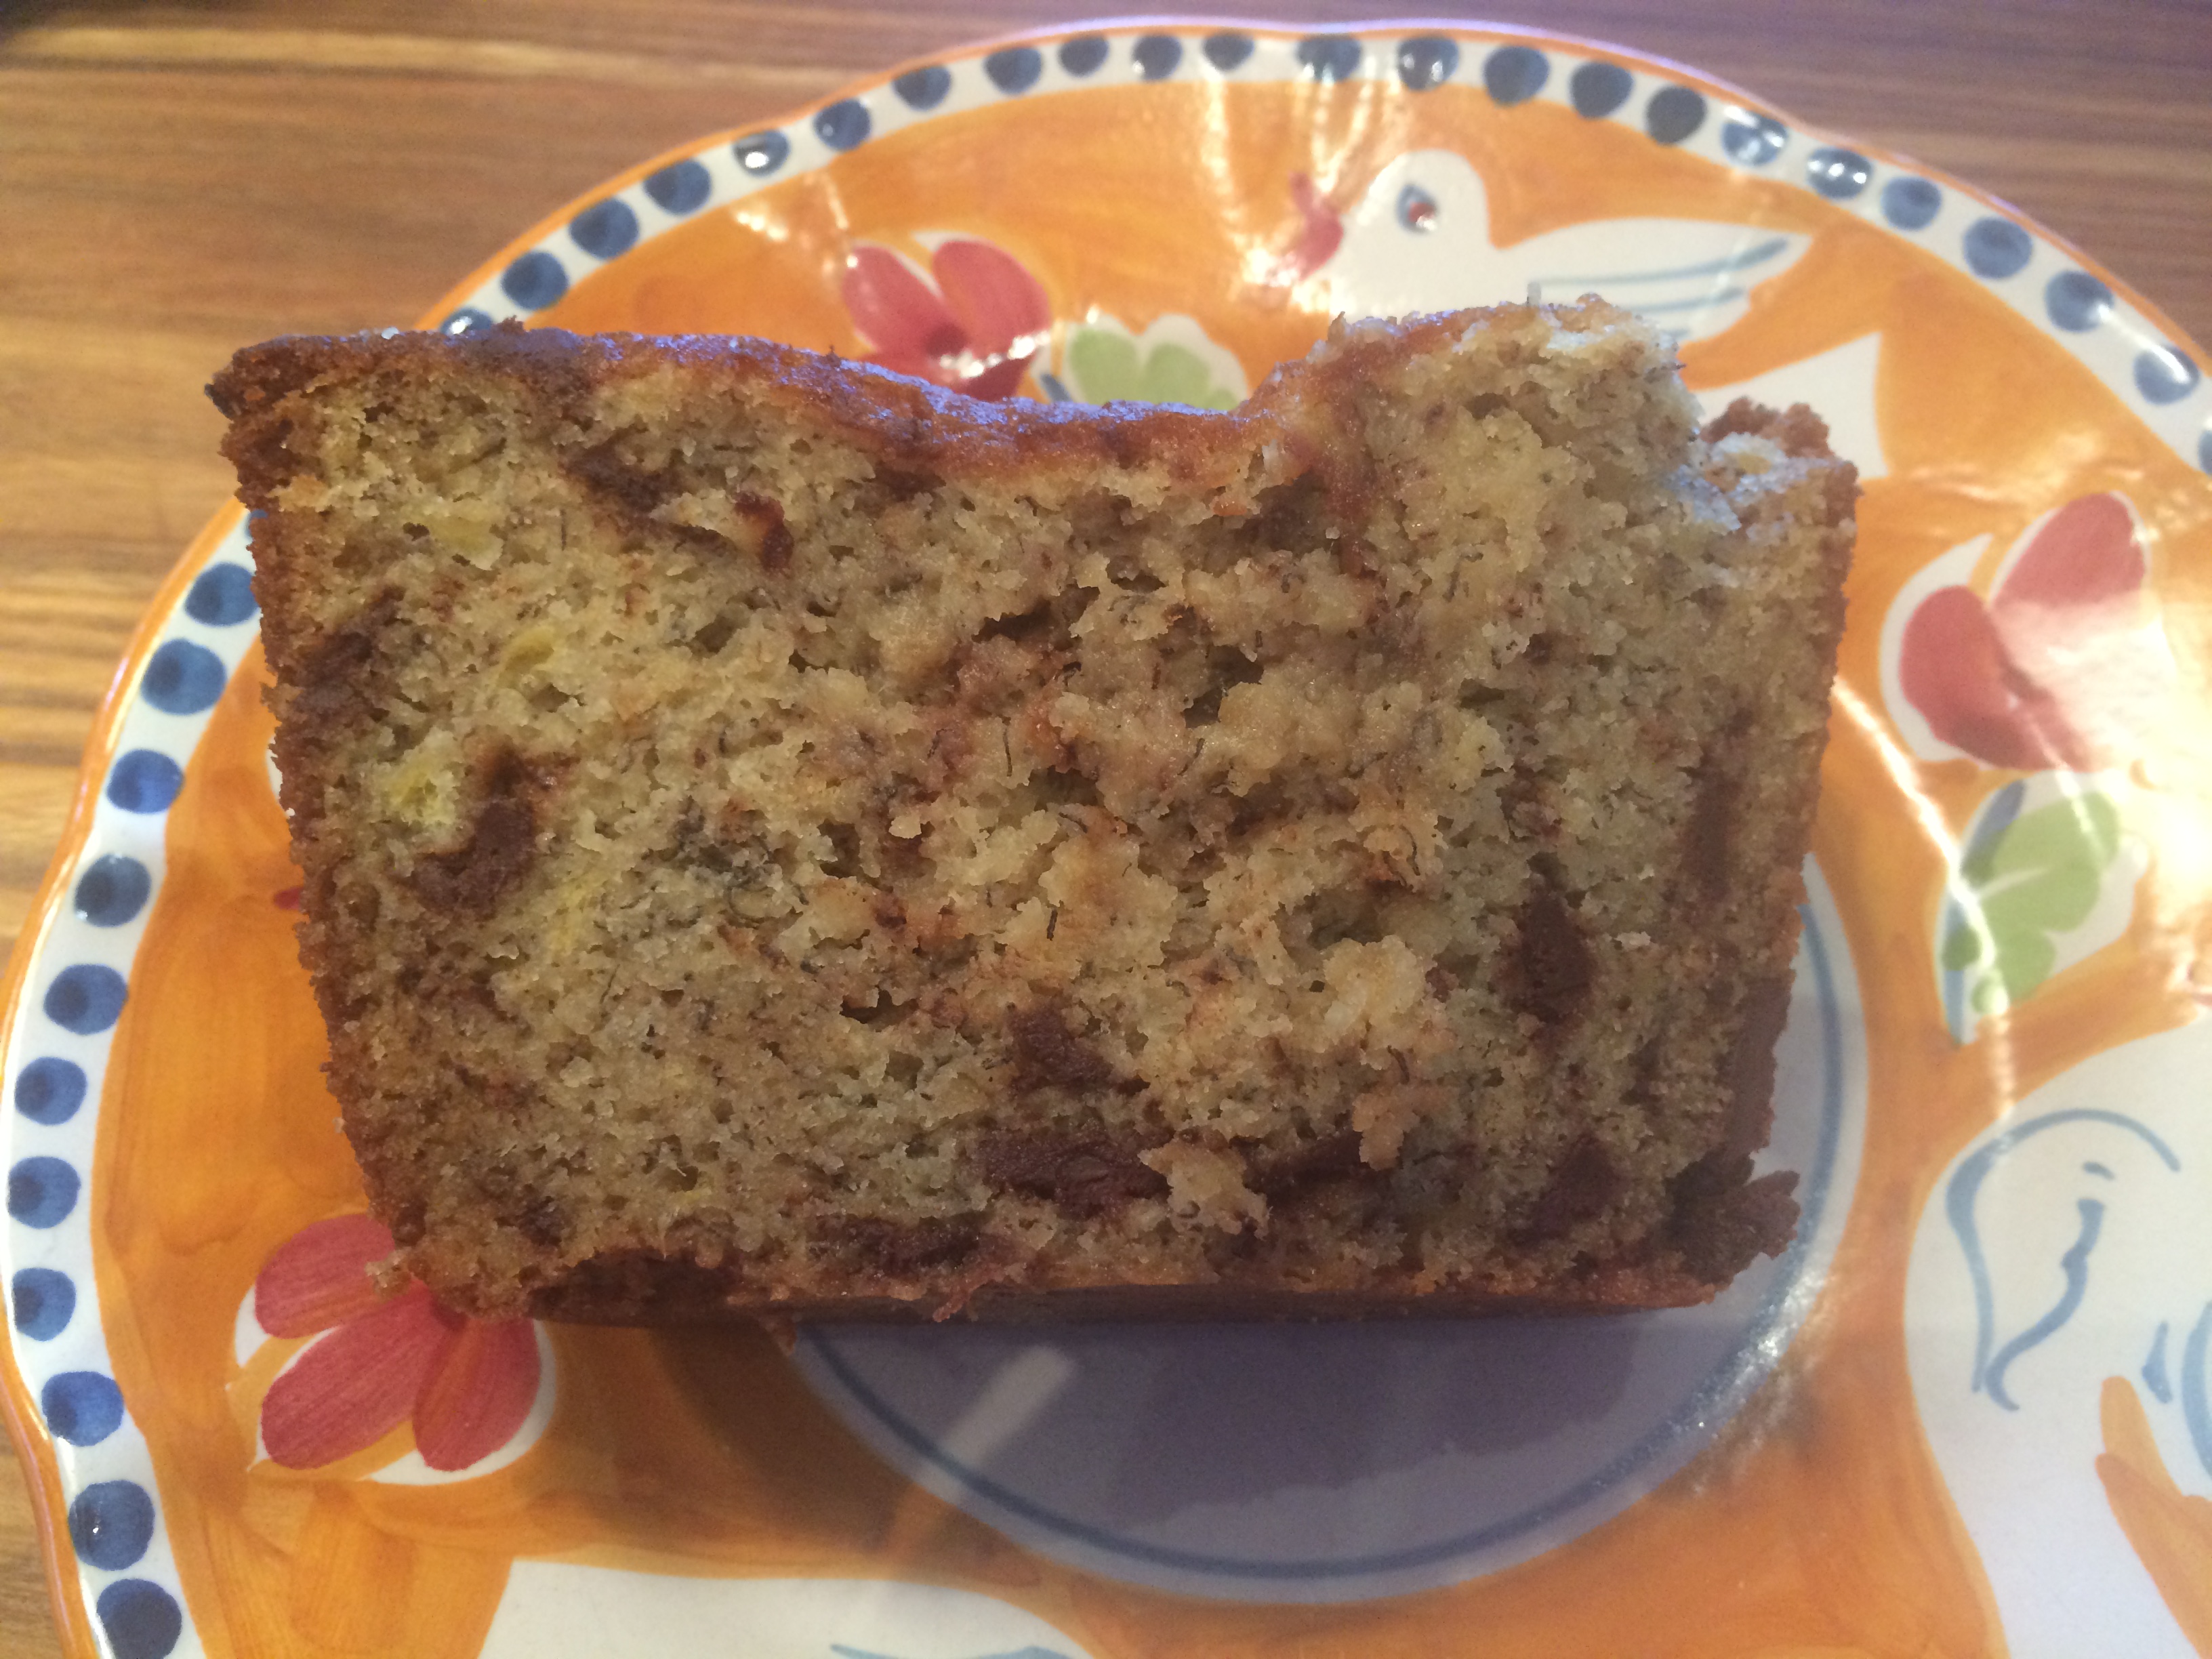
IMG_6987FullSizeRender (9)This is an amazing banana bread made with chopped bittersweet chocolate . Totally amazing and very hard to resist. You can make ahead and freeze up to 3 months! Of course I had 4 very over-ripe bananas and I had all of the other ingredients in the house so why not bake a banana bread but with chocolate this time out. By chopping up the chocolate you get different sizes of chocolate bits , some small and some large. I prefer chopping up the chocolate to using chocolate chips in this bread, it definitely adds more interest.

*FullSizeRender (6)FullSizeRender (3) If your bananas aren’t ripe enough and you really want to bake this bread, put them in a 300 degree oven unpeeled for about 15 minutes to soften. Make this bread–you won’t be sorry.

Ingredients:

1 stick unsalted butter, room temperature

1 2/3 cups all-purpose flour

1 teaspoon baking soda

1/2 teaspoon fine salt ( table salt)

1 1/4 cups sugar

2 large eggs, room temperature please

3 – 4 mashed over-ripe bananas app. 1 1/2 cups

2 tablespoons greek yogurt (plain) I used 0% fat or you can use sour cream

1 teaspoon vanilla extract

4 ounces bittersweet chocolate, chopped . Chocolate comes in bars available in the baking section of most supermarkets. There are many kinds of baking chocolate but this recipe calls for bittersweet not unsweetened.

Directions:

Preheat oven to 350 degrees. Spray a 5×9 inch loaf pan , I love Bakers Joy cooking spray for baking. In a medium bowl, whisk together flour, baking soda, and salt.

In the bowl of an electric mixer beat butter and sugar on medium-high until fluffy app. 3 minutes or so. Add eggs, one at a time, beating well after each addition and scraping down the sides of the bowl.

Beat in mashed bananas, yogurt, and vanilla. Beat in dry ingredients and chocolate on medium speed. Pour batter into prepared baking pan. Bake until a cake tester inserted into the center of loaf comes out clean, app. 50 – 60 minutes. I baked mine for about one hour.

Let bread cool in pan for about 15 minutes then turn out and let cool completely on a wire rack.

Apple and Cranberry Cake on my Table for Thanksgiving

It’s so hard to make a choice of Thanksgiving desserts. Usually by the time dessert rolls around everyone is so full . Somehow though everyone seems to rally for dessert, no matter how full. It’s been on my mind what to bake? I already baked my apple pie which is in my freezer from my Baking Class at ICE.  I know so nice and light right??? Well it’s Thanksgiving, and no one is eating the whole cake, so don’t moan and groan. This is an easy one to do. Pumpkin Cheesecake, not so easy. So if you haven’t finalized your decision, this is a great way to go.  I got this recipe from Barefoot Contessa. (Ina Garten). How easy is that? cookbook. This is a wonderful recipe to make for as long as you have those wonderful cranberries, so stock up in the freezer while they’re around.

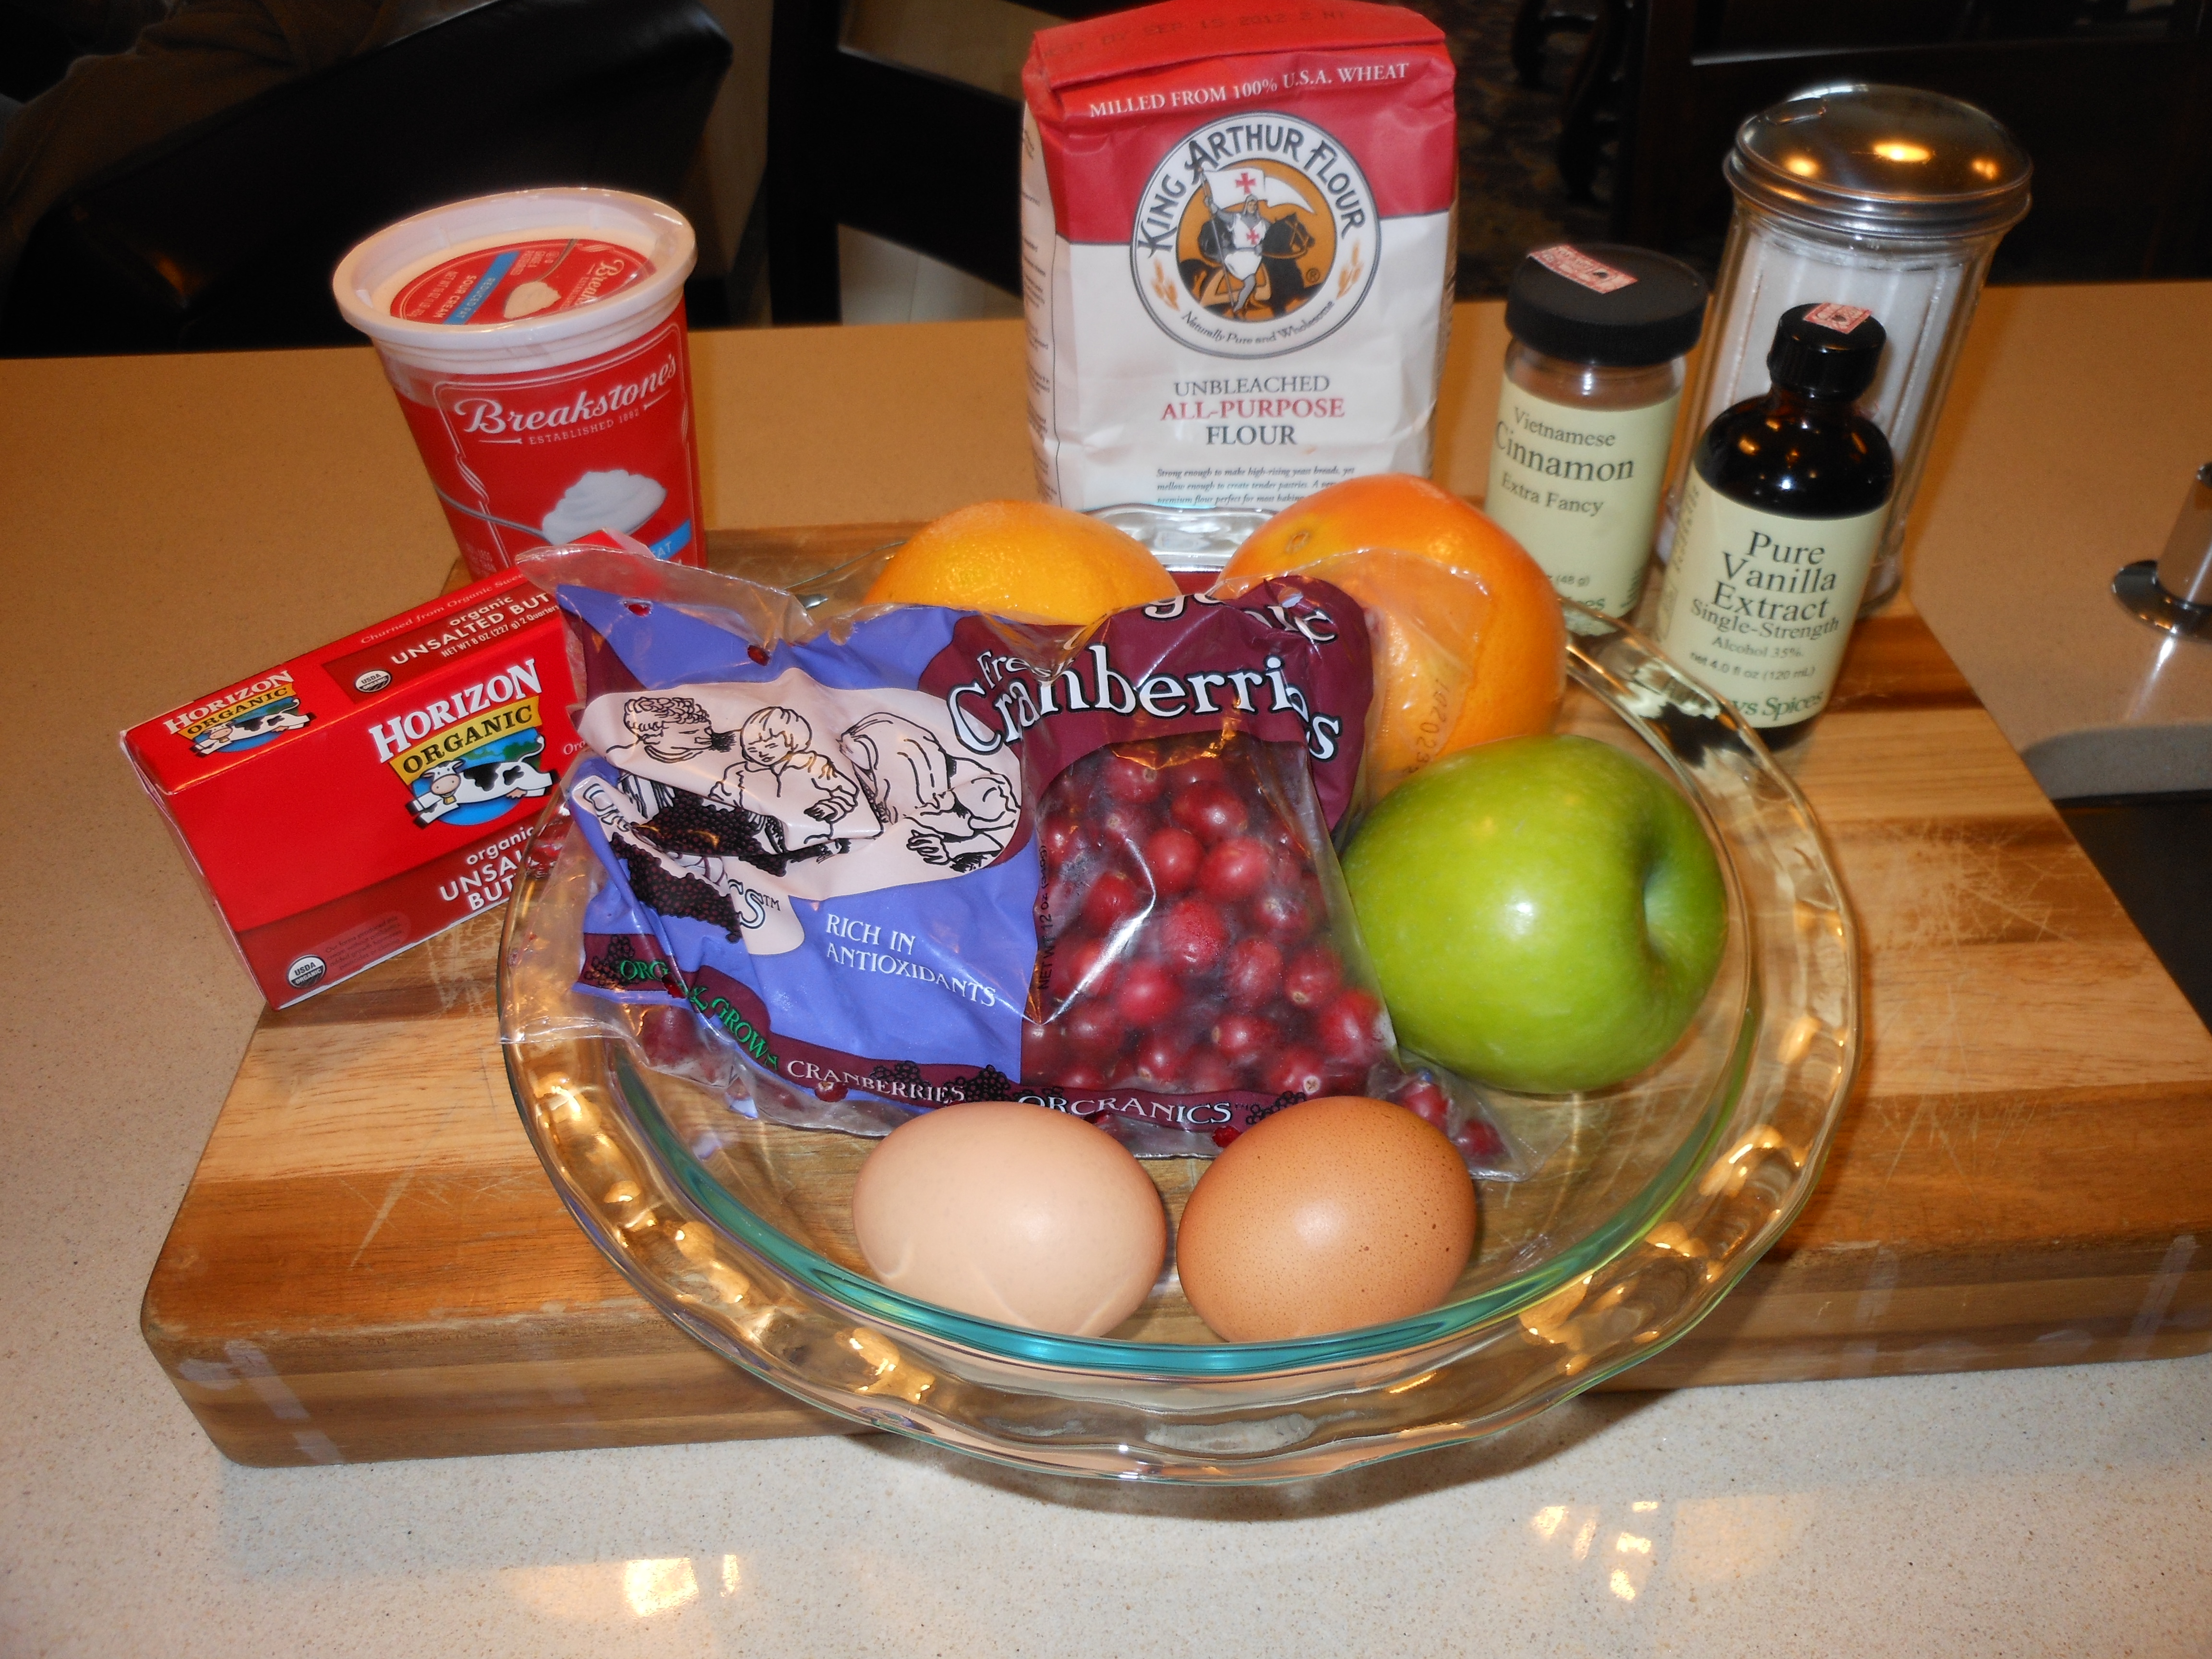
Ingredients:

10″ glass (Pyrex) pie plate

1 bag of fresh cranberries (rinse and pick out stems, etc.)

1 Apple peeled, cored, and diced (Granny Smith is a good choice here

1/2 cup light brown sugar, lightly packed

1 tablespoon orange zest (probably need 2 average size oranges)

1/4 cup freshly squeezed orange juice

1 1/8 teaspoons ground cinnamon,( divided 1 Teaspoon for fruit mixture and 1/8 teaspoon for topping)

2 xtra large eggs, at room temp.

1 cup plus 1 tablespoon  granulated sugar

1 stick unsalted butter, melted and cooled slightly

1 teaspoon pure vanilla extract

1/4 cup sour cream (lite OK) not fat free please

1 cup all-purpose flour

1/4 teaspoon kosher salt

Directions:

Preheat oven to 325 degrees

Combine the cranberries, apple, brown sugar, orange zest, orange juice and 1 teaspoon of cinnamon in a medium bowl. Set aside.

In the bowl of an electric mixer with the paddle attachment, beat the eggs on medium-high speed for about 2 minutes. With the mixer on medium, add 1 cup of the granulated sugar, the butter, vanilla and sour cream and beat until just combined . On low speed, slowly add in the flour and salt.

Pour the fruit mixture evenly into a 10 inch glass pie plate (Pyrex) Pour the batter over the fruit, covering it completely. Combine the remaining 1 tablespoon of granulated sugar and 1/8 teaspoon of cinnamon and sprinkle over the batter. Bake for 55 – 60 minutes, until a toothpick or cake tester inserted into the middle comes out clean and the fruit is bubbling around the edges.

Serve warm or at room temperature. Delicious with vanilla ice cream.

Banana Pudding from Magnolia Bakery – One of my Top Ten Desserts that you don’t even bake

Completely decadent and totally ridiculous in calories and richness, and I love it. It’s so very delicious. My daughter Jennifer has made this dessert numerous times over the last few years. It is actually a subtle taste of bananas, but I wouldn’t make this if I didn’t like bananas. I happen to just adore bananas and I absolutely love love this pudding. I cannot have it in the house because I will continually find an excuse to go into the fridge and eat it till it’s pretty much all gone. Jenn made it for dessert on Thanksgiving, it was one of 3 majorly desserts and it is really over the top. As full as I was and swearing I wasn’t going to eat another thing for at least a week, when I saw this  pudding I knew I was going to eat it.  She left the uneaten portion of it in my house and I couldn’t believe it I had to wake up to that bowl in the fridge. I find it impossible to resist, and I know others who suffer from this same fate. If you’re in the market for a purely decadent rich over the top dessert then this is it for you. Probably up there in my top ten desserts ever. This is from the More from Magnolia Cookbook so how could it be bad?

*this recipe really needs time , so you must start the day before to let initial pudding set, and then you’ll need at least 4 more hours minimum before serving. So you must factor time into your preparing of this awesome pudding.

*** sorry for the lack of pictures maybe this Thanksgiving I’ll remember to take more.

Ingredients:

1 14 ounce can sweetened condensed milk

1 1 /2 cups ice-cold water

1 3.4 ounce package instant vanilla pudding mix ( preferably Jell-O brand)is there another brand?

3 cups heavy cream

1 12 ounce box Nabisco Nilla Wafers ( no substitutions) is there another brand?

4 cups sliced ripe banana

Directions:

In a small bowl, on the medium speed of an electric mixer, beat together the sweetened condensed milk and cold water until well combined, about 1 minute. Add the pudding mix and beat well, about 2 minutes more.* Cover and refrigerate for 3 – 4 hours or overnight, before continuing. It is very important to allow the proper amount of time for the pudding mixture to set.

In a large bowl, on the medium speed of an electric mixer , whip the heavy cream until stiff peaks form. Gently fold the pudding mixture into the whipped cream until well blended and no streaks of pudding remains.

To assemble the dessert, select a large, wide bowl ( preferably glass) with a 4 – 5 quart capacity. Arrange one-third of the wafers to cover the bottom of the bowl, over-lapping if necessary, then one-third of the bananas and one-third of the pudding. Repeat the layering twice more, garnishing with additional wafers or wafer crumbs on the top layer of the pudding . ( Just crush up a few remainder cookies in food processor) Cover tightly with plastic wrap and allow to chill in the refrigerator for *4 hours–or up to 8 hours, but no longer! Serve and behold the love!

Serves anywhere from 12- 15

It’s a large dessert and a substantial one. It stands alone beautifully!

Break-the-Fast Food – Blintz Souffle

Here we go again…another holiday to cook for. Most of breaking the fast is taking in bagels, fish, etc. Easy to do. But I still try to make a few dishes and this recipe is an oldie but a goodie. I have been making this recipe since 1975 and it never gets old.  This dish can be assembled ahead of time, kept in the refrigerator and baked right before eating. This is a keeper and a tradition in my house. Always delicious. You can buy almost any of the frozen blintzes. Some stores have homemade ones, but it doesn’t really make that big of a difference with this recipe. Enjoy! This is super easy, with excellent results.

INGREDIENTS:

6 blintzes (you can use cheese or fruit-filled, whichever you like. Depending on how many people I’m feeding, I usually make 1 fruit and 1 cheese tray)

2 eggs

1/4 cup sugar

1 tbsp. unsalted butter or margarine

3/4 cup sour cream (lite is fine but I wouldn’t use fat-free)

1 tsp. vanilla

Dash of cinnamon

DIRECTIONS:

Preheat oven to 350 degrees.

Melt butter or margarine in saucepan. Spray baking dish with Pam spray (Original). Mix remaining ingredients in a bowl together. Place frozen blintzes in baking dish. I usually use a 9×13 size dish but anything close to that will work. You can double the recipe, in which case you’d obviously need a larger baking dish (you need room for the blintzes to expand a little and for the egg mixture to rise around it. Don’t spread it too thin.) Pour the melted butter on top of the frozen blintzes, followed by the sour cream mixture. Bake at 350 degrees for approx. 30-40 minutes. Let it sit for a few minutes out of the oven before cutting into it.

Baked French Toast — all time best

DSCN4275

DSCN4288

DSCN4283

DSCN4274

DSCN4270

DSCN4302

DSCN4294I posted this originally back in October 2011 for Yom Kippur break fast. It is truly one of the best French toast recipes I’ve ever made.  I include it every year since my friend Ilene Stern gave it to me. I never have a single piece left. Delicious and decadent, perfect brunch and breakfast food. I almost always include it in my Mother’s Day Brunch as well. Once you’ve made this recipe there is no turning back, your whole family will love it and you’ll have to make it every time.

The only downside is that you must prepare and refrigerate the night before without cooking it, you cannot cook this dish till you’re ready to eat it, the bottom will get hard like a caramel candy would. So cook right before you’re going to serve. Enjoy!

*recipe as is should serve 6- 8 if you have more people make 2 trays!

Ingredients:

1 cup packed light brown sugar

1 stick unsalted butter

2 tbsp. corn syrup ( I use Karo Original light corn syrup)

5 eggs (room temperature please)

1 1/2 cups milk ( you can use low-fat, I use Skim Plus)

1 tbsp. vanilla

1 package of sliced cinnamon bread. ( Pepperidge Farm is fine) if you can get thick slices it’s great , but the thin kind will work just double stack them it will be fine) You probably will use 12 slices of bread per tray. You will have 6 stacks of 2 slices each, 12 slices total, or 6 thick slices of cinnamon bread. If you can’t find just cinnamon bread use raisin cinnamon bread it’s easier to find .

Directions:

Melt butter, add brown sugar and corn syrup and combine well. Spray a 9×13 baking dish, Pyrex works well here. Pour butter mixture into baking dish and arrange bread slices flat in the mixture ( you will double stack the thin sliced bread) Unless the bread is 1″thick you will be doubling the standard sliced bread. Squeeze the bread to fit–it should hold 12 slices ( 6 double stacks), 3 on each side of a 9×13 baking dish.

In a blender mix the eggs, milk and vanilla and pour over the bread slices, covering them completely. Cover and refrigerate overnight. The bread will absorb all the liquid by the morning, so if you need to travel with it will be fine.

Uncover and bake in a preheated 350 degree oven for 30 minutes. Once it’s out of the oven you can dust with powdered sugar, but not necessary. Serve right from the baking dish.

*if you let this sit out too long before serving, the bottom may get hard like a praline candy. It never ever lasts long enough for this to happen at my table.

Look at my original recipe post on October 5 2011. More Break Fast: the all-time best Baked French Toast, I swear.

Applesauce and Raisin Cake – an Homage to the Bundt Queen

I always call my friend Susan the Queen of the Bundt Cake. It certainly seems to be her calling, as she is always coming up with new and delicious Bundt Cakes for all of us to try. I just hope I do her justice in trying to duplicate it. She made this cake for everyone last New Years  and I have been wanting to try it ever since.  I had to change one of the ingredients because I bought chunky applesauce instead of plain applesauce. Of course, if you’re so inclined you can make your own applesauce (I wasn’t so inclined today!).  The original recipe hails from The Silver Palate, and I have to say this is one cookbook you don’t want to be without. There are so very many wonderful recipes in it. This cake has a slightly spicy flavoring, and is just so darn good. I am very happy to report that this cake came out awesome! Super Delicious with the chunky applesauce. Very moist and delicious, cooked perfectly at 1 hour and 10 minutes. Thanks Suki and the Silver Palate!

This cake can be a wonderful addition to your holiday table, applesauce and raisins just so perfect for Rosh Hashana.

Ingredients:

1 cup (2 sticks) unsalted butter, plus a little extra for greasing the pan (Butter should be at room temperature.  I woke up early and didn’t have time to let it sit so I just put it in microwave to soften for 15 seconds.)

*if baking for the Jewish Holidays and don’t want to use butter you can use margarine

3 cups all-purpose flour

2 cups sugar

2 eggs (at room temperature)

2 cups applesauce (I used Chunky because probably didn’t have reading glasses in market and grabbed it.)

1 teaspoon vanilla extract

1 teaspoon ground cinnamon

1/2 teaspoon ground nutmeg, or 1 teaspoon freshly grated

2 teaspoons baking soda

1 cup raisins

Lemon/Orange Icing ingredients:

1 cup confectioner’s sugar

1/2 teaspoon ground cinnamon

1 1/2 tablespoons fresh lemon juice

1 1/2 tablespoons fresh orange juice

Directions:

Preheat oven to 350 degrees.

In a mixing bowl (electric mixer), cream together the butter and sugar until light and fluffy. Add the eggs, one at a time, beating well after each addition. Stir in the applesauce and vanilla.

Sift the flour, cinnamon, nutmeg and baking soda together then add to applesauce mixture. Next, sprinkle in the raisins, and blend gently but thoroughly.

Pour the batter into the tube pan and set on a rack in the center of the oven. Bake until a cake tester inserted into the cake comes out clean. 1 hour and 10 – 15 minutes. I cooked it 1 hour and 10 minutes.

Cool in the pan for at least 15 minutes (I will leave it all day as I go out hiking, and turn it over when it is completely cool when I return.)  When it is completely cool, I will make the icing and drizzle over the top. A little trick is to poke little holes in the cake (on top, with cake tester or toothpick) and pour icing over the cake and it will go into cake and infuse some of the lemon/orange directly into cake.

Instructions for icing:

Sift the confectioner’s sugar and cinnamon into a small bowl.

Dribble in the juices, stirring constantly until the icing is smooth. Drizzle over completely cooled cake.

*should be enough icing for 1 Applesauce Raisin Cake

Noodle Pudding with Apricot Nectar

I’ve tried so many noodle puddings, but keep coming back to the same old , same old. they’ve been passed down in so many different incarnations. i don’t even know what the original one is anymore. this is my most favorite. also a perfect break fast food. can and should be made ahead of time, they hold together better.  we used to add apricot jam, but it really was overkill. we omitted it, and it is perfect just the way it is. thanks to karyn r. for this noodle pudding and for being such a great cooking buddy for as far back as i can remember.

1 lb. noodles ( i use extra wide egg noodles, you’ll need a bag and 1/4 app. just eyeball it)

1 cup sugar

6 eggs ( I use extra large and at room temp. just make sure they are not right out of fridge) they work much better when they are not right out of fridge in baking.

1 tbsp. vanilla

1 stick unsalted sweet butter(melted)

6 oz. cream cheese (softened at room temp)

1 1/2 cups milk ( I use skim plus) would not use regular skim milk

2 cups apricot nectar (available in most supermarkets)

Topping:

1 1/2 cups cornflake crumbs

2 tsp. cinnamon

1/2 cup sugar

1 stick butter (melted)

app. 1/2 jar of apricot jam

Directions:

 cook noodles. mix 6 beaten eggs with the tablespoon of vanilla in one bowl. in another bowl melt 1 stick sweet butter(unsalted)softened cream cheese, and milk. add the apricot nectar and sugar. mix all ingredients together and put in large pyrex type baking dish. mix topping ingredients together, put on top of noodle pudding. cook at 350 degrees for one hour.   i usually cook this ahead of time, cook for 1/2 hour and then freeze it till i am ready to use, take out of fridge bring to room temperature and bake it for another hour till brown on top and cooked through. noodle puddings are best if you let it sit a while (at least 15 minutes before serving) they hold together better that way. can be served at room temperature.

*serves about 12 – 15 people doubled

Summer Crumble — Peach and Blueberries

photo 3 (6)photo 3 (7)photo 2 (6)photo 2 (8)A crumble or a crisp whatever you call it there is no reason not to make this simple delicious dessert. In the summer you have so very many seasonal fruits to choose from and all sorts of delicious combinations. I used peaches and blueberries today because the peaches are amazingly beautiful and I had an abundance of blueberries. Any stone fruit, berries, or pitted cherries will work. In the Fall I make this with apples and pears which is Joel’s favorite of all time. The fruit comes out soft and tender and the crumbly crunchy cap is ever so crisp. Delicious served warm with a scoop of vanilla ice cream.

I used an 8×11 pyrex but any baking dish around that size will work out just fine.

You’ll need a food processor to do the crisp topping this way. You must use cold butter straight out of fridge. I also added a little bit of chopped nuts but this is totally optional.

Plums and Nectarines work just as well. I also sprinkled a dash of cinnamon on the top (just a touch) right before baking , this is also totally optional.

Ingredients:

Fruit Mixture:

app. 8 cups sliced stone fruit, berries or pitted cherries I used peaches which I pitted, peeled and sliced and 1 container of blueberries (6 oz.)

1 cup sugar

2 Tbsp. Corn Starch

1 tsp. finely grated orange zest ( almost a whole orange)

2 Tbsp. of freshly squeezed orange juice from zested orange

pinch of kosher salt

In a large bowl toss fruit, sugar, cornstarch, salt, zest and juice together with a spoon. Set aside. I also sprayed baking dish with Bakers Aid cooking spray which is great stuff.

Preheat oven to 375 degrees.

Crumble Topping:

Ingredients:

3/4 + 1/4 cup of old-fashioned oats separated. 3/4 cup will be used at beginning and 1/4 cup at end.

1/3 cup all-purpose flour

1/4 cup light brown sugar ( firmly packed)

1/2 teaspoon kosher salt

1 stick chilled unsalted butter , straight out of fridge and this is important here. Butter should be diced into small pieces. Cut stick in half then cut into small uniform pieces.

Directions for crumble topping:

In the bowl of food processor with blade , pulse oats, flour, light brown sugar, salt together. Then through the top tube drop in diced cold butter and pulse until no dry spots remain, it takes a few minutes. Transfer to a bowl and add in 1/4 cup old-fashioned oats with your fingers.

Transfer fruit mixture to prepared baking dish, scatter crumble topping over the mixture. I added some chopped nuts and a little cinnamon at this point. Place baking dish on a baking sheet ( sprayed with cooking spray as well) and bake at 375 degrees for at least 50 minutes, check on it. You don’t want to pull it out too soon because you want the crumble to brown perfectly and the fruit will not thicken. You’ll know it’s ready by the color of the crumble topping.

Allow to cool for an hour.

You can heat up before eating at 250 degrees covered for about a 1/2 hour should be enough.

You can freeze this as well. Take out the night before you’ll want it and let it defrost in the refrigerator, the next day take it out and let it come to room temperature before re-heating. I freeze it often and it works out quite well.


Banana and Blueberry “Ice Cream” not Ice Cream Frozen Dessert

photo 2

Hummingbirds at sunset in Colorado.

photo 5 (2)


photo 4 photo 3This was a delicious variation of the Banana non ice cream I already posted back on May 29, 2013.  I had bought a lot of bananas and had a giant tub of blueberries so without any milk I made this for my dessert and it tasted so creamy and delicious that it was hard to believe it was not real ice cream.  The natural creamy consistency of bananas makes this taste like real ice cream and yet it’s a delicious frozen treat that’s actually dairy-free.

The only thing is that you have to prep by freezing bananas overnight.

Perfect for little kids. No nuts, No milk, No nothing but fruit and a pinch of salt.

Go for it and you certainly can try and mix it up by using bananas and strawberries, raspberries, etc.

Ingredients:

4 firm ripe bananas, cut into chunks, frozen at least overnight

1 cup blueberries

pinch of kosher salt

Directions:

Remove bananas from freezer and let sit for a few minutes to just soften a bit. Mine were in freezer for a few days and had to soften before I could attempt to puree them, about 5 – 10 minutes.

I used my Cuisinart Food Processor for this.

I pureed the Bananas, Blueberries and salt , scraping down the sides as I went.

Puree till you get a creamy texture.

You can make ahead of time and freeze for about a week. Let it sit before serving because it’s best when it’s creamy.

Super Healthy and low in calories and no fat.

Perfect Summer Food and why not all year round?