

I made this recipe for the first time back in 2014 and highly recommend it for a quick and delicious meal.
 It is super easy and not intimidating at all. I got the recipe from Jessica’s Seinfeld’s book The Can’t Cookbook even though I know how to cook.
http://www.doitdelicious.com this is Jessica Seinfeld’s site or you can just buy the book “The Can’t Cookbook”.
Ingredients:
2 dozen littleneck clams
3 cloves garlic
app. 1/4 cup chopped fresh flat-leaf parsley
1 cup dry white wine, such as Sauvignon blanc. I actually used what I had open which was a Pinot Grigio
1 box spaghetti, you can use any kind of spaghetti you like. I actually had bucatini style in the house so that’s what I used
3 Tbsp. Olive Oil
*if you’d like a little heat and you should know your audience because mine didn’t so I put on table for those who wanted to add heat. If you are adding add app. 1/4 tsp. crushed red pepper
Kosher Salt , to taste. I have to say I added almost no extra salt at all.
You’ll need a large deep pot to cook clams in. I used my Le Creuset Pot.
Directions:
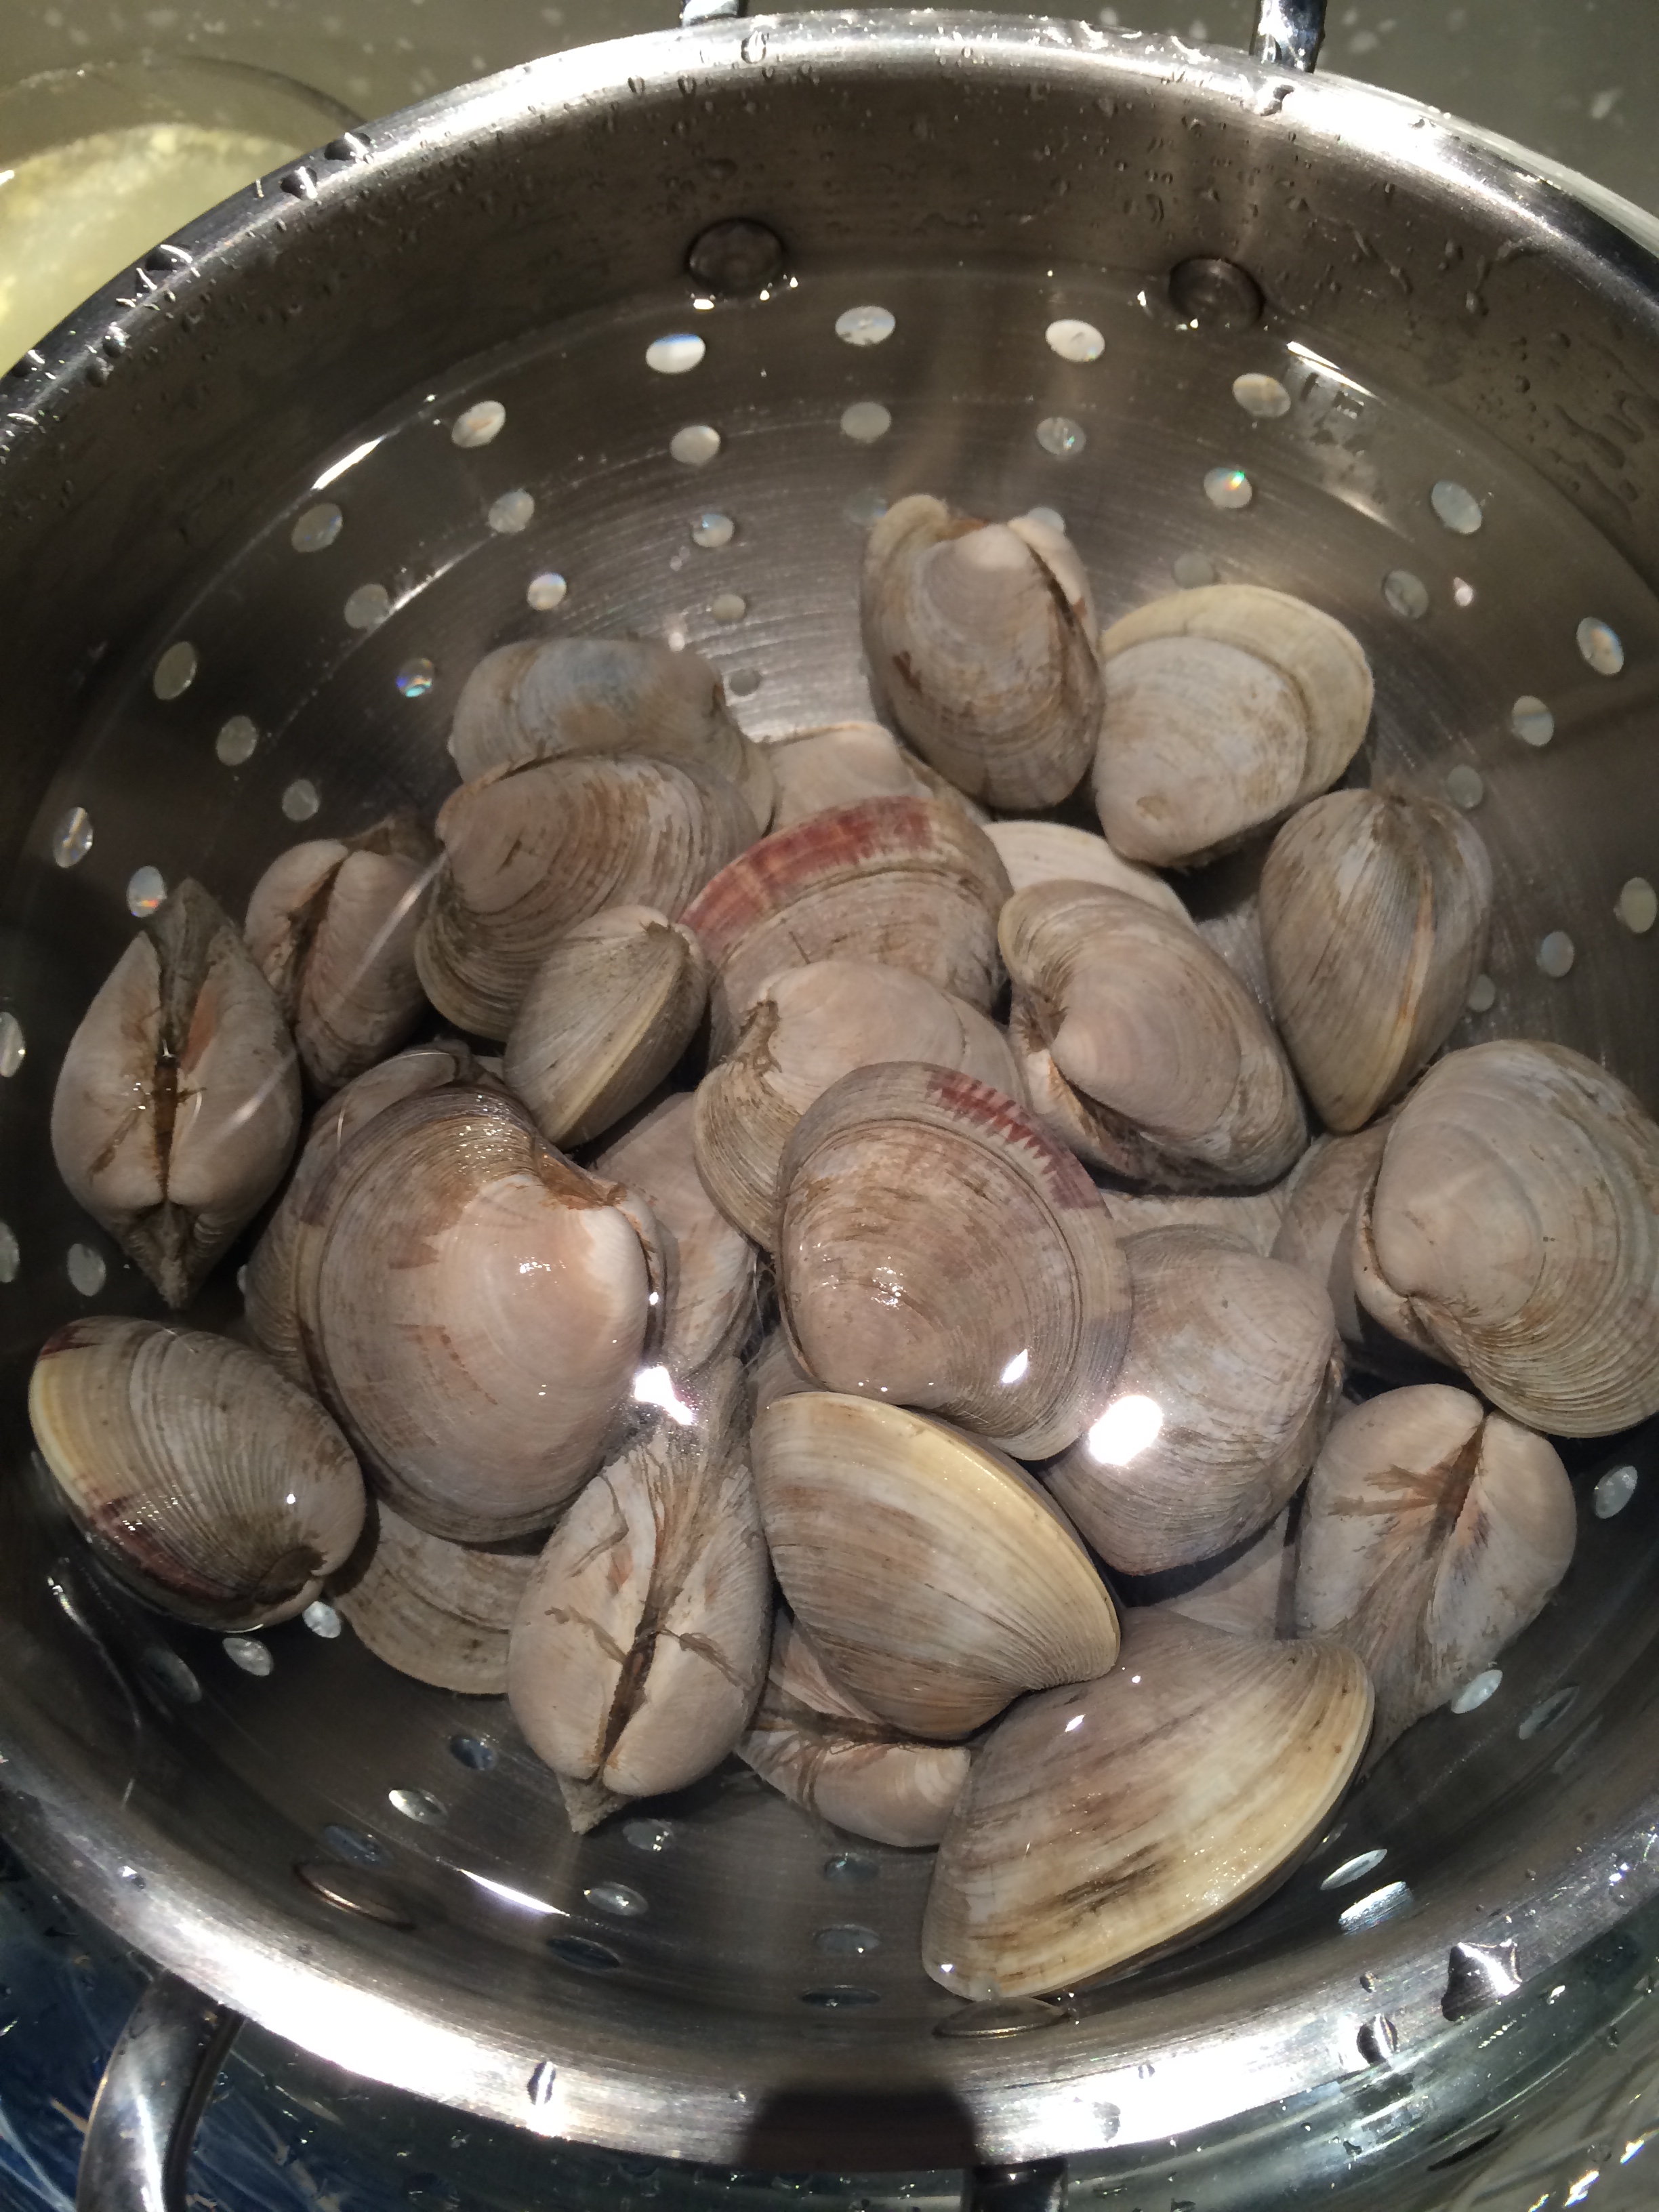
I placed my clams in a colander and I put the colander in a larger bowl in the sink and I filled the bowl with cold water. I let the clams soak for a few minutes, then rubbed with my fingers to dislodge any dirt; then drained the clams. Throw away any clams that remain open or were smashed. ( my clams were pretty clean) I purchased them clean from Whole Foods. Any Fish Store will clean them for you, but always run them through this process to remove any residual sand, etc.
Smash the garlic and chop it . Chop the Parsley. Measure the Wine. Place all your ingredients near to the stove.
Cook Pasta according to directions on box.
Place a large pot on the stove and turn the heat to medium. Pour in 2 Tbsp. of Olive Oil until it heats up and shimmers ( a few minutes) Add chopped garlic to the pot, and cook , stirring , for at least a minute, until you can actually smell the garlic breaking down. Don’t Burn!!!! Now add the wine and the clams and cover the pot with a tight-fitting lid and you’ll want a fairly high flame, probably medium-high . Cook clams until they open, I probably cooked for about 10 – 12 minutes. Looked so beautiful! Add the parsley and the red pepper now if you’re using. Throw away any unopened clams, they are no good.
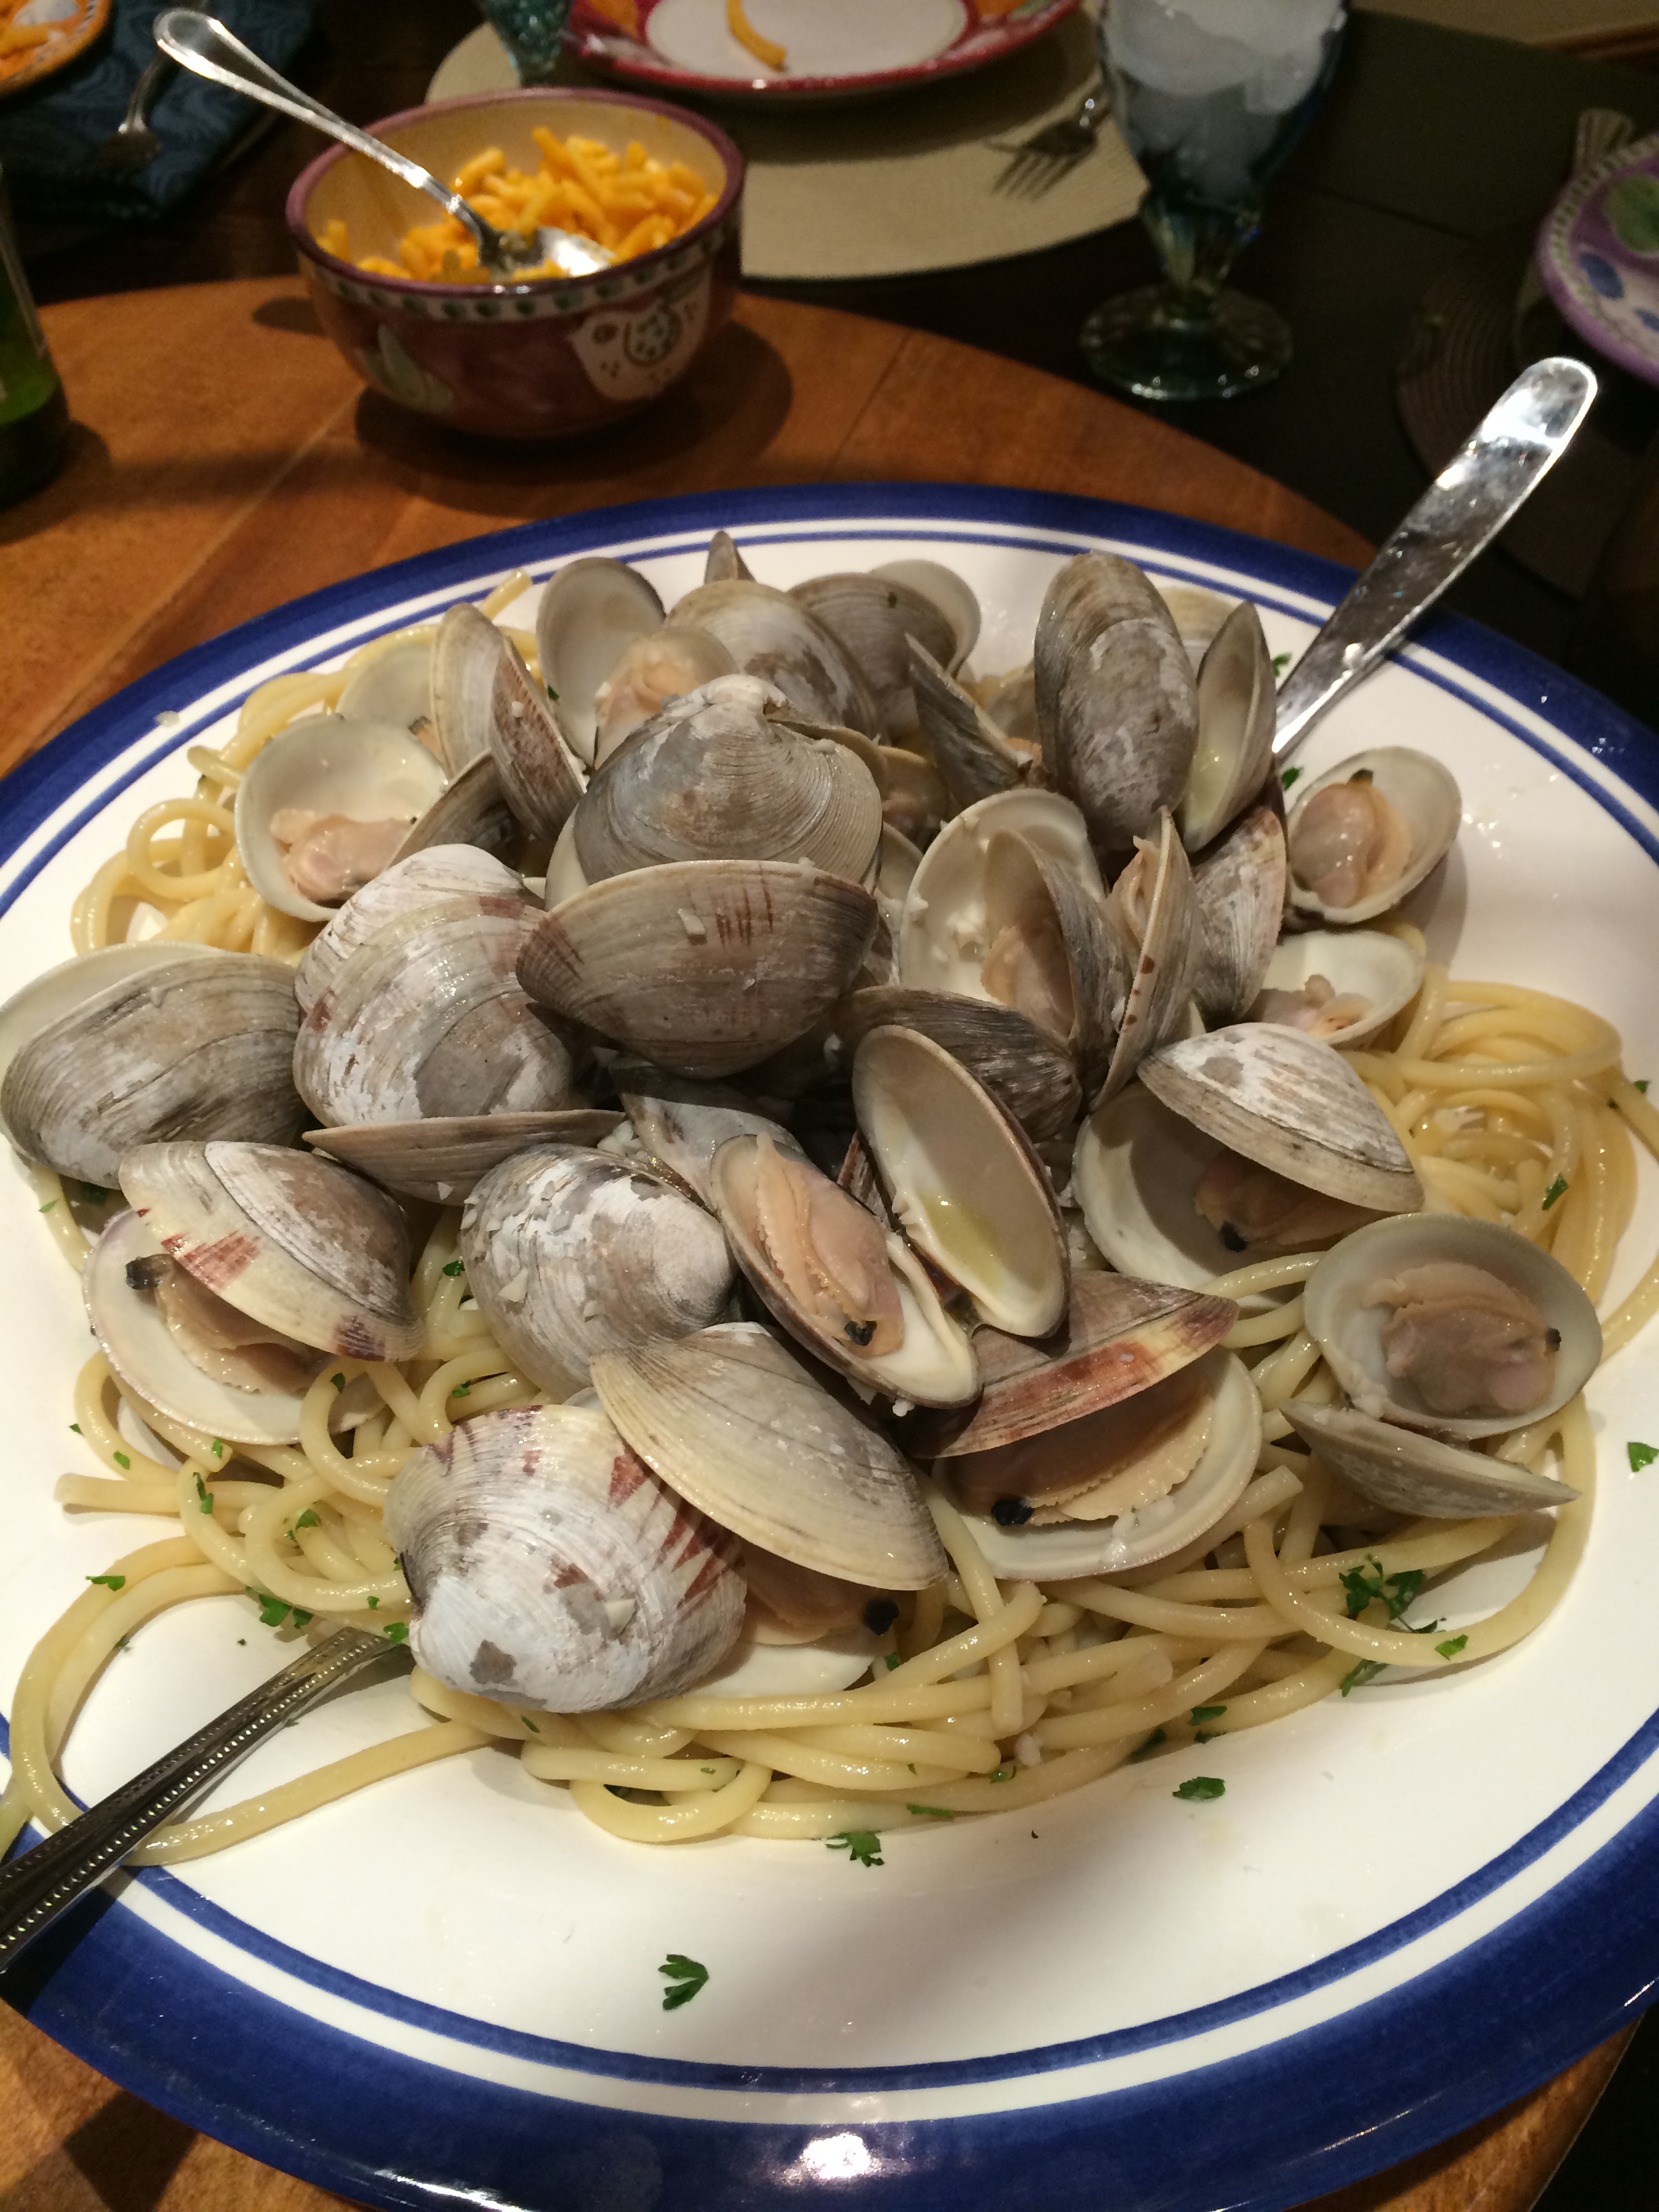
Once pasta is al dente and drained I transferred to a large serving bowl and added 1 Tbsp. of Olive Oil to pasta, top with clams. Sprinkle if you’d like a tiny bit of coarse salt now if you feel it needs it. I did not need to add any additional salt or pepper. Adjust to your taste.
Amazing!!!! and did I mention Super Easy!!!!!


")


