


Search Cooking with Candi
Cooking with Candi Archives
Recipe categories
-
Join 2,700 other subscribers
Old School Meatballs (sweet and sour)
 These meatballs are “old school” but still hold up. If you’re looking for an easy addition to your menu this could be it. L’Shana Tova from our house to yours. Enjoy! I cooked these last night and they cook up very fast and since the rules have changed dietary wise you can serve over rice if you’re observing Passover. If not use the bread crumbs.

Sweet and Sour MBalls with Turkey
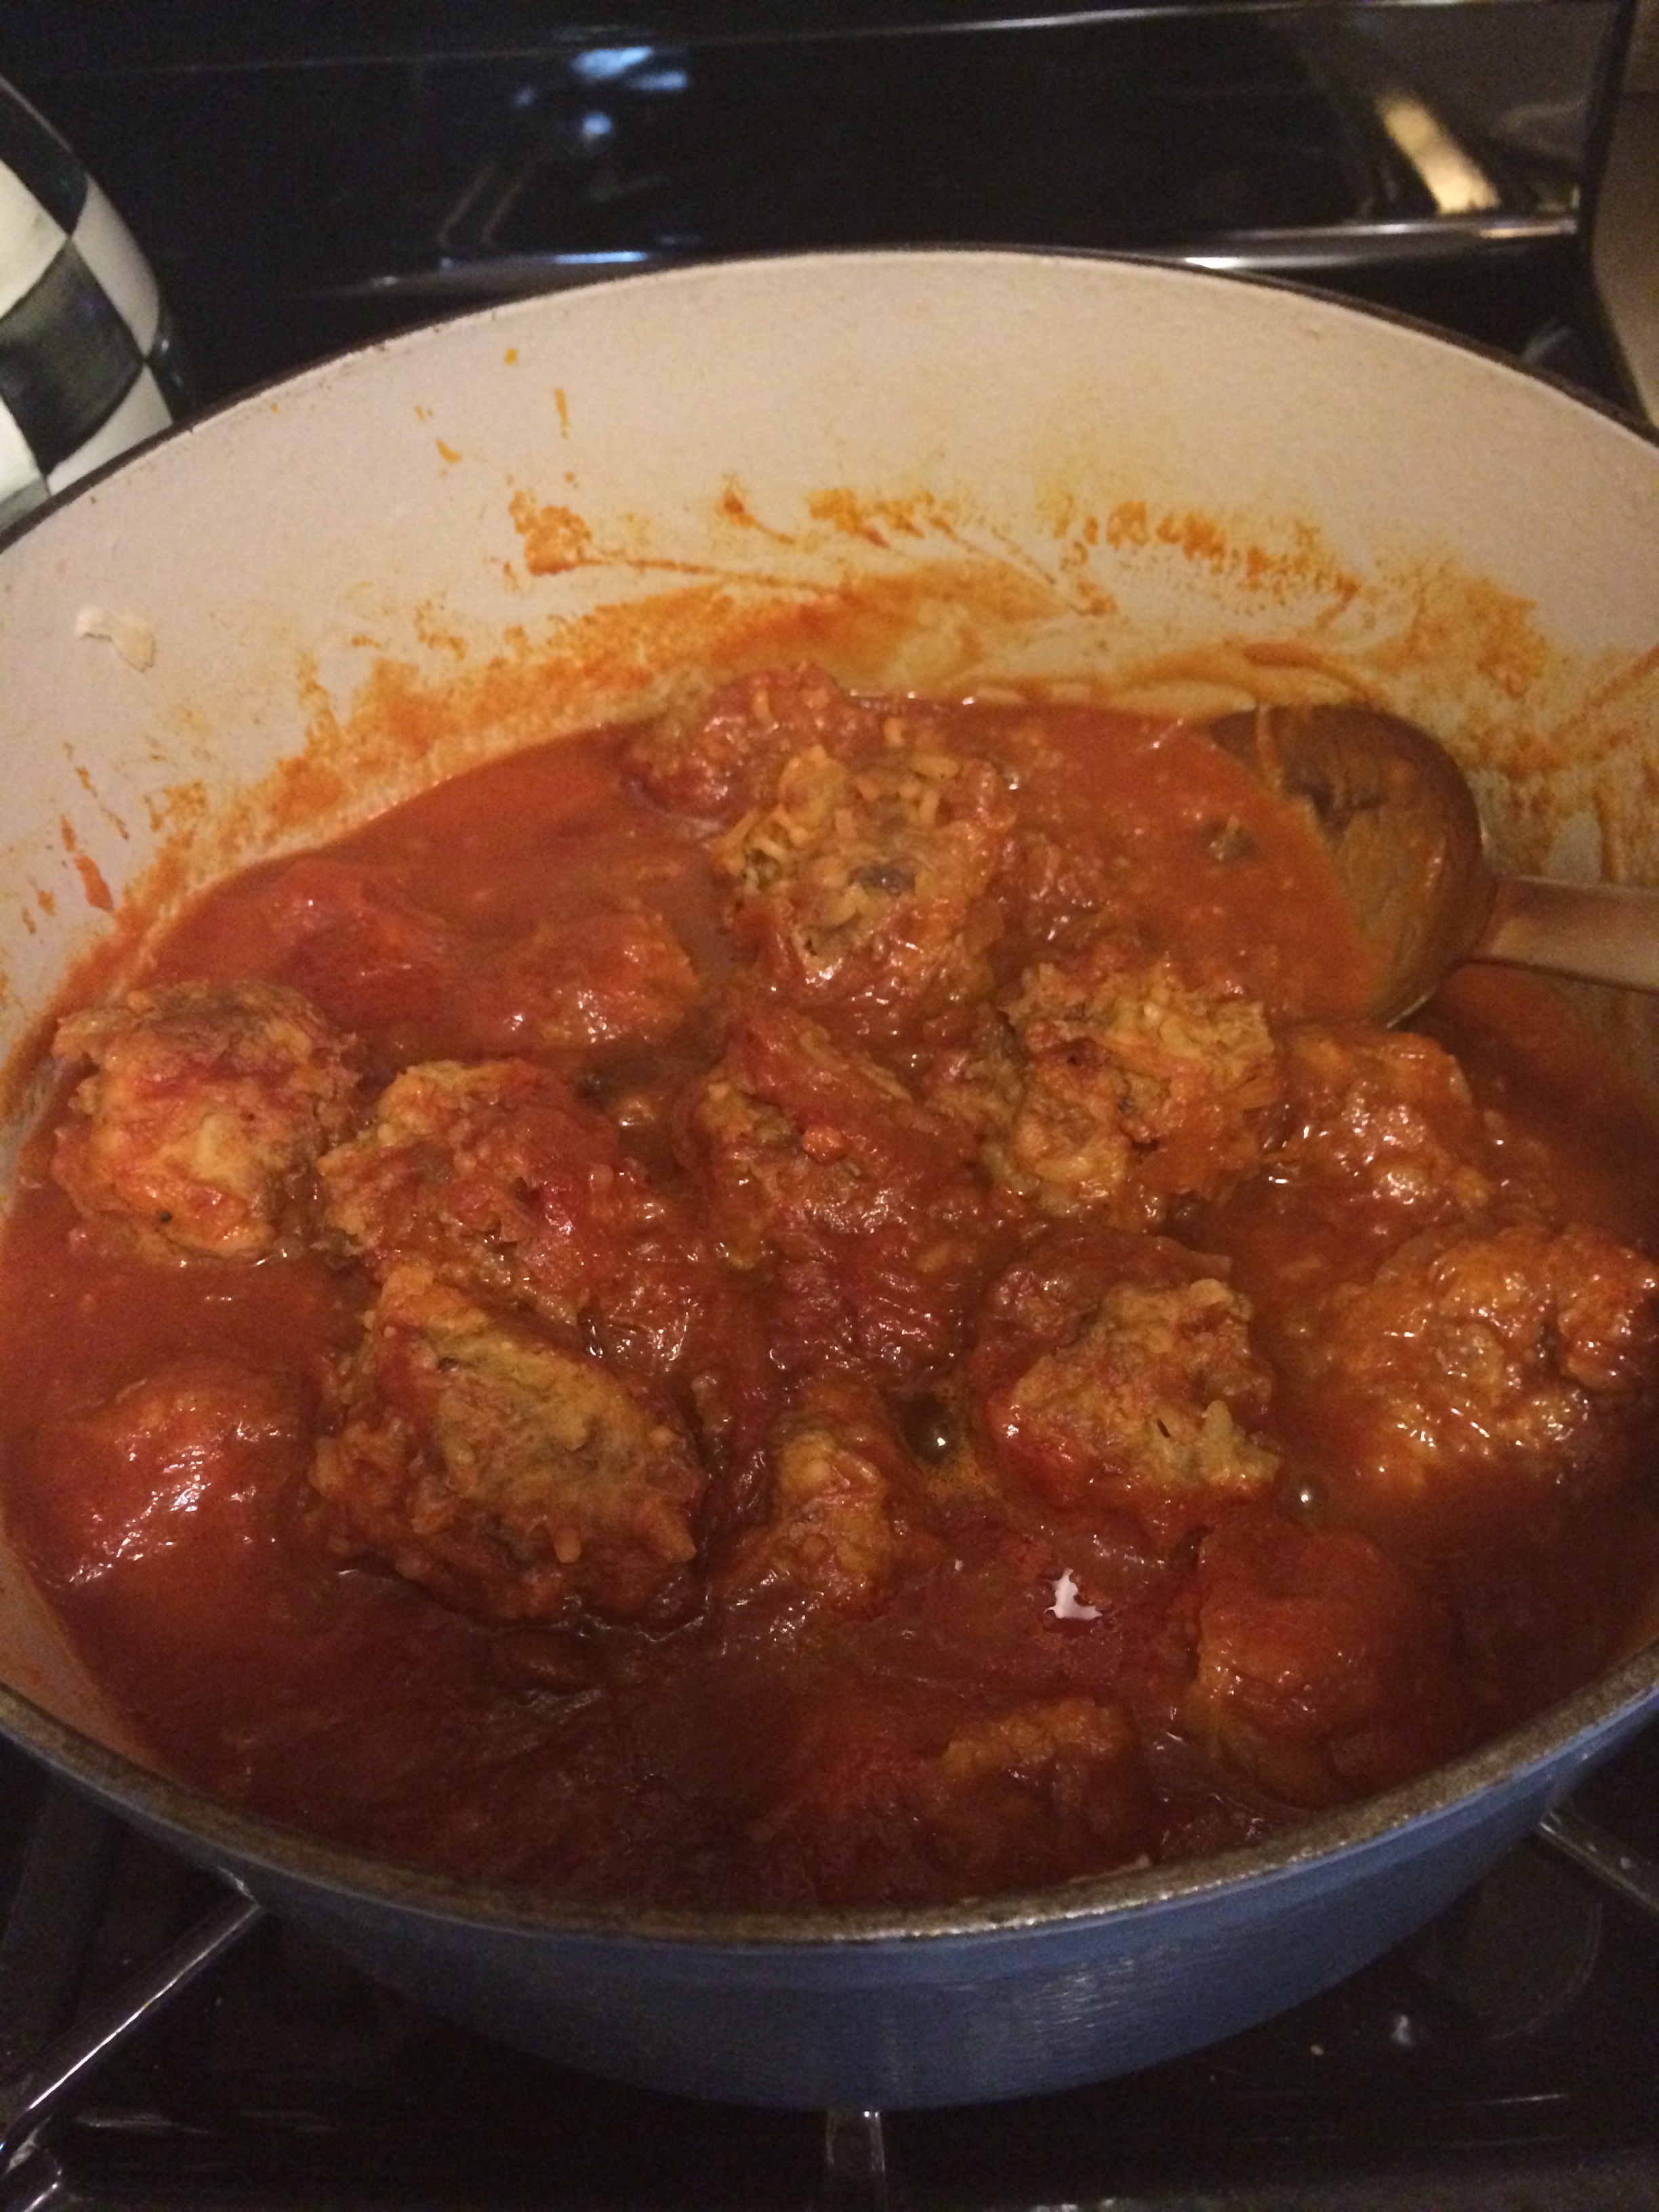
I have been making this recipe since I got married in 1975. It is really a perfect recipe for holidays or any time. You can use these meatballs with rice or anything like that. They are good for a big crowd when you have poultry and want another main. A lot of you are probably very familiar with this one and have different versions of it. Believe it or not, I still have the very original recipe. I’ve made a few changes to it: I now add my own bread crumbs, which I always make from whole wheat bread but feel free to use store-bought seasoned bread crumbs; If you want you can make these for* Passover by substituting matzo meal for bread crumbs. I also grate in a little onion (spanish); and my mother taught me to grate in a little potato so I always do that, as well. Now and then I’ll use turkey in this recipe too. Otherwise, this is the original and it’s super easy. I used turkey this time out, and they came out perfectly.
INGREDIENTS: (This is for one pound but you can definitely double and these freeze beautifully.)
1 lb. ground beef (Whatever kind you like. I sometimes use ground turkey. In 1975, we all ate beef, but today you might want to use ground turkey or ground chicken.
1 egg (room temp. works best)
1/4 cup bread crumbs (if you’re using from the can) I use 3 slices of whole wheat bread crusts removed. (when I doubled I used 5 slices and it was enough)
*For Passover – omit the bread crumbs and replace with matzo meal
Kosher Salt, app. 1 teaspoon
Freshly ground black pepper to taste (1/4 teaspoon)
1 clove garlic, minced (the original calls for garlic powder but I’ve changed this as well. If you prefer, try 1/4 – 1/2 teaspoon)
1/8 cup warm water (just to moisten it) when you double just add up to 1/4 , I don’t usually use the whole 1/4 cup.
1/4 spanish onion, grated
1/4 potato, grated
1 bottle (12 oz.) Heinz chili sauce
6 oz. grape jelly
Directions:
Mix meat, egg, bread crumbs, salt, pepper, garlic, and water all together. I then grate in the onion and potato too. Next, shape into small balls about 3/4 inches in diameter. Heat the chili sauce and grape jelly until they blend and bring to a low boil. Then drop the raw meatballs into the sauce and simmer, covered, for approx. 45 minutes and don’t touch the meatballs till they actually are cooked , this will give them a chance . I use a sauce pan if only making 1 lb. and I just pile the meatballs in and after 45 minutes I gently stir them. Again, these can be made ahead and frozen. They are quick, easy, and so good. The larger the pot the more balls you’re able to get in, so a large dutch oven works out best for this.
* serves about 8 – 10
*Some people have been known to throw a can of sauerkraut in the sauce, which is also delicious, but you hafta like that flavor. (Just saying…)
*you can also throw in some raisins if you’d like but throw them in when you put the meatballs in so they cook and plump up. Probably a 1/4 cup per 1 lb. should be fine
Posted in Holiday, Holiday Recipes, meat
Tagged holiday recipes, old school meatballs, Passover Recipe, Rosh Hashana
Un-Stuffed Cabbage–perfect for Rosh Hashana


 I love stuffed cabbage and my Grandmother made the most amazing stuffed cabbage ever . I love stuffed cabbage but do not feel like dealing with the actual stuffing of the cabbage, it is way too labor intensive for me. I have made several variations of this and found this one to my liking the best. You can play with the ingredients which is what I did . Original recipe is from Kosher by Design and it is perfect for Passover by just leaving out the rice and substituting matzoh meal in its place. Most perfect for Rosh Hashana and use rice. Basically this is meatballs in a sweet and sour sauce with cabbage . I doubt very much that Joel would ever eat real “stuffed cabbage” but he liked this. The cabbage cooks down so much that you don’t even realize you’re eating cabbage. I also used 1/2 chicken ground meat and 1/2 beef ground meat , this is entirely up to you. I wouldn’t do all chicken because it might be a bit dry, you can definitely make this with turkey but use dark meat turkey or the balls will also be very dry. You can also make this ahead for the holidays which is always a very good thing and feel free to freeze it. This is the original recipe , adjust amounts for how much you’re making. I made 2 lbs. of meat but made full sauce as I was testing it out. You’ll want to use a large pot for this recipe. Enjoy!
Follow me on Instagram @cookingwithcandi
Ingredients:
Meat
3 lbs. ground meat– I used chicken and beef (dark meat turkey is best here) white meat turkey tends to be very dry. Mixed with beef it’s fine but if using alone you’ll need to use dark meat ground turkey.
2 large eggs, lightly beaten. Use room temperature eggs they work best.*see my post about eggs–a little note on my blog.
3/4 cup cooked long grain white rice, for Passover use matzoh meal and omit the rice– I usually say un-cooked rice but some people have been saying that their rice hasn’t cooked– so to keep this from being a problem use cooked rice
1/4 cup water
1 onion finely chopped
Kosher Salt to taste–app. 1/2 to 1 tablespoon
Pepper to taste–app. 10 grinds on a pepper mill, or app. 1/4 of a tablespoon
*garlic powder if you like
Sauce:
2 packages of shredded cabbage, probably about 1 head of cabbage finely shredded, no need to do it when you can buy it pre-shredded (not red cabbage)
1 Tablespoon Vegetable Oil
Kosher Salt to taste ( app. 1/2 tablespoon)
1 1/2 tablespoons Kosher Salt
1 1/2 cups tomato juice
4 8 ounce cans tomato sauce ( or 32 ounces)
1/2 cup brown sugar ( use whichever brown sugar you have in house , it won’t make a difference. Light or Dark, I actually used dark.
1 cup sugar
3 lemons squeezed , I got about 1/2 cup , they were smallish lemons
1/2 cup raisins
Directions:
In a large mixing bowl combine the meat, eggs, water, rice and onions. Season with Salt and Pepper , and if you like garlic powder. Gently mix by hand, and I do mean gently, if you over do it the meat will be like concrete. Set aside.
Heat the oil in a large pot over medium heat. Add the shredded cabbage and about 1/2 tablespoon of kosher salt. Simmer for 10 minutes. Add the tomato juice, tomato sauce, brown sugar, sugar, lemon juice and the raisins. Stir till well combined and continue cooking sauce at simmer setting.
Gently form meatballs out of the meat mixture, I made a rather nice size meatball, not too large and not too small. Make whatever size you’d like. Just do not over-handle the meat because it will cause meat to toughen. Add to cabbage mixture, just drop into the hot sauce and do not stir, you can pile them on top of one another because they will cook down.
I left it to simmer for about 1 1/2 hours . I didn’t touch the meat balls for at least the first 1/2 hour, you’ll want them to cook through and form into nice balls before you stir, so just leave them to cook. After the first 1/2 hour or so you can gently stir and move the meatballs around. They don’t require a lot of stirring around .
This dish brought back memories of my childhood and was a most satisfying main dish.
Un-stuffed Cabbage
Posted in meat, Passover Recipes
Tagged Meatballs and Cabbage, Passover, Passover Recipe, Rosh Hashana Menu, unstuffed cabbage
Recipes for Jewish New Year–Rosh Hashana 2020

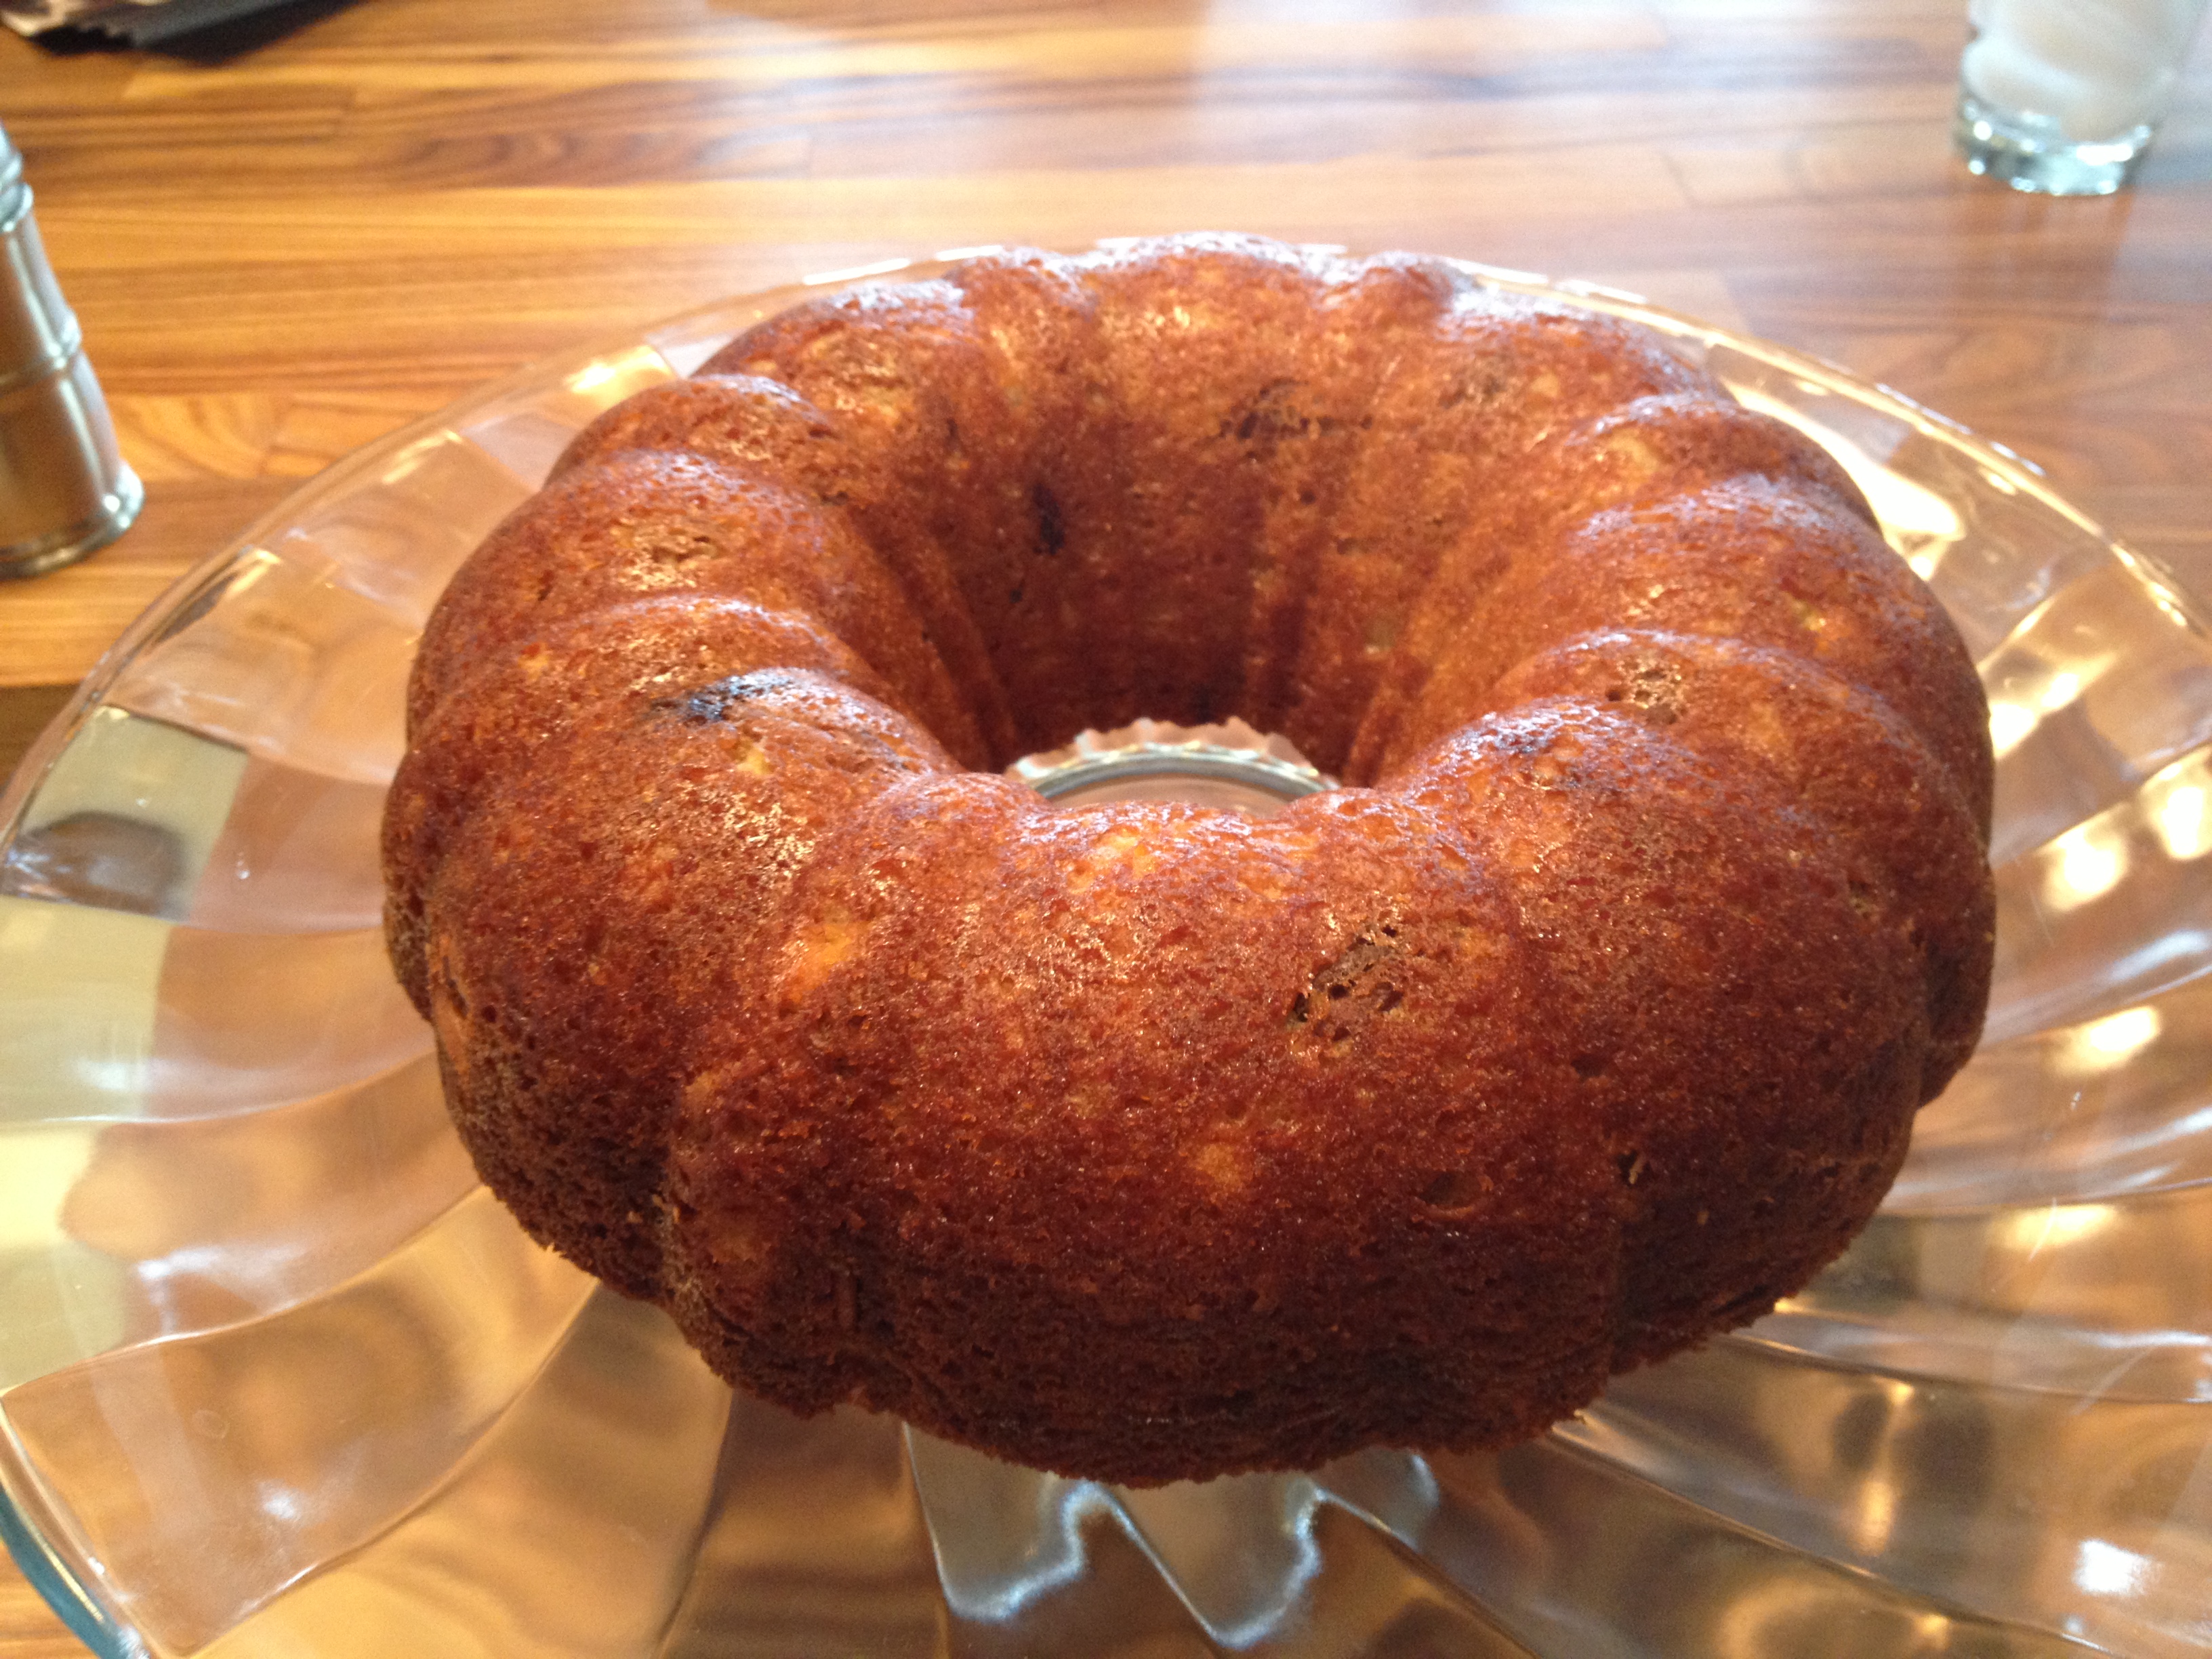
Finished Product Apple Cake
Un-Stuffed Cabbage


I cannot believe that the Jewish Holidays are here already and this year will be very different from years gone by. I will not be with my family for the first time in maybe my life. Time to reflect for sure. While I am not happy about the situation I am in this year I will still the mark the days with some delicious Holiday Food. Here is a list of some of the recipes that you can put in the search bar on my site or just google the recipe with cooking with candi and you should be able to get it.
I am wishing all of you who celebrate a Very Happy Healthy New Year. Let’s all hope and pray that next year we will all be in a very different place.
Rosh Hashana starts in the evening of Friday, September 18
Yom Kippur starts Sunday, September 27
I am always open to suggestions and inquiries and general help. You can DM me on Instagram/Facebook or email me at cmk55@sopris.net
For those who celebrate have a very Happy Healthy New Year!
Homemade Chicken Soup with not so Homemade Matzo Balls ( even though this is for Passover we eat it a lot on Rosh Hashana)
Happy New Year Brisket
Unstuffed Cabbage–a great alternative to meatballs
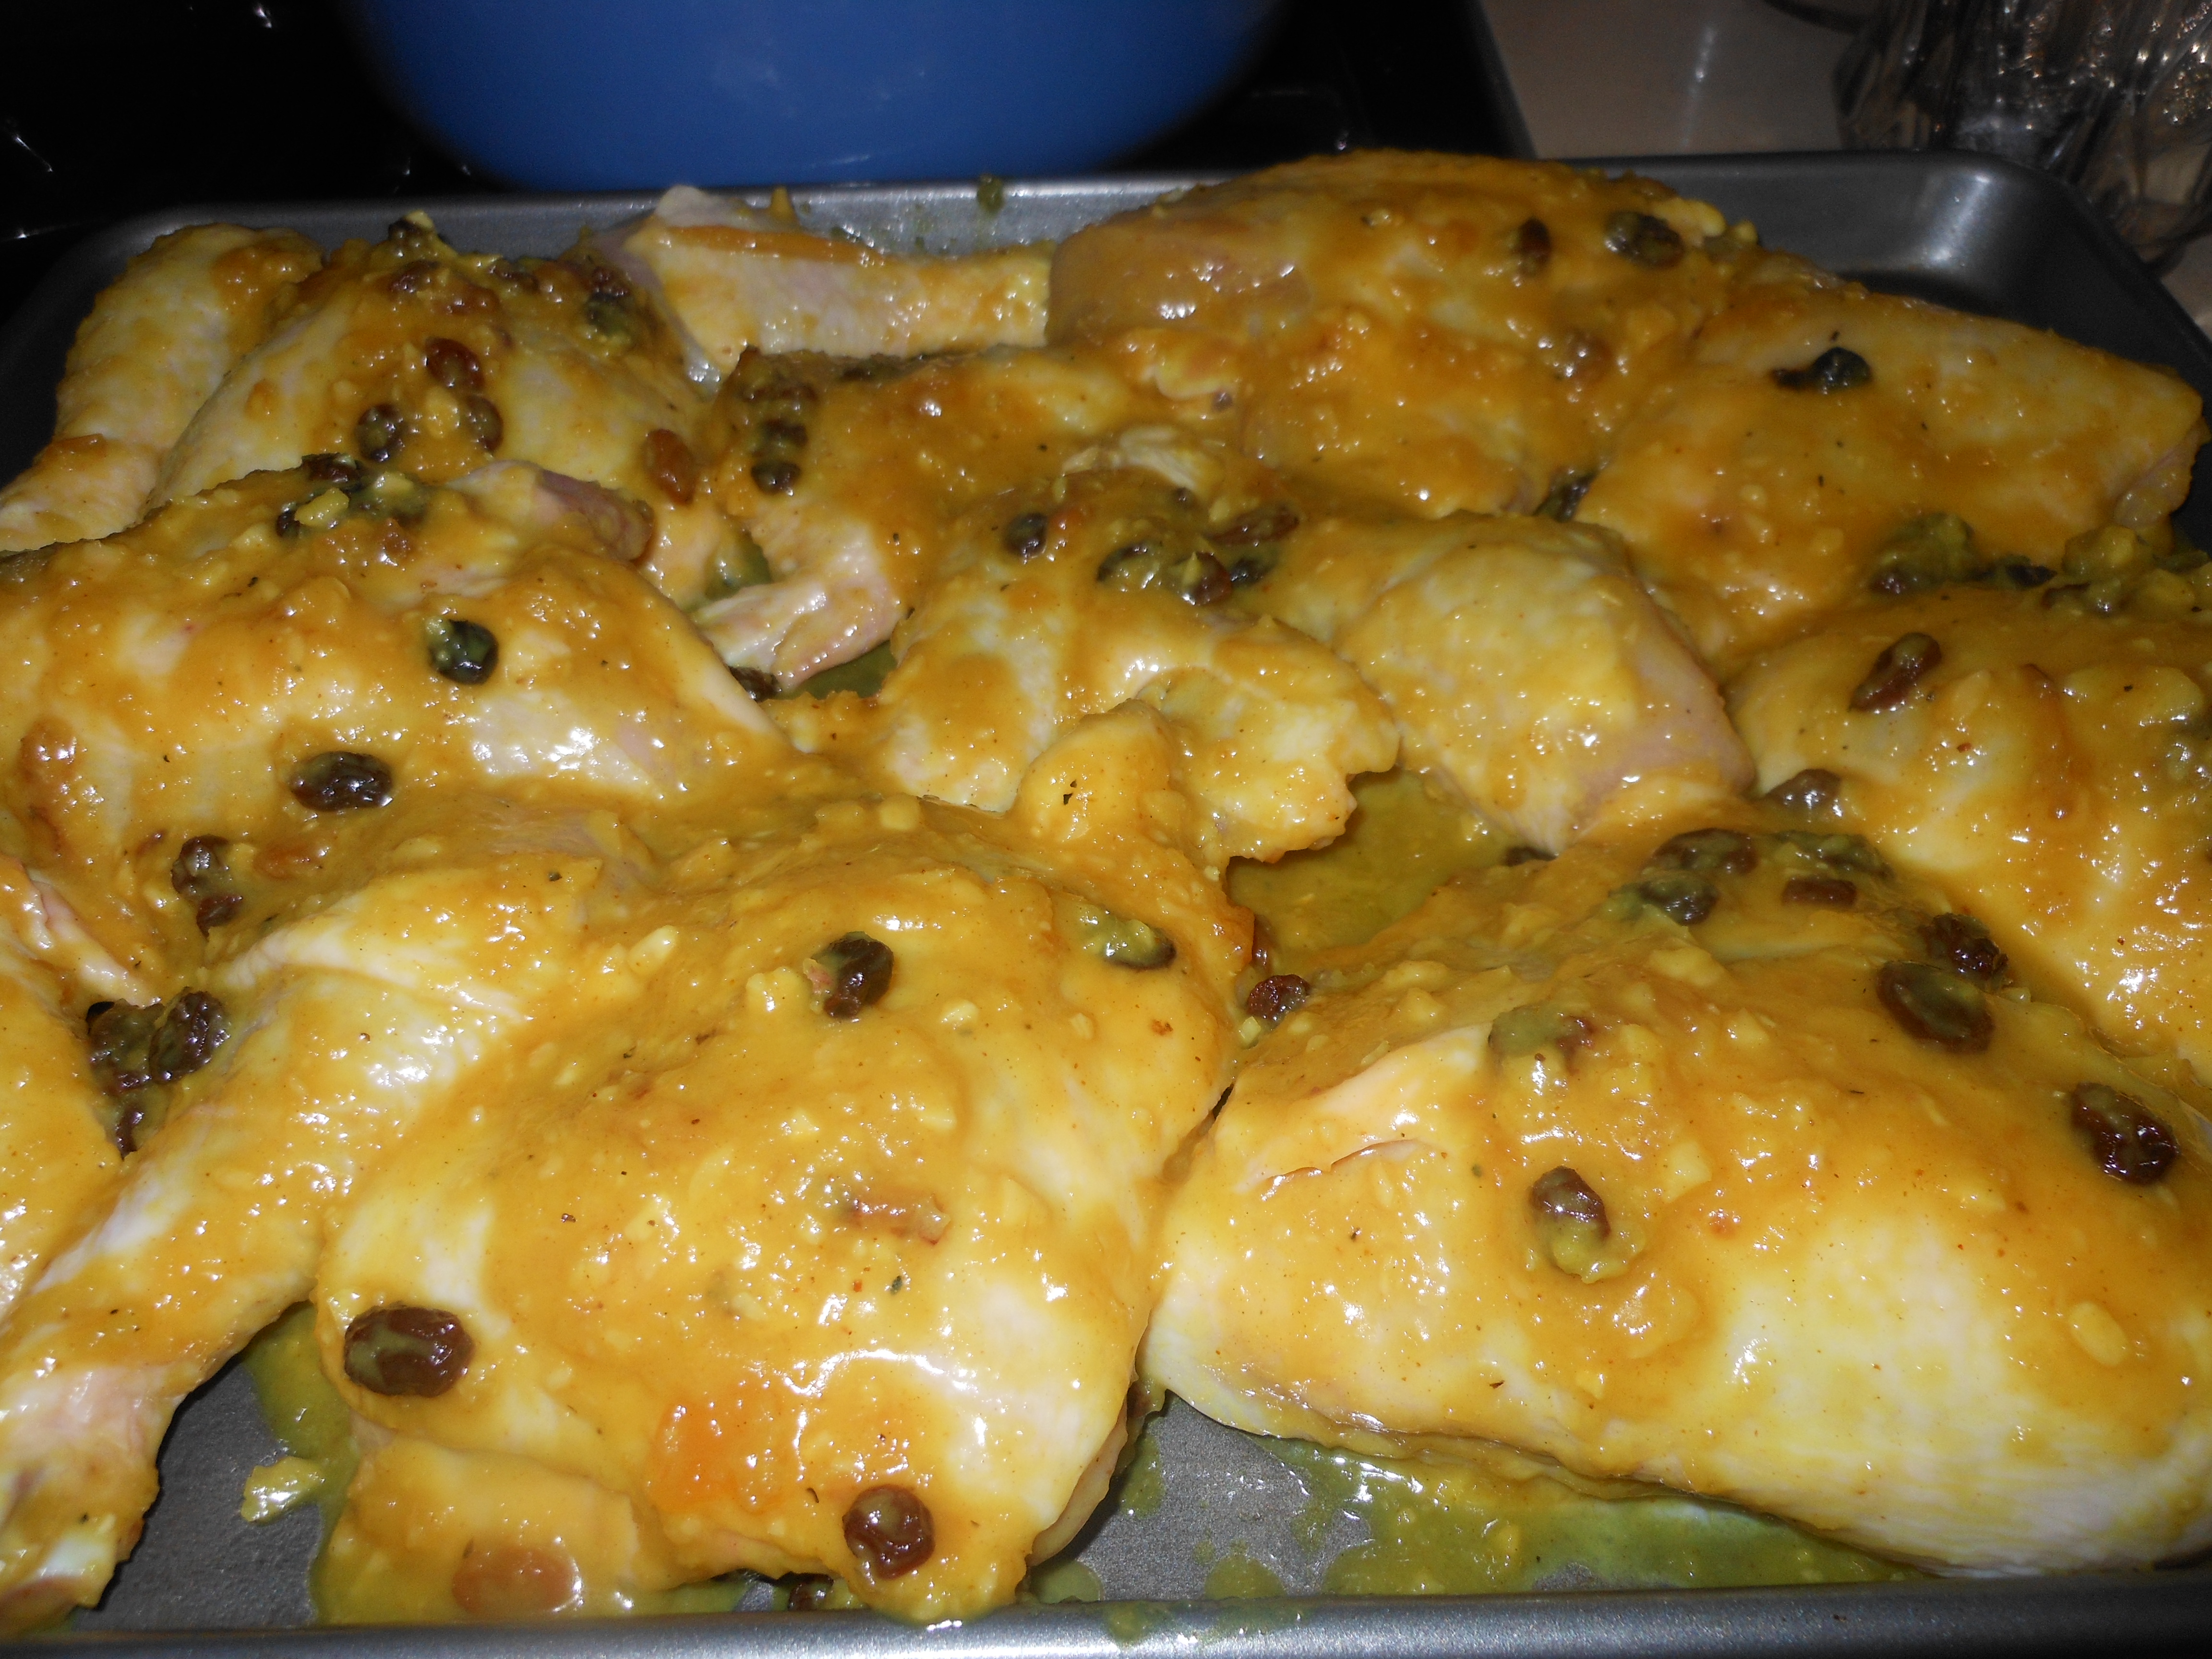
Chicken Marbella
Honey Roasted Chicken
Old School Meatballs
A Noodle Pudding from Ellen
Another Noodle Pudding from Marcy *kosher non dairy
Noodle Pudding with Apricot Nectar–probably one of the all time best kugels ever
Noodle Pudding from Julie
Mushroom Barley
Kasha Varnishkes
Grandma Millie’s Cauliflower
Applesauce and Raisin Cake
Don’t let the Apples go Bad Cake
Julie’s Honey Cake
Plum Torte
My farewell to Norah Ephron- her Tzimmes
Posted in Holiday, Holiday Recipes, jewish holiday
Tagged jewish new year, Rosh Hashana, Rosh Hashana 2019
Fried Rice with Chicken
This recipe has a lot of ingredients but it really is pretty easy to execute. I have to say this just tasted down right delicious and pretty healthy as well. The chicken was yummy along with all the other ingredients. I used 2 pouches of Basmati Rice from Uncle Ben’s ( they’re the 8.5 oz. bags) you can also make your own rice but I opted for the easy route. I like a long grain rice and you can use brown rice if you’d like. The pouches save time and I made a few hours ahead and let it sit out to cool off. Of course you can add any vegetables you like. This really was delicious.
Ingredients:
4 cups cooked rice — like I said I used 2 pouches of Basmati Rice made it a few hours ahead and let it sit in pouch on counter . You’ll want the rice completely cooled off. Leftover rice works well here too. Or use white, long grain or brown rice.
2 Tablespoons canola or vegetable oil or peanut oil
2 Tablespoons Sesame Oil
1 cup chopped onions — yellow or white onions
3 green onions, trimmed and sliced into thin rounds
1 cup frozen peas and carrots — I don’t thaw I use straight from freezer
3 garlic cloves, finely minced
3 eggs, lightly beaten
1 lb. boneless skinless chicken breasts, diced into small pieces — cut up and sprinkle lightly with kosher salt and freshly ground black pepper
Sauce:
1/4 cup Hoisin Sauce
1/4 cup Oyster Sauce– if no oyster sauce use soy sauce
2 tsp. garlic/chili paste– worth buying Sambal Delek ground fresh chili paste — available in most supermarkets or specialty stores you can omit if you can’t find but it adds a wonderful layer of flavor
1 1/2 tsp. Sesame Oil
Mix all the ingredients with a whisk or a fork and set aside.
Directions:
In a large non-stick skillet or wok ( spray with cooking spray) add the Sesame Oil and Canola Oil and heat up ( medium high) and cook chicken. Flip chicken around so all sides get cooked evenly. Cooking time will vary depending on thickness of your chicken. When chicken is finished cooking remove with a slotted spoon allowing oil and cooking juices to remain in skillet. Put chicken in a bowl and set aside.
With pan on medium low to high add the peas, carrots, green onions and onions cook for a few minutes, or until vegetables soften , stirring occasionally.
Add the minced garlic and cook for another minute or so, stirring.
I scrambled eggs in a separate pan but if you’d like to use 1 pan push vegetables aside and add the eggs to the other side and cook to scramble.
Add the chicken and rice mix all ingredients and then add the sauce. I cooked through for another few minutes and didn’t think it needed any additional Salt and Pepper, but everyone has their own taste so taste for S and P. Cook for a few more minutes till chicken is warmed through. Serve it up!
*leftovers will keep for a few days or freeze . Re-heat gently — I think the microwave works best for re-heating.


Posted in Uncategorized
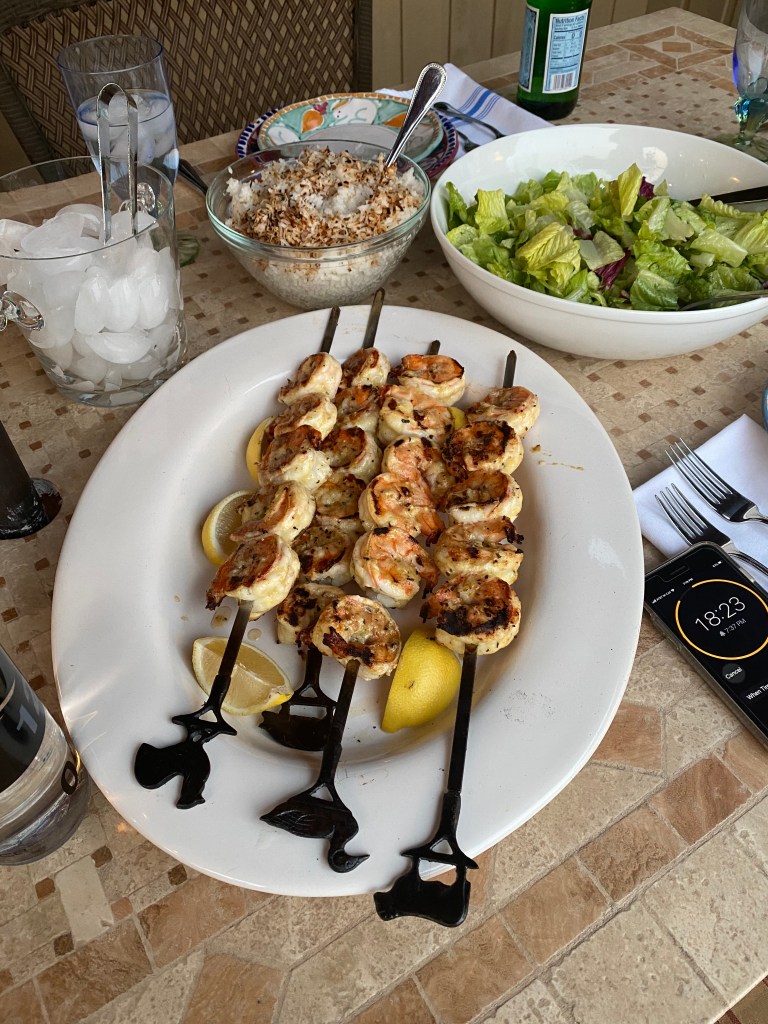
Shrimp on the Bar-B (marinade)

Shrimp for the BBQ
For shrimp I use Under 12’s, that’s about 12 to a lb. You can use whatever you like. The larger the shrimp, the easier it is to skewer. Since I am married to a shrimp expert, I am a bit choosy about my shrimp. This advice comes straight from Joel: always ask for mexican, shell-on, white shrimp. For size, ask for under 15, under 12, or under 10. Of course, you will have to peel and de-vein these babies but they’re worth it. I left the tail on this past weekend for grilling.
Marinade: I put all ingredients in a glass measuring cup and use a whisk to mix together.
1/2 cup olive oil
2 Tablespoons Dijon mustard
3 cloves garlic, minced
juice of 2 limes (this past weekend, I used lime; but you can also use 1 lemon and 1 orange or just lemons, oranges, or limes. ) you’ll want the citrus flavor
1 tsp. dried basil
2 tablespoons white wine (whatever is open)
I use about 1 tsp. kosher salt (I think you can add more, depending on your preference.)
freshly ground pepper
Marinate shrimp for about 1 to 2 hours — no more because the citrus can actually start the cooking process . I then put the shrimp on metal skewers which I prefer to the bamboo. They’re a worthwhile investment and have owned the same ones for many years. I place on the hot grill and cook for approximately 4 minutes on each side– keep in mind the size of your shrimp. The shrimp I use is rather large so takes about 4 minutes on each side. Obviously smaller shrimp will cook much faster– when shrimp starts to curl and turn pink is usually a sign they are done. You can always remove from heat and cut into one.
Old Fashioned Lemon Icebox Cake–No Baking at all


Nothing not to love here, Lemons, cream cheese, heavy cream, lemon curd and did I mention no baking??? So great and fairly easy with simple ingredients. You’ll need either an electric mixer or a hand mixer to whip cream. Nothing beats an electric mixer though with the whisking attachment.
I made it in a 9×13 pan but I think next time I will try to do it in a bowl. It would also be beautiful garnished with fresh lemon slices or berries. We were in a hurry to dig into it so never did get to garnish it. If you’d like it to look neater when you scoop it out you will have to be more precise with the layering. My cake was very uneven and all the layers and flavors blended together, who cares? it was delicious. If you’d like you can also layer in a trifle type bowl and make a very pretty presentation! Up to you but it was all delish.
This is simple and delicious food if not very rich, but hey it’s dessert! Perfect for a Labor Day BBQ or anytime!
Enjoy Labor Day Weekend even if it’s a little strange this year.
Visit me on Instagram @cookingwithcandi
Ingredients:
4 ounces cream cheese, softened (just leave it out at room temperature for a while till it’s room temperature and feels squishy and soft)
3 cups heavy cream
1/3 cup confectioners sugar
3 teaspoons lemon zest, plus a little more for garnish
1/2 teaspoon vanilla extract
11 ounces vanilla wafer cookies ( app. 1 1/2 boxes)
10 ounces lemon curd–usually available with the jams and jellies or baking aisle of most supermarkets. (see photo)
Directions:
Beat the cream cheese in a large bowl with an electric mixer until soft. Add the heavy cream, sugar, lemon zest and vanilla and beat until it just holds stiff peaks. It takes app. 3-6 minutes for peaks to form, be patient.
Spread the bottom of a 9 x 13 inch baking dish with 1/2 cup of the whipped cream. Arrange 1/2 of the cookies on top of the cream, fitting in as many as you can without overlapping.(see photos) Spoon 1/2 of the remaining cream mixture on top and smooth evenly with an offset spatula or if no offset spatula use a butter knife. In spoonfuls , app. every 2 inches, spoon half of the lemon curd onto the cream and then use a butter knife to swirl the curd into the cream. Top with another layer of cookies, followed by the remaining cream. Spoon the remaining lemon curd and swirl into the cream again with the butter knife. Cover with plastic wrap and refrigerate until the cookies have softened, it should be fine after at least 3 hours and you can make a day ahead and just leave in the fridge!
It would be pretty garnished with some lemon zest , some lemon slices or fresh berries, we were in a rush to eat it so no garnish in my photos. Next time!
*if you use a bowl you’ll just have to figure out the cream to cookie ratio but make sure you follow my steps so it ends up the same.
*another good thing–I actually froze leftovers and when I wanted to eat it , I removed from freezer for about an hour and it was perfect.
Posted in Cake, dessert, no bake dessers
Tagged Lemon Cake, lemon icebox cake, no bake dessert
Summer Crumble — Peach and Blueberries


 A crumble or a crisp whatever you call it there is no reason not to make this simple delicious dessert. In the summer you have so very many seasonal fruits to choose from and all sorts of delicious combinations. I used peaches and blueberries today because the peaches are amazingly beautiful and I had an abundance of blueberries. Any stone fruit, berries, or pitted cherries will work. In the Fall I make this with apples and pears which is Joel’s favorite of all time. The fruit comes out soft and tender and the crumbly crunchy cap is ever so crisp. Delicious served warm with a scoop of vanilla ice cream.
I used an 8×11 pyrex but any baking dish around that size will work out just fine.
You’ll need a food processor to do the crisp topping this way. You must use cold butter straight out of fridge. I also added a little bit of chopped nuts but this is totally optional.
Plums and Nectarines work just as well. I also sprinkled a dash of cinnamon on the top (just a touch) right before baking , this is also totally optional.
Ingredients:
Fruit Mixture:
app. 8 cups sliced stone fruit, berries or pitted cherries I used peaches which I pitted, peeled and sliced and 1 container of blueberries (6 oz.)
1 cup sugar
2 Tbsp. Corn Starch
1 tsp. finely grated orange zest ( almost a whole orange)
2 Tbsp. of freshly squeezed orange juice from zested orange
pinch of kosher salt
In a large bowl toss fruit, sugar, cornstarch, salt, zest and juice together with a spoon. Set aside. I also sprayed baking dish with Bakers Aid cooking spray which is great stuff.
Preheat oven to 375 degrees.
Crumble Topping:
Ingredients:
3/4 + 1/4 cup of old-fashioned oats separated. 3/4 cup will be used at beginning and 1/4 cup at end.
1/3 cup all-purpose flour
1/4 cup light brown sugar ( firmly packed)
1/2 teaspoon kosher salt
1 stick chilled unsalted butter , straight out of fridge and this is important here. Butter should be diced into small pieces. Cut stick in half then cut into small uniform pieces.
Directions for crumble topping:
In the bowl of food processor with blade , pulse oats, flour, light brown sugar, salt together. Then through the top tube drop in diced cold butter and pulse until no dry spots remain, it takes a few minutes. Transfer to a bowl and add in 1/4 cup old-fashioned oats with your fingers.
Transfer fruit mixture to prepared baking dish, scatter crumble topping over the mixture. I added some chopped nuts and a little cinnamon at this point. Place baking dish on a baking sheet ( sprayed with cooking spray as well) and bake at 375 degrees for at least 50 minutes, check on it. You don’t want to pull it out too soon because you want the crumble to brown perfectly and the fruit will not thicken. You’ll know it’s ready by the color of the crumble topping.
Allow to cool for an hour.
You can heat up before eating at 250 degrees covered for about a 1/2 hour should be enough.
You can freeze this as well. Take out the night before you’ll want it and let it defrost in the refrigerator, the next day take it out and let it come to room temperature before re-heating. I freeze it often and it works out quite well.
Posted in Baked Goods, dessert, fruit, fruit cobblers
Tagged Peach and Blueberry Crumble., Summer Crumble, Summer Fruit Crisp
Summer Bolognese


 I call this summer bolognese because it’s lighter than my regular bolognese recipe . It’s made with fresh tomatoes which makes all the difference. I made this sauce the other night and I have to say it was just perfect . It cooked up in no time ( about 1/2 hour) and tasted fresh and delicious. Of course if you would like it vegetarian just omit the chicken. I wanted the protein so added a pound of ground chicken you can also use turkey and if you want ground beef. This time I kept it fairly light and used ground chicken. Used a thick ropy pasta — Bucatini and it was perfection on a plate made with fresh tomatoes.
Ingredients:
1/2 cup extra-virgin olive oil
8 garlic cloves– minced– I use a mini food processor always for mincing garlic — just makes it easy
1 lb. ground chicken, turkey or beef
Kosher Salt to taste
1/4 cup dry white wine
4 Tbsp. tomato paste if you use double concentrate use 2
1 lb. cherry tomatoes ( which are abundant and fresh right now)
12 oz. Bucatini or any spaghtetti you like or rigatoni or penne would work here as well
about 1 cup of Pasta Water — which you may or not need
Finely Grated Parmesan for serving
Directions:
In a large skillet or pot heat oil then add garlic and cook till softened ( a few minutes) don’t brown it just soften it — sometimes you’ll need to turn off stove and let it just cook for a couple of minutes to soften.
With pan at medium high add chicken and cook, breaking up chicken for about 5 minutes or until chicken is no longer pink and fully cooked.
Add wine and reduce heat to medium low. Continue breaking up meat till it’s small pieces until wine is evaporated– another 5 minutes or so. Add tomato paste and cook, stirring till absorbed into chicken and cook for another few minutes.
Add tomatoes and let it cook down, stir to coat the tomatoes with the mixture — allow the tomatoes to cook till they are ready to burst — about 5 minutes. I used a masher ( see photo) and I smashed down on the tomatoes and burst all of them. You can leave some whole if you like but I didn’t because this is where the sauce will come from. Stir occasionally on medium low but don’t allow to burn. Allow sauce to thicken for about 5 minutes.
Meanwhile cook the pasta in a large pot of salted water until very al dente ( at least that’s how we like it)
Reserve about 1 cup of cooked pasta water because you may need it if sauce is too thick.
Taste sauce for salt and add accordingly. I probably added a teaspoon of Kosher Salt — everyone’s taste is different for salt so add to your liking.
Drain pasta and I used tongs and transferred pasta to pan with sauce. Tossing it in and cooking at a low simmer the pasta and the sauce thickened and I added a little pasta water at a time till I reached a perfect consistency . I probably used about 1/2 cup of pasta water. ( which also contains salt so consider this and don’t over-salt sauce — you can always add salt but it’s tough to take away if you make it too salty. The sauce was creamy and delicious .
Remove from heat and if you’d like add fresh basil.
Transfer to pasta bowls and top with Parmesan.
Orzo with Lemon Shrimp and Spinach


 By now you all know how very much we love shrimp. It comes in handy to have an ex-shrimp monger on hand to clean and devein my shrimp. I love cooking it but not so much cleaning and deveining it. Joel not only obtains the best shrimp around but he really does do a great job of cleaning and deveining. In any event we make a pretty good team when it comes to shrimp dishes.
This dish was pretty easy to pull together once shrimp was prepped. Not a whole lot of ingredients, and whole thing took about 1/2 hour. This dish was very light in flavor and a perfect summer night meal, doesn’t have to be served super hot , can be room temperature.
*once the shrimp is prepared this dish is a snap. Have your fish store clean and de-vein your shrimp for you if possible.
Ingredients:
Vinaigrette:
1/3 cup olive oil
zest of 2 large lemons ( try to use organic if you’re zesting and eating the peel) and scrub those lemons well
1/2 cup fresh lemon juice ( from the 2 large lemons you just zested)
1/2 teaspoon of kosher salt
1/2 teaspoon of freshly ground black pepper
In a small bowl, whisk together the olive oil, lemon zest and lemon juice, salt and pepper until smooth and set aside.
Ingredients:
1 lb. orzo
1 lb. shrimp , I used large under 10’s, peeled and deveined ( you can have fish monger do this )
2 tablespoon olive oil
1 large shallot , chopped
app. 1 more teaspoon kosher salt
1/2 cup dry white wine , ( I used what I had on hand)
6 ounces of spinach , I used baby spinach, use whatever greens you like. You can use arugula as well.
Directions:
Cook orzo according to directions. Drain and reserve 1 cup of the pasta water.
Place shrimp in a bowl and sprinkle with kosher salt and some freshly ground black pepper . Heat the 2 tablespoons of olive oil over medium high heat. Add the chopped shallots and cook until soft for a few minutes. Add the shrimp, cook shrimp until they turn pink and are just cooked through depending on the size of your shrimp. When shrimp is cooked through remove the shrimp from the skillet. Increase the heat to high and add the 1/2 cup of wine, allow to boil up and scrape up all the brown bits from the bottom of the pan, cook for another minute or so until most of the liquid has evaporated. Then add orzo to the pan along with the vinaigrette and the spinach and let it wilt down. I added most of the reserved pasta water , you’ll use as much or as little as you need, I used whole cup of reserved pasta water. Add the shrimp back in and toss well until all the ingredients are well coated. Serve up and enjoy.
