


Search Cooking with Candi
Cooking with Candi Archives
Recipe categories
-
Join 2,751 other subscribers
Posted in Uncategorized
Making Pizza at Home with store bought dough
Making pizza at home with store bought dough is one of my favorite things to do. It’s easy once you get the hang of the dough and I found a few tricks along the way which help make it easier. The real trick to the dough is letting it rise and come to room temperature. If you try to work with cold dough out of the fridge it won’t work . You will need a rimmed sheet pan as well. I keep some dough in the freezer and take it out the night before and let it defrost in the fridge and the next day about 4 hours before I am using I place it on the counter ( in the sun even better) and let it rise and come to room temperature. There are many places to buy dough and you’ll have to find the best one by your home. I buy in Whole Foods when I am in Colorado and in NY Trader Joes , Whole Foods and your local pizza place or bakery will probably be happy to sell you a ball of dough. .Dough will need at least 3 – 4 hours to rise outside of the fridge. Nothing will happen to it so just set it out on the counter — I open the bag and let it rise away. My ingredients are simple and if you follow instructions you should be fine. Don’t be discouraged if the first few times it doesn’t come out perfectly — it took me a few times with the dough to really get the hang of it. Give it a try!
This is what I do and these are my instructions:
Ingredients:
1 bag Pizza Dough — for 4 people I make for 2 and we always have extra slices
16 oz. Pizza Sauce — if I have homemade I use that if not I always have a jar of Raos Arrabiata or Marinara on hand
Italian Seasonings — dry app. 2 tsp. you’ll have to eyeball it
flour for stretching dough — this is a must
Olive Oil Spray for spraying baking sheet — I like this better than using olive oil — either one will work on baking sheet
Parmesan Cheese
Shredded Mozzarella — app. 8 oz. more or less
Directions:
Let dough rise. Read notes above. Keeping the store bought dough on a counter for at least 3 hours or more. It will keep rising in the bag so I usually open the bag to give it room to rise. If you’re defrosting it do so overnight in fridge and then take it out the next day. You’ll notice it rising in fridge ( at least it should)
Pre-heat oven to 450 degrees — very important to get oven hot so make sure you’re oven is pre-heated
Spray baking sheet with Olive Oil Cooking Spray or using a brush lightly coat bottom of baking sheet with Olive Oil . I use a 12x 17 rimmed baking sheet . You don’t need a pizza stone.
Stretch the dough. On a clean surface ( counter top ) I put down a light amount of flour (enough for both sides) and you can always add more , the dough will help to expand the dough. Place raw dough on top of flour, coating each side. Begin stretching the dough by pinching the outside in a circular motion to spread it out. I put my fists under the dough to stretch ( you don’t need a rolling pin) You can alternate between pinching the dough with your finger, pressing it out on your work surface, and using your knuckles to pull the dough from underneath in circular motions. Usually a few motions will get the dough stretching. When it’s large enough gently transfer to the prepared sheet pan. I spread it out thin in center and more dough around perimeter ( crust) if there are holes in your dough pinch together dough or fold over the dough in that spot and get rid of them . I spread it out all the way to cover entire baking sheet . Don’t worry about your dough being a perfect shape. All pizza is delicious and beautiful.
Bake the naked pizza dough in the oven at 450 degrees for 7 minutes. During this time prep your toppings. I am sort of a purist so it’s sauce, cheese , and seasoning. Never add the toppings to raw pizza dough.
After par-baking the pizza dough, remove from oven and raise temperature of oven to 500 degrees. ( make sure it gets to 500) I add my sauce — spreading it out on dough, I leave a little room around perimeter ( see photo) , dried Italian seasoning ( if you’re using) parmesan cheese and mozzarella cheese . Obviously if you have other toppings you want to use this is the time to add.
Bake the pizza at 500 for another 10 minutes — all ovens vary so check on it after 7 minutes.
I like my cheese fully melted and a little brown in spots. Let it cool off for a few minutes before slicing .
I use a pizza cutter and get 8 slices .
Let me know how this comes out — tag me on Instagram story — I would love that.
Posted in Uncategorized
Fresh Basil Pesto
 Chicken and Pesto on the Grill
 Pasta Pesto
The original recipe for this delicious pesto appeared back in May 2011 on Cooking with Candi and this pesto sauce has summer written all over it. Basil is abundant in the summer and it’s great on pasta as well as chicken. Yummy Pesto was the original title for this recipe way back in 2011. This is the same recipe from my BFF Suki. I have tried many pesto sauces and this remains my absolute go to favorite. It is super easy and while the basil is abundant you should make it and freeze it. When you freeze the pesto in a container, pour a thin layer of olive oil over the top . I have it frozen for up to 3 months. I use it on chicken, pasta, and it’s wonderful as a spread. This recipe is good for 2 lbs. of pasta usually. So I use 1/2 and freeze the rest if it’s just the 2 of us.
Enjoy!
 Pesto Chicken on the Grill with Grilled Peppers and Roasted Sweet Potatoes
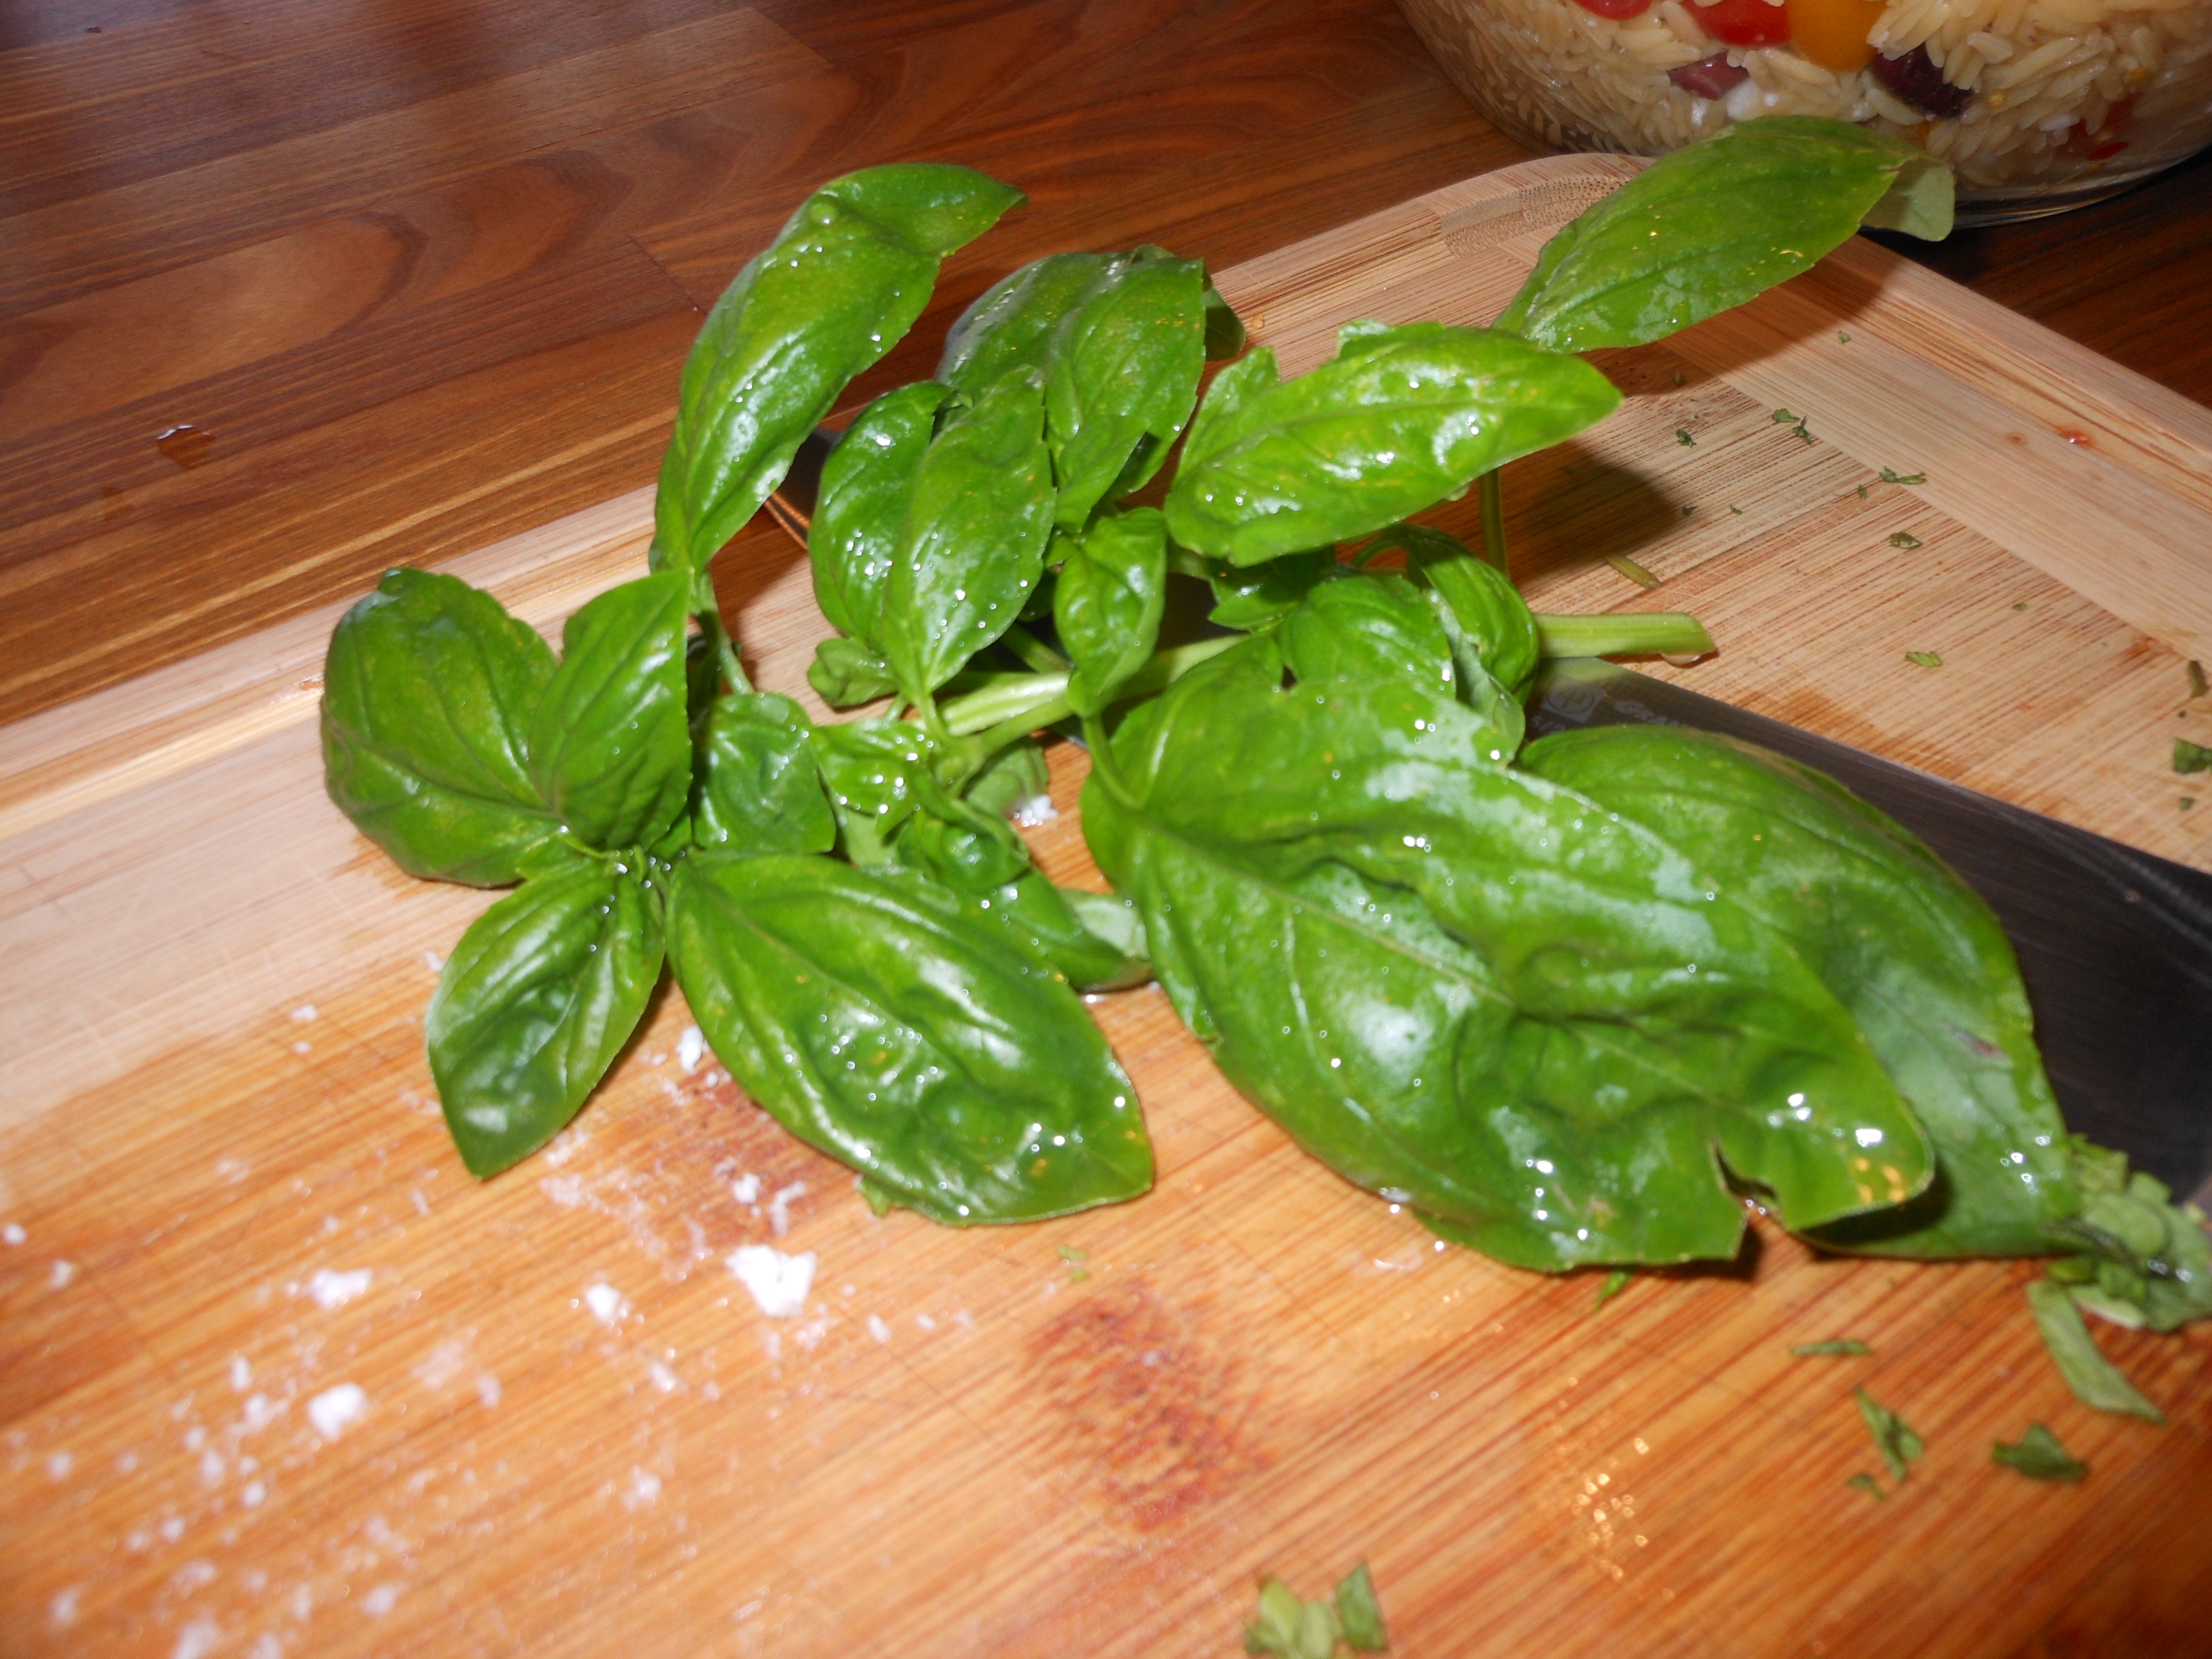 Fresh Basil
If you are going to use on chicken , just brush on the chicken sprinkle a tiny bit of kosher salt on it and let it marinate for a few hours at least and it can be marinated overnight in the refrigerator. Take it out of fridge and let it sit at room temp. before putting on the grill. That’s it!
*You’ll need a food processor
Ingredients:
2 cups fresh basil (washed)
1/2 cup romano cheese (grated)
1/2 cup parmesan cheese ( grated)
1/2 cup pignolli nuts or walnuts
1 cup extra virgin olive oil–use a good one
1 – 3 tablespoons of unsalted butter (it’s good if the butter is softened before adding) you can soften in microwave
4 cloves garlic – peeled and whole
freshly ground black pepper–to taste
*kosher salt to taste if you feel you need it after finished making pesto
Directions:
I put all ingredients except for olive oil in the food processor. Give it a few grinds using the blade attachment. Then I slowly add in the olive oil through the top of processor while it’s on. Beautiful green pesto! so easy. Taste for salt and pepper
Cook pasta and drain and add pesto. Done!
Posted in meatless, pasta, Sauce
Tagged Basil Pesto, food, freeze pesto sauce, fresh basil pesto, Pasta, pesto, Pesto Sauce, recipes
Lime-Garlic and Ginger Chicken —
Vm
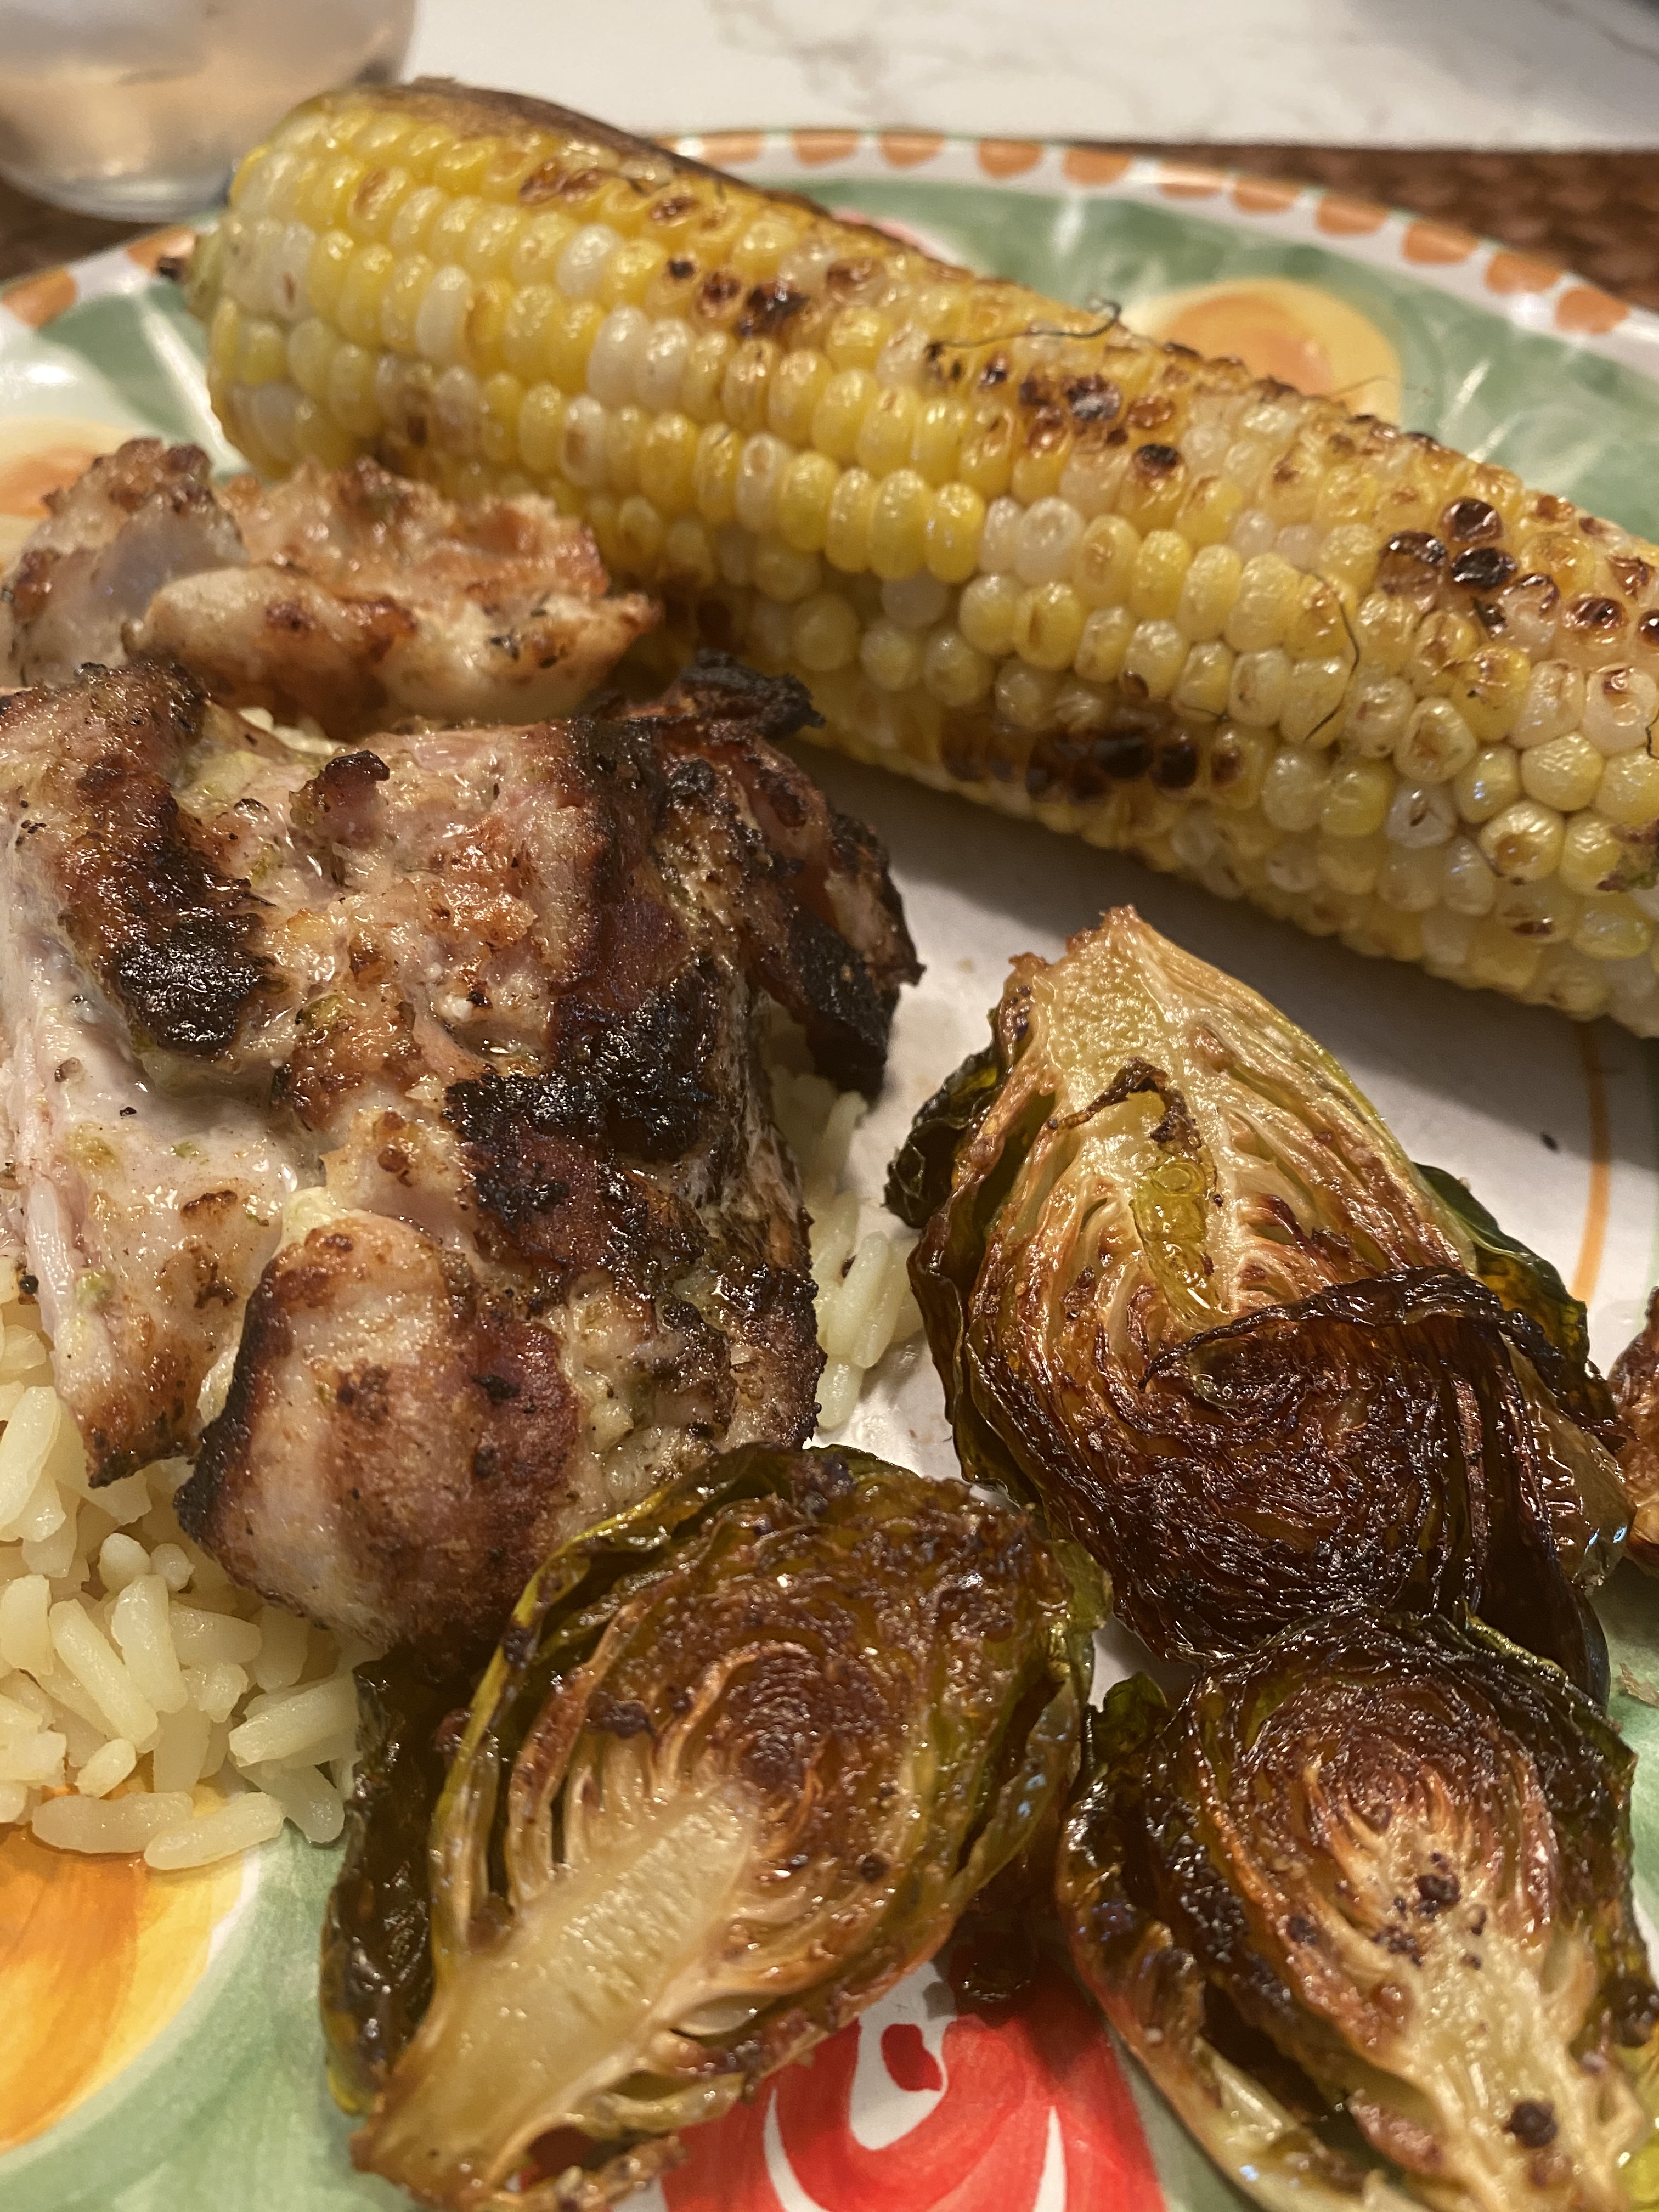 I made this recipe for dinner last night and it was just delicious. It elevated the weeknight bbq chicken for sure . The only thing is this recipe is best left to marinade for at least 6 hours. After breakfast I made the marinade and let it sit all day. This chicken can sit in the marinade for up to 8 hours–just let it come to room temperature before cooking. Not so tough to do and worth the results. If you don’t have an outdoor grill use a grill pan on medium-high . I plan on making this chicken all year round. Not a lot of ingredients at all and very easy to put together.
This can easily be doubled.
Ingredients:
1 1/2 to 2 pounds of boneless, skinless chicken thighs which is what I used but feel free to use chicken breasts
Kosher Salt and Freshly Ground Black Pepper
1/3 cup Mayonnaise — now I don’t use diet mayonnaise and the mayo burns off so you won’t be tasting it -the mayo makes it moist and yummy
1 Tablespoon Lime Zest — app. 2 limes and save the lime to squeeze over the chicken
1 Tablespoon finely grated fresh ginger — if no fresh ginger use about 1/8 of a teaspoon of powdered ginger –1/8 to 1/4 of powder is equivalent to 1 Tablespoon Fresh
2 garlic cloves finely minced — I always put my garlic in my mini processor for a fine mince . If you don’t have a mini processor you can just mince by hand but it’s a great little machine to own.
Directions:
Pat the chicken dry with some paper towels.
In a large enough bowl to add the chicken stir together the mayonnaise, lime zest, garlic, ginger and 1 1/2 teaspoon kosher salt and about 1/2 teaspoon black pepper. Add the chicken to the mayo mixture and stir to coat. I put my chicken in the fridge for the whole day and removed it about an hour before cooking to bring to room temperature.
To grill: Heat your grill to medium high and grill the chicken till cooked through I cooked for about 5 minutes per side and they were perfect. Breasts will cook up faster so just watch them . They’re finished when juices run clear. Turn as necessary to avoid burning them.
If cooking inside the house with a skillet/grill pan cook over medium-high heat also about 5 minutes per side.
I squeezed the fresh lime over before serving and they were just delicious.
Enjoy!!! Simple and Delicious!
Posted in chicken
Tagged BBQ, Chicken, chicken marinade for grill, dinner, food, garlic lime chicken, recipe, recipes
Summer Salad
I made this salad the other night and it came together so beautifully and it was very very tasty if I do say so myself. I made it with grilled chicken and bacon but if you want to keep it vegetarian you can . You can also serve chicken and bacon on the side if you’d like. It’s a yummy chopped up salad with lots of tasty items that I love together. The lemon vinaigrette dressing has a bit of kick but you can easily leave out the crushed red pepper. I used fresh butter lettuce but any lettuce will do .
Enjoy!
*this served 4
Salad Ingredients:
8 slices bacon — I used microwave bacon and cooked for 3 minutes and cooled it off and crumbled it. Of course you can use any type of bacon or omit — up to you
app. 1 pint blueberries
1/2 cup crumbled Feta or Goat Cheese — I hate blue cheese but if you love it use that
1 handful small cut up basil leaves
app. 4 cups farmers market lettuce or any lettuce you like — I used a soft butter lettuce this time–I tore it into small pieces
3 corn on the cobs kernels removed — leave it raw — it’s sweet and delicious
1-2 avocados — depending on the size of your avocados — I used 2 small ones
Grilled Chicken:
I used about 4 chicken breasts — small ones and brushed some olive oil and salt and pepper and a little dried oregano and grilled them on the grill for a few minutes on each side till done and set aside with aluminum till ready to serve salad and then cut up chicken into small pieces.

Lemon Vinaigrette Dressing:
I made salad dressing in my mini chopper — Perfect and easy if no mini chopper just mince garlic by hand and whisk all ingredients together adding olive oil in last slowly.
3 garlic cloves, finely minced
2 Tablespoons Dijon Mustard
1/4 cup Champagne Vinegar
3 Tablespoons fresh Lemon Juice
2 Tablespoons Honey
1/2 teaspoon kosher salt — more to taste — didn’t need it
1/2 teaspoon freshly ground black pepper
1/2 cup extra virgin olive oil
I used my mini chopper and started with the garlic and put all other ingredients and added the olive at the end slowly.
Taste for salt and pepper but it was fine by me.
- 1/2 teaspoon or more or less crushed red pepper flakes –we like kick and so did our guests so you may or may not want to use this which is fine
In a large salad bowl add in lettuce, chicken , blueberries, cheese, basil leaves, crumbled bacon, avocado and corn. Drizzle with the vinaigrette or serve salad and let your guests dress their own — up to you. Once salad is dressed serve immediately. I
Lemon Orzo with Feta
I love this recipe from Ina Garten’s Modern Comfort Food Book.
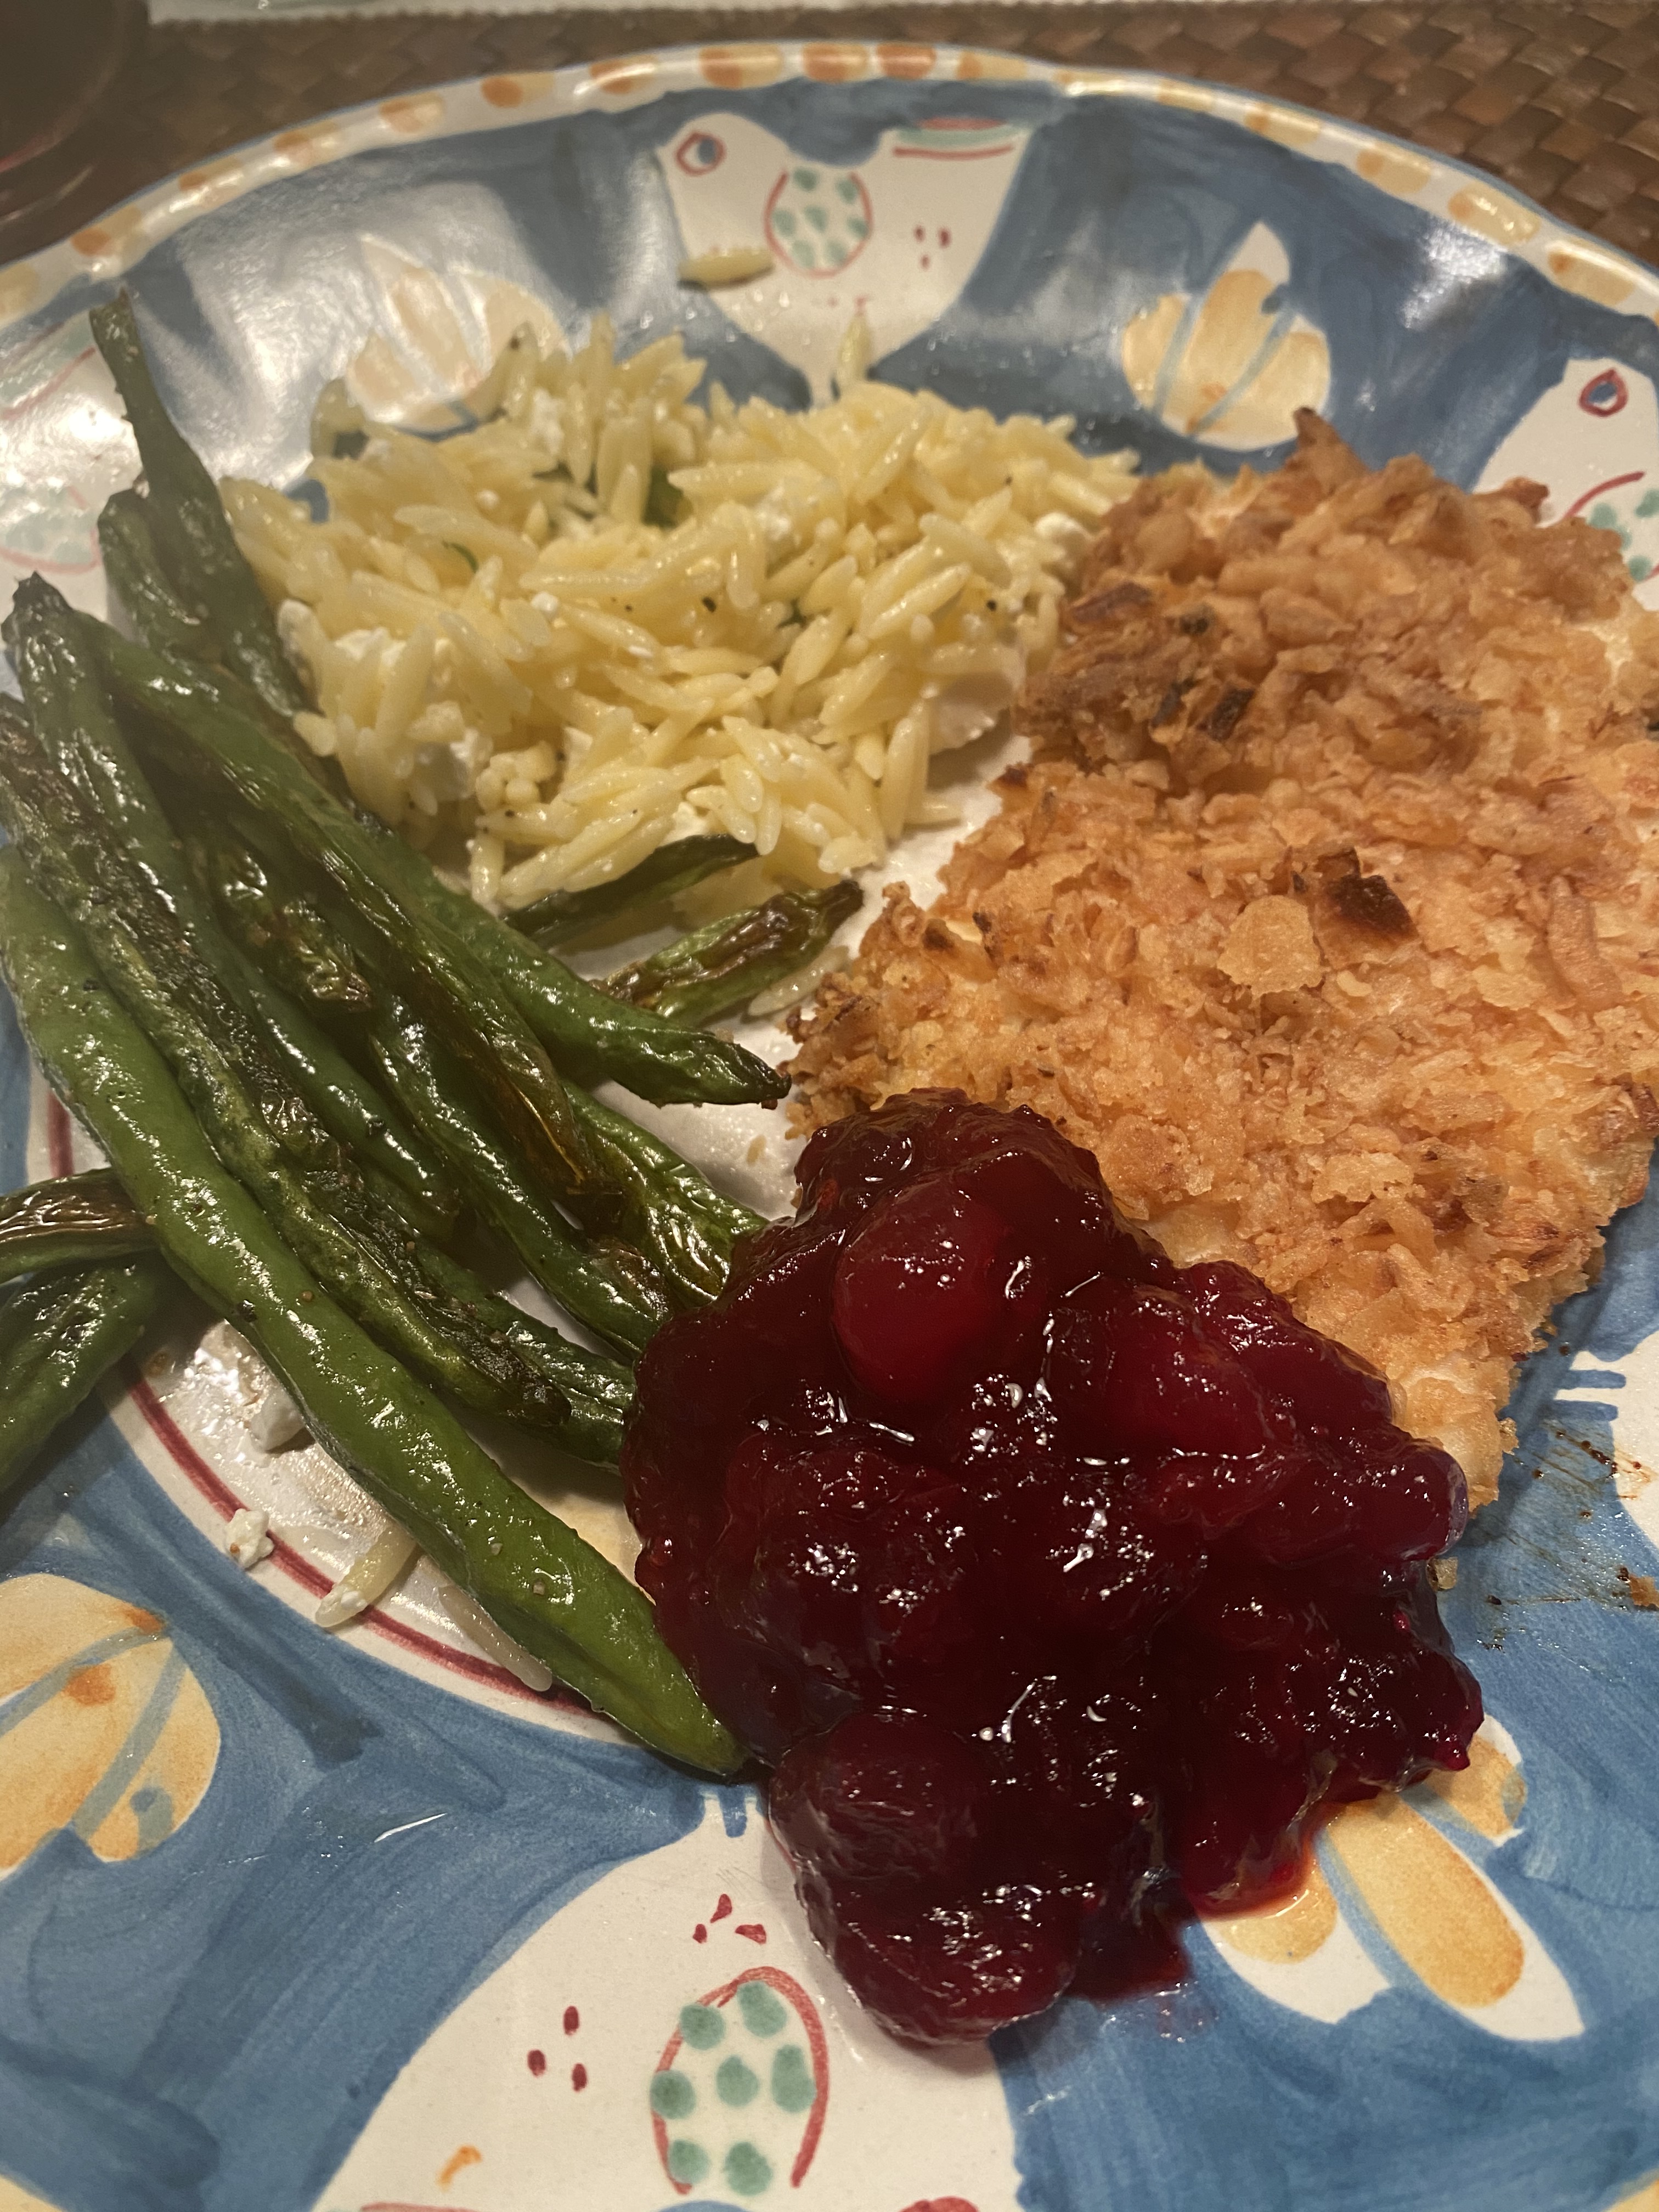
This is a delicious side dish for Chicken , fish ,and meat. I particularly like it with Roast Chicken. In the photo I posted here I served it with onion crusted chicken, oven roasted string beans, and homemade cranberry sauce. It was sort of perfect.

Get a good block of Feta or buy the crumbled one . I diced up a block of Greek Feta Cheese and it was just perfect but a nice crumbled one would work equally as well.
If you compare my recipe to Ina Garten’s original recipe you’ll notice I have omitted the salt, it was too salty for me. I tasted for Salt and Pepper when finished and added a little bit to the orzo when I cooked it. Everyone has a different palate for Salt so my suggestion is to taste at the end and add then, this recipe is easy to add at the end. Same goes for pepper just add to your own taste. Feta was plenty salty.
Simple to make and Delicious to eat .
Enjoy!
Ingredients:
1 cup Orzo
2 teaspoons grated lemon zest
2 Tablespoons Freshly squeezed Lemon Juice
2 Tablespoons good Olive Oil
1 Tablespoon minced fresh dill
1 cup small diced Feta ( try a good greek Feta ) or crumbled Feta Cheese
*kosher salt and freshly ground black pepper to taste– see note above
Directions:
In a large saucepan , bring 2 quarts of water to a boil, and cook the orzo according to package directions al dente.
Once orzo is cooked and drained transfer to a bowl and stir in the lemon zest, lemon juice, olive oil , dill, fold in the feta and taste for salt and pepper. I added no salt but about 1/4 teaspoon of freshly ground black pepper. This is up to you . Serve hot or at room temperature .
A Berry Patriotic Trifle
I made this for the Fourth of July a few years ago and it was so very pretty and pretty yummy too. I honestly didn’t care how good it tasted because it looked that good but it really was very yummy. Very easy to make and no baking involved. Perfect for the Fourth or Labor Day or really any old time . Actually this would be lovely made with all blackberries , all strawberries and just serve it any old time if you’re not feeling the Patriotic theme. It’s delicious and an easy solution for dessert for those summer bbq’s.
You’ll need a Trifle Bowl — worth the investment.
Happy Fourth of July America! Land of the Free because of the Brave!
Ingredients:
1 store bought angel food cake
For the syrup:
1/4 cup sugar
1/4 cup fresh lemon juice
1/4 cup water
1/4 tsp. Almond Extract
Whipped Cream Cheese:
2/3 cup sugar
1 lb. Cream cheese , at room temperature
2 cups Heavy Cream, at room temperature
Fruit:
2 pints blueberries
2 pints strawberries, hulled and sliced
Directions:
Heat 1/4 cup sugar, lemon juice , and 1/4 cup water in a saucepan over medium-high heat, stirring, until the sugar dissolves. Remove from the heat and stir in the almond extract.
Cut the pre made angel cake into 1 ” slices
Brush both sides of the sliced cake with syrup — I put on a rimmed baking sheet to do this
Cut the slices into 1″ cubes
Beat 2/3 cup sugar and the cream cheese with a mixer with paddle attachment on medium speed until smooth and light. Add the cream and beat on medium-high speed until smooth and the consistency of whipped cream
Arrange half of the cake cubes in the bottom a 13 cup trifle dish. Sprinkle evenly with a layer of blueberries. Dollop half of the cream mixture over the blueberries and gently spread
Top with a layer of strawberries
Layer the remaining cake cubes on top of the strawberries. Then sprinkle with more blueberries
Top with remaining whipped cream and finish with the remaining strawberries and blueberries, arranging them in a decorative pattern. Cover and refrigerate for at least a few hours. Overnight is perfect and what I recommend.
Like I said any berries will do , it’s a lovely dessert.


Farro Salad
This is a delicious farro salad made with arugula — this salad is similar to my take on Jennifer Aniston’s Salad but with arugula and shaved parm instead of feta. This is light and yummy and you can add a protein and make it a dinner salad if you’d like. Original recipe credit goes to the chef Charlie Bird on this one.
You can obviously add what you like and remove what you don’t like . Feel free to swap cheeses, or onions for radishes, etc and chopped up dates would be just fab.
Enjoy!
Follow me on Instagram @cookingwithcandi
Ingredients:
1 cup Farro– I use pearled farro
1 cup apple cider not apple cider vinegar
2 cups of water
2 teaspoons kosher salt, and more to your own liking
2 bay leaves
1/4 cup extra -virgin olive oil* you can double if you’d like for a bit more dressing
1/4 cup fresh lemon juice- * you can double if you’d like for a bit more dressing
app. 1/2 cup shaved Parmesan Cheese , I used a vegetable peeler but I do know you can buy Parmesan Cheese shaved this way ( time and mess saver)
app. 1/2 cup shelled Pistachios–I used salted pistachios and chopped them myself. You can use raw pistachios but they’re a tad tasteless or you can leave them whole up to you or substitute with any other nut you prefer or omit totally if you prefer gutless
app. 2 cups Arugula
app. 1 cup torn Basil Leaves or 1 cup chopped basil
app. 1 cup Mint leaves-cut up into smaller pieces– I prefer to chop it
2 large radishes sliced thinly or rough chopped–optional and you can use red onion here as well — sliced thinly or chopped into small pieces — totally optional but I love the crunch and the flavor of a fresh radish
app. 1/2 cup sliced grape or cherry tomatoes — totally optional
Directions:
Farro:
In a medium saucepan, bring farro, apple cider , dash of kosher salt , 2 bay leaves and 2 cups of water to a simmer. Simmer until farro is tender and liquid evaporates, about 30 minutes. If farro is cooked but there is still water I put in a colander/strainer and leave it till it cools down. If on the other hand the water evaporates before the farro is done, you’ll have to add a little more water. You can always strain it so no worries–but don’t overcook. Let farro cool down and discard the 2 bay leaves.
Salad:
In a salad bowl (large enough to fold in arugula and mix) whisk together the olive oil and lemon juice, I use a small wire whisk, it’s an amazing kitchen tool.
Salad is always best at room temperature so if you do refrigerate, just bring to room temperature before serving. If you’d like you can put farro and parmesan in the bowl with some dressing and allow it to sit, this would be the salad base and it can sit for a few hours out without refrigeration. I usually just mix all ingredients starting with the farro then add in everything else gently toss with some dressing and if people want more dressing it’s available. Add nuts at the end so they retain their crunch !


Posted in Salad, salad dressing, vegetarian
Tagged farro salad, food, recipe, recipes, salad, summer fresh salad, vegetarian
Simple Cole Slaw

 I love Cole Slaw and it is such a simple thing to make to add to any bbq or meal. It is especially good in the summer when we all love cold salads. I like it all year round. It’s a great side dish to almost any meat and I really like it with roast chicken.
It’s super easy if you buy the bags of pre -shredded cole slaw. If you want to do it yourself you can just cut a whole cabbage in half and remove the core, wash , drain, dry and shred in the food processor or by hand. I just picked up 2 bags of Cole Slaw available everywhere in the produce section. You’ll need about 8 cups. I used 2 bags about 16 ounces.
This is what I did.
Ingredients:
For app. 8 cups of cabbage/cole slaw mix use 16 oz. app 2 bags of pre shredded Coleslaw mix or cut in 1/2 and use 1 bag
1/2 cup mayo
2 Tablespoons Apple CiderVinegar
1/4 cup Dijon Mustard– I love Dijon so I do 1/4 cup
1/2 tsp. Kosher Salt and more to taste
1/4 tsp. Freshly Ground Black Pepper and more to taste
Mix dressing in a bowl with a whisk is best.
Start slowly adding dressing to coleslaw mix in a large enough bowl to continue tossing. I added a little bit at a time and kept mixing till it was completely saturated with the dressing.
It’s always best if it gets to sit for awhile so if you have the time make ahead.
Then I refrigerated it till we were ready to eat and gave it a good toss and tasted for Salt and Pepper before serving!
Enjoy!
Posted in cole slaw with homemade dressing, cole slaw. homemade cole slaw, side dish
Tagged BBQ, cole slaw, food, homemade cole slaw, recipes, sides
Easy Peasy Chicken Caprese
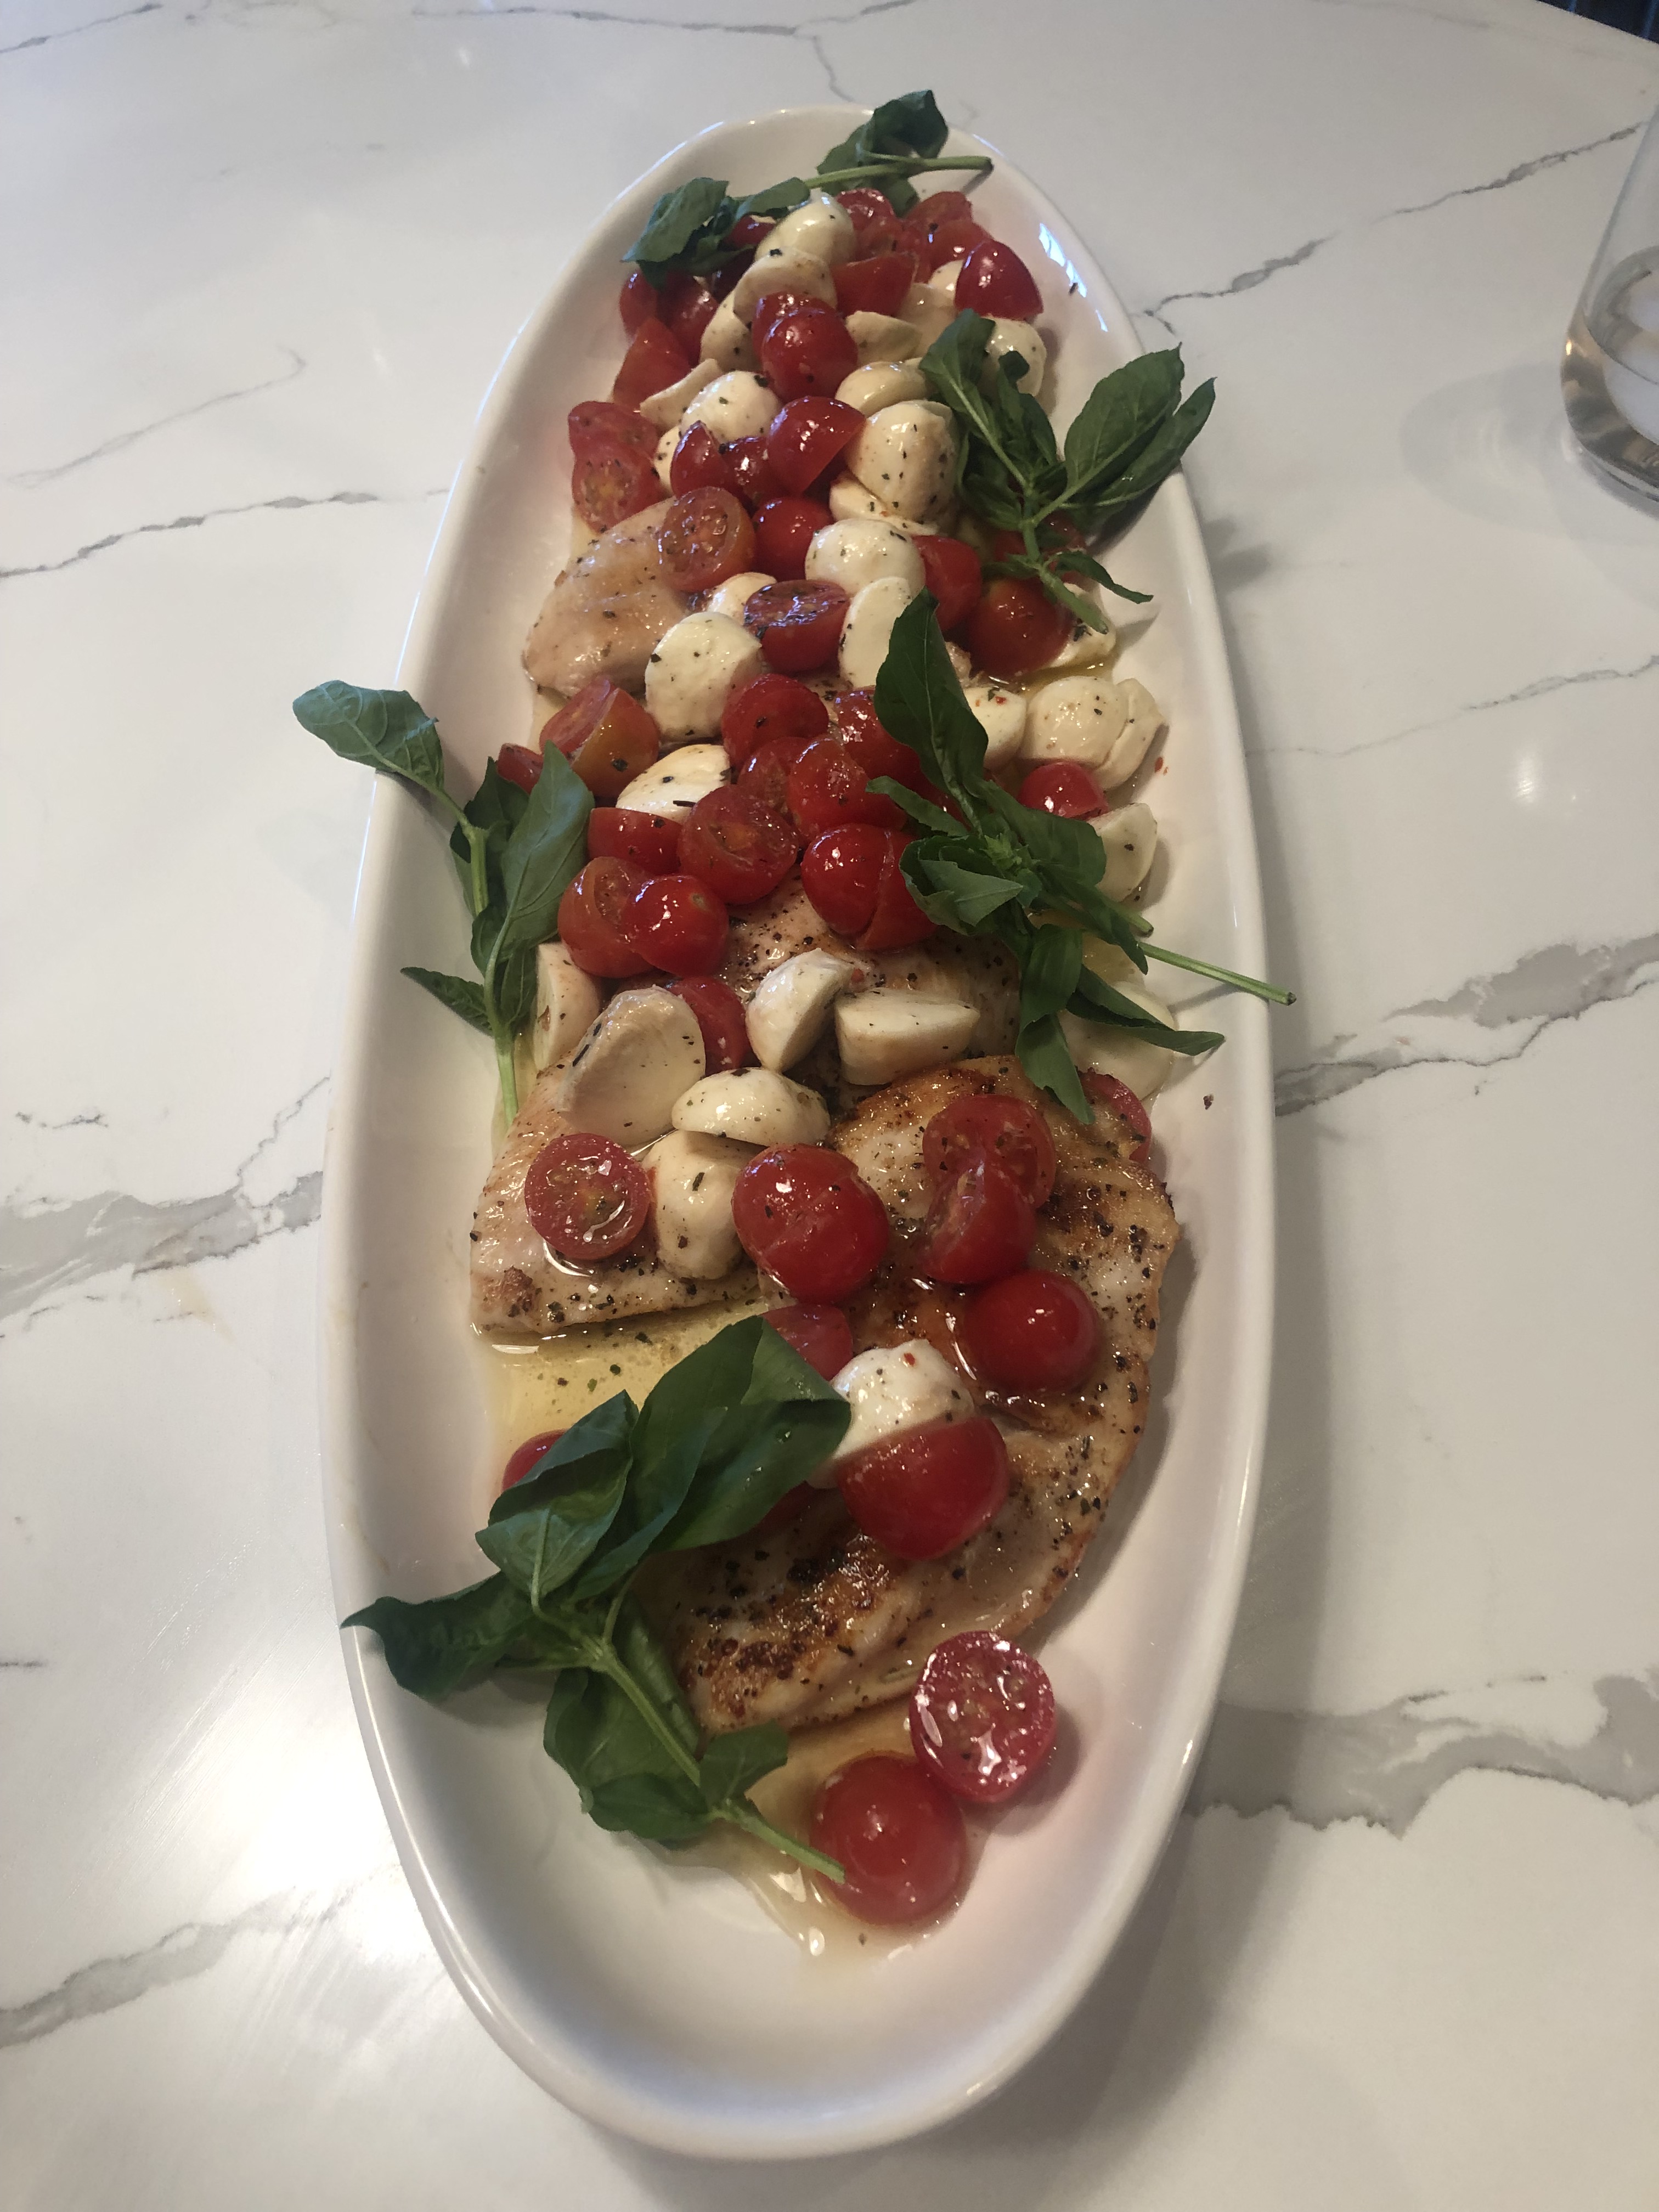


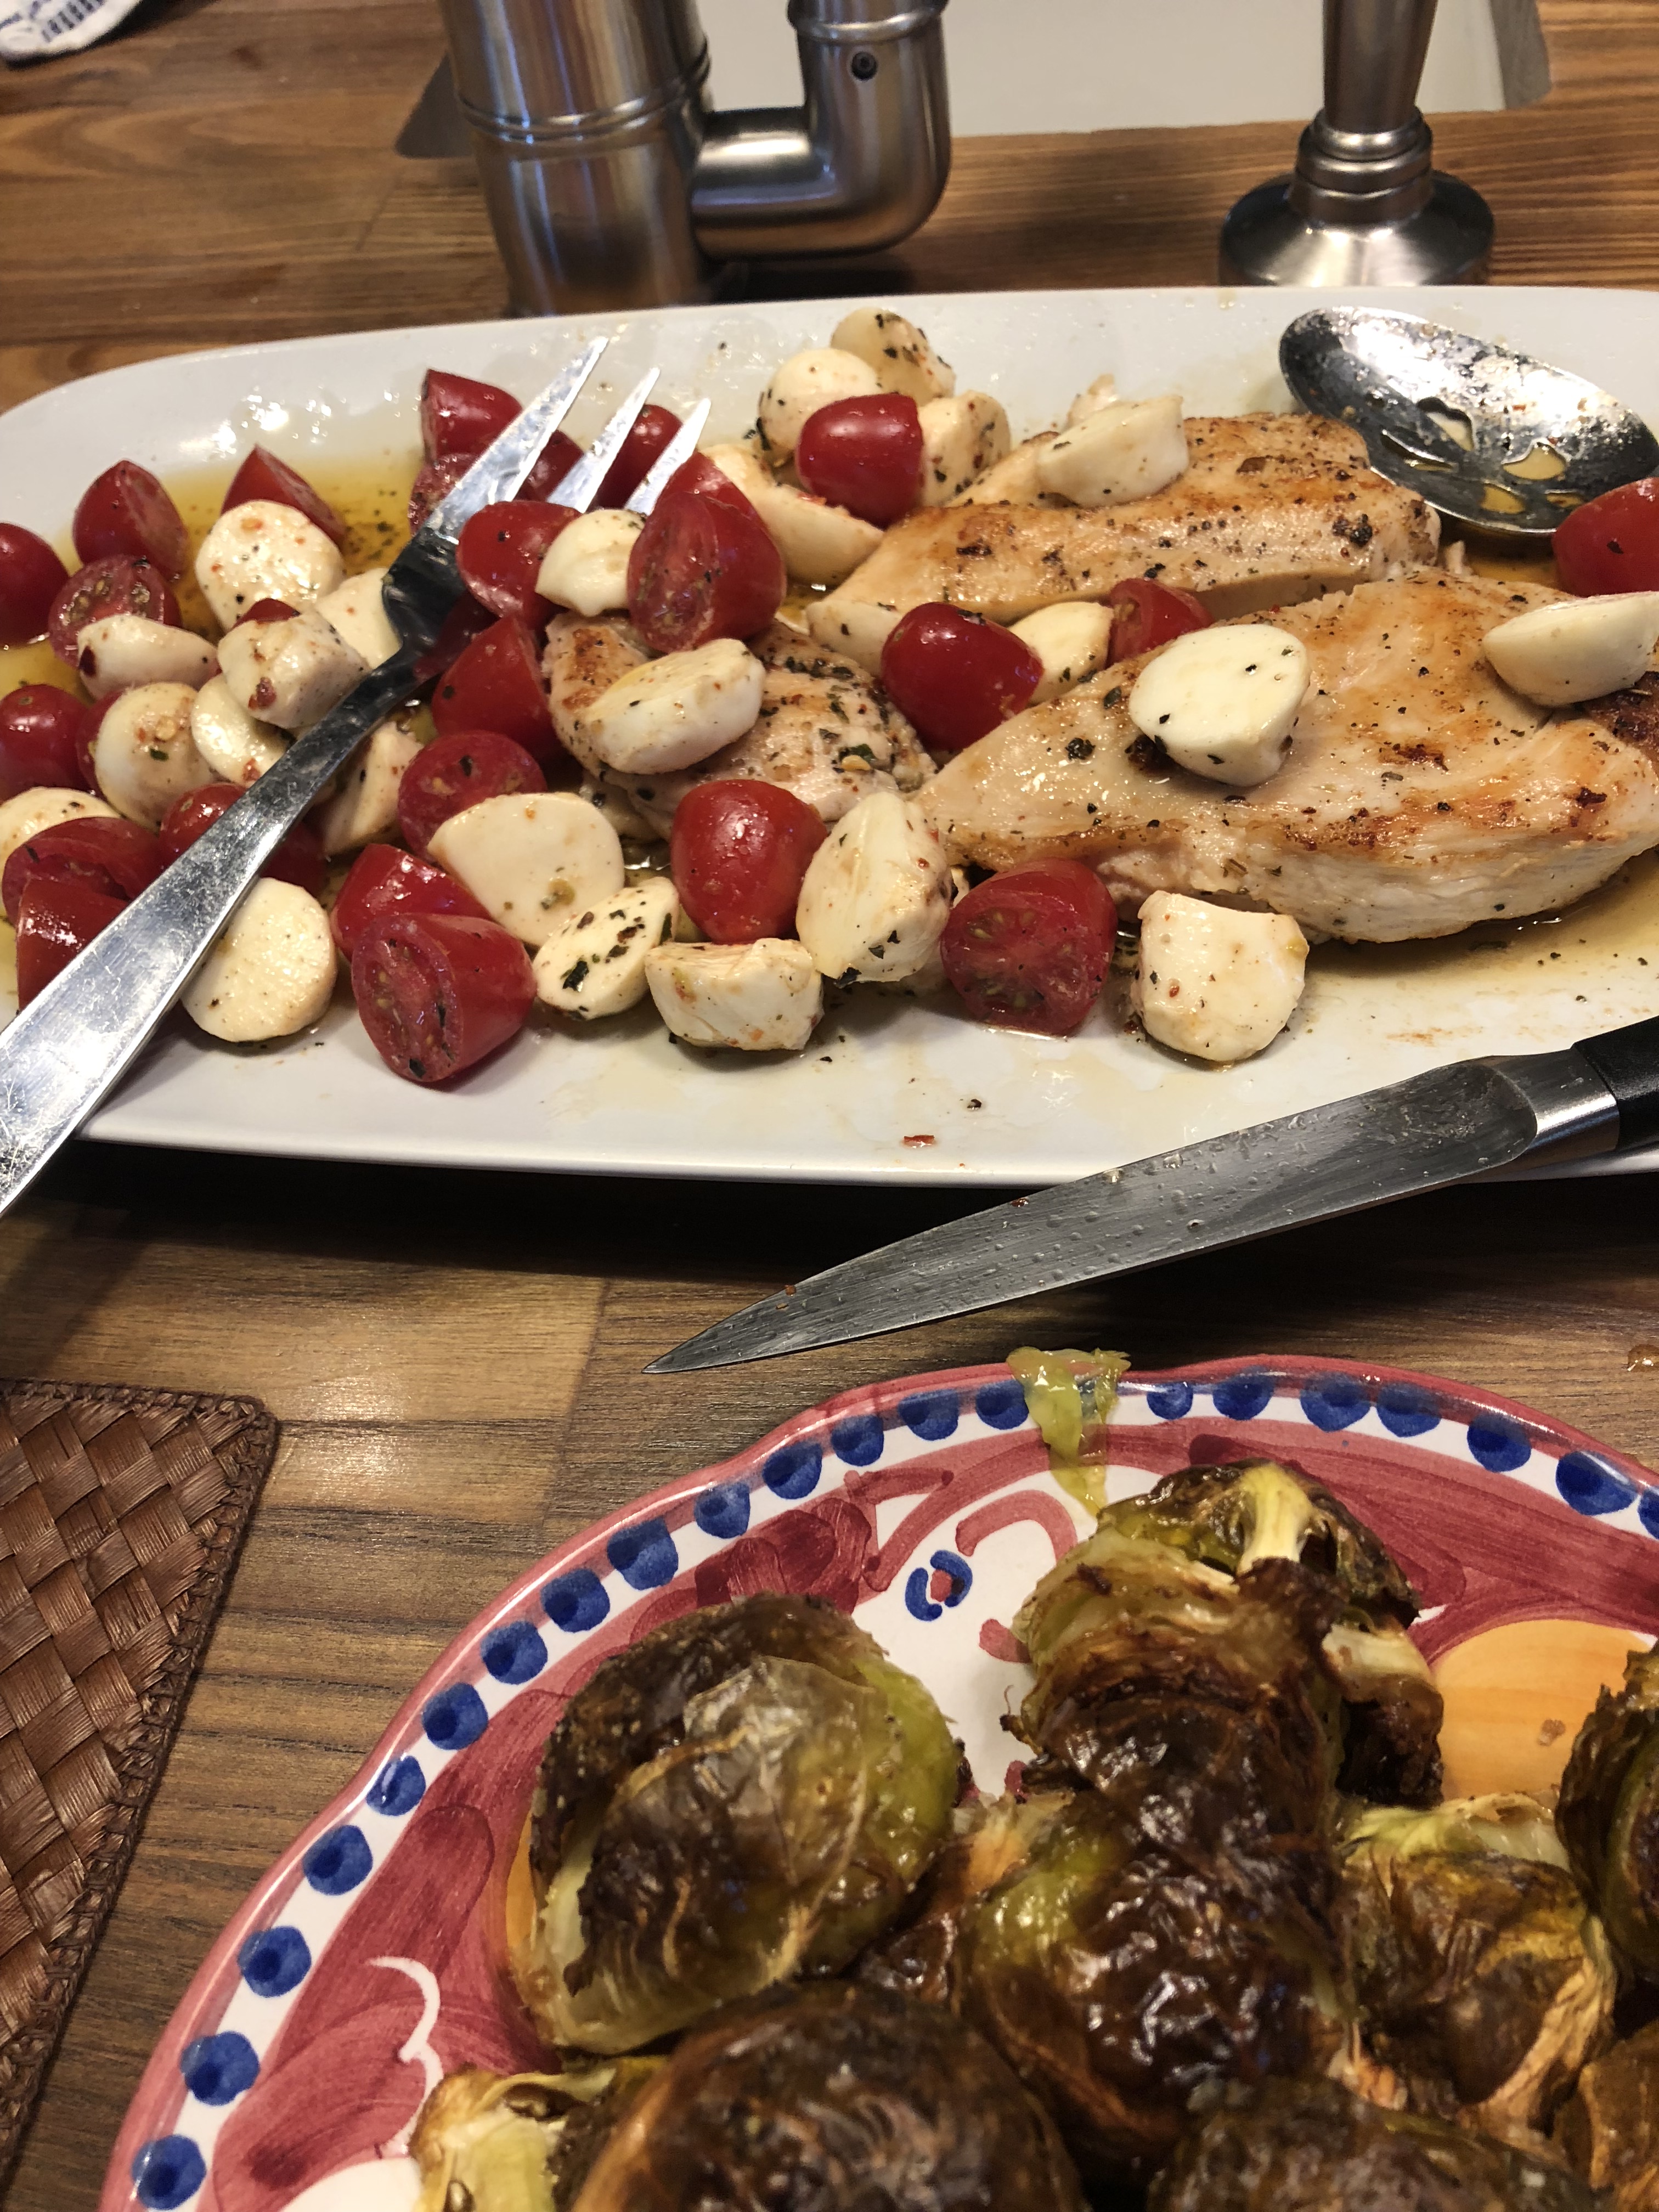
 This is one of those recipes that I make that is so super easy. Very few ingredients and other than cutting tomatoes and mozzarella balls, there is very little prep. You gotta love meals like this, especially in the summer when these beautiful heirloom tomatoes are abundant. I really only make this in the summer . It is light and delicious and makes for a beautiful salad as well and you can serve it at room temperature. I made this last night with burnt brussel sprouts on the side . You’re not going to believe how easy this is. It’s amazing!
Follow me on Instagram @cookingwithcandi
Ingredients:
1 container marinated bocconcini ( mozzarella balls) you will need the oil from the container to marinate chicken ( it comes in an olive oil marinade with spices)
4 skinless, boneless chicken breast halves , I buy them pounded thin or use chicken tenderloins –you just don’t want them too too thick
Kosher Salt and Freshly Ground Black Pepper
1 pint heirloom ( if you can get them) cherry or grape tomatoes, halved
*a little cut up basil is always a good idea!
Directions:
Take bocconcini balls out of the marinade. Cut bocconcini balls in quarters. Transfer about 1/2 of the marinade from bocconcini to a medium size baking dish , add the chicken , salt and pepper the chicken and let it sit at room temperature for about an hour before cooking. If you’d like you can refrigerate , and take out and bring to room temperature before grilling.
Put cheese in a bowl, add the remaining oil marinade and add the cut tomatoes to this bowl. Salt and Pepper to taste, give it a good stir and put in refrigerator till you’re ready to cook chicken. I removed from fridge about 1/2 hour before I cooked the chicken. Just bring it to room temperature.
Grill the chicken over medium high heat , till you get nice grill marks, probably about 8 minutes. You can cut the chicken into smaller pieces and mix with tomatoes and cheese. I just plated up the chicken and put tomato
 /cheese mixture on the plate. Perfect summer meal.
Posted in chicken
Tagged Chicken, chicken caprese, dinner, easy peasy chicken caprese, food, recipe, recipes, summer chicken dish
