Devil’s Chicken on the Grill

IMG_0575

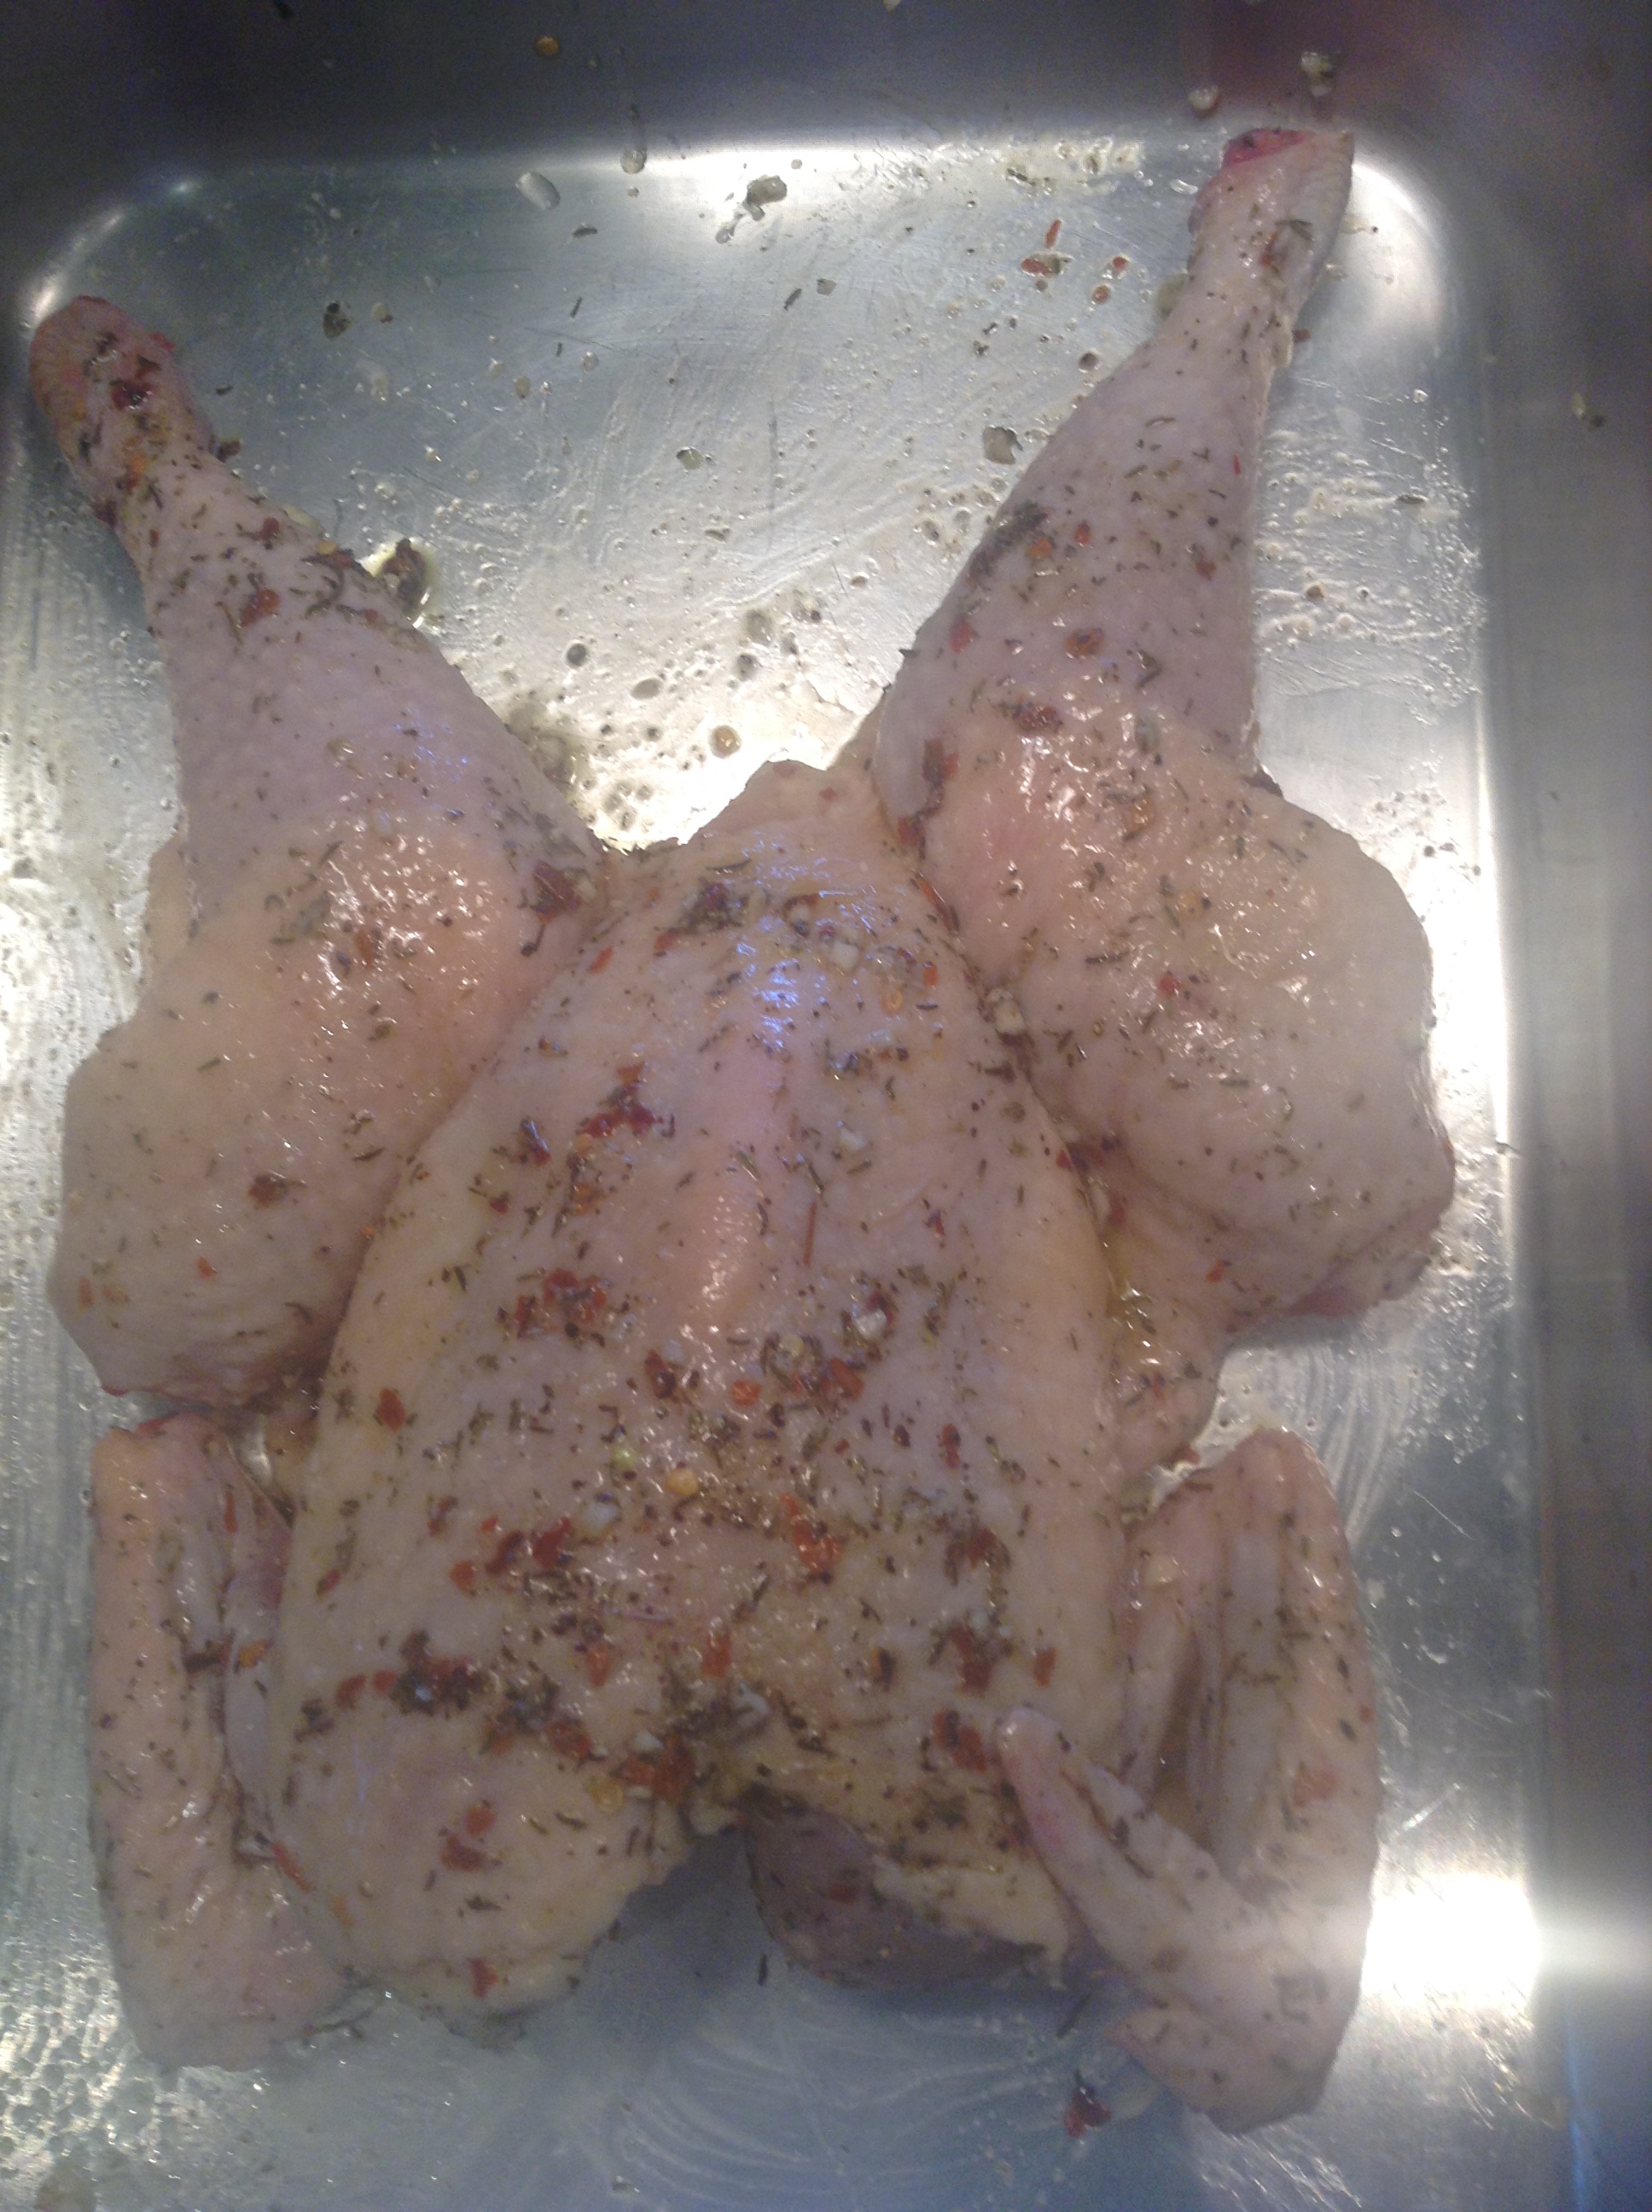
chicken flattened out right before cooking

IMG_7439

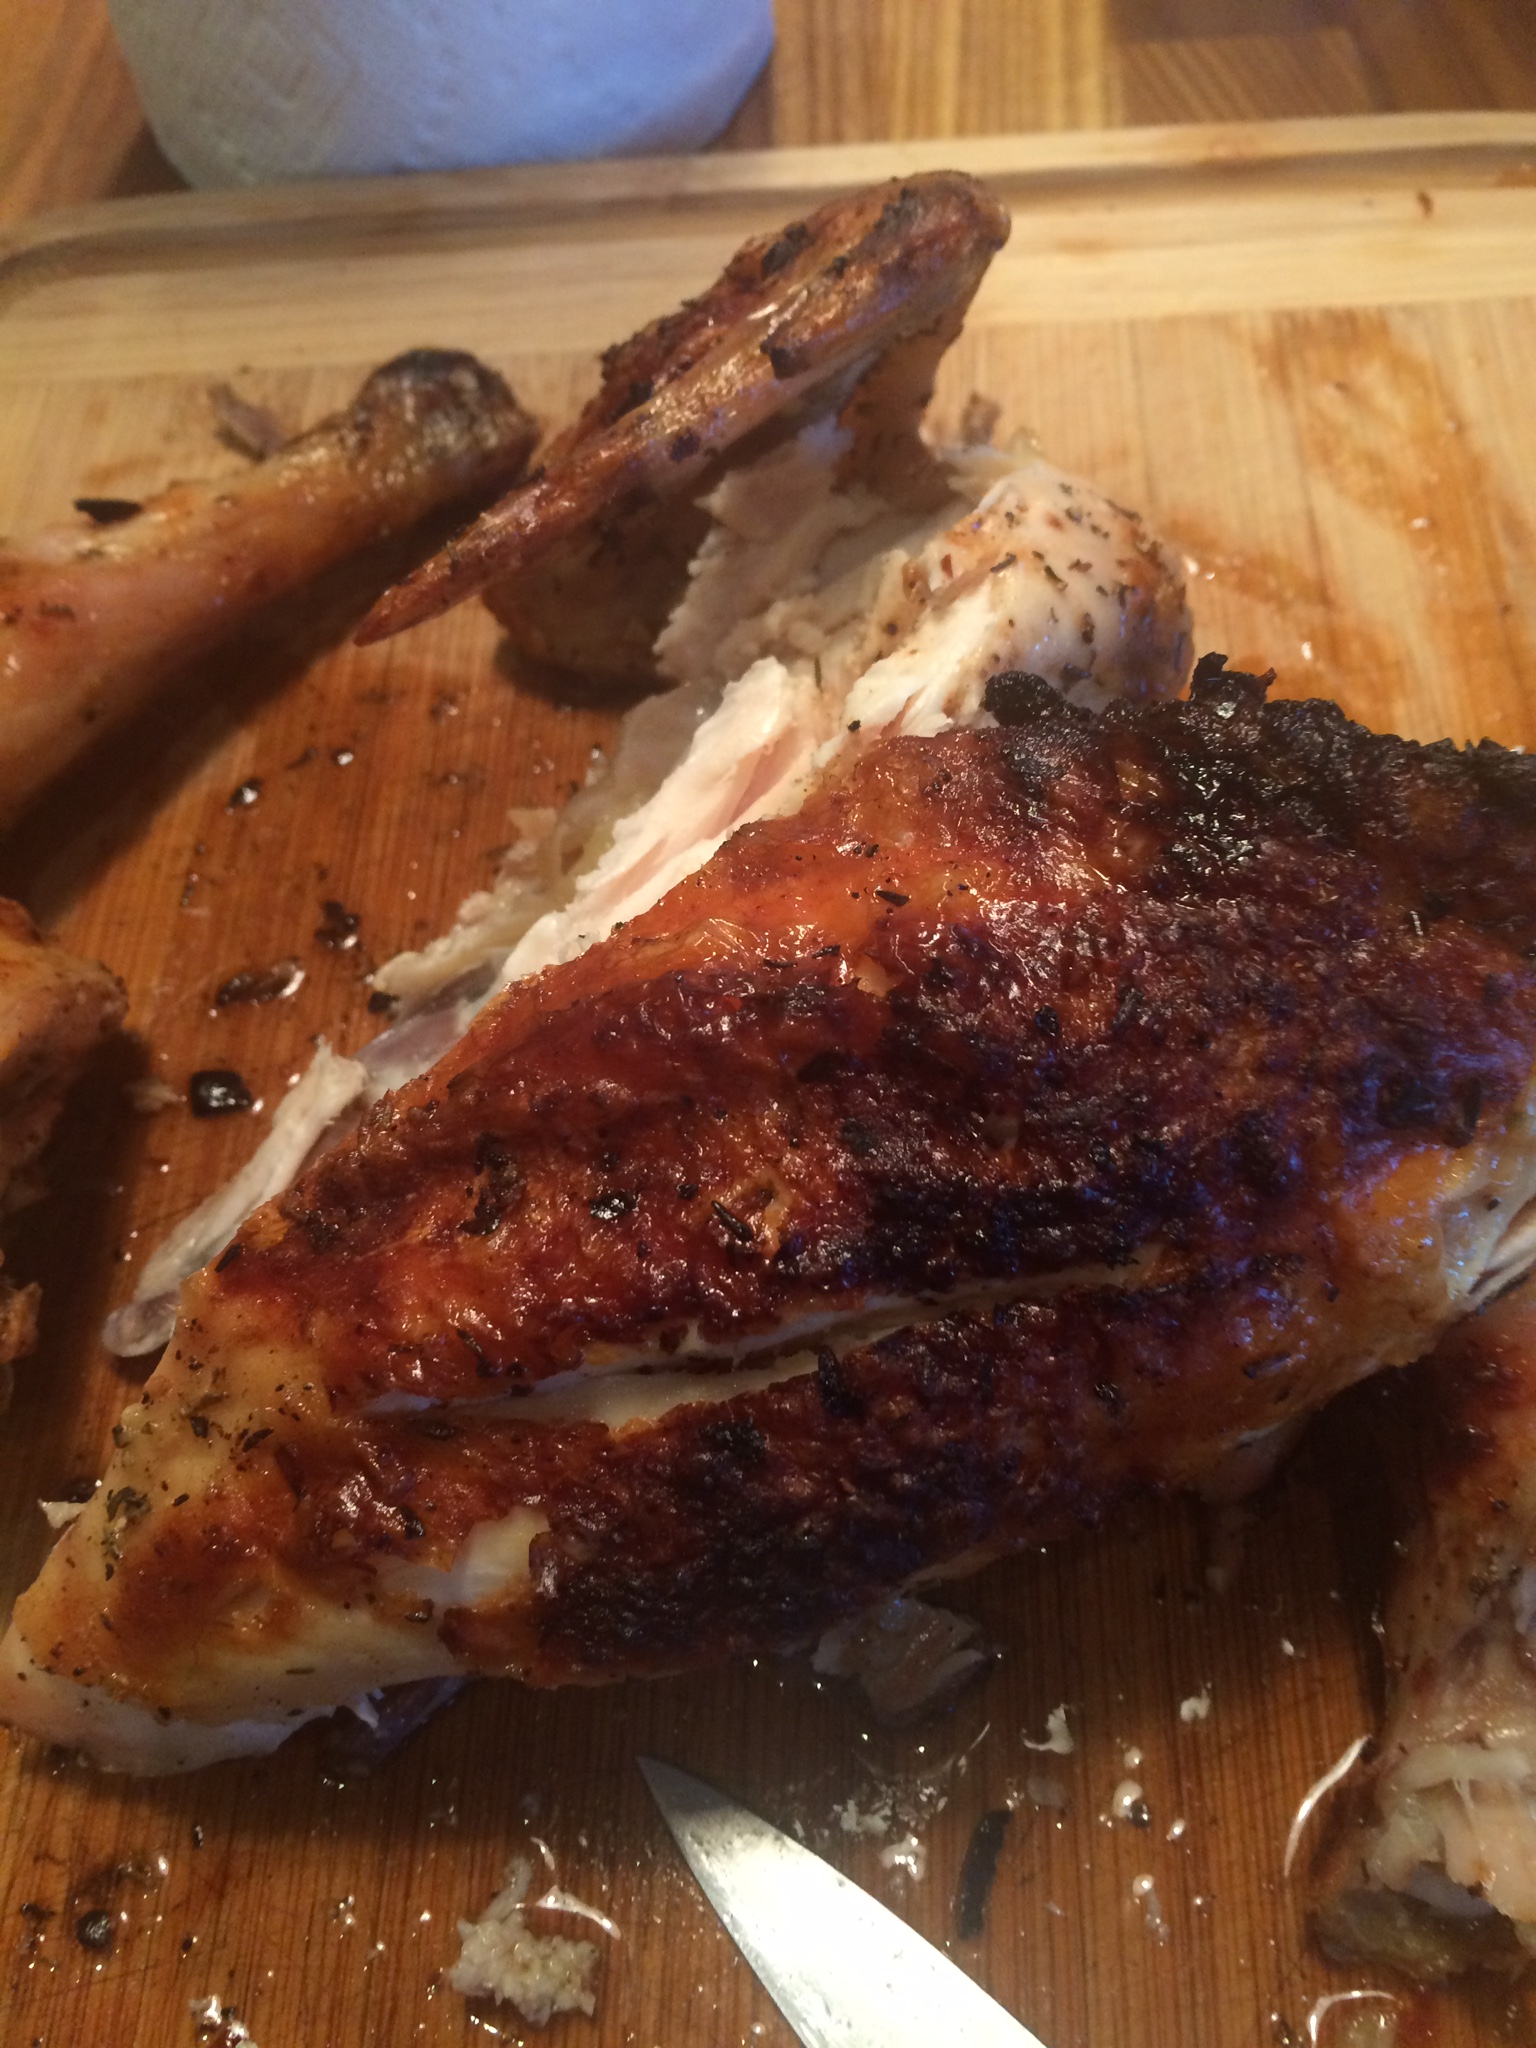
look at the color of the skin on this chicken, no black!!! just golden and brown

IMG_0572

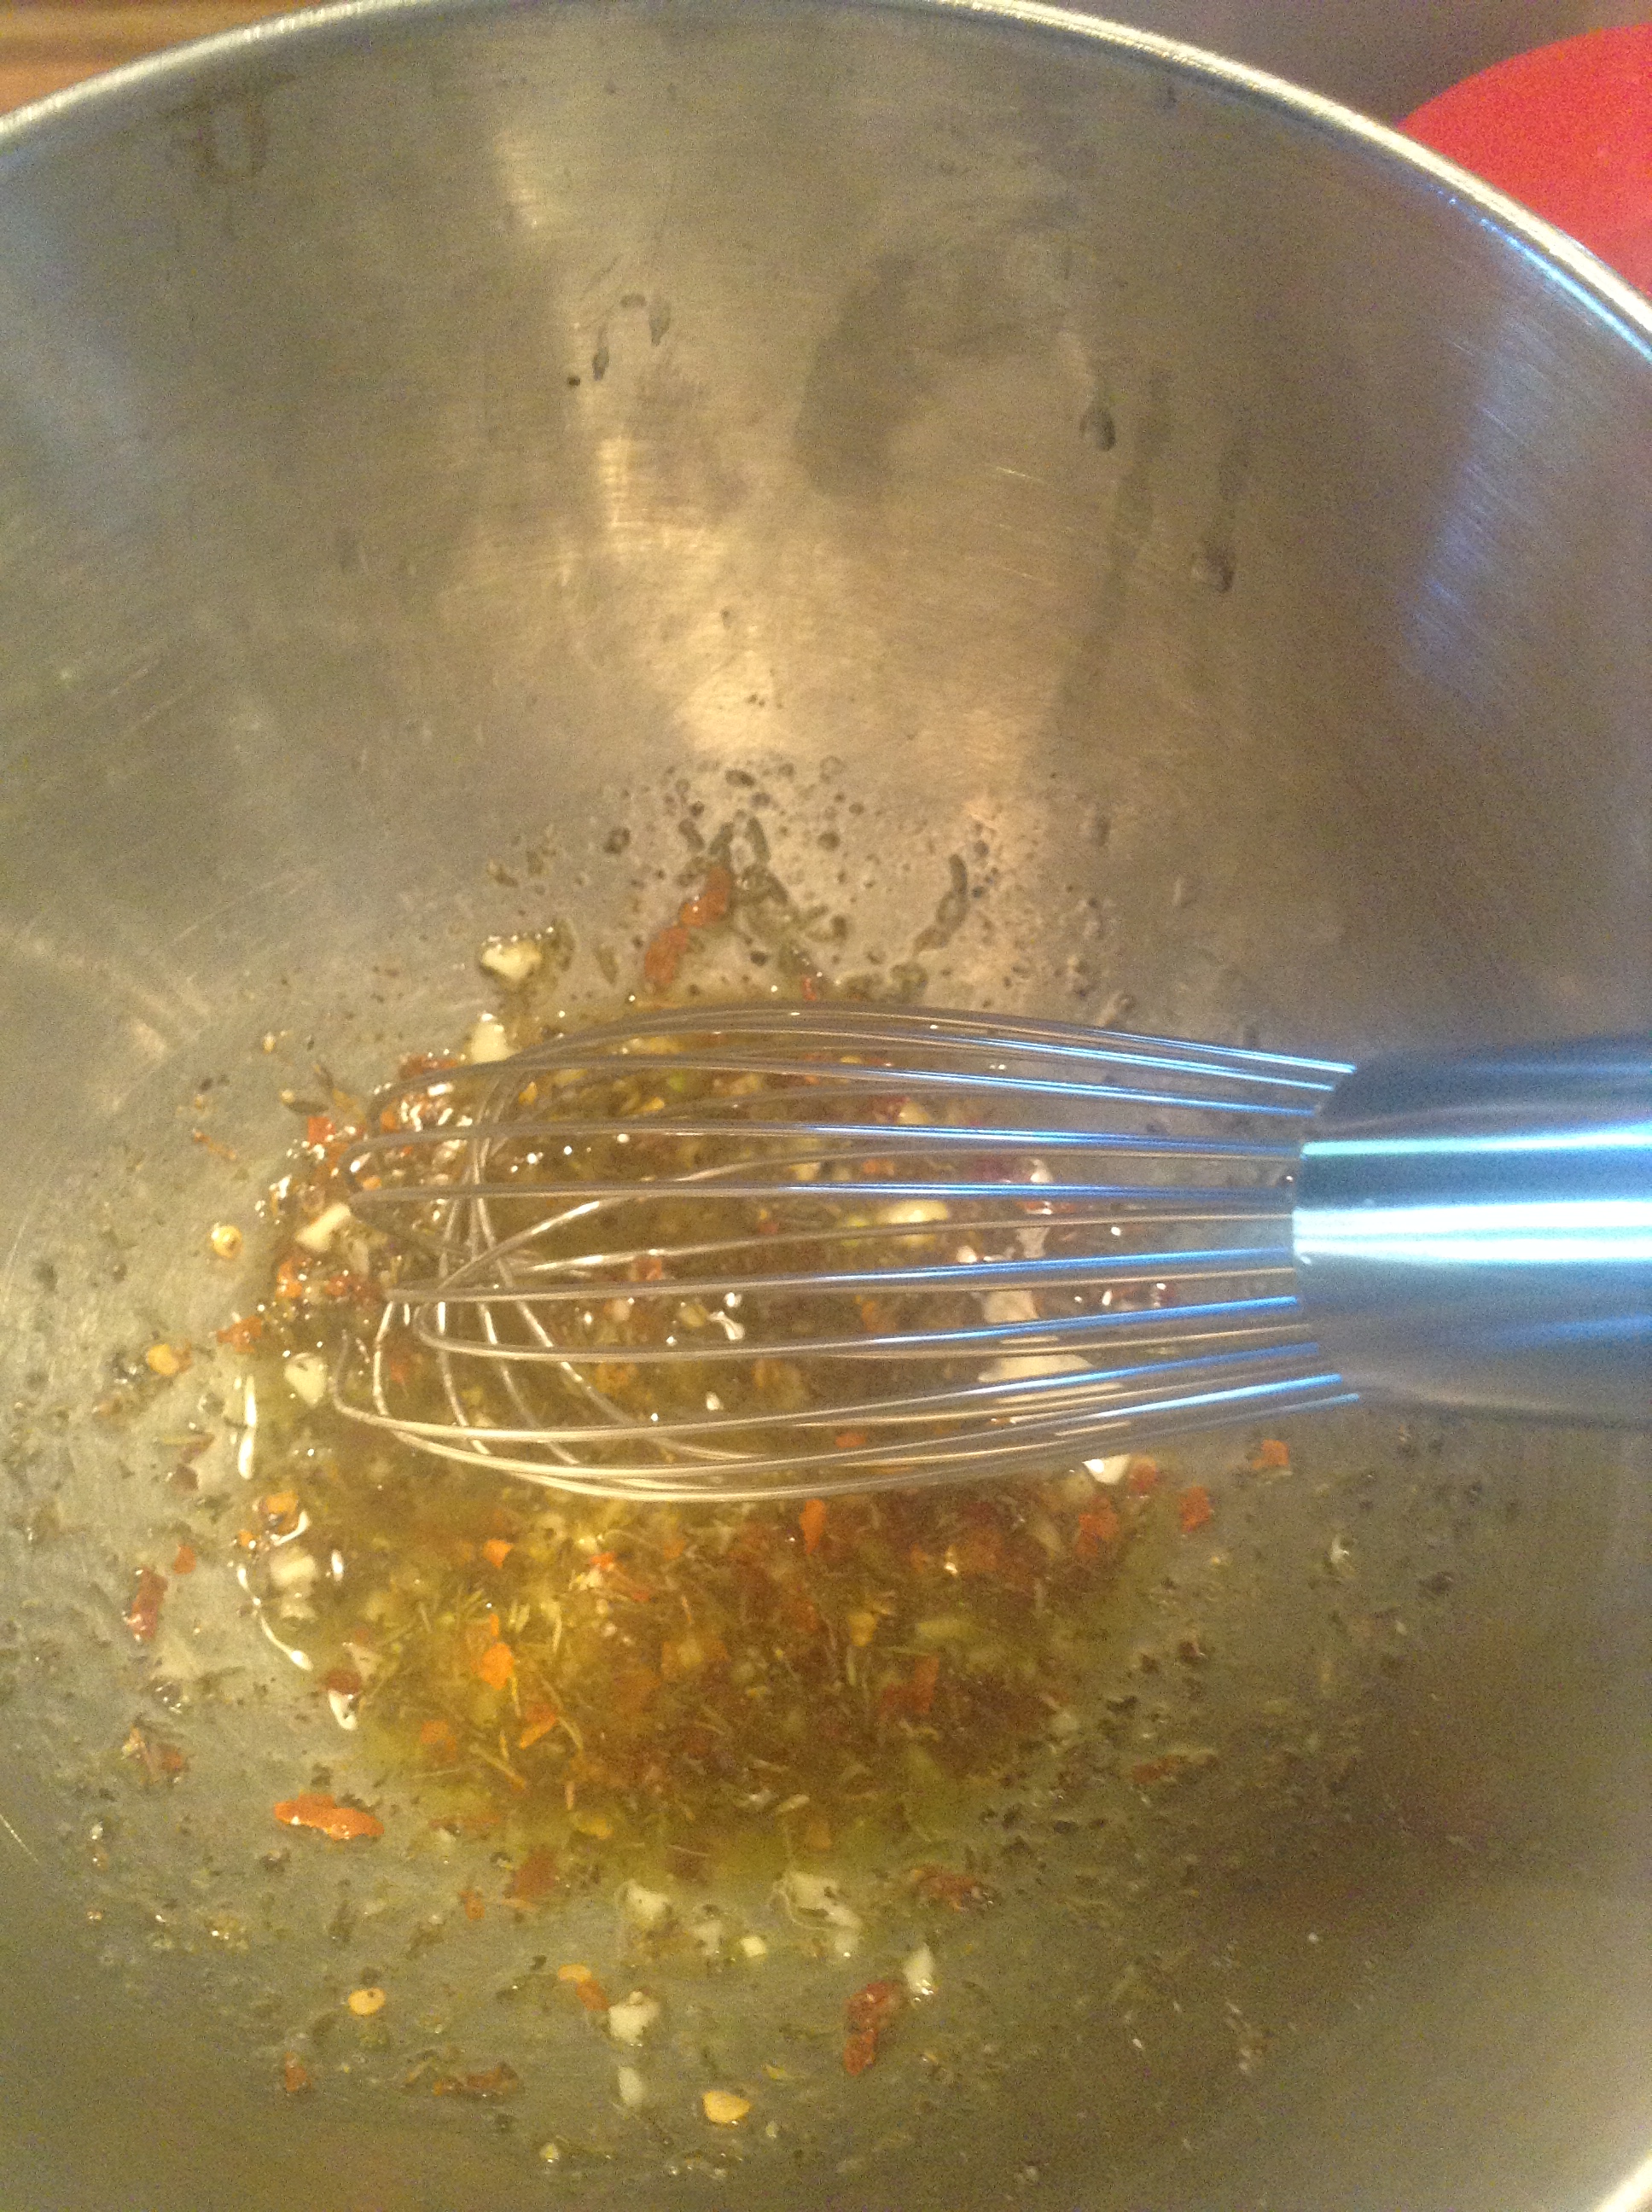
marinade for chicken

IMG_7440 
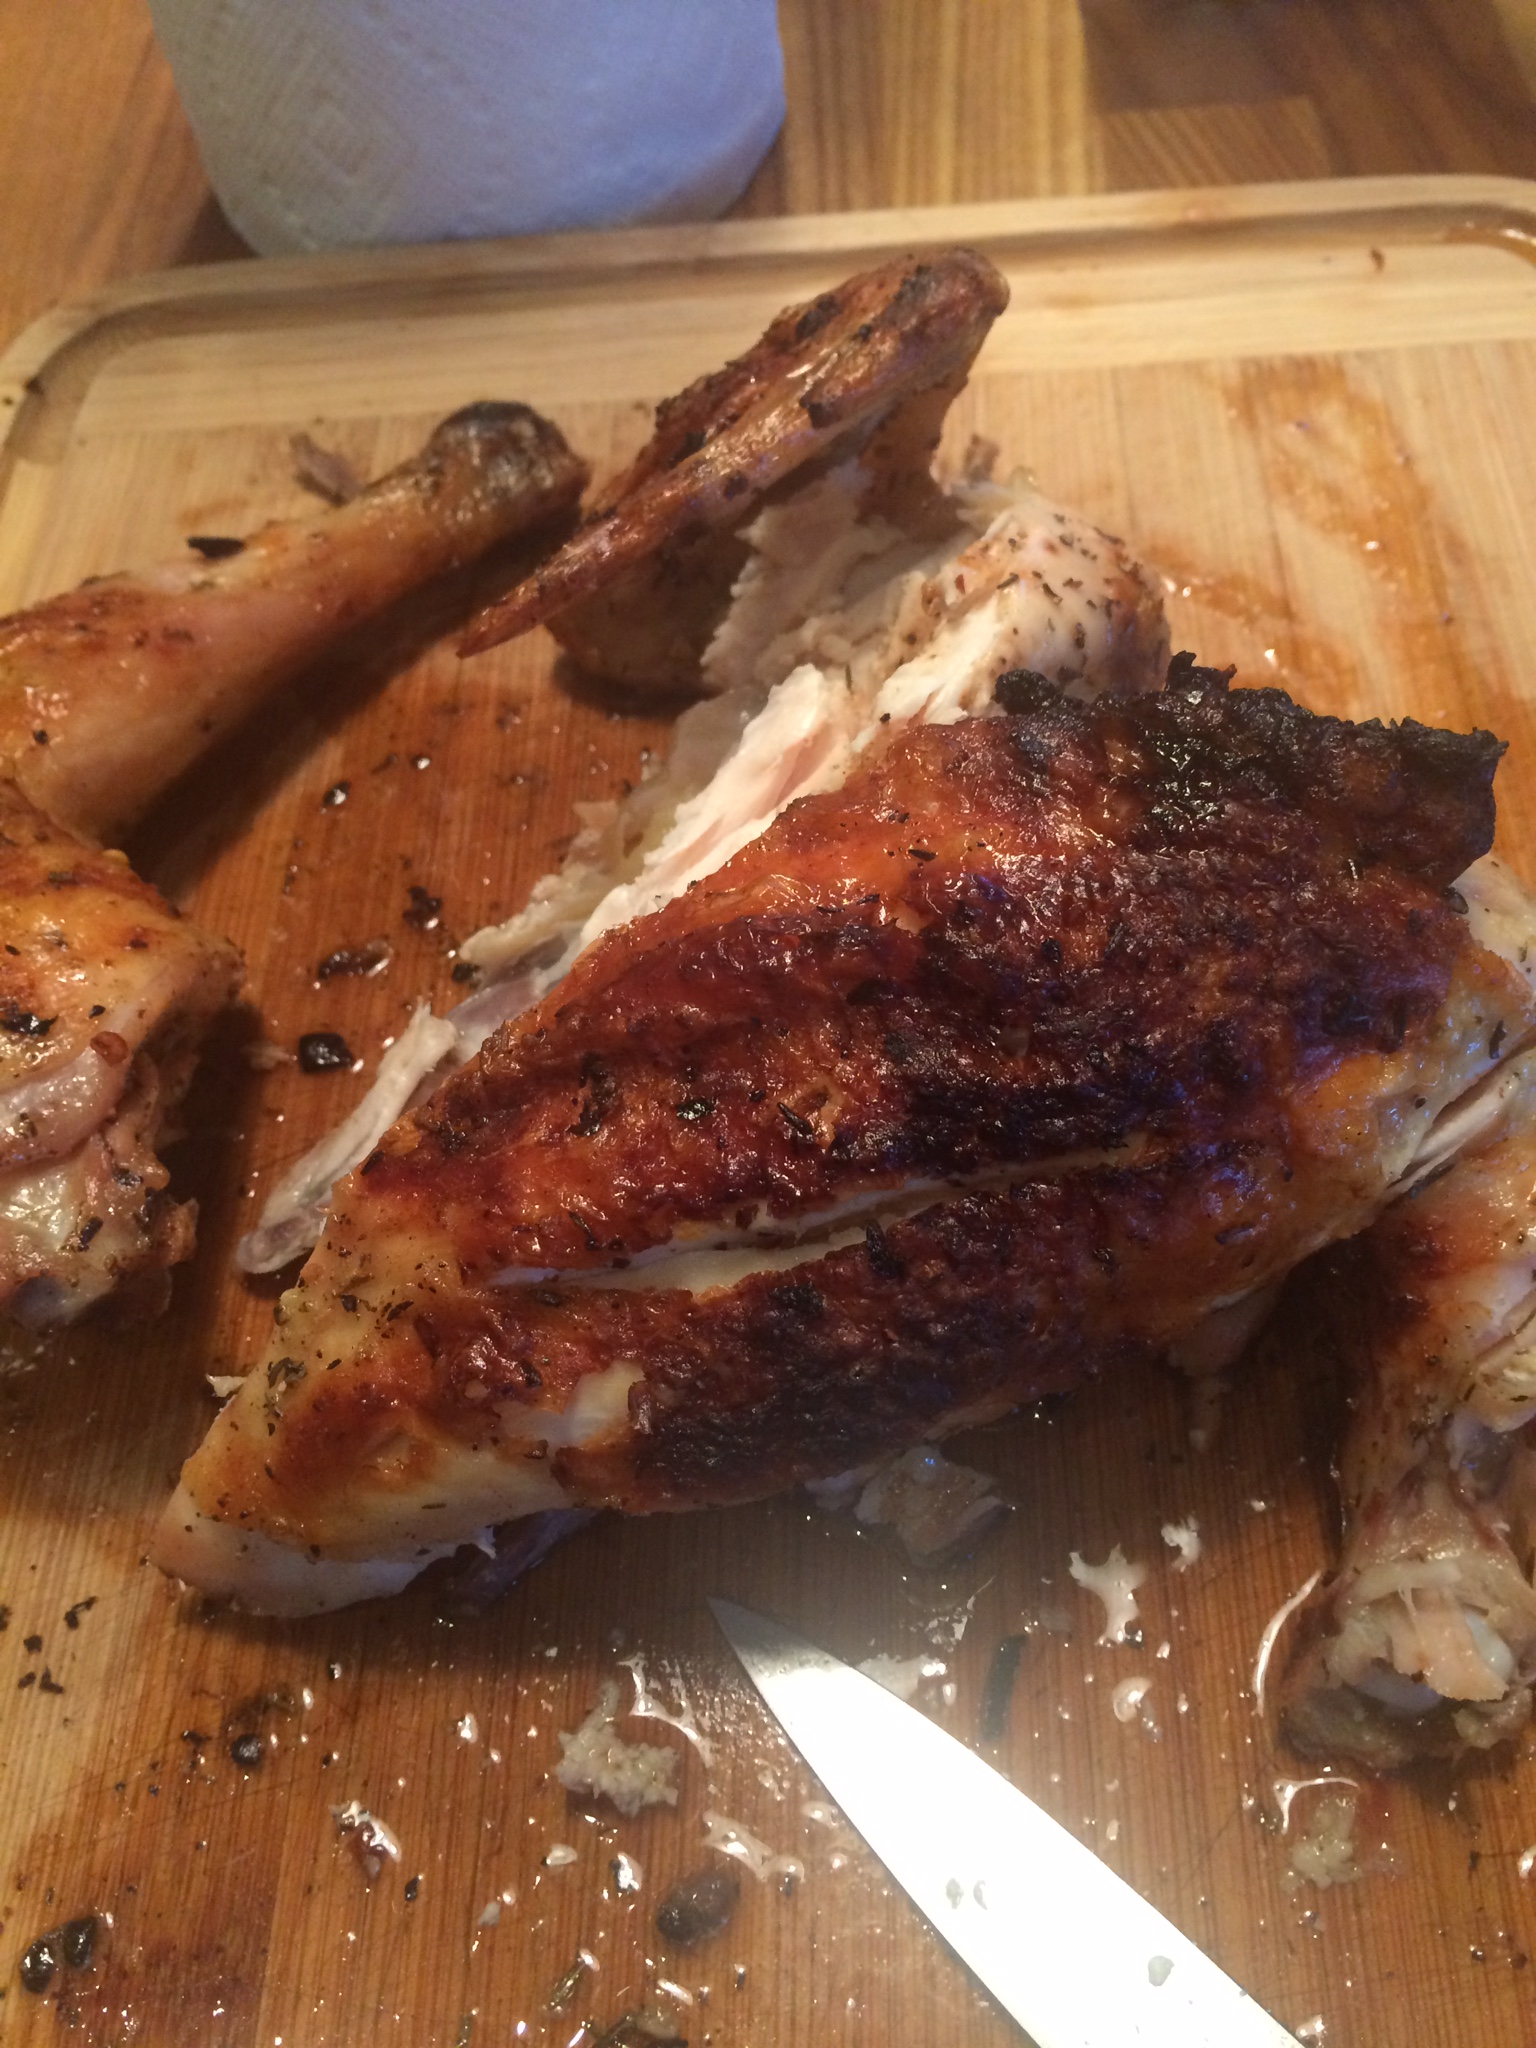
absolutely love spatchcocked chicken. Simply delicious made in the oven and on stove top (see recipe for Spatchcocking the Chicken) . In any event I hadn’t ever made it on the grill and I wanted to . It came out just perfect, just wish I had better photos. We started eating it before I could photograph so I kind of assembled it and snapped. Next time I will take better photos and add them because this will be a staple in our house.

As you know we love spicy food but you don’t need to use crushed red pepper you can just season with salt , pepper and paprika, garlic powder whatever you’d like . This is how I did it and for those of you who do like it a little spicy this was perfect. It wasn’t really all that spicy at all just a hint of kick.

You will ask your neighborhood butcher to please remove the backbone of your chicken unless you’re good with the kitchen shears and can take it out by yourself. I prefer having butcher do it . (see photo) Chicken will still be in one piece or you can have them cut it into two pieces, it doesn’t really matter which way. I kept it as one whole chicken.

Ingredients couldn’t be simpler, I’m sure you have all ingredients but the chicken.

Ingredients:

2 cloves garlic–chopped

1 Tablespoon fresh thyme leaves ( app. 10 sprigs) removed from sprigs and chopped or dry thyme use app. 1/3 of the fresh amount — this is a very loose recipe so a little more or less won’t hurt but eyeball it.

3 Tablespoons fresh lemon juice ( 1 nice size lemon)

2 Tablespoons Extra-Virgin Olive Oil

1 1/2 teaspoons kosher salt

3/4 – 1 teaspoon crushed red pepper ( use as little or as much as you’d like I used 1 teaspoon)

1/2 teaspoon freshly ground black pepper

1 whole chicken with back-bone removed and flattened as much as possible, if you’d like you can have chicken cut into 2 halves.

Directions:

In a small bowl , add chopped garlic, chopped thyme along with lemon juice, oil, salt, red and black pepper. Whisk all ingredients together. Rinse the chicken and pat dry with paper towels.

Put chicken on a baking tray and cover with marinade , I used a pastry brush to get marinade all over the chicken. Let chicken sit in marinade at least an hour and up to 24 hours.

Heat the grill ( spray grill first with cooking spray or oil the grates).

I turned heat on grill up all the way , once grill got very hot I turned it down to medium-low and placed the chicken on grill skin-side down, closed the cover and cooked it low and slow for about 22 minutes. You can check on chicken by lifting up with tongs , be sure to check up on it often to make sure you have no flare-ups with your grill. Flip chicken over and cook for another 20-25 minutes. You can cut into chicken to make sure it’s done. This method worked perfectly for me , as all grills are different you will have to see how long it will cook on yours. I did it 22 minutes per side and it seemed to work out perfectly. Depending on your grill and the size of your chicken you may need more time or a little less.

Roasted Salmon with Corn and Tomatoes

Sometimes you just need to lighten up the meal and I find Salmon always does the trick . It is filling enough without that full feeling when you’re done eating . This Salmon dish is light but satisfying in every way. This is what I did and I hope you enjoy it as much as we did. This will become your new favorite way to eat salmon. 

I happen to love Salmon, I find it’s nutritious , tasty and so very versatile. Yesterday I posted one of my favorite air fryer recipes for salmon . There are countless ways to cook and serve salmon, and they’re all delicious but I really love one pan meals so you can cook in one pan along with vegetables. The combination of flavors in this recipe is amazing. The sweetness of the corn and yummy mouth bursting cherry tomatoes is perfection! 

*this recipe should serve 4 nicely–easy to cut in 1/2 for 2

Ingredients:

I asked for 6 oz. fillets– just make sure they are the same size and I like from the middle of the salmon not the end–you will need 4 for 4 people. One fillet for each person

Kosher Salt and Freshly Ground Pepper

1 small container of cherry or grapes in any coloration you’d like-halved

2 cups frozen or fresh whole kernel corn

2 tsp. olive oil

1 tsp. chili powder

1/2 tsp. ground cumin

1/2 tsp. lime zest

1 Tbsp. Lime juice

1 tsp. honey

1/4 cup finely chopped red onion — I used a shallot this time because I didn’t have a red onion in the house or you can skip all together if you don’t like red onion — last night I added it and adds a nice little crunch and another layer of flavor

*if you love it snip some fresh cilantro in there at the end –while I love cilantro I don’t always have it to add and have to say equally as delicious

*also makes for delicious leftovers

Directions:

Pick up Salmon from your local fish store or Whole foods type of market

I rinse the salmon off and pat dry with paper towels. Preheat oven to 400 degrees. Line a 15×10 baking dish with aluminum foil or spray with your favorite cooking spray and I prefer to just spray and it’s fine but if no cooking spray then use aluminum foil.  Place fish in prepared pan. Sprinkle with about 1/2 tsp. kosher salt over salmon and about 1/4 tsp. freshly ground black pepper–you will have to eyeball it but the salmon needs salt and pepper it’s a question of how much. Lightly sprinkle.

In a medium sized bowl combine tomatoes, onion/shallot,  corn, oil , chili powder, cumin and a little more salt and pepper ( app. 1/4 -1/2 tsp. more salt and 1/4 tsp. pepper) Toss to coat. Spread tomato mixture around the fish in the baking pan. Roast uncovered, app. 15-18 minutes or until fish flakes easily and is cooked through. Cooking time will depend on the thickness of your fish so you should check on it after 15 minutes.

Meanwhile in a small bowl , stir together lime zest, lime juice, and honey

When fish is done to your liking remove fish to a platter. Brush fish with honey mixture. Add  cilantro to tomatoes in pan, stirring gently to combine all ingredients. Top fish with tomato mixture and if you’d like a little more cilantro this would be a good time to add it.

Tomato Time Pasta– perfect Summer Pasta made with fresh tomatoes–Meatless

photo 2 (3)photo 4 (2)photo 5 (3)Nothing but beautiful tomatoes out there begging to be eaten in a million different ways. Perfect for a “Meatless Monday” dish or any night of the week . There are tons of local tomatoes out there now. At any local farmers market you can pick up pints of these beautiful babies. This is a lovely light pasta.

I had bought 2 pints of those beautiful little cherry tomatoes and right now there are those gorgeous yellow sunburst tomatoes also available.  I wasn’t sure what I would do with them. They varied in size so I knew if I made a sauce some were getting cut and some would stay whole. Nothing ever sounds better than a plate of pasta to me,  nothing.   These beautiful tomatoes are only out for such a limited time you have to get them while the getting is good.  Some of the tomatoes were super small and I left them whole while I halved the larger ones. There are so many variations of this sauce and feel free to improvise. We love it this way. So simple and so delicious.

Follow me on Instagram @cookingwithcandi

Ingredients:

1 lb. spaghetti , any kind of long spaghetti is good for this — sometimes I use bucatini type and sometimes I use thin type long spaghetti– use whatever you’d like

1/4 cup extra-virgin olive oil plus more as needed

4 cloves garlic, peeled and minced.

1/2 teaspoon crushed red pepper* we like it spicy so if you don’t want it that spicy cut to 1/4, I actually used 1 whole teaspoon and it packed a lot of kick.

2 pints of cherry tomatoes or little plum tomatoes or you can use about 3 cups of chopped fresh tomatoes of any type. I cut the larger tomatoes in 1/2 and I left the little ones whole.

app. 20 leaves of fresh basil, I just cut them up into small slivers–this is totally optional if your kids don’t like green stuff– but it looks pretty

Kosher Salt and Freshly Ground Black Pepper to taste –I used app. 1 teaspoon on tomatoes and added towards the end as needed

freshly grated parmesan at your discretion

Directions:

Cook pasta according to directions on box for al dente. Reserve a cup of pasta water in the event you may need a little more liquid in your sauce. Add 2 tablespoons of salt to cooking water for pasta. The Italians like to say that their pasta water should be like sea water good and salty. After finished cooking pasta — reserve 1 cup of pasta water and set aside before you drain pasta.

Heat a large sauté pan over medium heat add 4 tablespoons of olive oil and garlic, cook until garlic is golden about 2 minutes. Be careful you don’t want to burn this garlic. Add the crushed red pepper now and the tomatoes, and cook over medium heat. I also added some kosher salt (about 1/2 teaspoon to start, you can always add more) and a little freshly ground black pepper. Stir for a while to make sure garlic doesn’t burn and tomatoes start to burst and deflate about 5  minutes and if you think you need a little more olive oil add it now . I let the tomatoes simmer in the pan for about 15 minutes to 1/2 hour for the best consistency. I smashed down stubborn little tomatoes at the end with the back of a wooden spoon or a masher if you have one.  A very low simmer at the end.  Taste for Salt and Pepper. The longer the tomatoes sit in the oil and cook down on a low simmer the better the sauce will be so if you have a little time let it sit.

Once the spaghetti is cooked and you’ve drained it ( remember to reserve a cup of pasta water).  Add it to the pan with tomatoes and over medium-high heat toss the pasta with the tomatoes well. Add the basil . I let everyone add their own cheese at the table.

Remove the pan from the heat and plate it up.

Yum! and even more delicious the next day.

S’Mores Baked in the Oven

IMG_8638IMG_8636IMG_8639 IMG_8641 IMG_8642IMG_8634 IMG_8633 IMG_8632Oh Wow!!! what could be better??? truly easy and very little fuss perfect with the kids and perfect for the adults. Very rich and gooey. Whole thing takes about 40 minutes from start to finish and you can re-heat the sliced bars in the microwave for about 30 seconds if you have some left-over. It’s great for a large group and I would say about 12-15 servings here. Let’s hold on to the last few weeks of summer with this delicious dessert.

For a very traditional s’mores taste eat immediately, I think they tasted a little better after they cooled down for a bit. Whichever way you prefer them –this is a great recipe for a crowd. You can prepare first and then pop in the oven while you are having dinner. Enjoy!

*also I was able to obtain these amazing square marshmallows in the supermarket, if you see them –grab them otherwise just regular old marshmallows will do the trick.

Ingredients:

Crust:

18 graham crackers

1/4 cup granulated sugar

pinch of salt

8 Tablespoons unsalted butter-melted

*parchment paper — I think you’ll want to work with it for this recipe–it can get difficult once they harden to get them out of pan. Clean up was a snap with it.

Topping:

3 extra-large Hershey Bars (or 7 regular-size ones)

24 jumbo marshmallows–look for the large square ones

Directions:

Preheat the oven to 400 degrees. Lightly grease a 9×13 Pyrex type baking pan with cooking spray and then line with parchment paper , allow an extra couple of inches of paper to hang over the edge.

In the food processor bowl, pulse the graham crackers until they are finely ground. Transfer the crumbs to a medium-sized bowl.

Add the sugar and salt to the graham crackers and stir to combine. Add the melted butter and stir until the crumbs are moistened. Pour the crumb mixture into the prepared pan and press into an even layer.

Bake the crust for about 10 minutes or until the edges turn lightly golden. Let the crust cool off completely before adding chocolate. I probably let it sit off heat for about 1/2 hour.

Arrange the chocolate bars (see picture) evenly on the top of cooled crust, I had to remove 1 row of chocolate to fit it in pan and left a little uncovered crumbs around edges. Arrange the marshmallows on top of the chocolate, leaving a little space between each one (see photos) Marshmallows will expand slightly.

Bake until the chocolate is soft and beginning to melt, and the marshmallows are evenly toasted on top. Probably about 10-15 minutes depending on your oven.

I couldn’t wait to eat them but I would suggest letting them cool off for  a little bit, cutting was easier when it cooled down ( after 15-20 minutes) I was able to cleanly cut slices. It’s more like campfire s’mores when you eat them hot out of the oven and certainly messier.

You can re-heat the sliced bars in the microwave for about 20-30 seconds. If you are keeping them , cut them and store individual slices.

Summer Crumble — Peach and Blueberries

photo 3 (6)photo 3 (7)photo 2 (6)photo 2 (8)A crumble or a crisp whatever you call it there is no reason not to make this simple delicious dessert. In the summer you have so very many seasonal fruits to choose from and all sorts of delicious combinations. I used peaches and blueberries today because the peaches are amazingly beautiful and I had an abundance of blueberries. Any stone fruit, berries, or pitted cherries will work. In the Fall I make this with apples and pears which is Joel’s favorite of all time. The fruit comes out soft and tender and the crumbly crunchy cap is ever so crisp. Delicious served warm with a scoop of vanilla ice cream. I had a lot of blueberries in the house but the blueberries do take over so all peach would be equally delicious as well .

I used an 8×11 pyrex but any baking dish around that size will work out just fine.

You’ll need a food processor to do the crisp topping this way. You must use cold butter straight out of fridge. I also added a little bit of chopped nuts but this is totally optional.

Plums and Nectarines work just as well. I also sprinkled a dash of cinnamon on the top (just a touch) right before baking , this is also totally optional.

Ingredients:

Fruit Mixture:

app. 8 cups sliced stone fruit, blueberries or pitted cherries I used peaches which I pitted, peeled and sliced and 1 container of blueberries (6 oz.) Use any combo you like.

1 cup sugar

2 Tbsp. Corn Starch

1 tsp. finely grated orange zest ( almost a whole orange)

2 Tbsp. of freshly squeezed orange juice from zested orange

pinch of kosher salt

In a large bowl toss fruit, sugar, cornstarch, salt, zest and juice together with a spoon. Set aside. I also sprayed baking dish with Bakers Aid cooking spray which is great stuff.

Preheat oven to 375 degrees.

Crumble Topping:

Ingredients:

3/4 + 1/4 cup of old-fashioned oats separated. 3/4 cup will be used at beginning and 1/4 cup at end.

1/3 cup all-purpose flour

1/4 cup light brown sugar ( firmly packed)

1/2 teaspoon kosher salt

1 stick chilled unsalted butter , straight out of fridge and this is important here. Butter should be diced into small pieces. Cut stick in half then cut into small uniform pieces.

Directions for crumble topping:

In the bowl of food processor with blade , pulse oats, flour, light brown sugar, salt together. Then through the top tube drop in diced cold butter and pulse until no dry spots remain, it takes a few minutes. Transfer to a bowl and add in 1/4 cup old-fashioned oats with your fingers.

Transfer fruit mixture to prepared baking dish, scatter crumble topping over the mixture. I added some chopped nuts and a little cinnamon at this point. Place baking dish on a baking sheet ( sprayed with cooking spray as well) and bake at 375 degrees for at least 50 minutes, check on it. You don’t want to pull it out too soon because you want the crumble to brown perfectly and the fruit will not thicken. You’ll know it’s ready by the color of the crumble topping.

Allow to cool for an hour.

  • last night I put together whole recipe and left in the fridge overnight. Next day a few hours before dinner I removed from fridge and baked it to have as dessert . Served in bowls with ice cream while it was still warm.

You can heat up before eating at 250 degrees covered for about a 1/2 hour should be enough.

You can freeze this as well. Take out the night before you’ll want it and let it defrost in the refrigerator, the next day take it out and let it come to room temperature before re-heating. I freeze it often and it works out quite well.

Bowtie Pasta with Sausage, Peas, and Mushrooms

This is one of my “oldies but goodies” if you’ve been following my blog you most likely have seen this recipe or made this recipe and if you haven’t it’s time to make it.  It is a sauce-less pasta and a perfect week-night staple. One of our very favorite go to dinners.  Very light, very tasty, and very easy to make. There aren’t a lot of ingredients, and it doesn’t take a long time to make. My husband, Joel, hates green things and loves this dish. And he even eats all the peas on his plate, which makes me very happy.  Easy obtainable ingredients and a simple “light” sauce makes for a very easy delicious meal! Enjoy! One of the family favorites.

INGREDIENTS:

1/2 cup olive oil

1 lb turkey sausages, casings removed (just squeeze all the meat out; I like Italian-style turkey sausage) or chicken sausage works perfectly if I can’t find turkey or chicken sausage I use regular Italian pork sausage — and I like the spicy one but sweet will work just as well

1 box of cremini mushrooms (Baby Bella), approx. 10 oz. (roughly chopped) I actually used 2 small  8 oz. boxes because I had them ( not an exact science)

About 3/4 bag frozen peas (take them out of freezer about an hour before, just slightly thawed is perfect)

1 box Farfalle pasta (bow ties) or any pasta you like , bowties are perfect  (1 lb.)

Salt and pepper, to taste — adjust to your own taste , you can do at the very end but I usually add with mushrooms and then check at end

Freshly grated parmesan, to taste

DIRECTIONS:

In a large, sauté pan, heat up two tablespoons olive oil (medium to high flame). Add the broken up turkey sausage and make sure to break up the large clumps. Cook for about 10 minutes (I like the sausage browned). When finished cooking, remove sausage from the pan with a slotted spoon and set aside. Heat a little more olive oil (approx. 2 TBSP). Add the chopped up cremini mushrooms and kosher salt and freshly ground pepper to taste (approx. a little less than a teaspoon of each, depending on your taste. Keep in mind that sausage is naturally salty.) Sauté until all the liquid is gone—about another 10 minutes. Add the frozen peas and cook for a few minutes. Return the sausage to the pan and cook for another few minutes (I turn off the heat at this point and just let the flavors blend.)

*just a little note if using pork sausage it will throw off enough fat to cook mushrooms in so you will not need the extra 2 Tbsp. of Olive Oil

In the meantime, cook pasta (according to package) al dente. Drain the pasta, reserve about 1/2 cup of the cooking water from pasta (this is the trick with “sauceless pasta”) and add pasta to the pan with all other ingredients. Combine well, adding some of that pasta water at a time; as needed. Drizzle in the 1/2 cup of olive oil, mixing as you go. Taste for salt and pepper. I also add red pepper flakes, but I love spicy.

Serve with freshly grated parm cheese and you’re good to go.

*Serves 4 as a main dish and 8 as a side.

My Most fav Lemon vinaigrette

I am a huge fan of lemons and citrus flavor and this salad dressing hits all the flavors that I love I even throw a 1/2 teaspoon of Honey in there for that sweet hit. If you want to omit the honey you can and you can substitute it with maple syrup if you’d like. This blows away store bought dressing and gotta say a little effort is involved but super easy, you can double on it if you’d like. You’re going to make this dressing again and again and again it’s easy versatile and delicious. You can drizzle it on a salad, a grains bowl, salmon, and veggies it will pep up anything and keeps well in the fridge. Enjoy! and you’re welcome.

Ingredients:

1/4 cup fresh lemon juice

1 garlic clove , minced

1 teaspoon Dijon mustard – I usually use a heaping teaspoon

1/4 teaspoon kosher salt or sea salt

a dash of freshly ground black pepper

1/2 teaspoon honey or maple syrup

1/4 cup extra virgin olive oil

Directions:

I put all ingredients except for olive oil in my mini processor, then drizzle in the olive oil give it a few whirls and it should be fine. If no little processor whisk in a small bowl and add olive oil slowly whisking as you go. The mini processor is a must for me does the garlic and whisks it all together.

I then put in a jar with a tight fitting lid ( see photo) and shake to combine before serving. It should stay good for a week in the fridge. Olive oil will solidify a bit but just take it out of fridge before serving to soften .

Enjoy!

Tequila Chicken

Tequila Lime Orangey Chicken! yum. I love this marinade , it’s full of citrus , spicy and savory. Almost everyone has a bottle of Tequila in the pantry right? in case of emergency ????  Be careful with the jalapeno, use gloves. I sometimes leave a few seeds because we like it hot, but remove all seeds if you don’t like it very spicy. This marinade packs a lot of flavor. I always let it marinade overnight. It’s an easy recipe and I make it on the grill mostly in the summer, delicious cold as well used in salad the next day if you have any left over. Original recipe calls for 2 lbs. of chicken, I use the thinner chicken cutlets because I prefer them. Use whatever you like. This marinade is also delicious on chicken on the bone, just use a chicken cut up in 8’s.  I use a plastic bag to marinate the chicken in fridge. Right before grilling, I put chicken on a plate and lightly sprinkle with kosher salt and a little freshly ground black pepper, this is important because the chicken needs the salt and pepper.  The original recipe comes from The Barefoot Contessa .  I also think that this would be awesome cut in strips and served with salsa , guacamole and some soft tortillas.

Ingredients:

1/2 cup tequila — whatever kind you have in the house

1 cup freshly squeezed lime juice ( about 5 -6 limes)

1/2 cup freshly squeezed orange juice ( 1 – 2 depending on the size of orange, get 2 in the event you need more)

1 tablespoon chili powder

1 tablespoon minced fresh jalapeno ( seeded)

1 tablespoon minced fresh garlic ( app. 3 cloves)

2 teaspoons kosher salt

1 teaspoon freshly ground black pepper

2 lbs . chicken cutlets ( I used boneless, skinless) thin cutlets. You can use whatever you like I really prefer dark meat so often times I use that, up to you.

Directions:

Combine the tequila, lime juice, orange juice, chili powder, jalapeno, garlic, salt and pepper in a large bowl. I used my mini chopper for jalapeno and garlic. Pour over chicken breasts and refrigerate overnight. As I said I put all ingredients in a large hefty ziploc bag.

Heat grill, and spray or brush rack with oil to prevent sticking ( which I always do) Grill the chicken for about 4 minutes on each side ( depending on what kind of chicken you are using) they should have nice marks and be browned. Turn the chicken and cook other side for the same. Remove from grill to a plate. Cover tightly with foil, and allow to rest for a couple of minutes.

Farmers Market to Table Gazpacho

DSCN0375DSCN0378

Delicious fresh vegetables from the local farmers market went into this gazpacho. This time of year you must take advantage of the awesome selection of fruit and vegetables at your local farmers market. In Colorado there is so much local produce it would be a pity not to . I bought the tomatoes , cucumbers, peppers, garlic and red onion all from our local farmers market. Whole Foods also sells many local products which is so amazing.  It’s just quite wonderful to put food on your table from your own garden or at least from one within 100 miles of where you live. Farm to Table . Simply put it’s the best . There are many variations of this wonderful cold soup — take what you want from this one and put your own mark on it.

Ingredients:

1 cucumber or 2 – 3 Kirby size cukes, halved and seeded , but don’t peel . If not Kirby cukes you can use a hothouse cucumber. Go organic, because you are eating the peel.

2 yellow bell peppers, cored and seeded. Of course you can use red bell peppers, but not green — you can also use an Italian frying pepper (cubanelle) if available or a light green pepper like an Anaheim, just core and seed all peppers.

4 tomatoes — Whole Foods and most grocery stores have beautiful produce this time of year so use the heirlooms if you can get them or any of the fresh tomatoes will do.

1 red onion

3 garlic cloves, minced or throw them into the food processor along with vegetables

3 cups Spicy V8 or use regular tomato juice

1/4 cup champagne vinegar or white wine vinegar

1/4 cup good olive oil

1/2 teaspoon kosher salt

1 teaspoon freshly ground black pepper

*1/2 to 1 whole jalapeno depending on how spicy you like it, remove seeds from jalapeno

* cilantro, chopped is a nice touch for garnish

*avocado cut up is also nice garnish

*shrimp is also a nice garnish

Directions:

I cut up cukes, tomatoes, bell peppers and red onions into app. 1 inch cubes. Put each vegetable separately into a food processor with steel blade and pulse until it is coarsely chopped. You can also use an immersion blender in a deep bowl–you may need to do it in batches or use a regular blender.

After each vegetable is chopped up add the garlic ( if you haven’t already) , juice, vinegar, olive oil, salt and pepper.  I like to drizzle olive oil slowly in while I blend it. Pour into a large bowl mix well and chill before serving. It’s a good idea to chill for a while, the longer it sits the more the taste develops.

The second night I added shrimp and avocado.

20130809-090155.jpg

20130809-090221.jpg

Raw Corn Salad

I found this recipe on one of my favorite food sites– Food 52 and I had to make this amazing corn salad which is absolutely no cooking at all. What could be better? The corn in the summer is so amazing and all of the other ingredients are readily available and  super easy to make.

I made a few changes from the original on Food52 but check out their site it’s worthwhile. www.food52

Ingredients:

4-5 ears of fresh corn shucked– I happen to have bought 5 ears of corn so I used all 5 don’t use less than 4

1 pint of small tomatoes–plum, cherry or whatever — halved

4 oz. of good feta cheese crumbled

1 cup chopped fresh basil

1/4 cup chopped fresh mint

1 can of Cannellini beans –or black beans or whatever kind of beans you prefer –rinse and drain before adding

Kosher Salt and Freshly Ground Black Pepper to taste

4-6 Tablespoons of Extra Virgin Olive Oil

1 Lime–halved

Directions:

Cut the corn off the cobs. Try to get as close to the cob as possible. This can be a messy process so I use a bundt pan and place cob in the hole of the bundt pan and cut down so almost all of the kernels fall in the pan.

Then in a nice size bowl I put the corn, sliced tomatoes, crumbled feta, herbs, and I added the beans.

I added 1/2 teaspoon of kosher salt and a few grinds of the pepper mill– taste and add 4 Tablespoons of the Olive Oil and the juice of half a lime. Mix well and taste if it needs a little more oil you can add and if you think it needs more S and P you can add now as well. I didn’t add more salt and pepper because the feta is salty and 1/2 teaspoon was enough. You can also add a bit more lime juice if you’d like.IMG_1611

Mix well before serving and serve immediately at room temperature.

Delicious!