Roast Pork Loin with Apples and Onions

FullSizeRender (9)FullSizeRender (8) FullSizeRender (6)FullSizeRender (4)FullSizeRender (3)FullSizeRender (2)FullSizeRender (7)
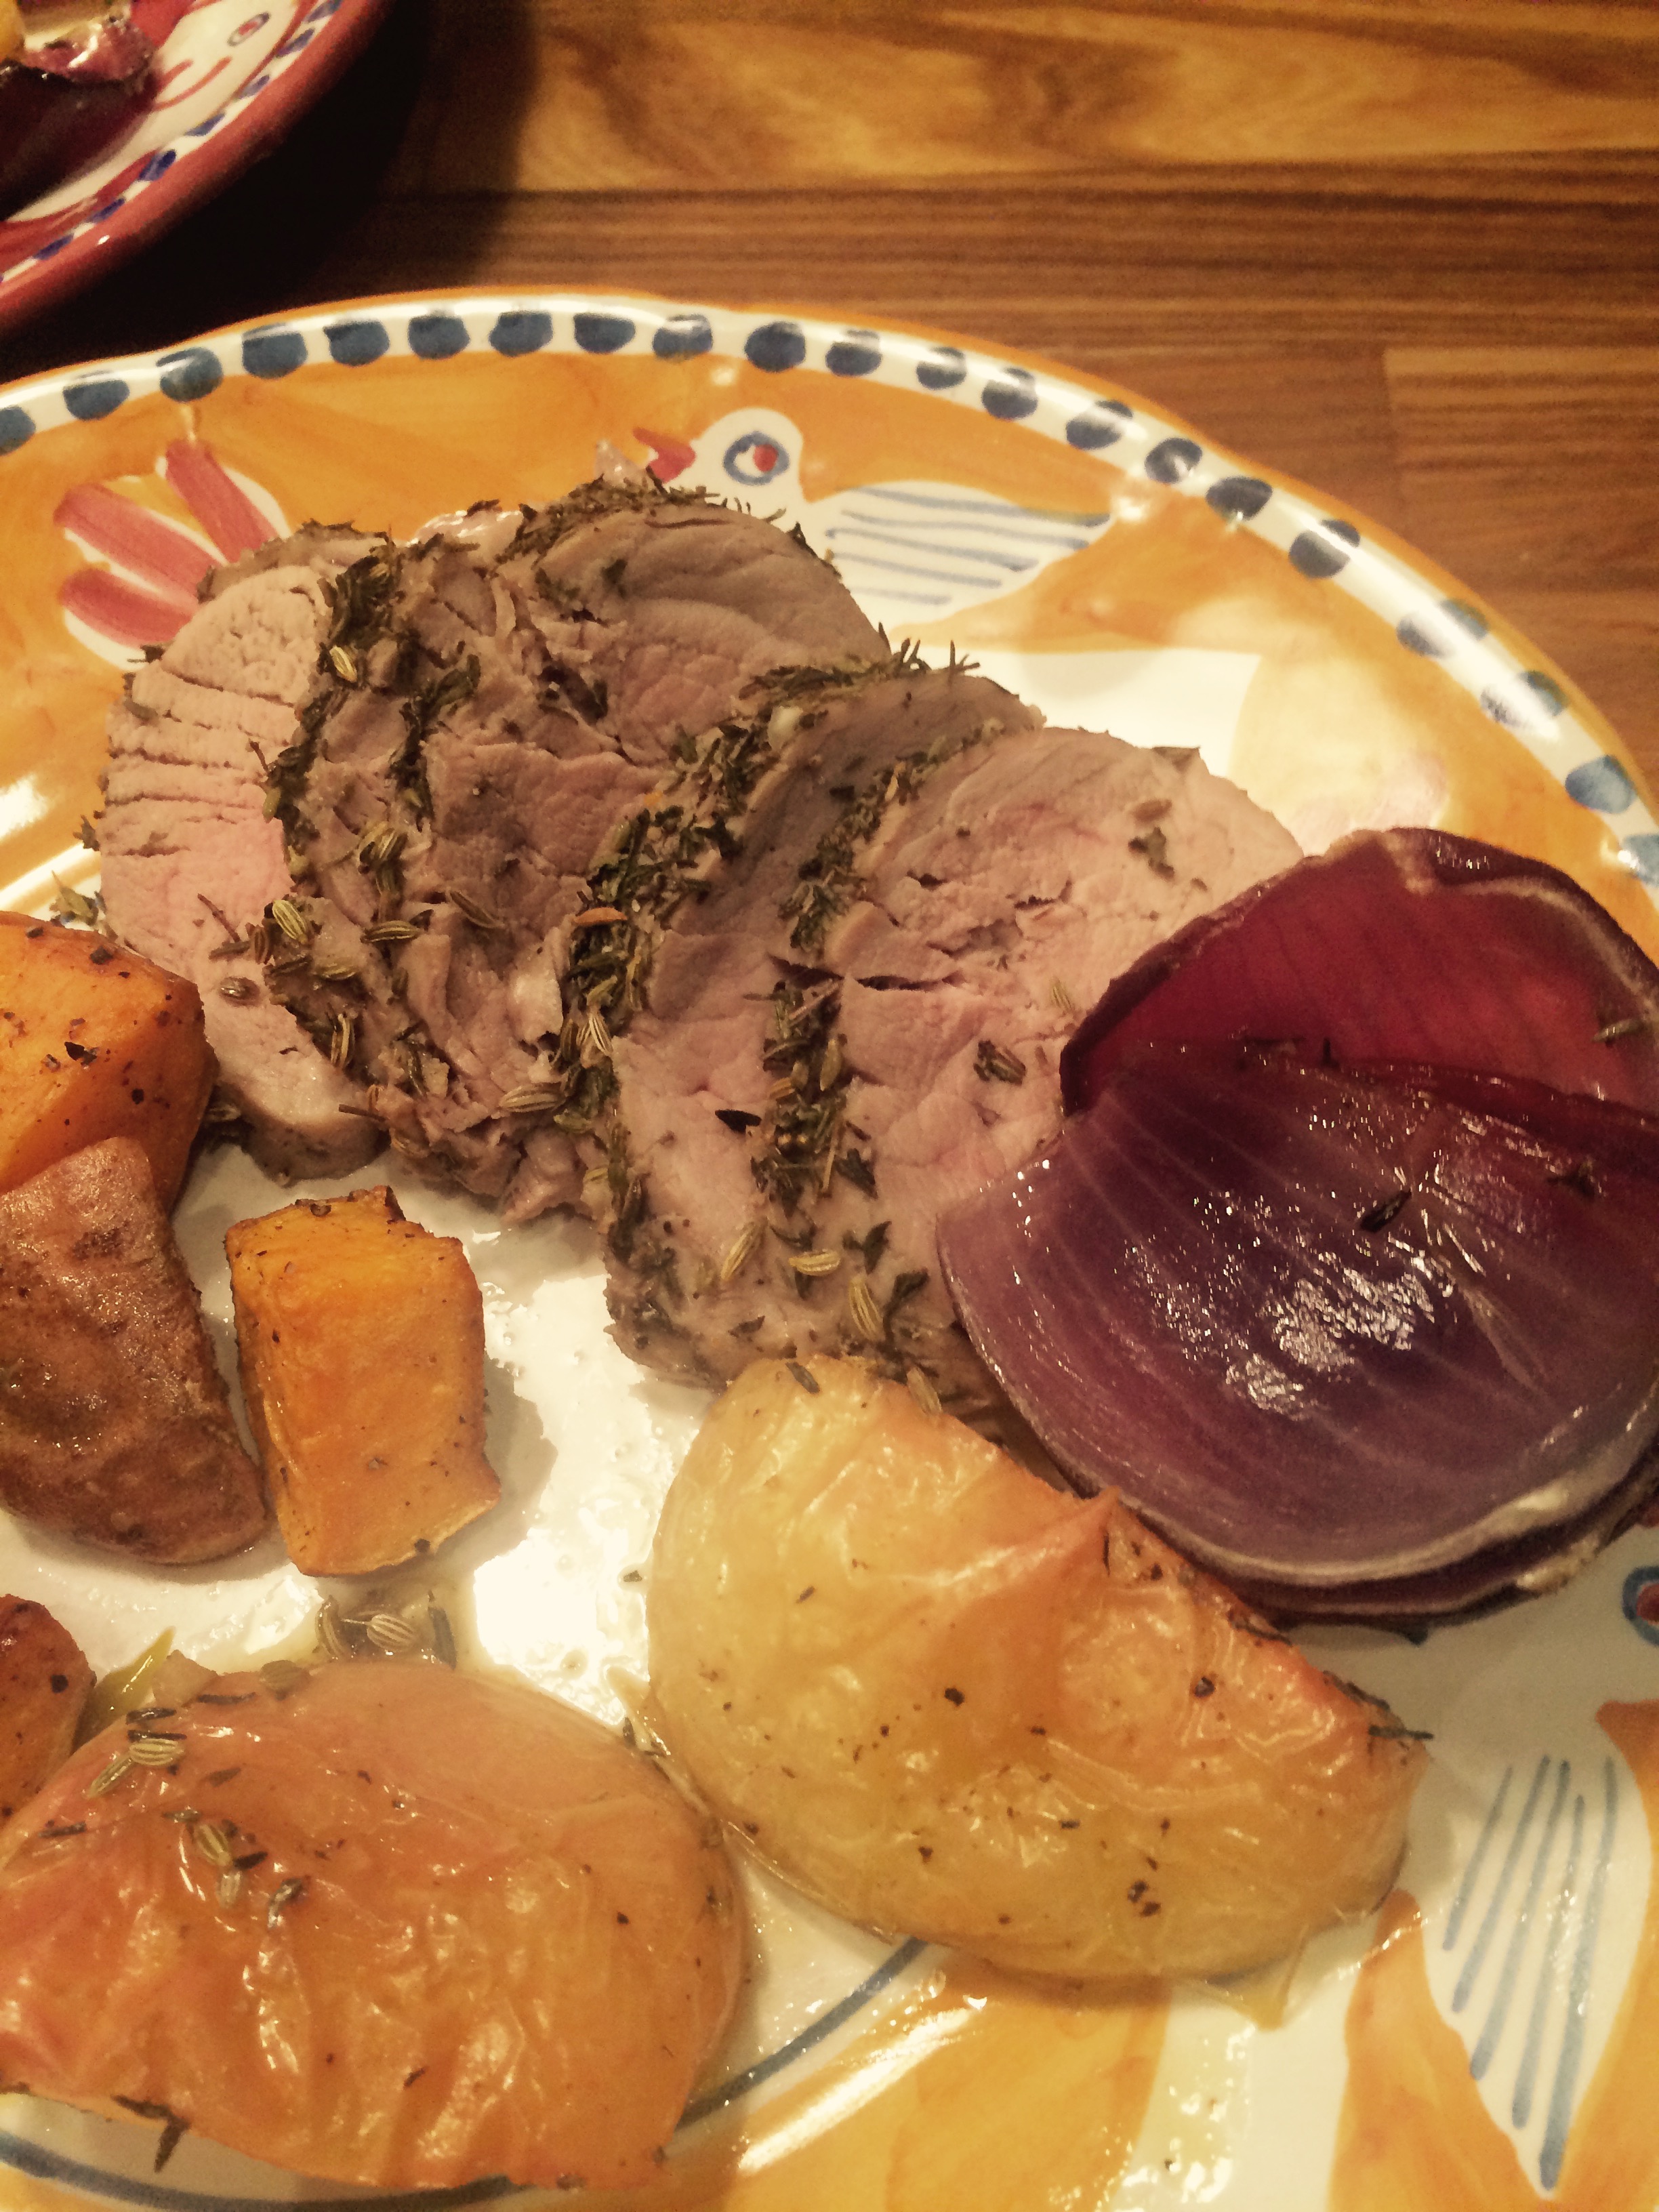
Wow!!! What an amazing delicious and easy dish is this to make. Prep is easy and pork loin is available in most butcher shops and Whole Foods type of supermarket. It will make you look like you really know what you’re doing in a few easy steps. It’s really just a dry rub on the pork but you’ll need an instant-read meat thermometer as this is very important in the cooking of this dish. Joel and I both enjoyed this very much. A winner! The roasted apples and onions were just an amazing addition to the pork.

* you’ll need a rimmed sheet pan and a cooking thermometer ( instant-read type) and make sure yours works, sometimes they stop working for no apparent reason.

thanks once again to Jessica Seinfeld http://www.doitdelicous.com and her wonderful cookbook The Can’t Cookbook which I love even though I can cook.

Ingredients:

1 1/2 lbs. boneless pork loin * see pictures

2 medium red onions, peeled and cut into quarters ( see directions)

3 red apples

3 Tablespoons of Olive Oil + 1 Tablespoon of Olive Oil

1 tsp. kosher salt ( divided 1/2 and 1/2 ) see directions

1/2 tsp. freshly ground black pepper ( divided 1/4 and 1/4) see directions

2 cloves garlic chopped

1 Tablespoon dried thyme ( from the jar) this is not fresh thyme

2 tsp. fennel seeds ( available in most spice sections of your supermarket)

Directions:

Preheat the oven to 400 degrees with the oven rack in the middle of the oven. Have pork out of refrigerator and at room temperature, about 1/2 hour prior to cooking.

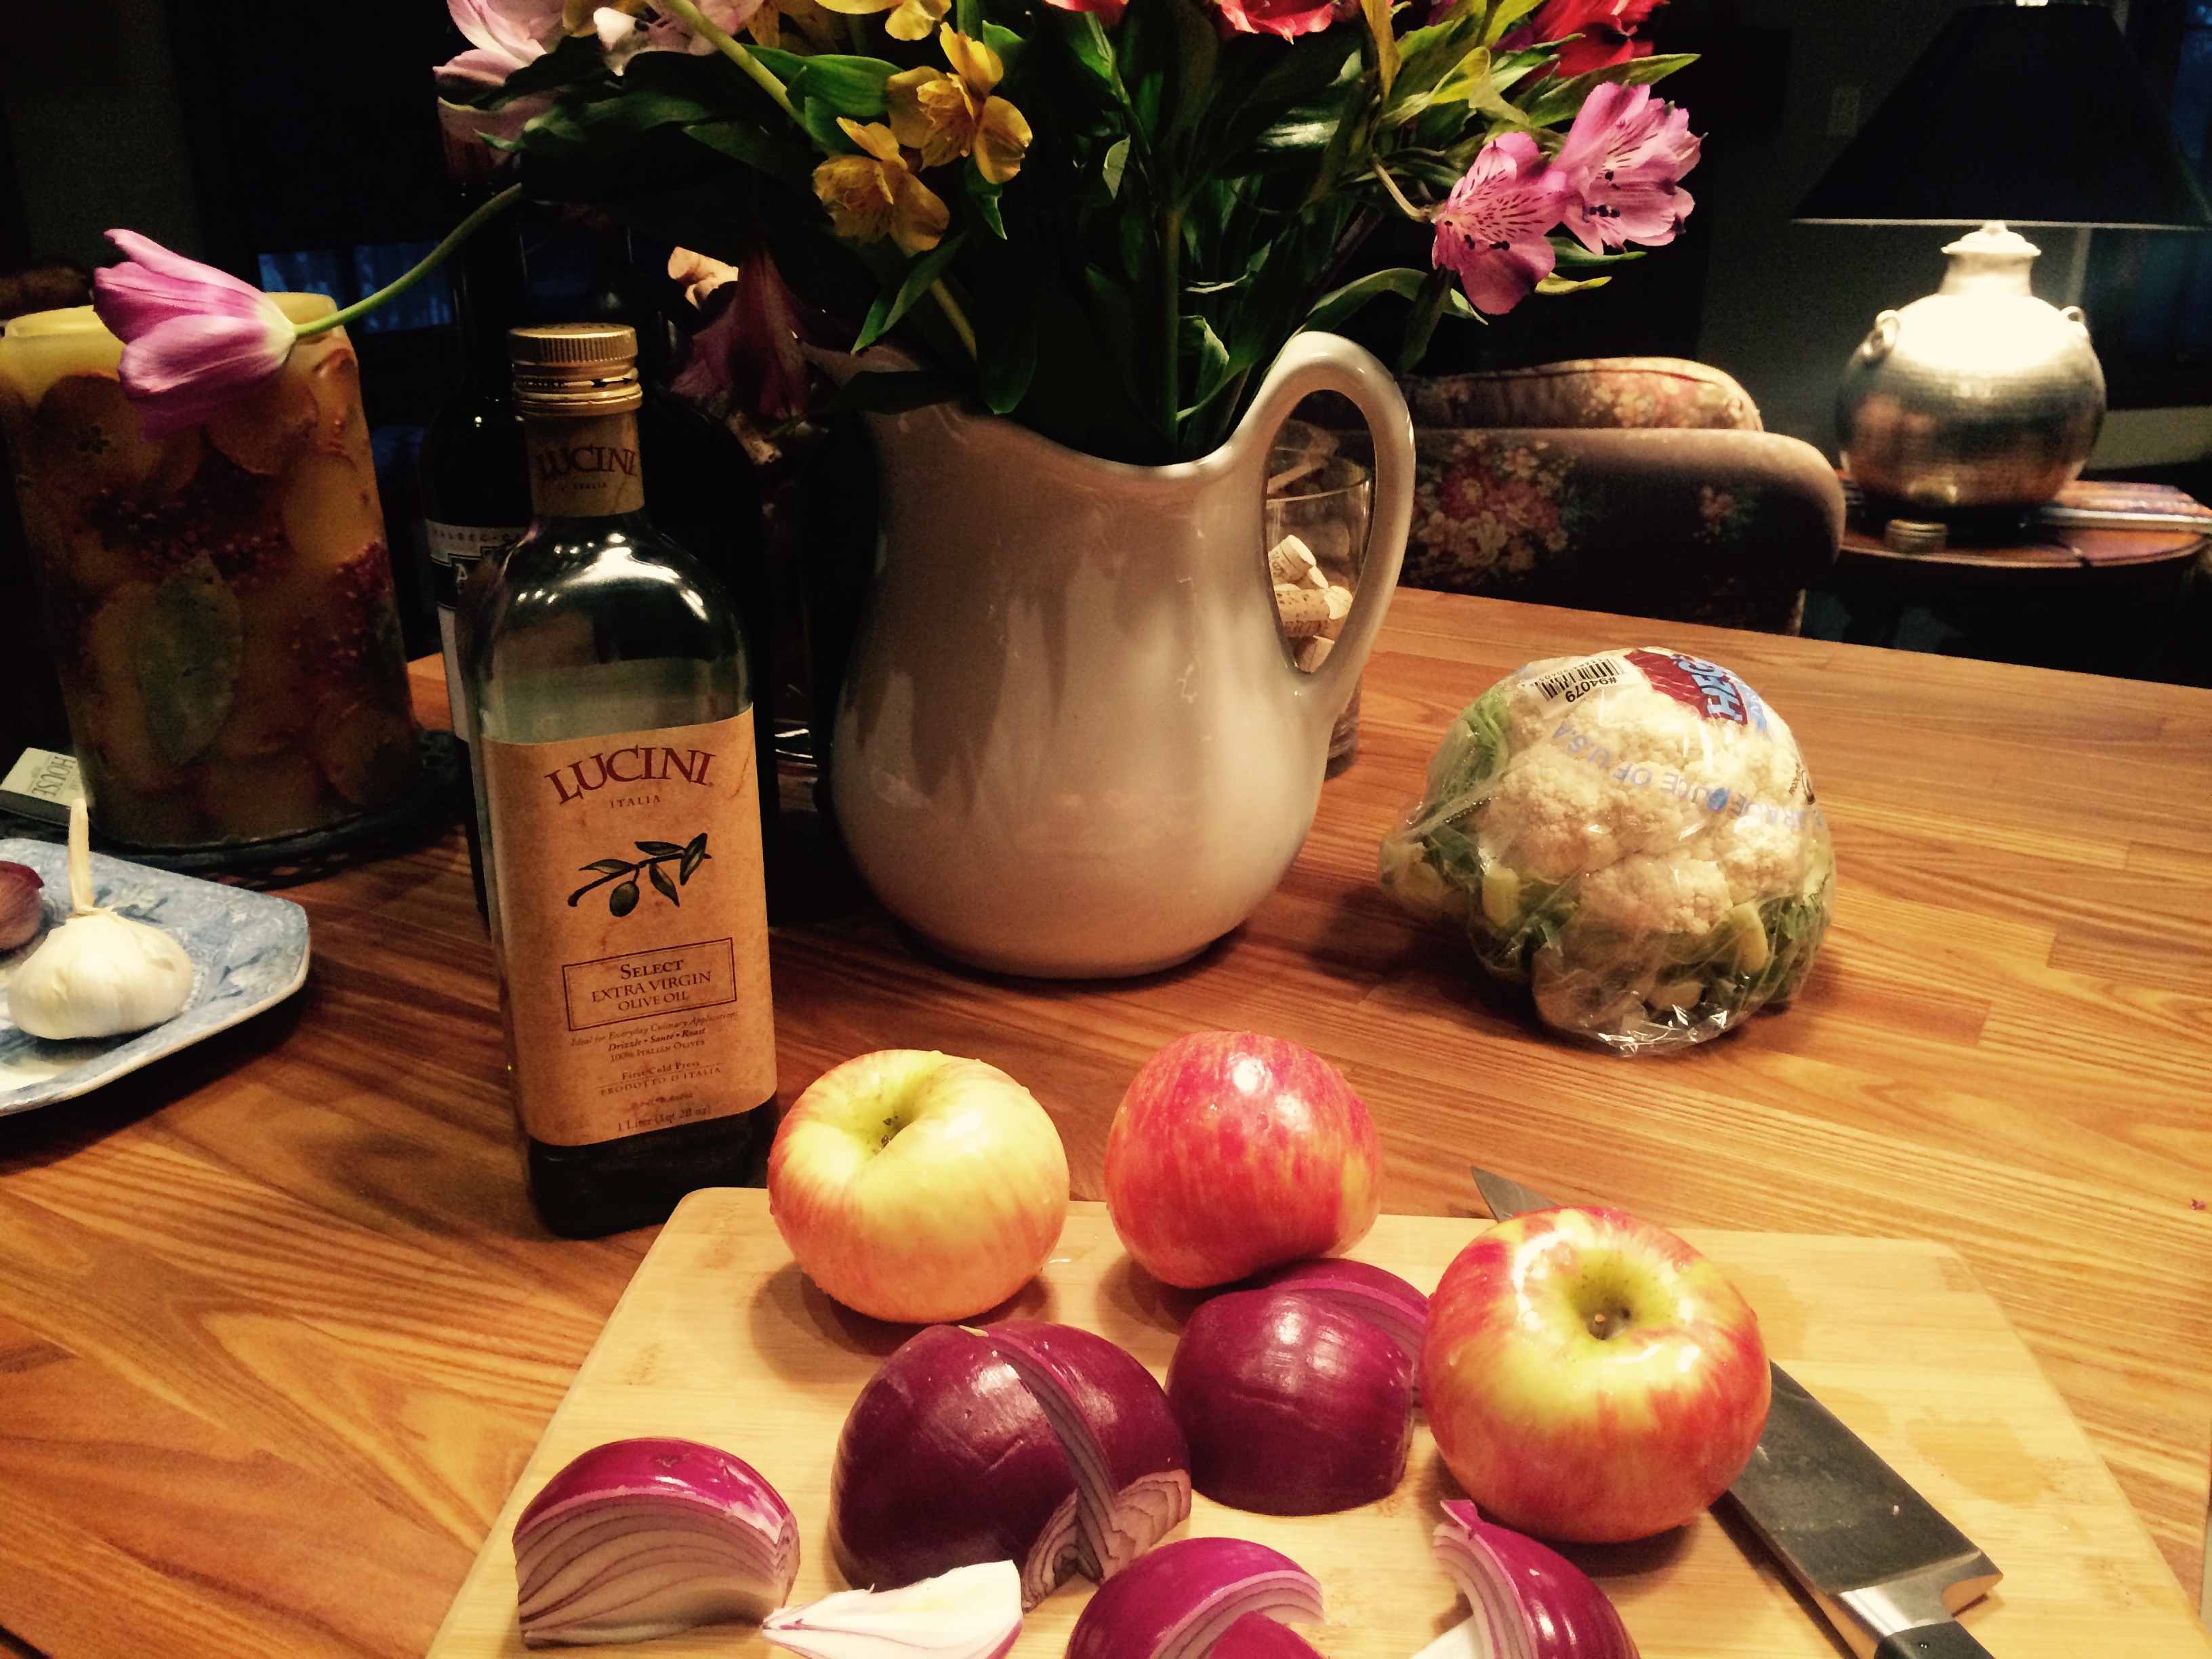
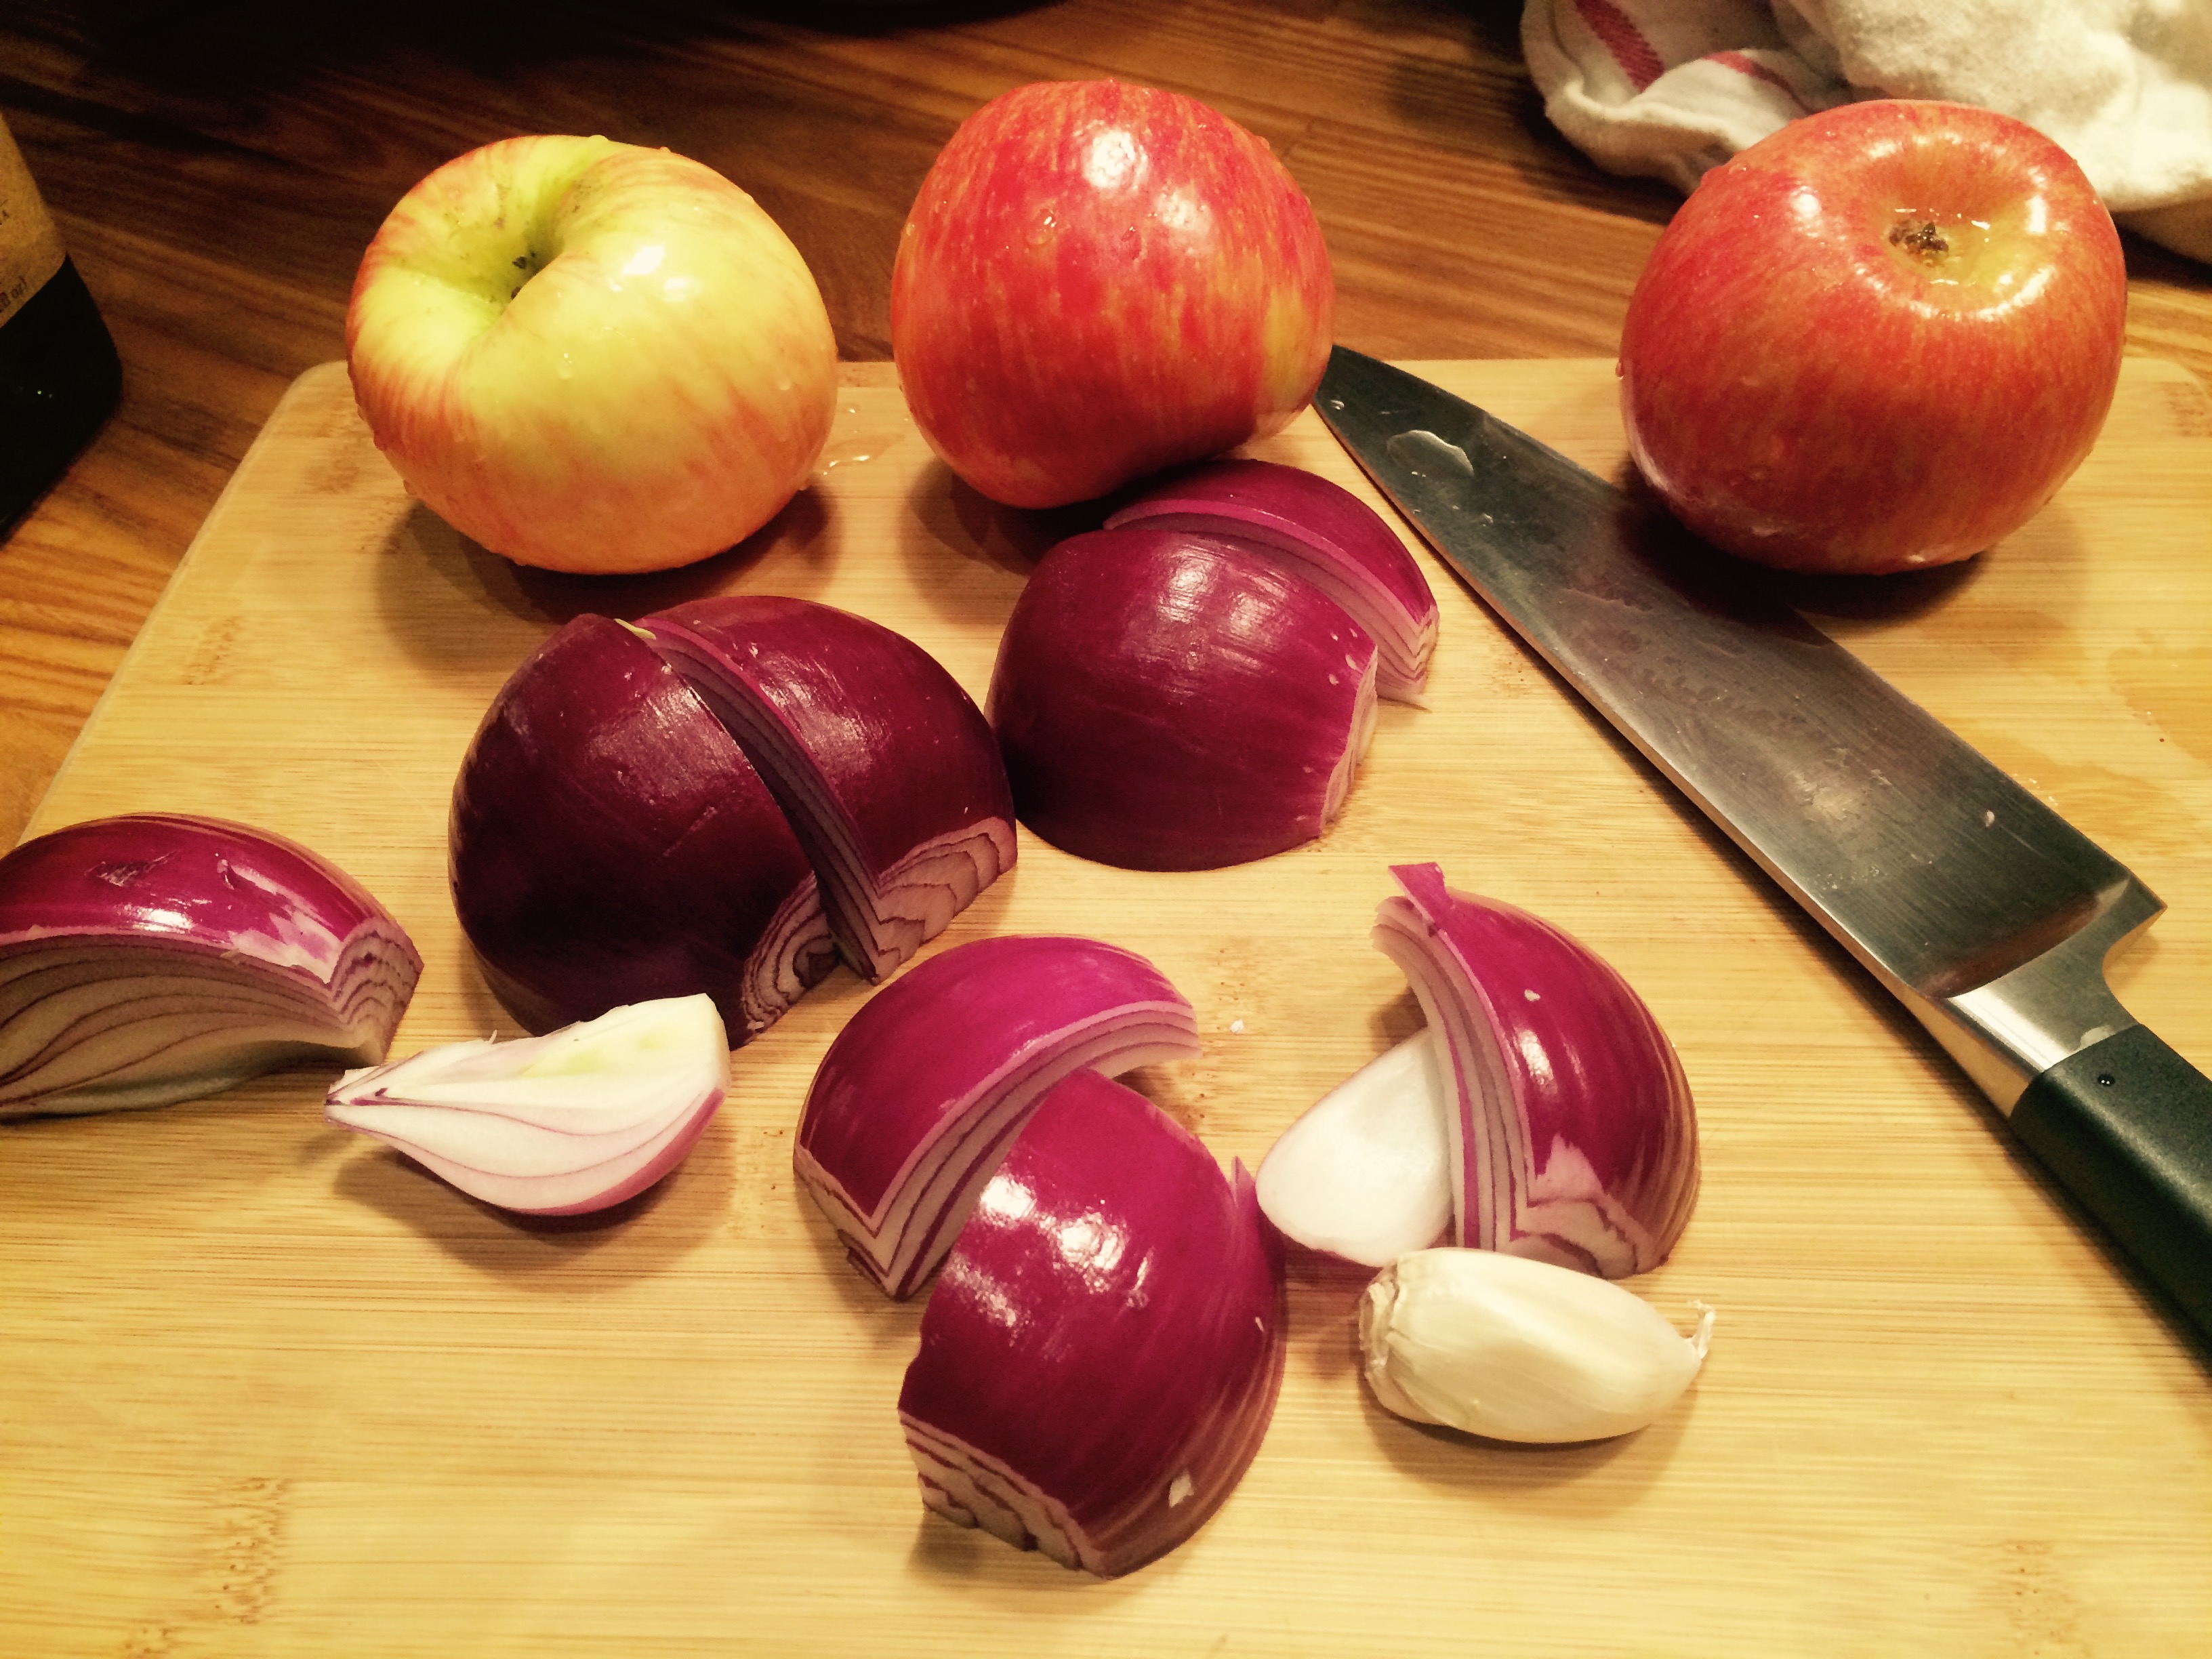
Cutting the onions–First peel the onions, then cut off both ends of the onions. Then cut the onions in half from end to end. Place each half of the onions cut side down and cut again. You have now quartered the onions.

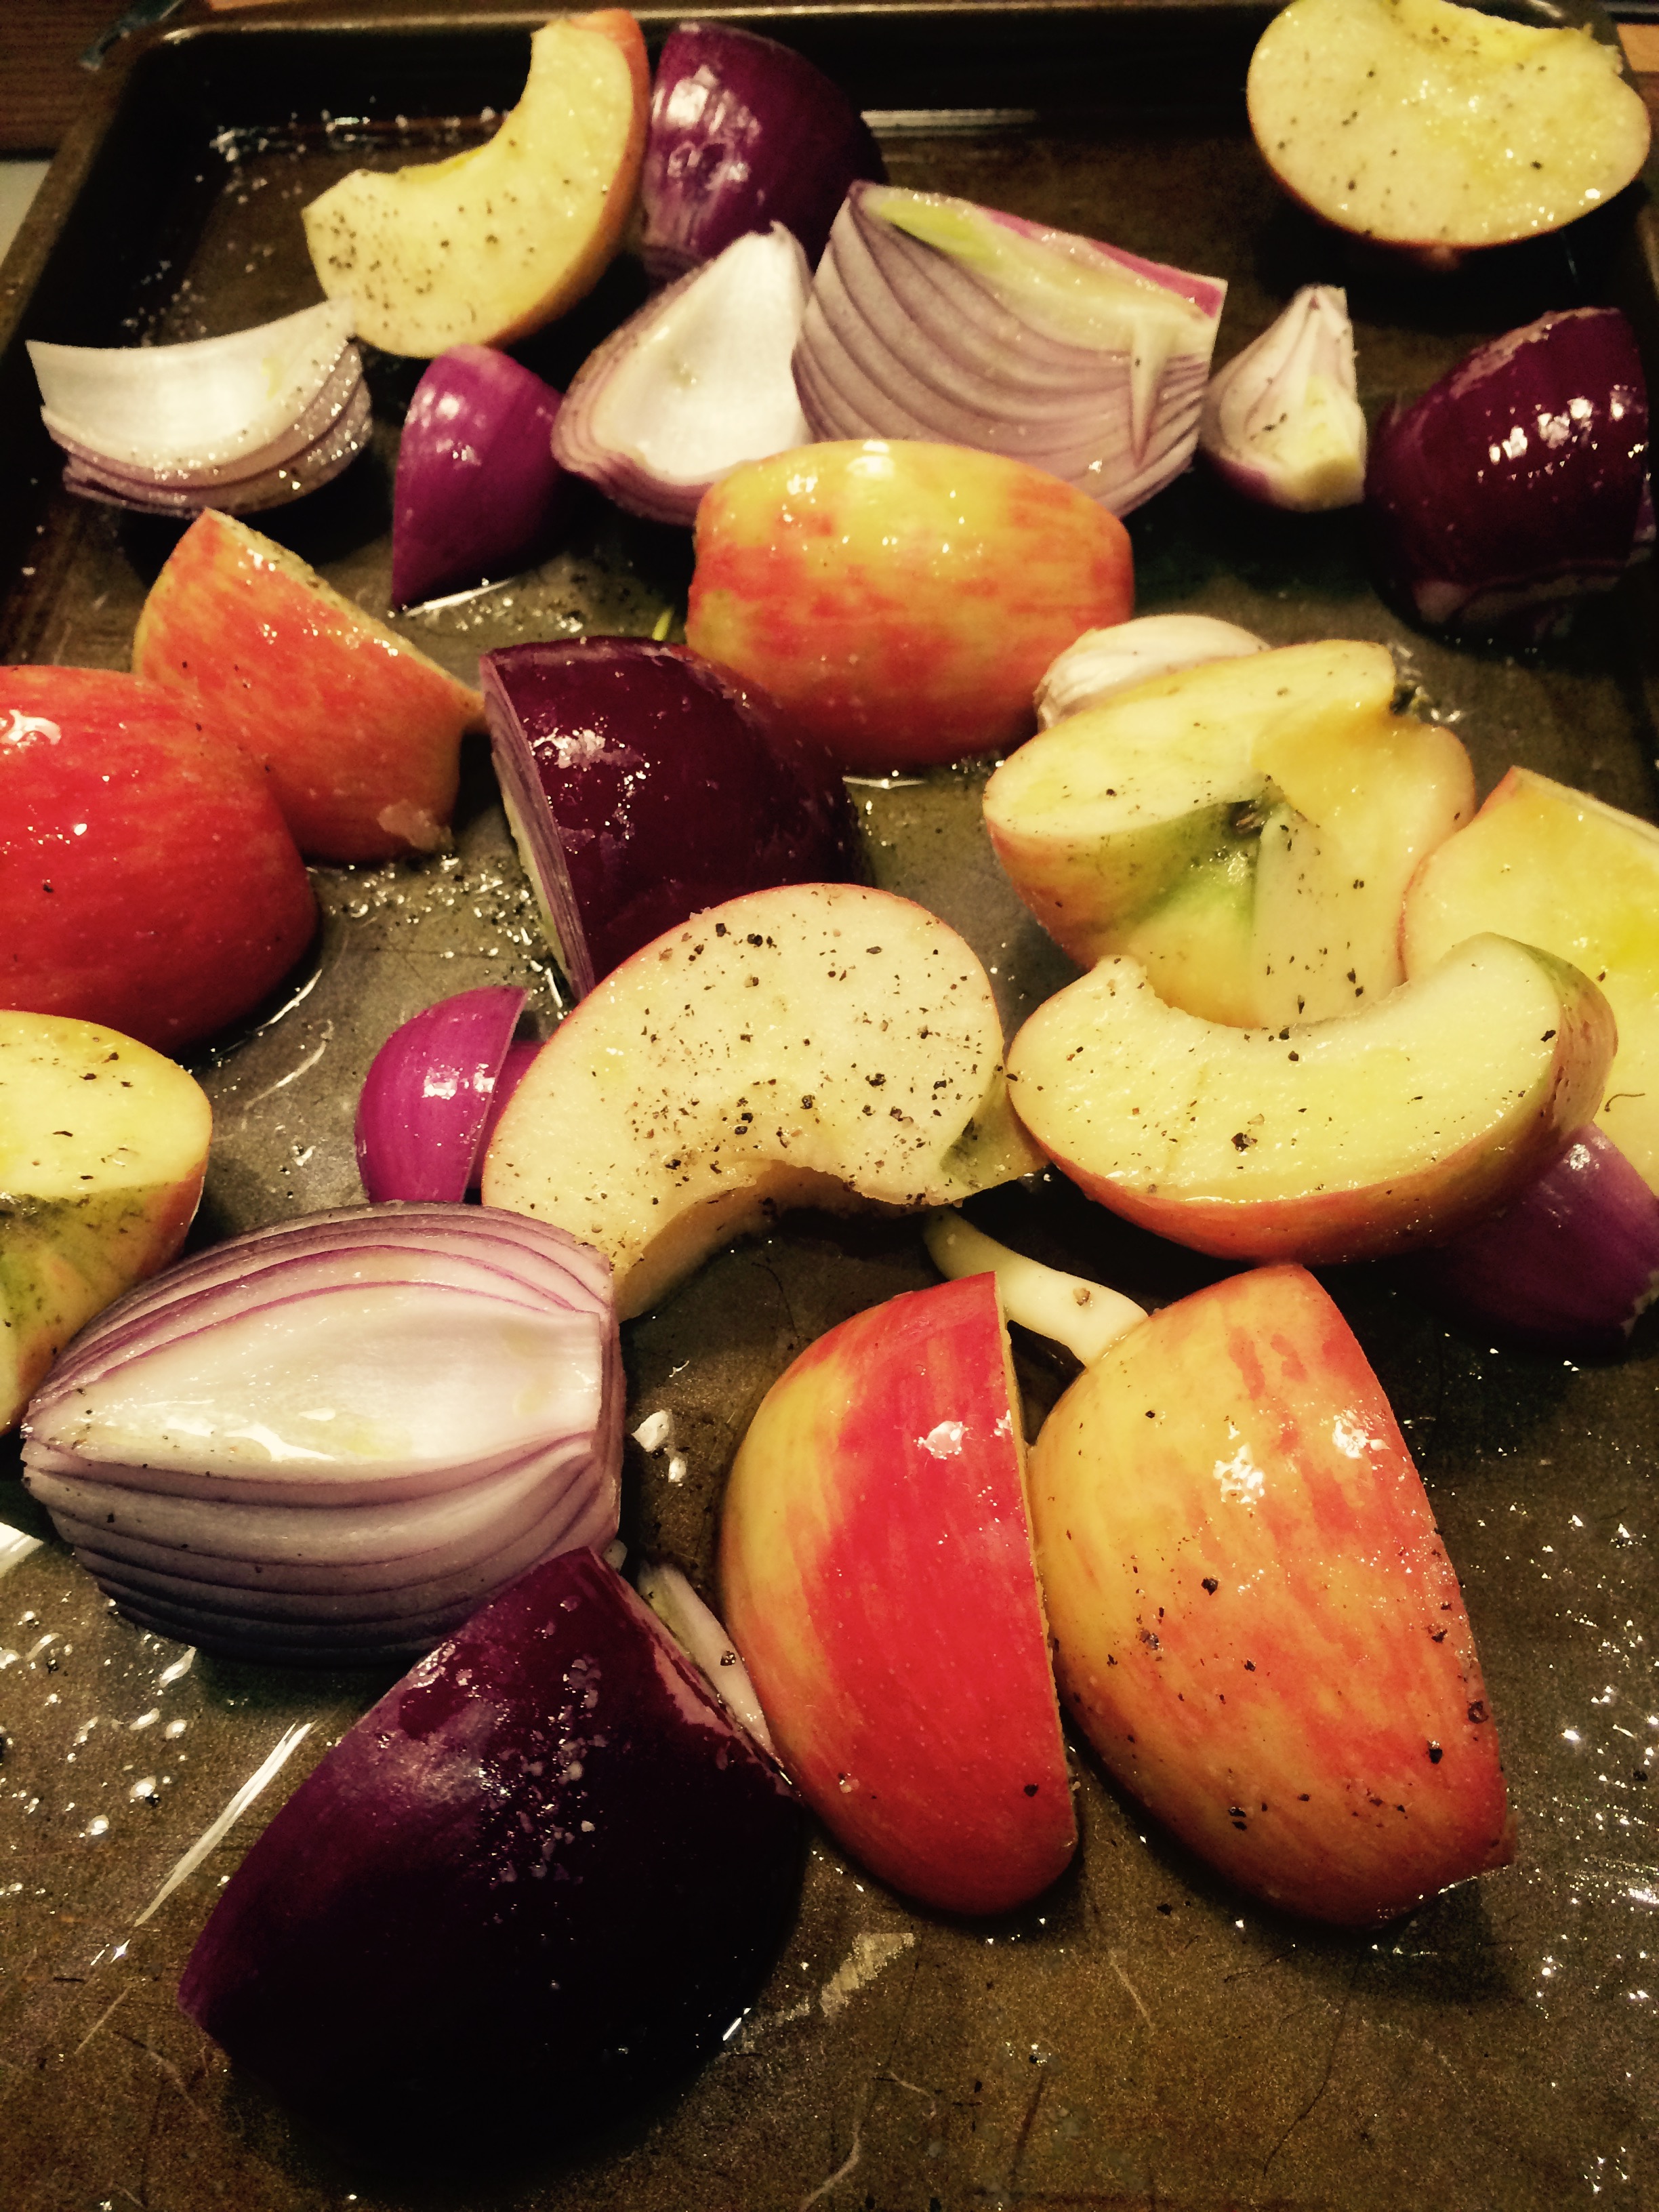
Cut the apples in 1/2 from stem to end.  Remove the core, the easiest method is to use a melon-baller or a small teaspoon to remove core and seeds.  Place each half cut side down and cut in half again. Place the apples and onions in a rimmed sheet pan ( I spray with Pam cooking spray first )

Drizzle the onions and apples with 3 Tablespoons of Olive Oil and sprinkle with 1/2 tsp. of kosher salt and 1/4 tsp. of black pepper ( app. 12 turns on a pepper mill) Toss together with clean hands and spread into a single layer.

Chop the garlic, and combine in a small bowl with the thyme, fennel, and the remaining 1 Tbsp. Olive Oil, 1/2 tsp. salt and 1/4 tsp. pepper. Place the pork, fat side up in the middle of the pan, push the apples and onions aside. Rub the entire pork loin with the spice rub.

Roast until an instant-read thermometer inserted into the center of the pork reads 145 degrees. Check the temperature after 50 minutes. I cooked for one hour and mine was perfect, but check temperature after 45- 50 . Your oven will determine how long it needs to cook and all ovens vary. A slight pink hue in the center of your cooked roast is perfectly desirable. Transfer the meat to a clean cutting board and let it rest for about 5 minutes before slicing. Plate it up with the apples and onions. I also served alongside roasted sweet potatoes.

Happy Valentines Day Brownies – Chocolatey and Fudgey


This is a delicious easy to make Chocolate Fudgy Brownie. Perfect for Valentines Day , as it is such a Chocolatey Holiday. I have always had a  rather large sweet tooth and  Valentines Day always meant candy, chocolate, dessert of one kind or another and it was always up there with my other favorite , Halloween for pretty much the same reasons. How can you not like a holiday that has so much sweetness?  Make this brownie  anytime and  top with ice cream and chocolate sauce for an incredibly killer dessert. I personally cut them up into small pieces and don’t feel as guilty when I eat them. I came in today from being out all day and saw them on the cake stand and because I had cut them up so small, I indulged in two pieces and it just hit the spot!!! Make no mistake these are the real deal, and I never really understand why anyone would use a mix when this is so easy and all the ingredients are so readily available.  And you have bragging rights for Homemade. Just make sure you use an 8 x 8 baking dish, this really does make a difference. Enjoy and Happy V-Day!!!!

Ingredients:

1/2 cup unsalted butter, melted

3 ounces unsweetened chocolate, chopped ( when you buy the box, the chocolate comes in squares, each square is an ounce)

1/8 tsp. salt (regular table salt)

1 cup sugar

2 large eggs at room temperature, lightly beaten

1 tsp. vanilla extract

3/4 cup Cake flour (make sure you use Cake Flour not regular Flour)

1 cup semi- sweet chocolate chips

1/2 cup chopped nuts ( I used chopped pecans , but chopped walnuts are good as well)

*extra unsalted butter for greasing the pan, I admit to using butter but you can spray with baking spray. (Pam)

Directions:

Preheat oven to 350 degrees. Grease an 8 inch square baking dish with unsalted butter ( or spray with Baking Pam)  In a saucepan melt the stick of butter and then when it is melted add the chopped unsweetened chocolate on low heat. Stir often until all the chocolate has been melted. Add the sugar in and let cool for at least 10 minutes.  Once it has sufficiently cooled off , take out another bowl and add beaten eggs and vanilla, and mix well and stir in chocolate mixture. Blend in cake flour ,salt and mix, do not  over mix, just mix till blended. Then add in chocolate chips, and nuts if you’re using them.

Pour batter into greased baking dish and spread evenly. Tap the pan on countertop to get rid of any air bubbles, about 3 or 4 times ought to do it.

Bake the Brownies for 30 minutes ( it’s exactly how long I did)  insert a cake tester or toothpick and it should come out almost clean. Be careful not to over bake.

Remove from the oven and cool completely before slicing into squares.

I actually took out of oven and let it sit out covered almost all day, so by the time I cut into them they were completely cool. I used a knife and wet it, so it would cut cleanly.

So yummy!:) Served with an ice cold glass of milk, perfection.

Also can sprinkle a little sifted confectioners sugar on top of cooled brownies before serving if you’d like.

Sexy and Sassy Shrimp for Valentines Day – Fra Diavolo

photo (3) photo (5)photo (2)OK it’s Valentines Day and that’s the reason for the sexy, and the reason it’s sassy is because this shrimp packs some heat known as Fra Diavolo sauce. What a perfect meal for Valentines Day and it’s red!!! this was so delicious and light. I highly recommend it and it really was an easy dish to make. I would say it’s downright easy to make. This 1 lb. of shrimp should feed 4. I made it with Bucatini pasta, which is a thick ropey spaghetti, you can use whatever type of spaghetti you prefer or none at all. I would say that this whole dish start to finish took 1/2 hour. That’s so perfect. Buy your shrimp peeled and deveined which will save you time. Happy Valentines Day!

*don’t leave out the fresh herbs, they kick it up a notch

Ingredients:

1 lb. large shrimp, peeled and deveined

1 teaspoon of kosher salt , plus more as needed

1/2 medium yellow onion, chopped

1 (14 oz. can) diced tomatoes

3 tablespoons olive oil, plus 2 teaspoons

1 cup dry white wine

3 garlic cloves , chopped

1/4 teaspoon oregano leaves

1 teaspoon crushed red pepper, I didn’t think this was too spicy ,  you’ll have to adjust to your own taste buds. I actually thought 1 teaspoon was pretty mild, next time I will add more, but we like it spicy.

3 tablespoons chopped fresh italian parsley leaves

3 tablespoons chopped fresh basil leaves

Directions:

In a medium bowl toss the shrimp with 1 teaspoon of kosher salt and crushed red pepper flakes. Heat 3 tablespoons oil in a large skillet over medium-high heat. Add the shrimp and saute for a few minutes, toss around a bit and continue cooking until shrimp is just cooked through. ( you’ll want it pink and slightly curled up)

Remove shrimp to a bowl, set aside.

In the same skillet add 1 – 2 teaspoons of olive oil and add onions and saute until translucent and soft, about 5 minutes. Add the can of tomatoes with their juices, wine, garlic, and oregano.  Simmer until the sauce starts to thicken up, about 15 minutes. If sauce sits for a while it may loose some of its liquid , you can just add a little bit of water at a time to get sauce where you’d like it, but just a little at a time.  When you’re ready to serve, add the shrimp back into simmering sauce with any juices that they may have accumulated, toss to coat the shrimp, and cook for about 3 minutes . You can cut into a shrimp to make sure it’s cooked , it should be opaque not translucent. Stir in the parsley and basil. Taste for salt, and serve.

*prepare pasta according to directions and serve shrimp and sauce right on top.

Bucatini al’Amatriciana

Amatrice is a small town in Italy outside of Rome and this dish is named for it.  What I love most about this sauce is that it’s a return to simple Italian food, nothing excessive here.  This dish is intended to be made with guanciale , which is a pig jowl and it tastes like a porkier version of bacon or pancetta. I use pancetta, which now comes pre-diced in packages making for a very easy time. I also keep packages of the diced pancetta in my freezer, they defrost very quickly which makes them a perfect dinner ingredient.  I also use bucatini pasta which is thick and ropey with a hole like a straw. I wouldn’t wear white while eating this it’s a messy one. Super easy and delicious. I made it tonite with my marinated flank steak. I also used 2 containers of grape tomatoes, but you can easily substitute with 1 large  can of San Marzano tomatoes ( crushed )The cherry/grape tomatoes give it a lighter sauce, and I prefer it especially in the summer months but for the winter months or for a heavier tasting sauce use 1 28 oz. can crushed tomatoes with juices instead of fresh tomatoes.

45 minutes from start to finish and full of bright sophisticated flavors.

serves 4 as a main dish.

Ingredients:

4 tablespoons olive oil

4 – 6 oz. diced pancetta ( or 1/4 lb. glacial)

1/2 yellow onion chopped finely

2 garlic cloves , minced

2 containers of tomatoes halved ( I used grape tomatoes , I love them ) or 1 can 28 oz. crushed or whole tomatoes with their juices. If using whole tomatoes just crush them with the back of a wooden spoon.

*1 teaspoon red pepper flakes ( we like spicy) use your own discretion , can always add at the table

1/2 teaspoon salt, or more to taste

1/2 teaspoon freshly ground black pepper, or more to taste

Grated Pecorino Romano Cheese, or any kind of Parmesan Cheese

1 lb. bucatini ( you can obviously use 1/2 pound and save any leftover sauce to freeze for another time) any thick spaghetti will do but I love this one in this recipe. Perciatelli is another good choice.

Directions:

In a large heavy skillet, heat 2 tablespoons of olive oil over medium heat. Add the pancetta and cook, stirring constantly. I like my pancetta crispy, but just get it golden brown, about 5 – 7 minutes. Using a slotted spoon remove pancetta into a separate bowl. Add onions to olive oil till translucent, about 5 minutes. Stir in the garlic and red pepper flakes , I do this off the heat. I then add all the tomatoes, some kosher salt ( to taste) and some black pepper and add back in the pancetta. I also add 2 tablespoons of olive oil and cook the tomatoes till they start to break down and form a sauce. Taste for salt and pepper. Simmer uncovered for at least 45 minutes , up to an hour for perfect sauce.

Cook Pasta according to package directions, tender but still firm to the bite. Before draining pasta take out about 1 cup of pasta water and set aside. Drain the pasta and place in a large serving bowl, I add a little of the pasta water and then I add the sauce. Toss gently and serve. I served with Parmesan Cheese .

Sheet Pan Shrimp


Oh wow! I am so very into all my sheet pan meals. This one was particularly simple to prepare once you have the shrimp prepped. I really kind of just winged it. You can roast some broccoli separately as it would need a little more time to cook.  I served with some rice and a salad and that was it. No kidding around this meal took less than 1/2 hour from oven to table. Of course it is super easy if your fish store can prepare your shrimp. Joel does all the shrimp prep around here and boy am I happy he does. If you call your fish store ahead they will peel and de-vein the shrimp for you.

Enjoy this super easy light dinner.

This recipe will serve 4 people.

Ingredients:

1 1/2 lb. peeled and deveined shrimp. You can leave the tails on if you’d like but I didn’t. I used rather large shrimp. Under 10–Mexican White Shrimp.

2 cups cherry tomatoes

2 nice sized garlic cloves, minced

app. 2 – 3 Tablespoons Olive Oil

Kosher Salt and Freshly Ground Black Pepper

*1/2 teaspoon crushed red pepper–if you like the heat. Totally optional

1/2 lemon

*some steamed spinach would also be perfect!

Directions:

Preheat the oven to 400 degrees.

I put shrimp, cherry tomatoes and garlic in a large bowl, drizzled 2-3 Tbsp. of Olive Oil over it added app. 1 teaspoon Kosher Salt and some grinds on the pepper mill. You may want to use more or less salt depending on your particular taste. I also sprinkled some crushed red pepper in –app. 1/2 teaspoon. Mix it up with a large spoon and if it looks like a light glaze of oil and everything is covered with the oil –you’re good. I used between 2 and 3 tablespoons of olive oil. You’ll have to eyeball it to be sure. One large sheetpan should do it. I sprayed sheet pan with cooking spray or you can use parchment paper for even quicker clean up . Spread out on sheet pan and that’s it.

Roast until the shrimp are opaque , start to curl up and turn pink,  and tomatoes start to burst. I cooked for 15 minutes, but I had very large shrimp. You’ll have to adjust time for the size of your shrimp. Smaller shrimp could take 10-12 minutes. You can always cut into the middle of a shrimp to be sure it’s done.

Finish with a squeeze of some fresh lemon, app. 1/2 lemon.

Serve with rice , pasta or just alone. Add a nice green veggie alongside and you’re good to go.

Say Thank You for this delicious and easy recipe!


Cream Cheese and Lox/Salmon Appetizer

Winter '13 colorado 023Winter '13 colorado 020Winter '13 colorado 021Winter '13 colorado 022This is an appetizer that I used to make all the time and then for some reason stopped making and am now starting to make again! It’s funny how that happens.  It couldn’t be easier and it looks so good. It’s good if you’re looking for something new to make, very few ingredients and all you’ll really need is a good sharp knife for cutting rolls. Out here in Colorado I was able to get very soft extra large tortillas, they work really well. If you can’t find very soft ones, just use regular tortillas or wraps. If you can’t get large just use small ones.  Look at photos, just lay salmon on top of cream cheese in a row starting at the top and go to just before the bottom of tortilla. One 4 oz. package will probably go for 3 large tortillas and 4 small. Good for 4 – 6 people.

Ingredients:

1 4 oz. package of salmon ( or 4 ounces lox)

whipped cream cheese (just easier to spread than bar cream cheese)

1 package of large soft tortillas, or just any size tortilla will do just fine (or you can just use any kind of wrap bread) these are usually available in the deli department of your supermarket.

Directions:

* see photos (for best description)

Take out tortilla , spread whipped cream cheese all over the tortilla, place  slices of salmon starting at the top and go to almost bottom, and then roll up tortilla ( like a wrap) I cut off the ends, and then slice tortilla into app. 1 to 1 1/2″ pieces. App . 5  pieces per tortilla.  Refrigerate till ready to eat and you’re good to go. Put on a pretty plate with some lemon wedges and you’re good to go.

*you can add diced up red onions, or capers. Your call. I just did cream cheese and lox and they were perfect.

Seven Layer Dip

Winter cont'd 021Seven Layer Dip 005This is a super easy and beautiful dish to entertain with. It’s great in a glass bowl where you can see all of the layers. I prefer to make this without meat but if you would like make one of the layers ground beef or ground turkey. Just drain the meat before adding and make sure that the meat has cooled before adding all the other ingredients. Feel free to play around with ingredients, whatever works for you. This recipe is best served at room temperature, I’ll usually make it earlier in the day and take it out of refrigerator an hour or so before serving. Another thing I would suggest is to go to a local Mexican restaurant that you like and buy your refried beans, guacamole and salsa there. It’s usually the best. Sometimes I will make my own guacamole etc. If you’d like to you can double down on all the ingredients. This will probably serve 12 as an appetizer.

Ingredients:

16 oz. refried beans

1 package taco seasoning

1 cup sour cream, I used light not fat-free

1 cup guacamole

1 cup salsa

1 cup Mexican blend shredded cheese

4 ounces black sliced or chopped olives

1 cup chopped tomatoes

*if adding meat use app. 1 – 1 1/2 lbs. ground beef or turkey and make sure it is drained and cooled down before adding it to dip.

Directions:

Layer in this order

1. refried beans mixed with 1 package of taco seasoning – I remove 2 tablespoons of the taco seasoning for the sour cream, if you don’t it’s no biggie I just do it to give the sour cream a little punch

2. 1 cup sour cream mixed with 2 tablespoons of taco seasoning

3. 1 cup guacamole

4. 1 cup salsa

5. 1 cup Mexican cheese

7. 1 cup chopped tomatoes

*if using meat just heat up a little bit of olive oil in pan and cook meat and drain meat after cooking. You’ll want to cool meat down completely before adding to dip.

* if you like cilantro you can sprinkle on top or sliced green onions are a nice touch

*lime wedges are a nice touch as well

Cover with plastic wrap, refrigerate and remove about an hour before serving. Serve with chips for dipping and have a spoon handy to help serve it.

Spinach and Artichoke Dip – Game Day Dip

Game Day is finally here, it’s two days away. If you’re looking for a delicious dip , this is it. This recipe belongs to my daughter Jenn, she always makes it and it is always delicious. It goes perfectly with any kind of chip , or you can toast pita bread and cut into triangles. I know it’s fattening, but what the hell ? Superbowl comes but once a year right? This is a Super Snack, and if you like you can use Lite Mayo and Lite Sour Cream, just not fat free, it won’t work out well at all. This is just a great dip to make anytime of the year, and ingredients are super easy to obtain. Just make sure you squeeze out the excess water from the spinach.

Ingredients:

1 box or bag of frozen chopped spinach * (defrosted)  drained and squeezed out of all liquid, this is the most important thing here is to get the spinach as dry as possible.

1 Can Artichokes drained and coarsley chopped ( if you can buy them quartered already do so)

1 1/2 cups Mayonnaise ( Lite is fine)

3/4 cup Sour Cream ( Lite is fine)

3/4 cup Shredded Parmesan Cheese (not grated)

* In order to get spinach as dry as possible, I put it in colander to defrost, or leave it out for a few hours. I then literally squeeze it out to get all the liquid out of it, you don’t want it wet, the liquid will ruin the dip. So first defrost, then drain it, then wring it out with your clean hands.

Directions:

Mix together all ingredients and put in a nice oven proof dish that you’ll want to serve it in and bake at 350 degrees till brown and bubbly , about 30 – 35 minutes.

Mocha Icebox Cake –can be gluten free

This is a most amazing dessert. It can be made in a large bowl like a trifle, which is what I did or for a more spectacular presentation in an 8″ springform pan. I made it in a large glass bowl and while I don’t have a lot of photos I can tell you that this was a big hit! I even froze the leftovers and they were outstanding. I made it with Tates gluten-free chocolate chip cookies because a friend of mine who was coming for dinner is gluten-free. If you’re looking for a gluten free dessert for a crowd this is it!

This was surprisingly easy to make and no baking makes it a perfect go to dessert. This was a crowd pleaser for sure.

You’ll need an electric mixer with the whisk attachment for this.

Ingredients:

2 cups heavy cream ( I didn’t say this was diet food)

12 ounces Italian Mascarpone Cheese

1/2 cup sugar

1/4 cup coffee liqueur, I used Kahlua

2 Tablespoons unsweetened cocoa powder

1 teaspoon instant espresso powder

1 teaspoon pure vanilla extract

3 packages chocolate chip cookies, I used Tates (gluten-free or regular) in the bowl I didn’t quite use the 3 packages but if you do it in a springform you’ll probably need them all.

Shaved semi sweet chocolate for garnish

Directions:

In the bowl of an electric mixer fitted with the whisk attachment, combine the heavy cream, mascarpone, sugar , Kahlua, cocoa powder, espresso powder, and vanilla. Mix on low speed to combine and then slowly increase speed until it forms firm peaks (this could take up to 6 minutes so don’t get nervous if it takes a while)

In a large glass bowl, I broke the cookie into pieces for the bottom of the bowl, covering the bottom as much as possible. Spread some of the mocha whipped cream evenly over the cookies ( you’ll want about 5 to 6 layers depending on the bowl) so eyeball the whip cream so you’ll have enough. Place another layer of cookies on top, lying cookies flat and touching one another. Follow by another layer of cream, continue layering cookies and cream until there are about 5 or 6 layers and you’ll want to end with a layer of cream. Smooth the top, cover with plastic wrap , and refrigerate overnight.

Right before serving I sprinkled the top with chocolate shavings. Serve cold.

I did freeze this in small plastic containers and then just defrosted it in refrigerator and took out of fridge for a little bit and it was perfectly delicious.

I scooped into dessert dishes, a little goes a long way with this because it’s pretty rich. Will probably serve 10-12 in small dessert dishes.

Springform Pan directions:

You’ll need an 8″ inch springform pan.

Directions are pretty much the same – 5 layers will do it. When you are ready to serve run a sharp knife around the outside of the cake and remove the sides of the pan. Sprinkle the top with the chocolate, cut in wedges, and serve cold.


Red Chili with Turkey or Beef

  • makes Superbowl time and the food that always comes to mind is chili. I have already posted my white bean chili, which I love but this is a more common version. Chili is not an exact science and you can feel free to make substitutions where you like. Obviously the toppings are optional and at your own discretion. Chili is just so easy to make. It sits on the stove or your slow cooker and when you’re ready to eat it, it’s all done. I like chips or taco shells with this. I love fresh jalapeno on the side chopped up, guacamole, refried beans, sour cream, cheese, salsa, diced red onions, etc. If you don’t want beef, make it with turkey instead. I usually make it with turkey but this time out I made it with ground beef because I couldn’t get the turkey. We just landed in Aspen and the small market by the airport only had ground beef so it will have to do. I usually make this one day ahead for a special event. This allows the flavors to all meld together and then I just reheat–couldn’t be easier.

A little trick I learned a while back was to add a little Masa flour. It is usually available in the section with Mexican foods. I stumbled upon it quite by accident, and sneak it in with this recipe. I use about 1/8 a cup of Masa flour to about 1/2 cup very hot water. I add it during the first 1/2 hour and see how it thickens up. I probably use about 2/3 of the flour in the end, and it adds a corn flavor and thickens up the chili. (Directions are below.)

By the way this is so delicious you should make it all year round. I usually make it a few days ahead and keep in the refrigerator. And if it’s for two of you then you will have some amazing left-overs. This freezes amazingly well. (I have kept frozen for up to 2 months) perfect for when you remember you have this in the freezer and have no other dinner planned!

Enjoy!

Ingredients:

2 lbs. ground beef or ground turkey–I prefer dark meat ground turkey, it’s just much more flavorful. If you prefer white try and get 85/15 white meat. 100% white meat turkey can be very dry. It’s a preference and you can use whichever you prefer–just saying….

2 cloves garlic, minced

1 can (12 – 14 oz) tomato sauce, and then about 1 –  2 cans of water–you may need to add more water if chili gets too thick.

1 can (Ro-tel) diced tomatoes and chilies

1 can (15 oz.)red kidney beans, drained and rinsed

1 can (15 oz.) pinto beans, drained and rinsed

1/8  cup masa harina (corn flour) found in the Mexican food section of the supermarket (Mix flour with about 1/2 cup very hot water. It will be quite thick. Drop in by spoonfuls and mix well to incorporate. I probably used 2/3 of the flour mixture. This is optional but ever since I discovered it, I’ve been using it.)

1 can yellow corn (optional, but I always like to add it in. I use a small 8 oz. can)

1 small can (4 oz.) poblano green chilis, cut up or diced (also in Mexican aisle)

1 teaspoon ground oregano (I use Mexican oregano. Use it if you can get it. If not, regular is fine.)

1 tablespoon ground cumin

2 tablespoons chili powder

1/2 teaspoon cayenne pepper (I like the heat. This is optional. You can also take down to 1/4 teaspoon.)

1 teaspoon kosher salt (then you will taste for additional salt. I added 1/4 teaspoon more at the end.)

Grated shredded cheddar or jack cheese for serving

diced red onion and diced fresh jalapeno for serving

Tortilla chips, guacamole, sour cream and salsa for serving

*cilantro for topping (I love cilantro so I chop it up and leave it out for individual garnish.)

Directions:

Place the ground beef or turkey in a large stock pot (Le Creuset) and put in the garlic. Cook over medium heat until meat is browned. Drain off any excess fat. Add in the tomato sauce, chili powder, cumin, oregano, salt and cayenne. Stir together well, and reduce heat to low. I use the 15 oz. can of tomato sauce as a measuring cup and add 1 -2 cups of water (this time out I used 1 1/2 cans of water.) Let simmer for an hour or so, covered, occasionally stirring, and adding water, if necessary.

Place the masa harina in a small bowl. Add 1/2 cup water and stir together with a fork. Add masa mixture to the chili and stir together and taste for seasonings. Add more water if needed. Add the beans, corn, and chilis. I usually add salt at this point. Simmer for another 1/2 hour or so covered. It can simmer for a long while, if you so desire. Or, turn off heat, and just heat up 1/2 hour before serving.  You should check for thickness. During the last 1/2 hour, I added a bit more water .

Serve with assorted toppings I’ve listed. Cheese, jalapenos, chips, guacamole, salsa, chopped onions, sour cream  and cilantro.