Category Archives: Uncategorized

Tuna Ceviche

I struggled with the title for this recipe and finally decided to name it Ceviche because it is the interpretation of what this tuna really is. When a fish is denatured by a citrus juice, in this case lime juice it really is considered to be a ceviche which is very popular in Latin America. However the recipe that I got this from was titled Tuna Tartare. My resident “fish expert” wants it to be called Ceviche and he enjoyed it very much. This is the second time I made this recipe. The first was on New Years Eve and I made it with my friend, Susan. We made the amounts listed here, last night I made 1 box and cut the recipe by 2/3. You can play somewhat with ingredients, you might not want to use hot sauce or jalapeno and you can omit. I have to say I used both last night and would have liked it spicier. Next time I will add more hot sauce.

Also a little note after researching the topic of Tuna. The original recipe says to mix well so I did, but if you mix well with the fish in it you cause a lot of air to get into the fish and the fish will turn a browner color. It is just oxygenation of the fish and it is not harmful. So I recommend mixing the sauce well first and then add to the fish and stir gently and cover with plastic wrap and refrigerate for at least an hour to allow flavors to marinate. The change in color is not harmful as long as you are starting out with very fresh tuna . I used a box of sushi grade frozen tuna available in my Whole Foods Market. You can purchase from your local fish store as well. The frozen one was very easy to work with but comes in very small blocks. (see picture) and is rather pricey.

It takes about 1/2 hour to prep. and is worth the effort. This recipe will probably serve 6-8 and maybe a little more as an appetizer. I served alongside some delicious tortilla chips but any chips will do. The layering of all these flavors is spectacular. If you don’t want to use toasted sesame seeds you can omit.

*I would eat any left-overs within 24 hours.

Ingredients:

1 1/4 lb. sushi grade tuna (see photo of the tuna I used or ask your local fish merchant)

3/4 cup good olive oil

3 limes, zest grated

1/2 cup freshly squeezed lime juice ( use the limes you just zested) you may need more so have a few extra on hand. I used a juicer because it’s impossible to hand squeeze limes.

1 teaspoon wasabi powder

1 1/4 Tbsp. Soy Sauce

1 Tbsp. Hot Red Pepper Sauce–I used Cholula Hot Sauce

1 Tbsp. Kosher Salt

1/2 Tbsp. Freshly Ground Pepper

app. 6 minced scallions, white and green parts

1/2 -1 Minced Fresh Jalapeno Pepper, seeds removed–wear plastic gloves and leave a few seeds if you like spicier.

3 ripe Haas Avocados or any ones you can get

1 Tbsp. Toasted Sesame Seeds, optional if you don’t want the seeds.

Directions:

Follow directions on the box of sushi grade tuna for defrosting

if you’re not using fresh. Make sure fish is dry and cut the tuna into small dice pieces about 1/4″and place in a large bowl. In a separate bowl, combine the olive oil, lime zest, lime juice, wasabi, soy sauce, hot red pepper sauce, salt and pepper, use a whisk and whisk well then pour over the tuna , add the scallions and jalapeno and mix gently and quickly so as not to oxygenate tuna too much. Cut the avocados in half, remove the pit and peel. Cut the avocado into small chunks to your liking. Carefully mix the avocado into the tuna mixture. Add the toasted sesame seeds, if you are using and season to taste. Allow the mixture to sit in the refrigerator for at least an hour for the flavors to meld together.

Serve with tortilla chips of your liking and Enjoy!


Lemon Garlic Chicken with Mushrooms

IMG_0586

IMG_0589I had chicken breasts in the refrigerator ready to go and had to figure out what I was doing with them using ingredients that I had in the house.  I had lemons, garlic, even had fresh rosemary in the house. I really threw this together and the next time out I would use thin chicken cutlets or pound the ones I had thinner.   I used 1 package of cutlets for the 2 of us, which is usually around the 1 lb. mark. This recipe would be perfect for 1 lb. of chicken cutlets. Double up for 2 lbs.

As I said this was a very thrown together recipe. I tried to keep track of what I was doing so I could duplicate recipe. It is one of those recipes that you sort of wing as you go. We really enjoyed this chicken and I hope you will too.

Ingredients:

1 package of thin chicken cutlets or app. 4 chicken cutlets

2 Tbsp. olive oil

2 Tbsp. Grapeseed Oil, if no Grapeseed Oil use canola or sunflower

3 Tbsp. fresh lemon juice ( app. 1 average size lemon)

2 Tbsp. all-purpose flour, if you’re gluten-free use gluten-free flour such as rice flour, or corn flour and it will be just fine

2 cloves garlic, minced

1 Tsp. fresh rosemary, chopped

1 Tsp. Kosher Salt and more to taste

1/2 Tsp. Freshly Ground Black Pepper and more to taste

1/4 cup dry white wine

Directions:

Whisk together in a large bowl the olive oil, lemon juice, rosemary and 1 tsp. kosher salt and 1/2 tsp. freshly ground black pepper. Place chicken cutlets into bowl and place in the refrigerator for a 1/2 hour.

Remove chicken cutlets from marinade and place on a plate, discard the marinade. I sprinkled a little more kosher salt and pepper on the top side of chicken (shiny side) . Then dredge lightly in the flour, you should have more than enough flour with 2 Tbsp. but if you need more you can add it. Tap Breasts after you dredge to remove excess flour.

Turn oven on low or a warming drawer works well here , just to keep chicken warm after you cook it on stovetop.  Heat a large skillet over medium to high heat and add grapeseed oil. When oil is very hot, place one or two pieces of chicken in the pan–don’t crowd. Cook for a few minutes on each side, (try not to overcook or the chicken will be very dry) just until you see it browning up, this is why the thinner chicken works best here.  Transfer to a plate and blot the chicken with paper towel. Cook all the chicken. I placed chicken on a baking sheet and put in the oven/warming drawer while I cooked the mushrooms.

Turn burner down to medium high heat , add mushrooms to the pan and sprinkle with a little kosher salt and pepper. Let them sear for about a minute without touching them, then stir , scraping the bottom of the pan with a wooden spoon. When the mushrooms start to soften add the wine, chopped thyme, and you can taste for salt and pepper. Continue to stir the mushrooms until the wine has evaporated and mushrooms are tender and ready , app. 10 minutes. I removed chicken from oven , plated it up over basmati rice and added the mushrooms over the chicken. That’s it and it was delicious.

Sheet Pan Shrimp


Oh wow! I am so very into all my sheet pan meals. This one was particularly simple to prepare once you have the shrimp prepped. I really kind of just winged it. You can roast some broccoli separately as it would need a little more time to cook.  I served with some rice and a salad and that was it. No kidding around this meal took less than 1/2 hour from oven to table. Of course it is super easy if your fish store can prepare your shrimp. Joel does all the shrimp prep around here and boy am I happy he does. If you call your fish store ahead they will peel and de-vein the shrimp for you.

Enjoy this super easy light dinner.

This recipe will serve 4 people.

Ingredients:

1 1/2 lb. peeled and deveined shrimp. You can leave the tails on if you’d like but I didn’t. I used rather large shrimp. Under 10–Mexican White Shrimp.

2 cups cherry tomatoes

2 nice sized garlic cloves, minced

app. 2 – 3 Tablespoons Olive Oil

Kosher Salt and Freshly Ground Black Pepper

*1/2 teaspoon crushed red pepper–if you like the heat. Totally optional

1/2 lemon

*some steamed spinach would also be perfect!

Directions:

Preheat the oven to 400 degrees.

I put shrimp, cherry tomatoes and garlic in a large bowl, drizzled 2-3 Tbsp. of Olive Oil over it added app. 1 teaspoon Kosher Salt and some grinds on the pepper mill. You may want to use more or less salt depending on your particular taste. I also sprinkled some crushed red pepper in –app. 1/2 teaspoon. Mix it up with a large spoon and if it looks like a light glaze of oil and everything is covered with the oil –you’re good. I used between 2 and 3 tablespoons of olive oil. You’ll have to eyeball it to be sure. One large sheetpan should do it. I sprayed sheet pan with cooking spray or you can use parchment paper for even quicker clean up . Spread out on sheet pan and that’s it.

Roast until the shrimp are opaque , start to curl up and turn pink,  and tomatoes start to burst. I cooked for 15 minutes, but I had very large shrimp. You’ll have to adjust time for the size of your shrimp. Smaller shrimp could take 10-12 minutes. You can always cut into the middle of a shrimp to be sure it’s done.

Finish with a squeeze of some fresh lemon, app. 1/2 lemon.

Serve with rice , pasta or just alone. Add a nice green veggie alongside and you’re good to go.

Say Thank You for this delicious and easy recipe!


Mocha Icebox Cake –can be gluten free

This is a most amazing dessert. It can be made in a large bowl like a trifle, which is what I did or for a more spectacular presentation in an 8″ springform pan. I made it in a large glass bowl and while I don’t have a lot of photos I can tell you that this was a big hit! I even froze the leftovers and they were outstanding. I made it with Tates gluten-free chocolate chip cookies because a friend of mine who was coming for dinner is gluten-free. If you’re looking for a gluten free dessert for a crowd this is it!

This was surprisingly easy to make and no baking makes it a perfect go to dessert. This was a crowd pleaser for sure.

You’ll need an electric mixer with the whisk attachment for this.

Ingredients:

2 cups heavy cream ( I didn’t say this was diet food)

12 ounces Italian Mascarpone Cheese

1/2 cup sugar

1/4 cup coffee liqueur, I used Kahlua

2 Tablespoons unsweetened cocoa powder

1 teaspoon instant espresso powder

1 teaspoon pure vanilla extract

3 packages chocolate chip cookies, I used Tates (gluten-free or regular) in the bowl I didn’t quite use the 3 packages but if you do it in a springform you’ll probably need them all.

Shaved semi sweet chocolate for garnish

Directions:

In the bowl of an electric mixer fitted with the whisk attachment, combine the heavy cream, mascarpone, sugar , Kahlua, cocoa powder, espresso powder, and vanilla. Mix on low speed to combine and then slowly increase speed until it forms firm peaks (this could take up to 6 minutes so don’t get nervous if it takes a while)

In a large glass bowl, I broke the cookie into pieces for the bottom of the bowl, covering the bottom as much as possible. Spread some of the mocha whipped cream evenly over the cookies ( you’ll want about 5 to 6 layers depending on the bowl) so eyeball the whip cream so you’ll have enough. Place another layer of cookies on top, lying cookies flat and touching one another. Follow by another layer of cream, continue layering cookies and cream until there are about 5 or 6 layers and you’ll want to end with a layer of cream. Smooth the top, cover with plastic wrap , and refrigerate overnight.

Right before serving I sprinkled the top with chocolate shavings. Serve cold.

I did freeze this in small plastic containers and then just defrosted it in refrigerator and took out of fridge for a little bit and it was perfectly delicious.

I scooped into dessert dishes, a little goes a long way with this because it’s pretty rich. Will probably serve 10-12 in small dessert dishes.

Springform Pan directions:

You’ll need an 8″ inch springform pan.

Directions are pretty much the same – 5 layers will do it. When you are ready to serve run a sharp knife around the outside of the cake and remove the sides of the pan. Sprinkle the top with the chocolate, cut in wedges, and serve cold.


White Bean Chili

Original post was back in the winter of ’13. For those of you who are new to the blog or missed it, I am re-posting the recipe. It is delicious and the inspiration comes from Bonnie’s on Aspen Mountain. It is probably my most favorite thing to eat at Bonnies , so if you ever find yourself out here skiing go to Bonnies and get the White Bean Chili with Chips of course!

Perfect recipe for Superbowl! I like to make it a day or two ahead and let the flavors all come together but if you can’t it’s fine to make the day you’re eating it. You can use your slow cooker and you will probably have to add some more liquid, or use a Le Creuset type of pot which is deep enough to hold all the ingredients. You can change up recipe and use ingredients which you prefer, it’s a very “flexible” type of recipe.

*when I use the slow cooker I brown meat and veggies first on the stovetop

*you can double up on this recipe by adding ingredients,  I will usually increase the meat to 2 lbs. and maybe a little more diced tomatoes, spices, and a little more onion and vegetable. This is a very flexible recipe.

Ingredients:

1-2 lb. Ground dark meat turkey , I prefer the dark meat turkey flavor but use whatever you’d like, I stretch recipe by adding an extra pound of meat here (2 lbs.) you will have to increase liquids though —

3 Tablespoons unsalted butter

1/2 large white onions, chopped

1 green pepper , chopped( I use the green for color here, but feel free to change it to any color pepper you prefer)

1 yellow pepper, chopped (same goes for this pepper)

1 Tablespoon chopped garlic ( about 1 large clove or 2 small)

3 15 ounce cans of White Northern Beans, or any white bean you like. Drained.

7 oz. salsa or picante sauce

1 8 ounce can of diced green chiles. ( I used 2 cans of 4 oz. hot green chiles)

1 8 ounce can of whole kernel corn

1 lb. can diced tomatoes ( drained)

1 Tbsp. cumin

1 Tbsp. oregano ( I love to use Mexican oregano) but no worries if you can’t find it

Kosher Salt to Taste– keep tasting , I added a fair amount of salt. Add at your own discretion.

Freshly ground black pepper, but if you have it you can use white pepper !

3-4 cups chicken or vegetable stock –start out with 3 and if it is too thick you can always add more liquid.

12 oz. Sour Cream–I use light not fat free. Strain the sour cream to get rid of the little bit of liquid. You can also use yogurt if you like. Add this ingredient last and blend it in well.

Shredded Cheese ( Mexican Style, Jalapeno or Cheddar. This is a topping so I just put it out in a bowl alongside some fresh chopped jalapeno. Tortilla chips on the side as well.

Directions:

In a large stockpot or slow cooker ( I use my Le Creuset pot) melt the butter on medium heat. Add onion, peppers and garlic until softened. I add the garlic and some kosher salt here. Add in the 2 lbs. of dark meat turkey and brown that up as well.

Puree 1 1/2 cans of the drained white beans. ( Food Processor here) until beans are smooth and then I add them to the pot.

Add the rest of the drained beans, along with the salsa, chiles, corn, tomatoes and spices ( plus anything else you may want to add) Cook for a few more minutes on a low heat until all of the ingredients are blended.

Add the stock and bring to a boil. I then lower the heat and simmer for about an hour on the stove top.

Before you’re ready to serve it, add the sour cream and blend it in while chili is simmering.

I place the shredded cheese, extra sour cream, chips, fresh cut up jalapenos, salsa and guacamole in bowls on the side so everyone can make their chili their way.

Enoy!!!

I know there are a lot of ingredients but this is so easy you can make it in the morning and it sit all day in the fridge. You may need to add more liquid when you go to serve it. This freezes really well also.

Sheet Pan Chicken –Meditteranean Style-String Beans and Potatoes

I love one pan and one pot dinners! Just amazing! This is an easy no-fuss meal cooked in the oven on one sheet with a marinade that has a distinct Meditteranean flavor from the lemon juice, olive oil and oregano.  Use chicken thighs or legs , I prefer dark meat for this but if you insist on using white meat –go ahead. Some green beans and potatoes make this a one pan staple. Delicious and Nutritious. Did I mention super easy to clean up? It was the Golden Globes so I wanted to eat and watch without a big mess to clean up. You’ll need a rimmed baking sheet for this recipe.

Enjoy! this is for 2 +people but you can double for 4. It will probably feed 2+ but depends on your people. This is what I did for the 2 of us. We ate the whole thing! no leftovers! If you are making for a larger crowd (4 or more) either use a very large baking sheet or 2 baking sheets .

Ingredients:

1/2 lb. baby red potatoes- I quartered them but if they are very small you can cut in 1/2

1/2 lb. green beans , trimmed

2 Tbsp. olive oil plus for marinade

Kosher Salt and Freshly Ground Black Pepper, I salt chicken liberally and potatoes because they tend to be bland –see notes below on salt and pepperimg_3437

*2 Tbsp. Chopped Fresh Parsley – totally optional along with some slices of fresh lemon for beautiful presentation


Marinade for the Chicken- Marinate for about an hour

app. 1 package of chicken thighs– bone in , skin on . When I say 1 package it is usually a little under 2 lbs ( 6 smallish thighs)  which is more than enough for 2 people. Usually about 6 chicken thighs in a package depending on the size of thighs.

1/4 cup olive oil

3 cloves garlic, minced

Juice of 1 lemon- I used juicer because I wanted to make sure I got every drop

1 Tbsp. Red Wine Vinegar

1 Tbsp. dried oregano

Kosher Salt and Freshly Ground Black Pepper , to taste–I used 1/2 tsp. kosher salt and about 10 grinds on the pepper mill for the marinade

In a large Ziploc Bag, combine chicken, olive oil, garlic, lemon juice, red wine vinegar and oregano; season with app. 1/2 teaspoon salt and a few grinds (10-12) of freshly ground black pepper, to taste. Marinate for at least an hour, turning the bag occasionally. Remove the chicken from the marinade by draining it, discard the excess marinade.

Preheat oven to 400 degrees. Lightly spray a large size baking sheet with cooking spray.

Place potatoes and green beans in a single layer onto the prepared baking sheet. Drizzle with olive oil and season with salt and pepper. Top with chicken in a single layer. Salt is an important component here–I sprinkled a light amount over chicken and potatoes and string beans –probably another 1/2 teaspoon and a few grinds of the pepper mill

Place into the oven and roast until the chicken is completely cooked through, should register 165 degrees with a meat thermometer after about 1/2 hour . After I check for readiness I place under the broiler for a few minutes, till skin is golden brown and a little charred ( but not too charred) watch chicken for signs of burning.

Serve immediately, you can garnish with lemon slices and parsley for a beautiful presentation!

Enjoy


Top Ten Posts from 2016

These were the top posts/recipes from 2016. This list is based on “you” my readers. These are not necessarily my favorites but they are the posts that got the most attention in order of their popularity. Baked Salami always wins the #1 spot, so I suppose that even in a world where everyone seems so diet conscious people still like a little decadence. This recipe comes in first every year! These are my most googled recipes and my most read recipes. So you might want to check some of them out.

Happy New Year to all my readers and thanks for being there for the past 6 years. It makes me so happy that you’re all out there reading and cooking from all over the world. Looking forward to sharing more recipes with all of you in 2017.

From my kitchen to yours — Happy Healthy 2017!

Most Popular Recipes from 2016–based on my readers

  1. Baked Salami–deliciously decadent recipe from the 1970’s which still remains popular
  2. Chicken Cubes with Rosemary, Lemon and Garlic–simple and easy and makes you look like a rock star
  3. Mushroom Barley–Side Dish–old-fashioned “comfort food”
  4. Vinaigrette with Maple Syrup–the new salad dressing you’ve been looking for
  5. Creamy Butternut Squash Soup (no cream)–always one of my most popular recipes
  6. Passover Cobbler–awesome addition to the Passover Dessert Table
  7. Pumpkin Walnut Bread (no butter)–what can I say? Perfectly Delicious
  8. Peach Farfel for Passover –crowd favorite for sure–once you make it you will always have it on your Passover Table
  9. Orzo with Lemon Shrimp and Spinach–delicious, simple and beautiful to look at and eat
  10. Chicken with Mushrooms–a wonderful hearty meal

Slow Cooker Chicken Tortilla Soup

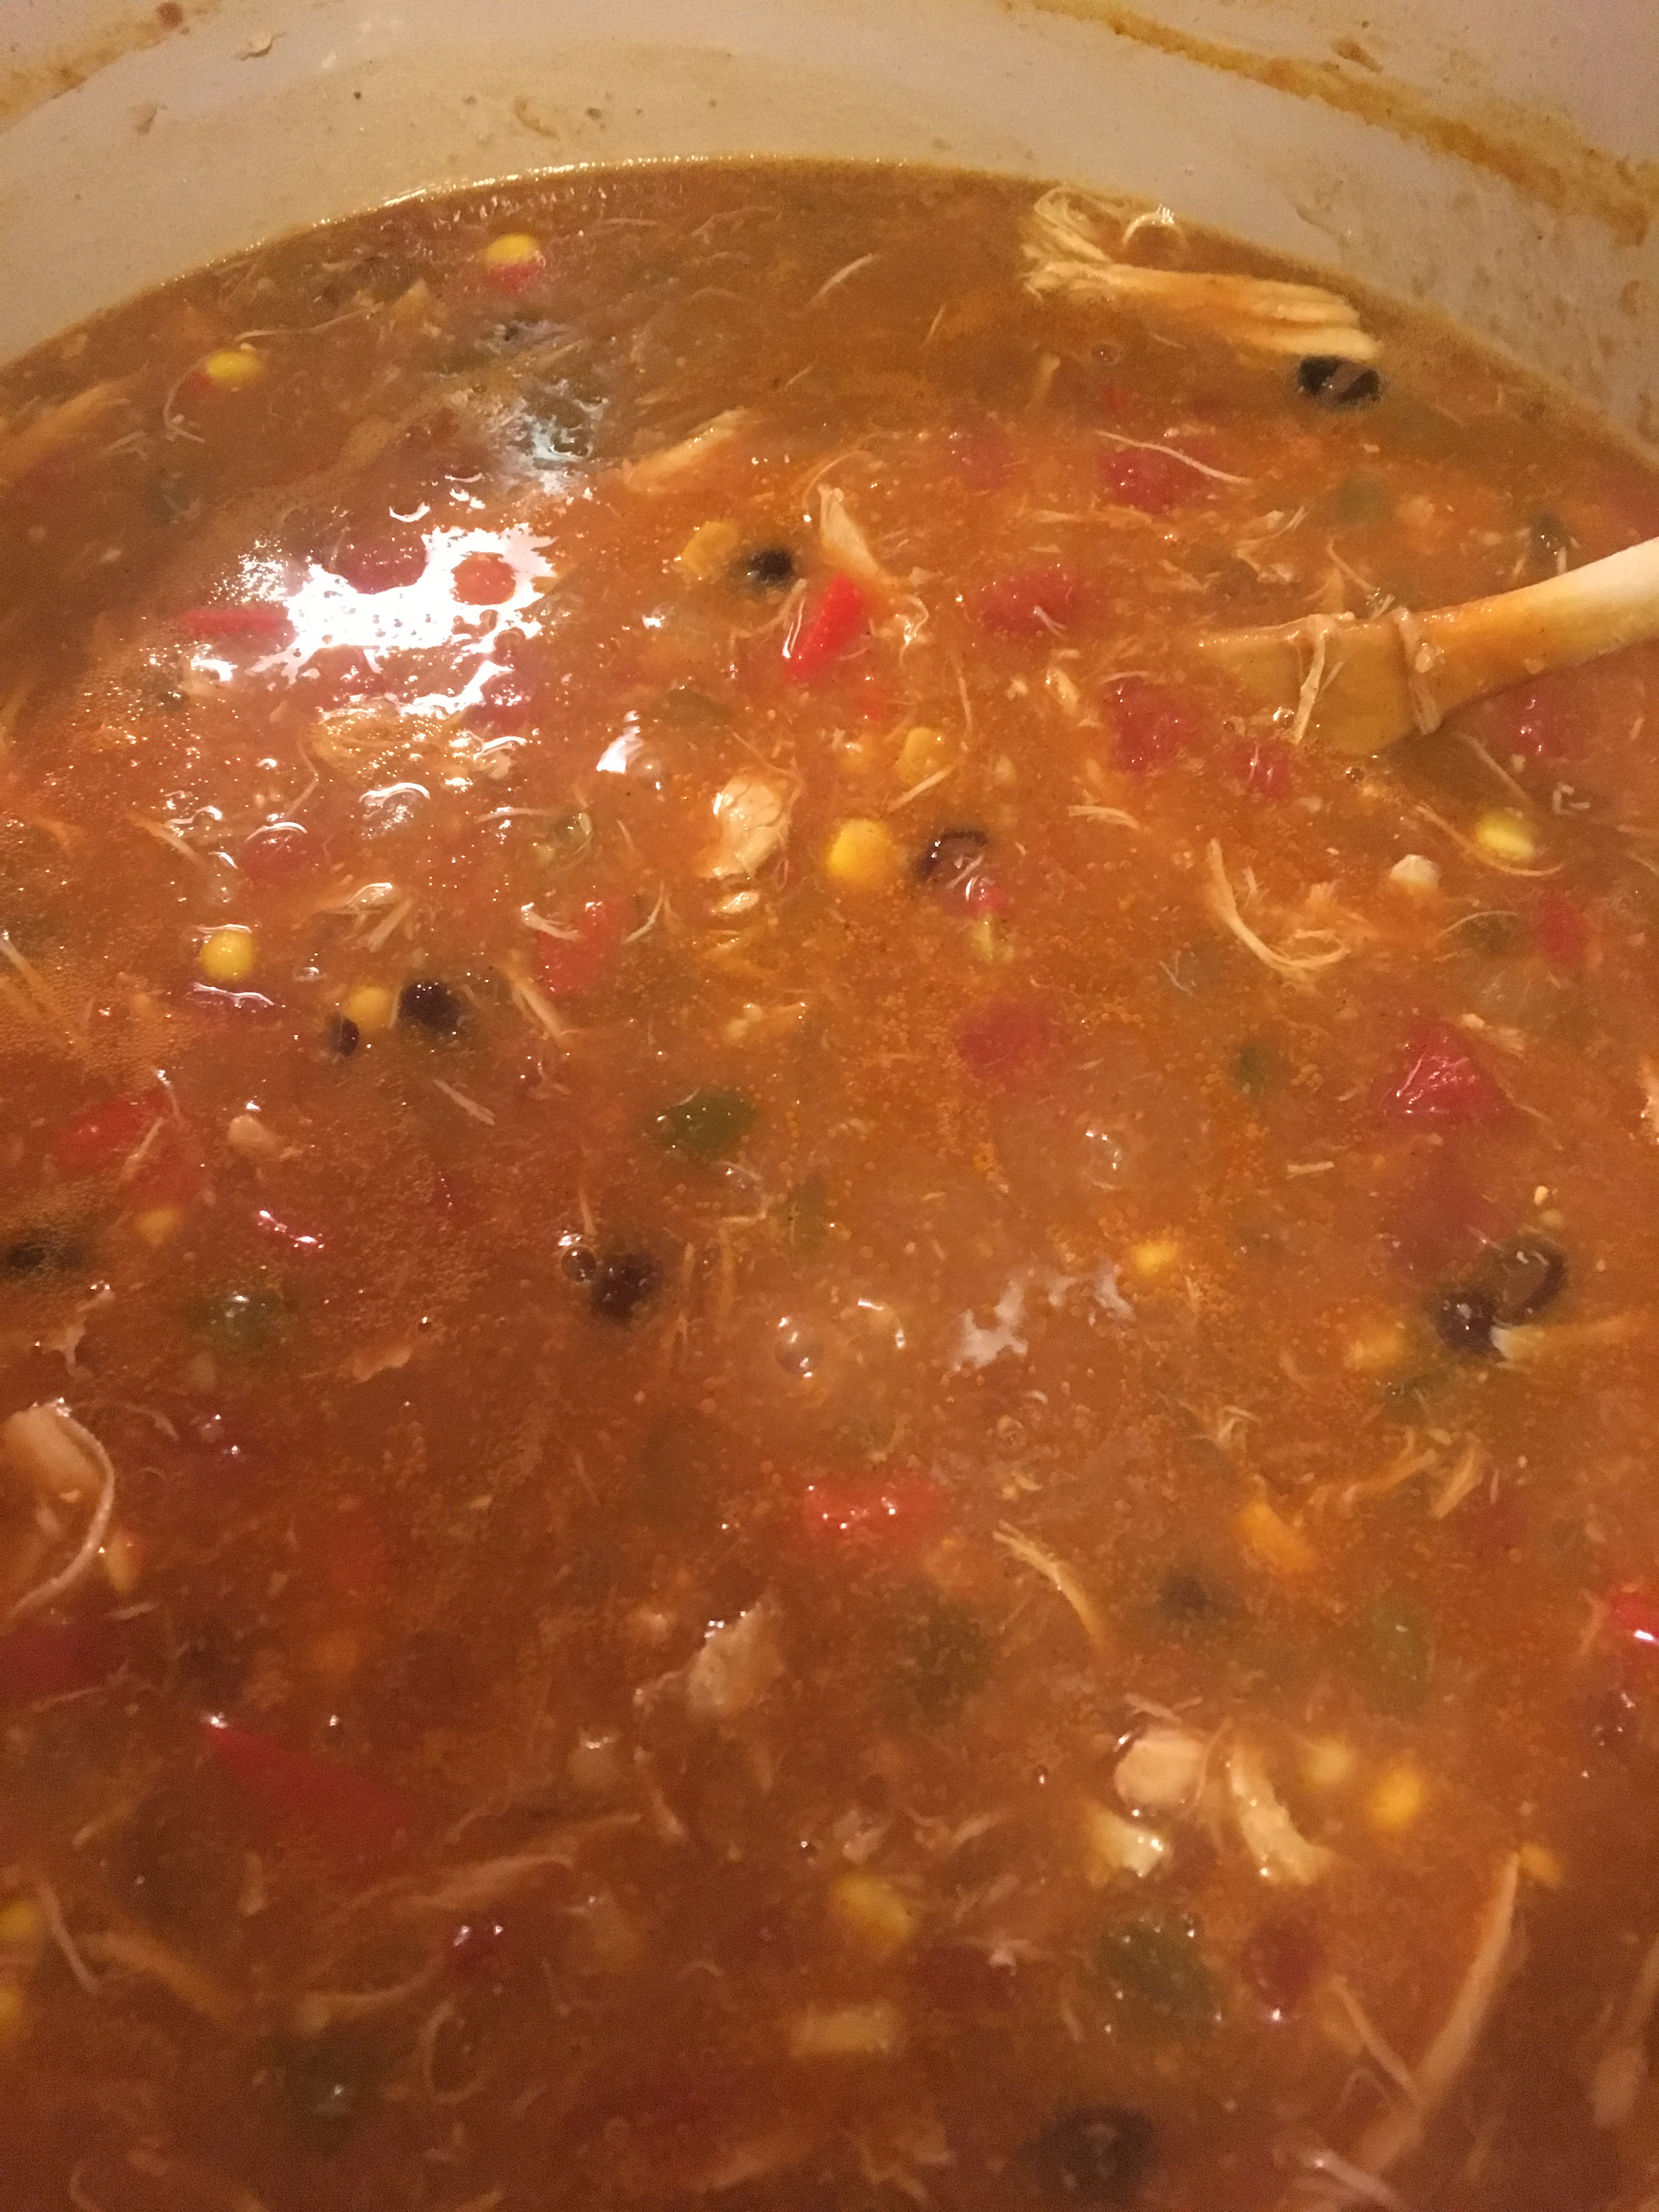
I recently posted my recipe for Chicken Tortilla Soup on the stove top which was a real hit with us. I wanted to be able to make this soup in my slow-cooker as well. Coming home from a day out to these delicious aromas is worth getting up and cooking in your pajamas. I call it cooking in your pajamas because that’s exactly what it is. Not to mention that at dinner time you only have one pot to clean and not all the other mess from cooking and chopping etc. So totally amazing!

Again there are options here which is why I love to cook soups and slow cooker meals. You can add what you like and substitute for what you don’t like. Make it as spicy as you like or just leave the bottle of Cholula on the table for those who prefer spicy. The only thing about the slow cooker is the amount of cooking liquid you will probably need and the 4 cups of chicken broth worked out perfectly. This recipe is very mix and match so use whatever you’d like and leave out what you don’t like. Let me know how it works out for you. Liquid is very important here so don’t change the 4 quarts of stock! The consistency was perfect last night but if yours is too thick you can always add more broth or water. A little at a time. Honestly, I was out all day and didn’t even look at pot till 8 hours later and all was good.

Soup will easily serve 6-8 as a main dish. It is quite filling with all the toppings and I used soft corn tortillas this time and they added a delicious taste to the already delicious soup!img_3246

look closely and you’ll see me in my pjs taking the photo!


Ingredients:

2-3 chicken breasts – I used 2 large ones which was a little over a pound

4 cups chicken broth

2 14 oz. cans black beans, rinsed and drained

28 oz. diced tomatoes, with juice and all–you can also use fire-roasted diced tomatoes if you’d like

1 4 oz. can of diced green chiles – mild (spicy is very spicy)

1 15 oz. can whole-kernel corn, drained

1 green pepper-diced

1 red, yellow or orange pepper – diced

3 garlic cloves – minced

1 whole medium yellow or white onion – chopped

1 package Taco Seasonings –use whichever you like

1 can green or red enchilada sauce –be careful don’t buy spicy–unless you really like spicy

3 Tbsp. Tomato Paste

Salt to taste

*this is optional and only if you like a smoky spicy kind of flavor –1 whole chipotle pepper in adobo sauce ( available in the can) just take out one of the peppers, you can take out the pepper and cut it up or just drop it in whole with liquid from can. I will say that this made the soup very spicy and it didn’t say spicy on the can.

*Cholula Sauce on the table for those who like it spicy or you can add some chile powder ( app. 2 teaspoons ) if you’d like it spicier

Toppings:

Avocado, Cilantro, Grated Cheese, Sour Cream, Tortillas (see note), Lime Juice squeezed in at the end is also excellent. Diced Red Onion adds a nice crunch.

*Tortilla notes–If using soft tortillas. I buy the small yellow corn tortillas and following directions on the package I heat them up and cut into uniform strips before adding to soup. This adds a wonderful layer of flavor. Of course you can always just throw in some crunchy tortilla chips!! Whatever you like.

Directions:

I spray my slow cooker with cooking spray first always. You’ll thank me for this.

Place the chicken into slow cooker, sprinkle the package of Taco Seasoning on the chicken.

Add the chopped onion,peppers, tomatoes, chicken broth, tomato paste, chipotle if you’re using them, black beans, enchilada sauce, green chiles, corn and garlic. Basically all ingredients.

Stir , place the lid on the slow cooker , and cook for 5 hours on high, or 8 hours on low. And walk away from the slow cooker –you’re done.

When soup is finished and you’re ready to serve–remove chicken which should be very tender and using 2 forks just shred it. Add back into the soup. This is your opportunity to taste for more salt–I added maybe a teaspoon of kosher salt. At this time you can squeeze a bit of lime juice in, not necessary but another layer of flavor.

Serve piping hot in bowls with whatever toppings you like!!!! What a wonderful meal and alot of leftovers for us!


Chicken Tortilla Soup

img_3215

This soup has always been a favorite of mine and I usually try to order it when it’s offered on a menu. I am a big fan of Mexican Food and have always wanted to try to make my own Chicken Tortilla Soup .This is a super easy version using a store-bought rotisserie chicken and a packet of Taco Seasoning.  Now that the weather has turned super cold it’s a perfect time for heart warming meals. I started cooking soup in the afternoon, prep was pretty quick and I let it simmer for an hour and then turned off stove while we went out. When we got home I turned on the stove and continued cooking soup. I cut up avocado, chopped up some cilantro, put sour cream and cheese into some little bowls and in less than 1/2 hour we were sitting eating this delicious and tasty soup! Joel even ate the avocado!!!! This is big!!! He loved the soup. It’s very filling.

I used crispy tortillas because that’s what I had in the house. It would be delicious with soft corn tortillas sliced up and added into the soup at the end also. I love when the crunchy chips go soft in the soup with the melted cheese– I could go on and on about this soup.

If you have the time I suggest making this soup, it is so easy with a prepared chicken or you can make your own chicken .  The prep is about 15 minutes using store-bought chicken and cooking is about 1 1/2 to 2 hours for soup.  I just think soup tastes better the longer it sits. I prefer making it in the early part of the day and letting it sit on the stove for a while.

This is a big soup and will probably serve 6-8 nicely. I have a container in my freezer and 4 of us ate this soup.

Look for my slow cooker version coming soon.

Enjoy!

Ingredients:

1 Rotisserie Chicken from your favorite supermarket

1 Tablespoon Olive Oil

1 Packet of Taco Seasoning — this is really easy , use whatever brand you like

1 cup diced onion

3 cloves garlic, peeled and minced

1 diced green pepper

1 diced yellow, red or orange pepper

1 10 oz. can  Rotel brand Tomatoes and Green Chiles–just a suggestion

1 can enchilada sauce– green or red ( in Mexican Food section of your supermarket)

1 15 oz. can of whole-kernel corn  – drained

32 ounces Chicken Broth

3 Tablespoons Tomato Paste

4 cups hot water

2 cans Black Beans , drained

3 Tablespoons Cornmeal –mixed with water ( see instructions)

5 Soft Corn Tortillas (I use the small ones) cut into uniform strips or crunchy tortilla chips–use as many or as little as you like–or skip all together for a lighter version.

Toppings:

*optional and use whatever you like — these are just some suggestions

Sour Cream

Cilantro

Grated Cheese –Monterey Jack is a good choice here or Mexican Blend Grated Cheese

Cut-Up Avocado

Salsa or Pico De Gallo

Diced Red Onion

Diced Fresh Jalapeno

Hot Sauce like Cholula is my favorite go to sauce

Directions:

I took skin off chicken and shredded most of the chicken meat.

Heat 1 Tbsp. Olive Oil in a large Pot –dutch oven is great here (Le Creuset) add onions, peppers, and minced garlic. Stir and begin cooking, then add the packet of Taco Seasonings if it’s very dry and hard to stir you can add a little more olive oil. Add in the shredded chicken and stir it all up.

Pour in Rotel, chicken stock, tomato paste, enchilada sauce, water , black beans and corn. Bring to a boil, then reduce heat to a simmer. Simmer for app. 45 minutes to an hour, uncovered.

In a little bowl mix 3 cornmeal with a small amount of water , just enough to mix it into a paste like consistency. Pour into the soup, then simmer for an additional 30 minutes at least, I cooked for another hour. I always believe the soup is best when it sits for a long time.

Check seasonings, adding more salt if you need it , I added kosher salt because I felt it needed it. Taste has to be your guide but be sure not to undersalt, you don’t want this to be bland. Turn off heat and allow to sit for about 20 minutes.

Five minutes before serving, gently stir in the tortilla strips if you’re using them.

Ladle into bowls, then top with your favorite toppings and there you go! I think the chips/tortillas make this soup along with the cilantro and avocado. Let your taste be your guide here.


Easy Skillet Lasagna

This was truly one of the most epic meals! The whole meal in under an hour, and yes that’s lasagna folks. While I love a real lasagna I didn’t have the time to put the whole thing together and deal with it. Once you have the ingredients the prep time is minimal and you aren’t using store bought sauce , this is with sauce you make and I can’t say enough about the way it tasted! This can be done a few different ways and I invite you to play around with the ingredients and spices to your own liking. All I can say is Wow!  Delicious! Joel was very happy with our Sunday night dinner, I should have taken a picture of the big smile he had on his face when he saw this on his plate.  All in one pot is truly a great way to cook, no fuss, no muss and no having to deal with cooking lasagna noodles!!!!!! Yeah!

This can easily be made with ricotta cheese and spinach or any veggies you like. I would even try it with cut up eggplant!

*You’ll need a large oven proof skillet with lid

Ingredients:

1 to 1/2 Tablespoon Olive Oil–I used 1 1/2 you can start with 1 and add more to onions if you need it

1/2 lb. ground beef ( I used 80/20)

3 Italian sausage links, casings removed ( I used Hot Italian Sausage) use what you like , you can use turkey or chicken sausage as well

1 onion, diced

1 14.5 oz. can diced tomatoes

1 8oz.can tomato sauce

*Italian seasonings , if you have Italian seasonings in a jar that’s great if not use a little dried oregano and dried basil. Italian Seasonings is available in the spice department of all food stores.

*1/2 teaspoon crushed red pepper

App. 1/4 tsp. Kosher Salt and more to taste

2-3 garlic cloves, minced

app. 10 lasagna noodles, broken into 1/4’s, if it breaks up differently don’t worry it’s a very loose recipe! 8 ounces Farfalle Pasta also works if you don’t feel like using the lasagna noodles. Un-cooked Noodles!!!!!

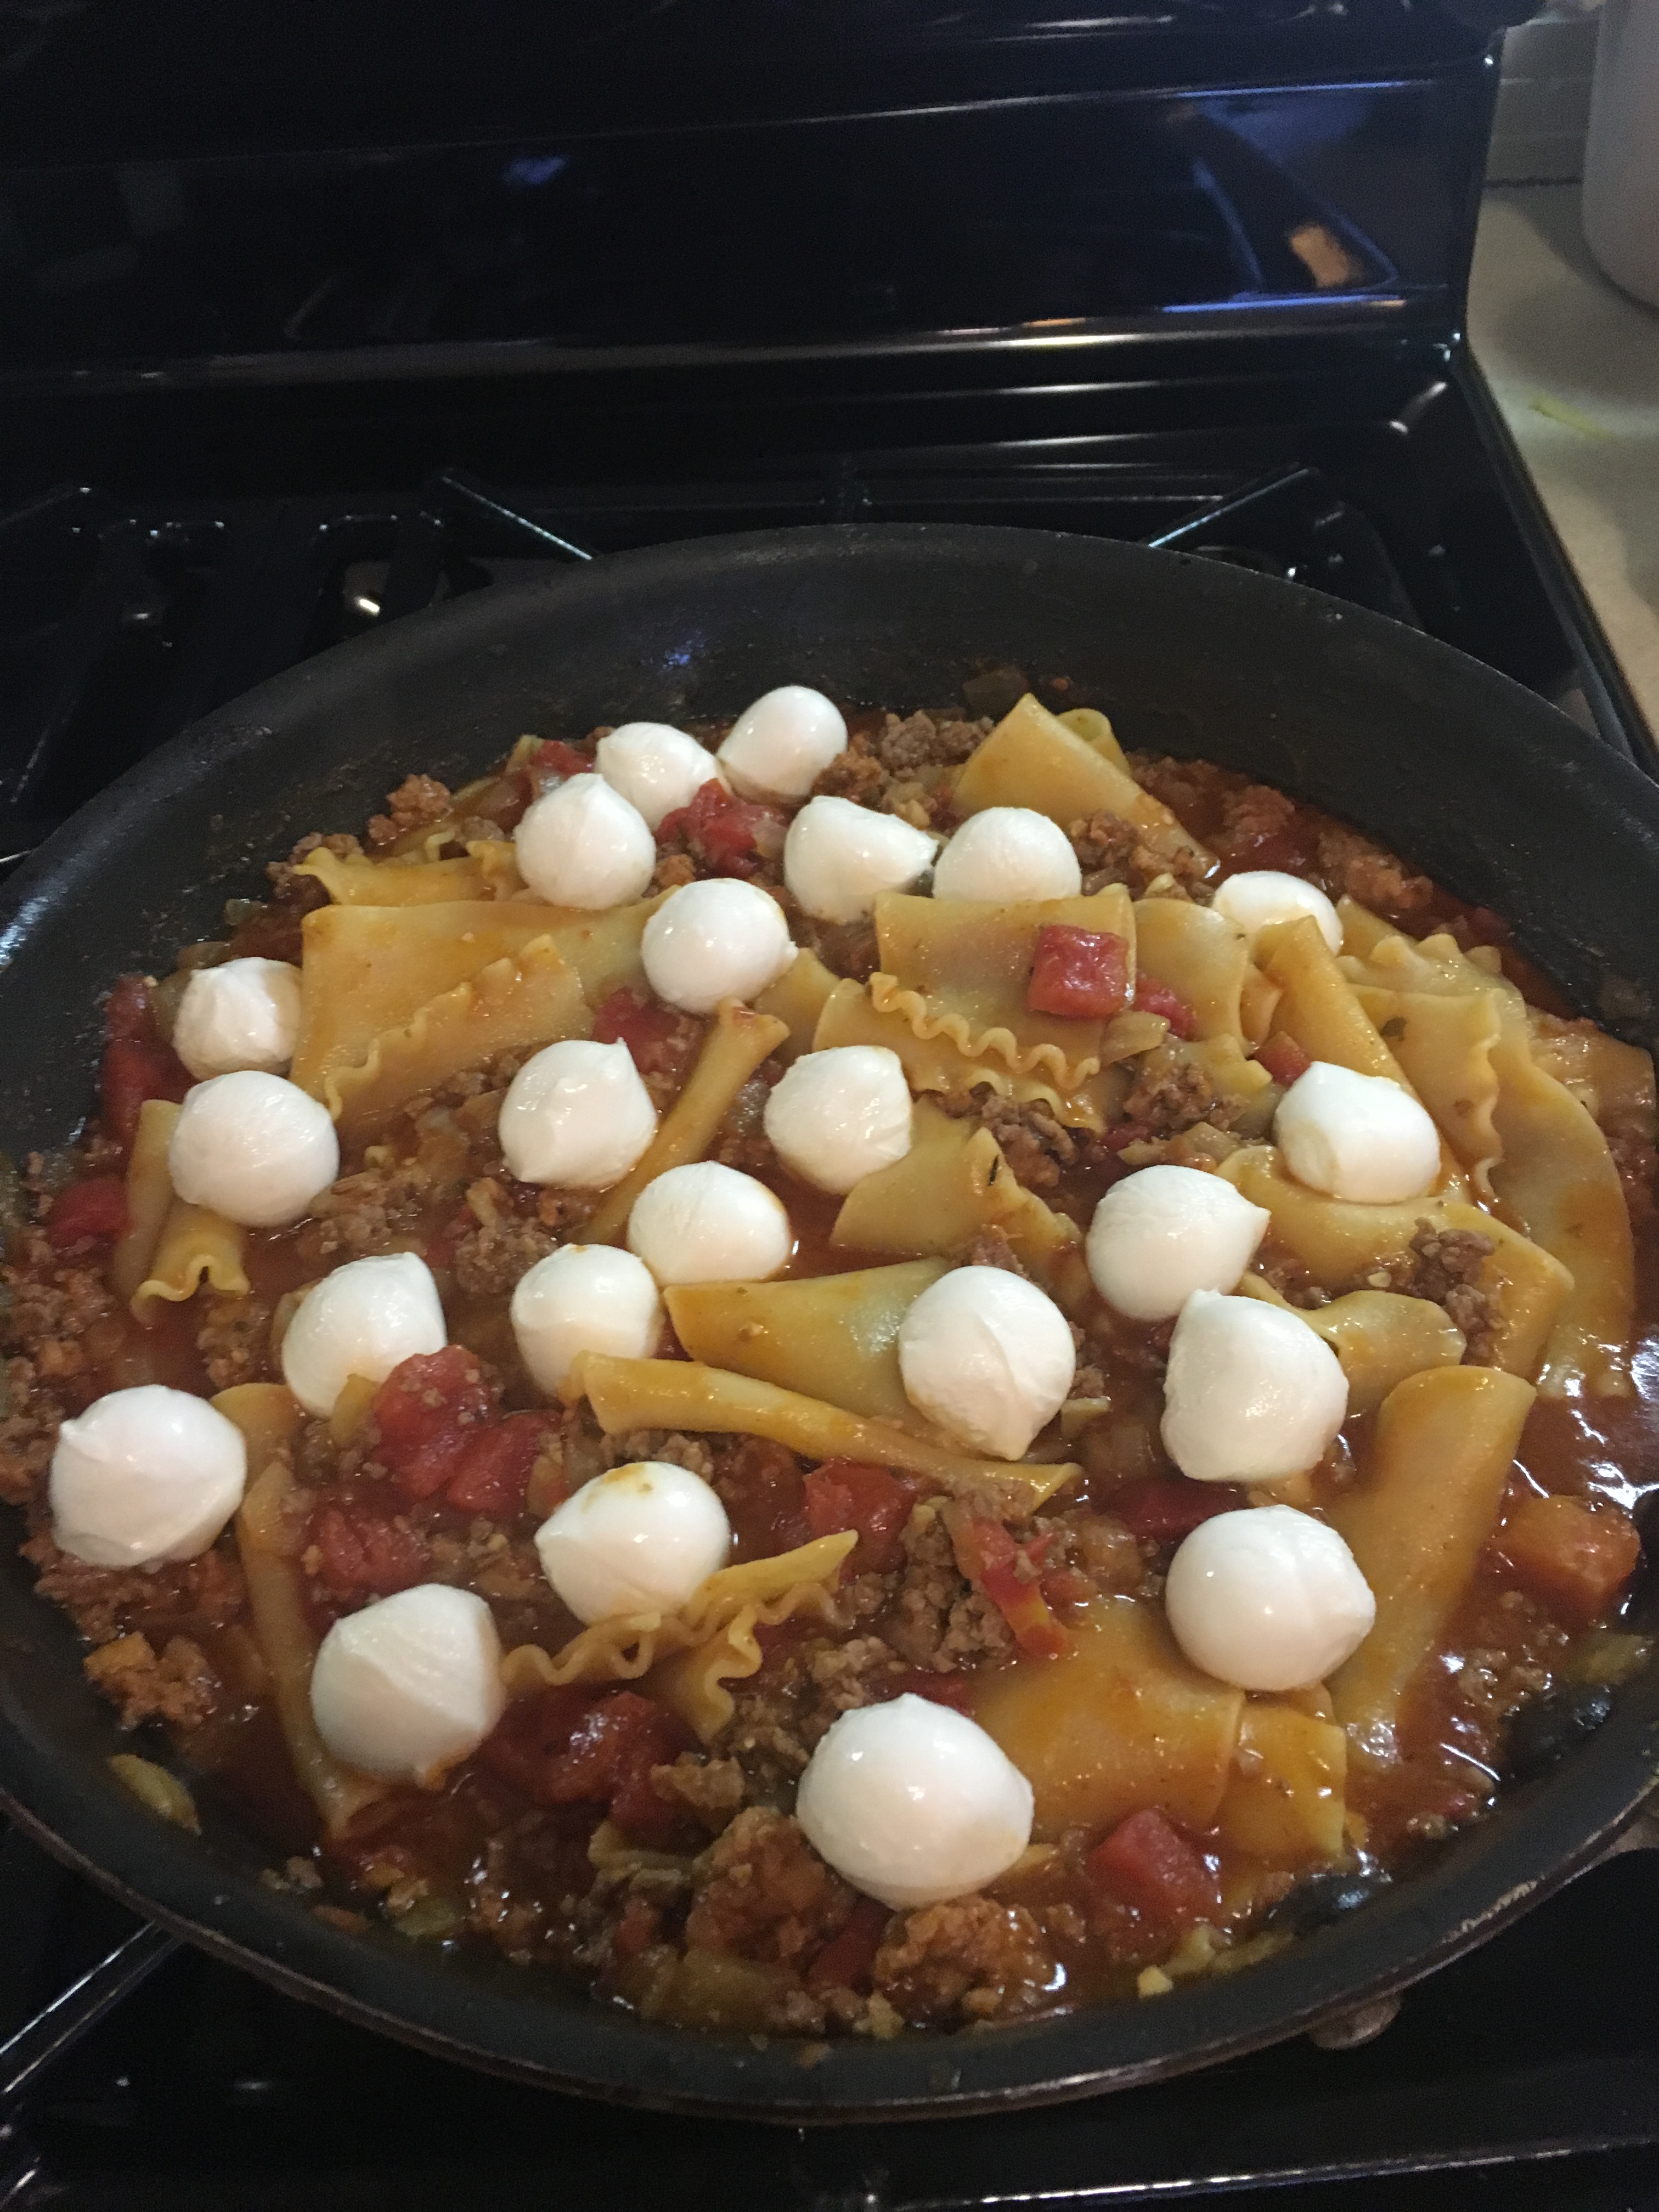
8 oz. mozzarella balls ( fresh) I used the small ones this time. Use whatever cheese you like but these worked out beautifully.  You can always use shredded mozzarella, or just cut a large ball of mozzarella into small pieces ( as much or as little as you’d like) if using shredded mozzarella, you’ll need about 1 cup

2 cups water

Freshly grated Parmesan Cheese for serving

*you can also use 1 cup Ricotta Cheese for a very cheesy version, I would use this if I was making it with spinach and going veggie.

Directions:

Heat olive oil in a large skillet over medium-high heat. Add onions and cook till translucent, add garlic towards the end of onion process. Add ground beef to the onions, stirring occasionally till browned. I removed with slotted spoon and set aside in a bowl. I then cooked up the sausage making sure to crumble the sausage as it cooked.  I then removed sausage to bowl with meat , onions, and garlic and drained all excess fat from pan.

Pre-heat oven to Broil

Return meat to pan, add tomato sauce, diced tomatoes, spices, add 1/4 tsp. kosher salt to taste, if you need more add it. Add in the meat mixture and stir, bring to a simmer and add in broken lasagna pieces and 2 cups of water. Bring to a boil; cover, reduce heat and simmer until pasta is cooked through, about 13- 15 minutes for al dente. I stirred it gently a few times just to make certain that the noodles cooked through and didn’t stick together.

Remove from the heat . I placed my Mozzarella on top and placed in oven under broiler for about 5 mins. Check on it because you don’t want it to blacken. All ovens are different, in mine it needed about 6 minutes to just start browning without burning, but you don’t want to burn this up so set timer and keep an eye on it!

Remove from the oven and let it sit out for a few minutes. Plate it up and let everyone add their own parmesan cheese! Enjoy! you will.

IMG_1101

Plated up and ready to eat

IMG_1097

Finished Product


IMG_1096

adding mozzarella before placing under broiler


IMG_1093

placing un-cooked noodles into sauce


This would serve 4. It’s tough to double because you would need a super large pan.

This makes for an amazing leftover!