Category Archives: dessert

Banana Pudding from Magnolia Bakery – One of my Top Ten Desserts that you don’t even bake

Since the first time my daughter Jenn made this dessert we have added it to our Thanksgiving Table. Just what you need after that big dinner is this dessert!!! We love it and can’t get enough of it. Whether you’ll be making it for Thanksgiving or anytime just be prepared to fall in love with it. Completely decadent and totally ridiculous in calories and richness it is love at first bite.

It is actually a subtle taste of bananas, but I wouldn’t make this if I didn’t like bananas. I happen to just adore bananas and I absolutely love love this pudding. I cannot have it in the house because I will continually find an excuse to go into the fridge and eat it till it’s pretty much all gone.  As full as I was last year and swearing I wasn’t going to eat another thing for at least a week, when I saw this  pudding I knew I was going to eat it.  I find it impossible to resist and I know others who suffer from this same fate. If you’re in the market for a purely decadent rich over the top dessert then this is it for you. Probably up there on my top ten desserts ever. This is from the More from Magnolia Cookbook so how could it be bad?

*this recipe really needs time , so you must start the day before to let initial pudding set, and then you’ll need at least 4 more hours minimum before serving. So you must factor time into your prep of this awesome pudding but it’s so worth it.

Happy Thanksgiving from our house to yours.

Ingredients:

1 14 ounce can sweetened condensed milk

1 1 /2 cups ice-cold water

1 3.4 ounce package instant vanilla pudding mix ( preferably Jell-O brand)is there another brand?

3 cups heavy cream

1 12 ounce box Nabisco Nilla Wafers ( no substitutions) is there another brand?

4 cups sliced ripe banana

Directions:

In a small bowl, on the medium speed of an electric mixer, beat together the sweetened condensed milk and cold water until well combined, about 1 minute. Add the pudding mix and beat well, about 2 minutes more.* Cover and refrigerate for 3 – 4 hours or overnight, before continuing. It is very important to allow the proper amount of time for the pudding mixture to set.

In a large bowl, on the medium speed of an electric mixer , whip the heavy cream until stiff peaks form. Gently fold the pudding mixture into the whipped cream until well blended and no streaks of pudding remains.

To assemble the dessert, select a large, wide bowl ( preferably glass) with a 4 – 5 quart capacity. Arrange one-third of the wafers to cover the bottom of the bowl, over-lapping if necessary, then one-third of the bananas and one-third of the pudding. Repeat the layering twice more, garnishing with additional wafers or wafer crumbs on the top layer of the pudding . ( Just crush up a few remainder cookies in food processor) Cover tightly with plastic wrap and allow to chill in the refrigerator for *4 hours–or up to 8 hours, but no longer! Serve and behold the love!

Serves anywhere from 12- 15

It’s a large dessert and a substantial one. It stands alone beautifully!

Baked French Toast — all time best for Yom Kippur Break Fast

DSCN4275

DSCN4288

DSCN4283

DSCN4274

DSCN4270

DSCN4302

DSCN4294I posted this recipe back in October 2011 for Yom Kippur break fast and every Break Fast it is on the table, it’s practically a law in our family now! It is truly one of the best French toast recipes I’ve ever made.  I include it every year since my friend Ilene Stern gave it to me. I never have a single piece left. Delicious and decadent, perfect brunch and breakfast food. I almost always include it in my Mother’s Day Brunch as well. Once you’ve made this recipe there is no turning back  your whole family will love it and you’ll have to make it every time.

The only downside is that you must prepare and refrigerate the night before without cooking it, you cannot cook this dish till you’re ready to eat it, the bottom will get hard like a caramel candy would. So cook right before you’re going to serve. Enjoy!

*recipe as is should serve 6- 8 if you have more people make 2 trays!

Yom Kippur begins at sundown on October 1; ends at nightfall on October 2 2025

For those of you who fast — have a good fast.

Ingredients:

1 cup packed light brown sugar

1 stick unsalted butter

2 tbsp. corn syrup ( I use Karo Original light corn syrup)

5 eggs (room temperature please)

1 1/2 cups milk ( you can use low-fat, I use Skim Plus)

1 tbsp. vanilla

1 package of sliced cinnamon bread. ( Pepperidge Farm is fine) if you can get thick slices it’s great , but the thin kind will work just double stack them it will be fine) You probably will use 12 slices of bread per tray. You will have 6 stacks of 2 slices each, 12 slices total, or 6 thick slices of cinnamon bread. If you can’t find just cinnamon bread use raisin cinnamon bread it’s easier to find .

Directions:

Melt butter, add brown sugar and corn syrup and combine well. Spray a 9×13 baking dish, Pyrex works well here. Pour butter mixture into baking dish and arrange bread slices flat in the mixture ( you will double stack the thin sliced bread) Unless the bread is 1″thick you will be doubling the standard sliced bread. Squeeze the bread to fit–it should hold 12 slices ( 6 double stacks), 3 on each side of a 9×13 baking dish.

In a blender mix the eggs, milk and vanilla and pour over the bread slices, covering them completely. Cover and refrigerate overnight. The bread will absorb all the liquid by the morning, so if you need to travel with it will be fine.

Uncover and bake in a preheated 350 degree oven for 30 minutes. Once it’s out of the oven you can dust with powdered sugar, but not necessary. Serve right from the baking dish.

*if you let this sit out too long before serving, the bottom may get hard like a praline candy. It never ever lasts long enough for this to happen at my table.

Easy Fast to all .

Follow me on Instagram @cookingwithcandi

Don’t Let the Apples Go Bad Cake

Apples are the kind of fruit we eat all year round. They are always in the fridge and if they don’t get eaten, I  feel guilty that they’re just sitting there and going to go bad.  I saw this recipe on Smitten Kitchen and decided to make it.  I would make it and freeze it, so if you’re interested in doing so this cake freezes well. You’ll need a tube pan. You don’t need an electric mixer, so it’s pretty easy on the special equipment. Use those leftover apples–don’t let them go bad. No butter in this recipe, lots of sugar though.  My house smelled divine.

I also love this recipe for the Jewish Holidays which are just around the corner…..just saying.

*you can see in photos that I use a melon baller to get the pits out of the middle of the apple. I prefer this technique over the corer thing which never really works for me.  The melon baller works perfectly: first cut apple in half, then scoop out just the pits.

Thanks to Smitten Kitchen again for a wonderful recipe.

www.smittenkitchen

Ingredients:

6 apples (I used what I had in the house: a combo of Granny Smith and Honey Crisp. Good old Macintosh will work, too.)

1 tablespoon cinnamon

5 tablespoons sugar

2 3/4 cups flour, sifted

1 tablespoon baking powder

1 teaspoon salt

1 cup vegetable oil

2 cups sugar

1/4 cup orange juice (try to use fresh but if not, Tropicana will do)

2 1/2 teaspoons vanilla

4 eggs

1 cup walnuts, chopped (this is optional; I didn’t use them this time out)

Directions:

Preheat oven to 350 degrees. Grease a tube pan. Peel, core, and chop apples into chunks. Toss with cinnamon and sugar and set aside (I sprayed with a baking spray. There’s no need to add any butter here.)

Stir together flour, baking powder, and salt in a large bowl. In a separate bowl, whisk together oil, orange juice, sugar and vanilla. This mixture will be rather thick.  Mix wet ingredients into the dry ones, then add eggs, one at a time. Scrape down the bowl to make sure all ingredients are incorporated. Use a rubber spatula to get it all out of the bowl.

Pour 1/2 the batter into prepared tube pan. Spread 1/2 the apples over this. Pour the remaining batter over the apples and arrange the remaining apples on top. Use your eye to halve  batter and apples (don’t worry if it’s not perfectly halved.) Bake for about 90 minutes, or until a cake tester (or toothpick) comes out clean. I would check cake after 1 hour 20 minutes. I baked for the full 90 minutes; it’s a rather thick cake.

Summer Crumble — Peach and Blueberries

photo 3 (6)photo 3 (7)photo 2 (6)photo 2 (8)A crumble or a crisp whatever you call it there is no reason not to make this simple delicious dessert. In the summer you have so very many seasonal fruits to choose from and all sorts of delicious combinations. I used peaches and blueberries today because the peaches are amazingly beautiful and I had an abundance of blueberries. Any stone fruit, berries, or pitted cherries will work. In the Fall I make this with apples and pears which is Joel’s favorite of all time. The fruit comes out soft and tender and the crumbly crunchy topping is ever so crisp. Delicious served warm with a scoop of vanilla ice cream. I had a lot of blueberries in the house but the blueberries do take over so all peach would be equally delicious as well .

I used an 8×11 pyrex but any baking dish around that size will work out just fine.

You’ll need a food processor to do the crisp topping this way. You must use cold butter straight out of fridge. I also added a little bit of chopped nuts but this is totally optional.

Plums and Nectarines work just as well. I also sprinkled a dash of cinnamon on the top (just a touch) right before baking , this is also totally optional.

Ingredients:

Fruit Mixture:

app. 8 cups sliced stone fruit, blueberries or pitted cherries I used peaches which I pitted, peeled and sliced and 1 container of blueberries (6 oz.) Use any combo you like.

1 cup sugar

2 Tbsp. Corn Starch

1 tsp. finely grated orange zest ( almost a whole orange)

2 Tbsp. of freshly squeezed orange juice from zested orange

pinch of kosher salt

In a large bowl toss fruit, sugar, cornstarch, salt, zest and juice together with a spoon. Set aside. I also sprayed baking dish with Bakers Aid cooking spray which is great stuff.

Preheat oven to 375 degrees.

Crumble Topping:

Ingredients:

3/4 + 1/4 cup of old-fashioned oats separated. 3/4 cup will be used at beginning and 1/4 cup at end.

1/3 cup all-purpose flour

1/4 cup light brown sugar ( firmly packed)

1/2 teaspoon kosher salt

1 stick chilled unsalted butter , straight out of fridge and this is important here. Butter should be diced into small pieces. Cut stick in half then cut into small uniform pieces.

Directions for crumble topping:

In the bowl of food processor with blade , pulse oats, flour, light brown sugar, salt together. Then through the top tube drop in diced cold butter and pulse until no dry spots remain, it takes a few minutes. Transfer to a bowl and add in 1/4 cup old-fashioned oats with your fingers.

Transfer fruit mixture to prepared baking dish, scatter crumble topping over the mixture. I added some chopped nuts and a little cinnamon at this point. Place baking dish on a baking sheet ( sprayed with cooking spray as well) and bake at 375 degrees for at least 50 minutes, check on it. You don’t want to pull it out too soon because you want the crumble to brown perfectly and the fruit will not thicken. You’ll know it’s ready by the color of the crumble topping.

Allow to cool for an hour.

  • last night I put together whole recipe and left in the fridge overnight. Next day a few hours before dinner I removed from fridge and baked it to have as dessert . Served in bowls with ice cream while it was still warm.

You can heat up before eating at 250 degrees covered for about a 1/2 hour should be enough.

You can freeze this as well. Take out the night before you’ll want it and let it defrost in the refrigerator, the next day take it out and let it come to room temperature before re-heating. I freeze it often and it works out quite well.

Old Fashioned Lemon Icebox Cake–No Baking at all

IMG_1266

Nothing not to love here, Lemons, cream cheese, heavy cream, lemon curd and did I mention no baking??? So great and fairly easy with simple ingredients. You’ll need either an electric mixer or a hand mixer to whip cream. Nothing beats an electric mixer though with the whisking attachment.

I made it in a 9×13 pan but I think next time I will try to do it in a bowl. It would also be beautiful garnished with fresh lemon slices or berries. We were in a hurry to dig into it so never did get to garnish it.  If you’d like it to look neater when you scoop it out you will have to be more precise with the layering. My cake was very uneven and all the layers and flavors blended together, who cares? it was delicious. If you’d like you can also layer in a trifle type bowl and make a very pretty presentation! Up to you but it was all delish.

This is simple and delicious food if not very rich, but hey it’s dessert! Perfect for a Labor Day BBQ or anytime!

Enjoy Labor Day Weekend !

Visit me on Instagram @cookingwithcandi

Ingredients:

4 ounces cream cheese, softened (just leave it out at room temperature for a while till it’s room temperature and feels squishy and soft)

3 cups heavy cream

1/3 cup confectioners sugar

3 teaspoons lemon zest, plus a little more for garnish

1/2 teaspoon vanilla extract

11 ounces vanilla wafer cookies ( app. 1 1/2 boxes)

10 ounces lemon curd–usually available with the jams and jellies  or baking aisle of most supermarkets. (see photo)

Directions:

Beat the cream cheese in a large bowl with an electric mixer until soft. Add the heavy cream, sugar, lemon zest and vanilla and beat until it just holds stiff peaks. It takes app. 3-6 minutes for peaks to form, be patient.

Spread the bottom of a 9 x 13 inch baking dish with 1/2 cup of the whipped cream. Arrange 1/2 of the cookies on top of the cream, fitting in as many as you can without overlapping.(see photos) Spoon 1/2 of the remaining cream mixture on top and smooth evenly with an offset spatula or if no offset spatula use a butter knife. In spoonfuls , app. every 2 inches, spoon half of the lemon curd onto the cream and then use a butter knife to swirl the curd into the cream. Top with another layer of cookies, followed by the remaining cream. Spoon  the remaining lemon curd and swirl into the cream again with the butter knife. Cover with plastic wrap and refrigerate until the cookies have softened, it should be fine after at least 3 hours and you can make a day ahead and just leave in the fridge!

It would be pretty garnished with some lemon zest , some lemon slices or fresh berries, we were in a rush to eat it so no garnish in my photos. Next time!

*if you use a bowl you’ll just have to figure out the cream to cookie ratio but make sure you follow my steps so it ends up the same.

*another good thing–I actually froze leftovers and when I wanted to eat it , I removed from freezer for about an hour and it was perfect.

S’Mores Baked in the Oven

IMG_8638IMG_8636IMG_8639 IMG_8641 IMG_8642IMG_8634 IMG_8633 IMG_8632Oh Wow!!! what could be better??? truly easy and very little fuss perfect with the kids and perfect for the adults. Very rich and gooey. Whole thing takes about 40 minutes from start to finish and you can re-heat the sliced bars in the microwave for about 30 seconds if you have some left-over. It’s great for a large group and I would say about 12-15 servings here. Let’s hold on to the last few weeks of summer with this delicious dessert.

For a very traditional s’mores taste eat immediately, I think they tasted a little better after they cooled down for a bit. Whichever way you prefer them –this is a great recipe for a crowd. You can prepare first and then pop in the oven while you are having dinner. Enjoy!

*also I was able to obtain these amazing square marshmallows in the supermarket, if you see them –grab them otherwise just regular old marshmallows they will do the trick.

Ingredients:

Crust:

18 graham crackers

1/4 cup granulated sugar

pinch of salt

8 Tablespoons unsalted butter-melted

*parchment paper — I think you’ll want to work with it for this recipe–it can get difficult once they harden to get them out of pan. Clean up was a snap with it.

Topping:

3 extra-large Hershey Bars (or 7 regular-size ones)

24 jumbo marshmallows–look for the large square ones

Directions:

Preheat the oven to 400 degrees. Lightly grease a 9×13 Pyrex type baking pan with cooking spray and then line with parchment paper , allow an extra couple of inches of paper to hang over the edge.

In the food processor bowl, pulse the graham crackers until they are finely ground. Transfer the crumbs to a medium-sized bowl.

Add the sugar and salt to the graham crackers and stir to combine. Add the melted butter and stir until the crumbs are moistened. Pour the crumb mixture into the prepared pan and press into an even layer.

Bake the crust for about 10 minutes or until the edges turn lightly golden. Let the crust cool off completely before adding chocolate. I probably let it sit off heat for about 1/2 hour.

Arrange the chocolate bars (see picture) evenly on the top of cooled crust, I had to remove 1 row of chocolate to fit it in pan and left a little uncovered crumbs around edges. Arrange the marshmallows on top of the chocolate, leaving a little space between each one (see photos) Marshmallows will expand slightly.

Bake until the chocolate is soft and beginning to melt, and the marshmallows are evenly toasted on top. Probably about 10-15 minutes depending on your oven.

I couldn’t wait to eat them but I would suggest letting them cool off for  a little bit, cutting was easier when it cooled down ( after 15-20 minutes) I was able to cleanly cut slices. It’s more like campfire s’mores when you eat them hot out of the oven and certainly messier.

You can re-heat the sliced bars in the microwave for about 20-30 seconds. If you are keeping them , cut them and store individual slices.

Blueberry Crumb Bars

photo (2)photophoto (3)photo (4) It’s summertime and blueberries are abundant and deliciously sweet. These blueberry bars are great to make and keep in freezer till you need them. I combined a few recipes that I had and kept my fingers crossed and made a mess in the kitchen and used too much butter and here it goes. Sometimes I just don’t feel like using electric mixer even though I seemed to use a lot of different mixing bowls for this one. I had seen another recipe for a blueberry crumble but it called for shortening, so I substituted butter. It’s a lot of butter I know, but how much can be in one piece? My plan is to eat a little of this and freeze the rest for when my family comes out next month. As I was cutting it up to freeze I managed to eat way more than I should have and they were really beautiful and delicious. Just the right amount of sweet. I let them sit in fridge overnight, and they were way easier to cut into right out of the fridge. They are now nestled in the freezer except for the few pieces I left out to eat. I would keep unused and unfrozen pieces in the fridge and take out and bring to room temp. when you’re ready to eat them. You can also heat up in microwave if you prefer them warm. Either way, once you taste this buttery fruity combo you’ll be hooked.

Enjoy! and Happy Fourth of July.

Ingredients:

1 cup sugar plus 1/2 cup sugar

1 teaspoon baking powder

2 sticks cold unsalted butter I cut it up into small diced pieces. I sliced stick in half, and then cut up into smaller pieces which would be easier to blend in.

1 egg

3 cups all-purpose flour

1/4 teaspoon salt

4 teaspoons cornstarch

1/4 cup of lemon juice and zest of one whole lemon ( I did use a large lemon)

4 cups fresh blueberries

9 x 13 inch pan , I used a glass Pyrex and it was perfect

Directions:

Preheat the oven to 375 degrees and Spray 9 x 13 pan. I used Bakers Aid Baking Spray because there is enough butter in this already.

In a medium size bowl, stir together 1 cup sugar, 3 cups flour, and baking powder. Mix in salt and lemon zest. Using a fork or pastry cutter blend in the cold butter pieces and egg. Then with clean hands I played with the dough a bit and got a crumbly texture going. I took half the dough and patted it down gently into pan with my hands. I made as clean an edge as I could, but I wouldn’t worry too much about that.

In another bowl, stir together the sugar, cornstarch and lemon juice. Gently mix into the blueberries. Sprinkle the blueberry mixture evenly over the crust. Crumble with your clean hands the remaining dough over the berry layer.

Bake in preheated oven for about 45 minutes or until top is slightly browned. I baked for 50 minutes , then checked on them. I baked for another 5 minutes. Cool completely before cutting into squares. I actually cooled in refrigerator over night, and cut up the next day.

Blackberry Cobbler

before cobbler gets baked , with biscuit topping

before cobbler gets baked , with biscuit topping

finished product - Yum

finished product – Yum

photo (3) It’s the start of summer and it brings me to this delicious dessert filled with the most delicious in season blackberries.  I have posted numerous blueberry cobblers but this one has to be my personal favorite made with Blackberries.  It’s a real deal Old Fashioned Cobbler.  You can really make this with any fruit but I love Blackberries while they’re sweet, plump and delicious! Blueberries and Red Raspberries will also work  well. Or you can mix up the fruits!  I just love blackberries when they’re in season and can’t get enough of them so this time of year I go with just blackberries.

Enjoy!

Ingredients:

1 pound or about 3 1/2 – 4 cups blackberries , cleaned , rinsed and dried

1 tablespoon arrowroot or cornstarch

2 tablespoons fresh lemon juice

1 cup all-purpose flour

3/4 cup sugar, I use regular granulated sugar for cobbler inside and on top I use turbinado sugar. 1/2 cup granulated sugar for inside cobbler and 1/4 cup turbinado sugar for topping

1 teaspoon baking powder

1/4 teaspoon salt

1/2 cup whole milk or you can use low-fat buttermilk

3 tablespoons unsalted butter, melted

3/4 cup boiling water

Directions:

Preheat the oven to 350 degrees.

In a bowl I place the clean blackberries that I’ve washed and dried. I sprinkle them with the arrowroot and lemon juice and mix gently  Set aside.

In a medium size bowl, I sift the flour, 1/2 cup sugar, baking powder and salt. Add the milk and butter. Stir until just combined, don’t over stir, it shouldn’t be smooth. Then by the mound-ful drop dough onto blackberries. I spread around a little bit but don’t completely cover the top of berries. ( see photo) the dough will spread a little once it’s baked.

Pour boiling water over the dough and fruit before you bake it. Sprinkle top with 1/4 turbinado sugar or regular sugar. Raw sugar or turbinado sugar makes it a little crunchier topping. I prefer it to regular sugar for a topping.

*if you are preparing in advance which is what I did today. Prepare up till the boiling water and sugar part. Refrigerate for up to 2 days , bring to room temperature then pour boiling water and top with sugar and bake. I baked for app. 45 minutes till dough gets browned and crackly looking and blackberries are bubbling. ( see photos)

Remove from oven and let sit but serve while it’s still warm with ice-cream for extra added deliciousness!

Happy Summer from my kitchen to yours.

OMG Apricot Bars

OMG Apricot Bars out of oven

OMG Apricot Bars pre cooked

These bars are nothing short of a-mazing! They are the most perfect, delicious treats- Just go ahead and bake them–it is not difficult. I woke up early this morning and decided to bake them and one hour later, they were finished and out of the oven. They remind me of a yummy, soft granola bar. If you don’t like apricots, substitute cherries and cherry preserves, blueberries and blueberry preserves, etc. (I’m not sure if I would use fresh blueberries. Just stick with the dry version of the fruit and the matching preserves.) Thanks to Giada for the inspiration on this one!

INGREDIENTS:

Filling:

1 large jar of apricot preserves (I used an 18 oz jar of apricot/pineapple preserves because that’s what I had in the house. You can use a 13 oz jar of apricot preserves. I like it very gooey so I used a large jar of preserves.)

8 dried apricots, chopped up into small pieces

Crust:

1 3/4 cups all-purpose flour

1 cup light brown sugar, packed

1 teaspoon ground cinnamon

3/4 teaspoon baking powder

3/4 teaspoon kosher salt

1 teaspoon vanilla

1 3/4 cups old-fashioned oats (not the instant or 1-minute kind)

1 cup chopped walnuts

1 stick unsalted butter, melted

1 egg (room temperature), beaten

DIRECTIONS:

Preheat oven to 350 degrees. Make sure oven rack is in the center of the oven.

Line a 9×13 baking dish with parchment paper (see picture) on the bottom and the sides and then spray the paper with cooking spray (I use Pam).

In a bowl, mix together the jam and the dried apricots and set aside.

In a large, separate bowl, whisk together the flour, brown sugar, cinnamon, salt and baking soda. Stir in the oats and walnuts. Add the melted butter, egg and vanilla and mix very well. Using a utensil or your clean hands, lightly press half of the crush mixture into the bottom of the prepared pan. Using a knife or spatula, spread the apricot filling (use it all) over the first layer of crust. Cover the filling with the remaining crust mixture and gently press the crust mixture to flatten. Bake for about 35 minutes until light golden brown. Cool for at least one hour. Cut into bars. They will lift right out of pan with the paper and cleanup is a snap with parchment paper.

These will stay in an airtight container for at least three days. I will freeze them for the next time we want them, because they are too dangerous to have around.

* Yields about 24 bars

My Favorite Macaroons–Traditional Style for Passover

macaroons for passover

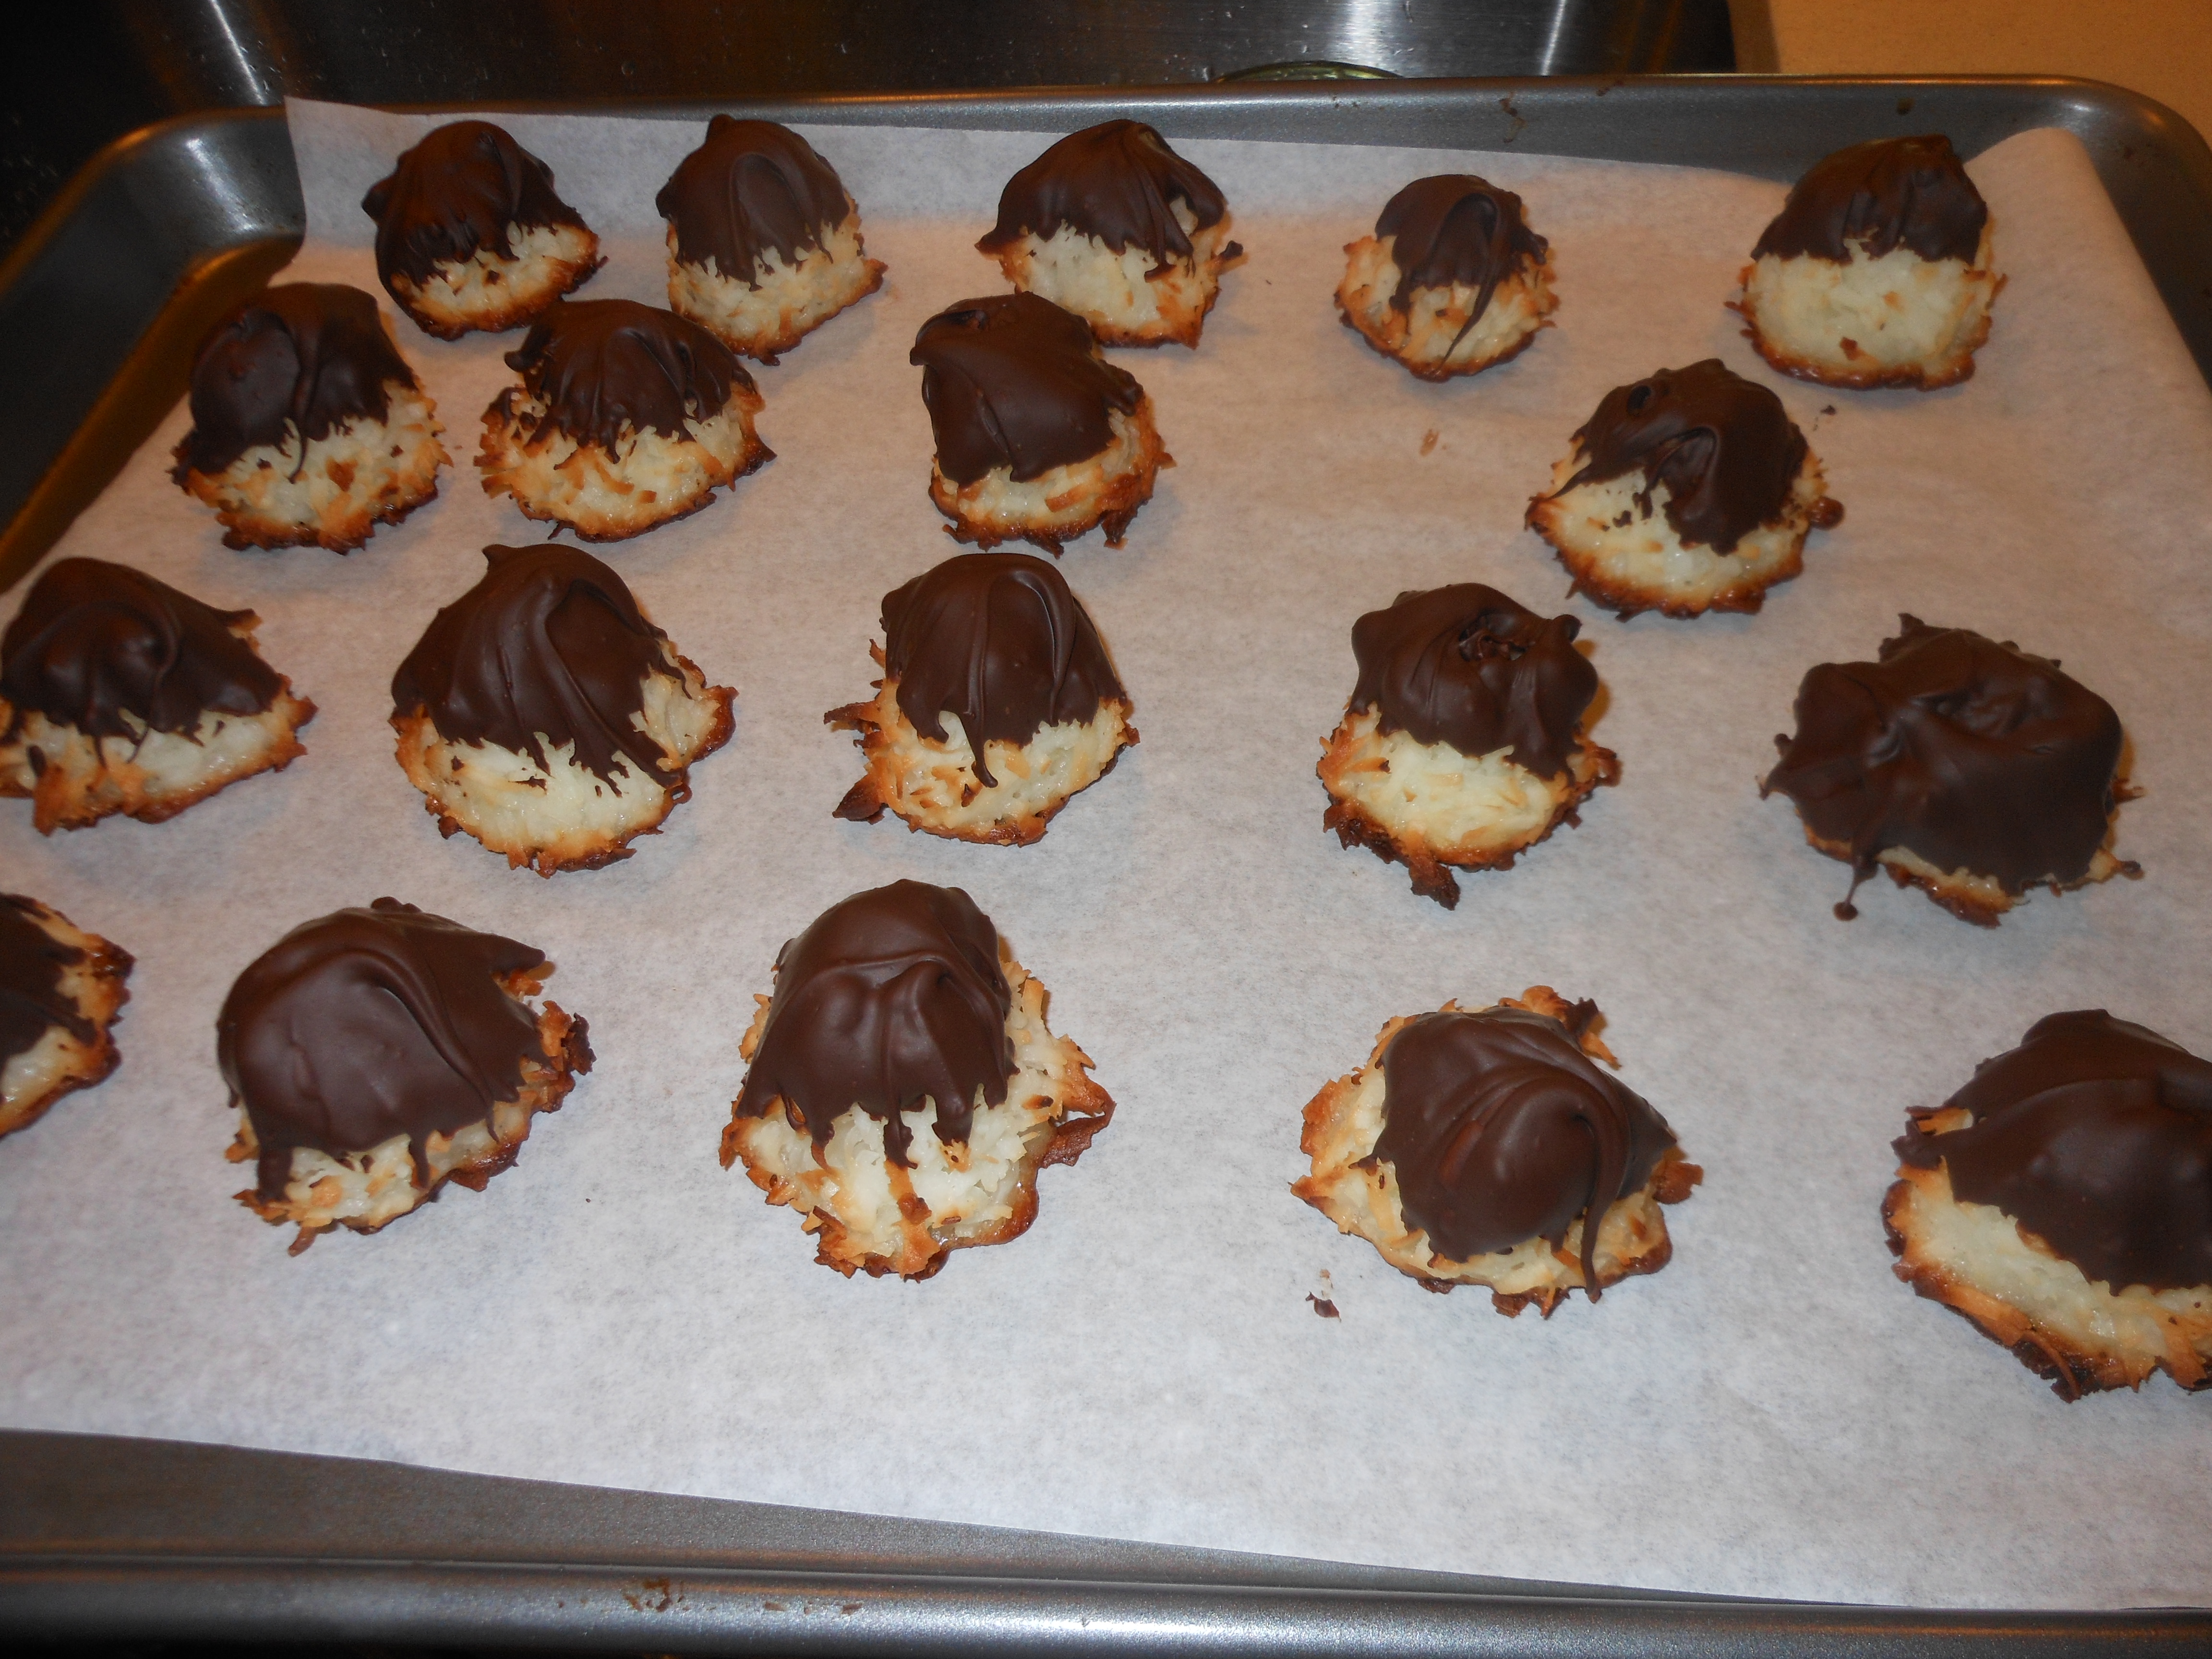
I am not sure why I only make these macaroons during Passover. They are definitely my favorites; they are very easy to make, look totally professional, and are the Passover cookie in my book. These can be made ahead of time and stored. I usually make a few days before the Seder because I dip them in melted chocolate (just the tops). You don’t have to dip, you can leave plain. I dip up to 1/2 the macaroon in the chocolate. They are sweet and crunchy on the outside, and moist and chewy on the inside. After Passover, if there are any left over, I freeze them. Cannot have them lying around. Of course you may make these any time of year…they are always welcome on the menu.

*When dipping, just turn macaroon upside down (with top part into the chocolate). I usually go just a bit more than the top (probably 1/2 the macaroon into the chocolate). Use as much or as little as you like.

*just a little note, silpat is awesome to use for this recipe instead of parchment paper. You must cool completely before trying to lift off the paper. Also before you dip into chocolate I like to cool down completely.

This could be a fun recipe to do with your kids. A little messy but whatever — desperate times call for desperate measures right? They may not come out uniform but the kids could have fun making them and dipping them.

Stay Safe and Be Smart

Ingredients:

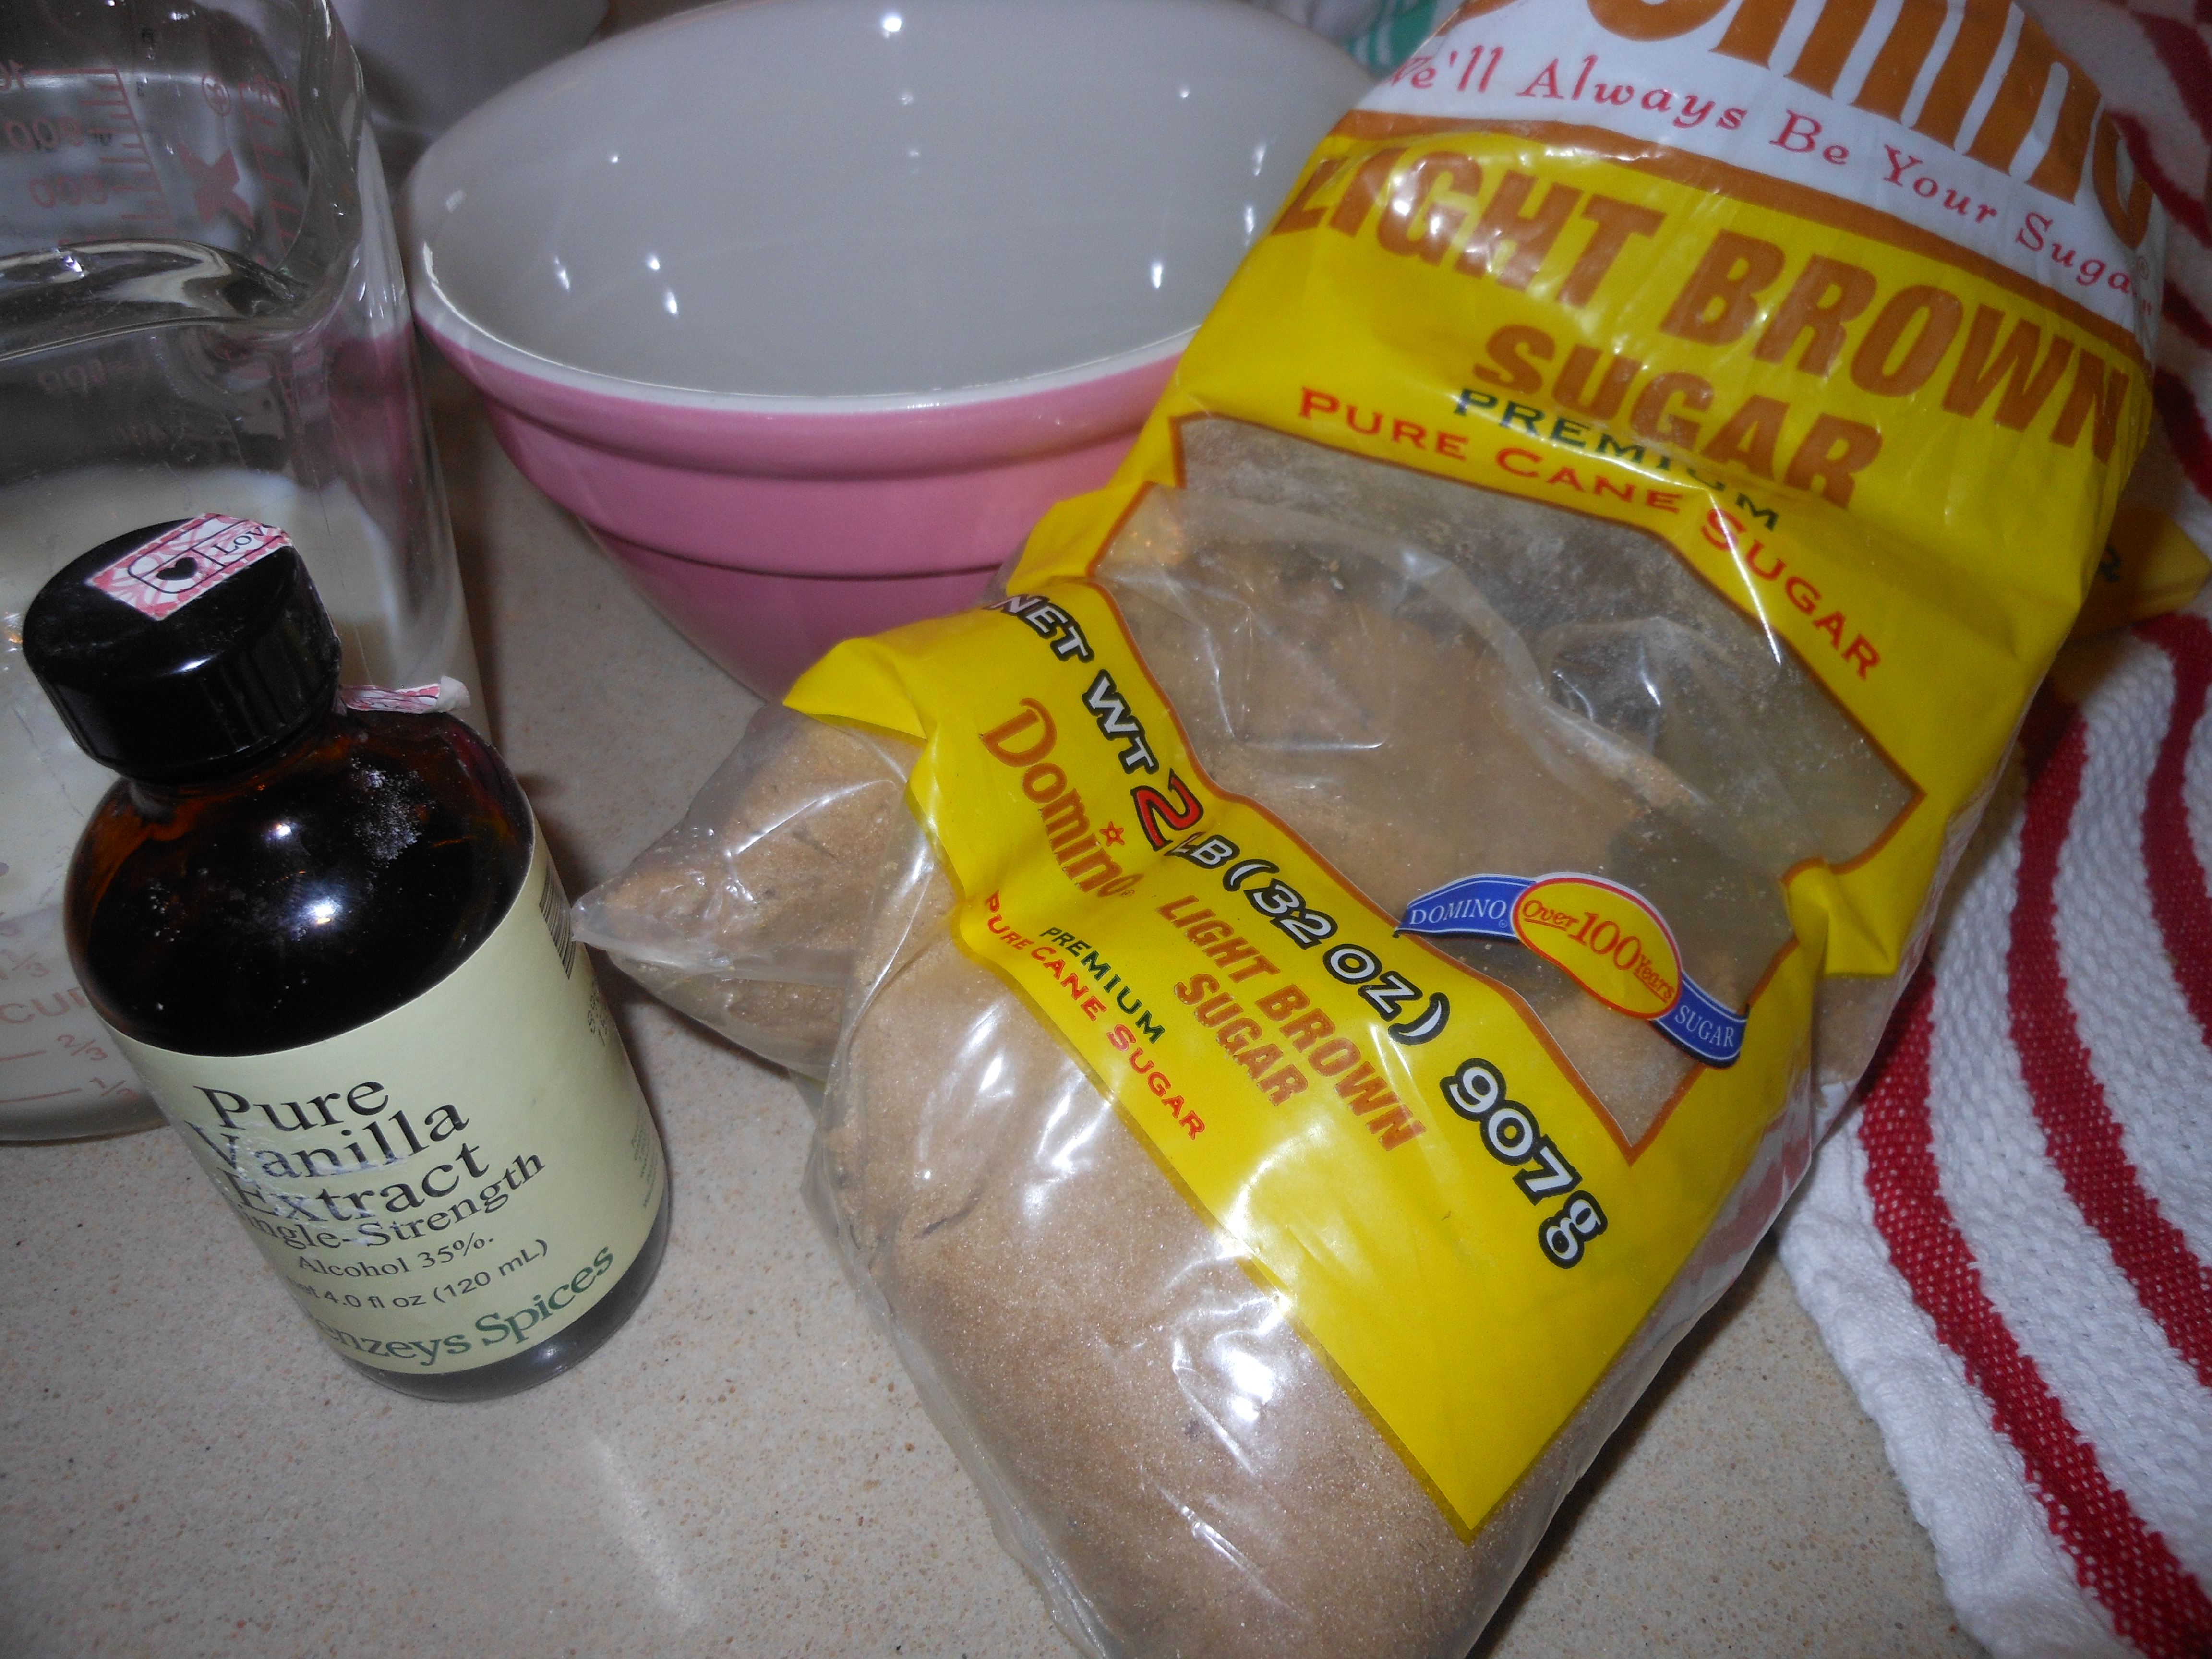
3  large egg whites (When I bake, I always leave eggs out so that they are at room temp.)

1/2  cup sugar

1/4 teaspoon salt

1 package (14 oz.) sweetened, flaked coconut ( I like this Angel Flake Baker’s Brand, but they’re all fine)

*1 package semi-sweet chocolate chips (You can really use any semi-sweet chocolate to melt. It’s just easy with the chips.)

Directions:

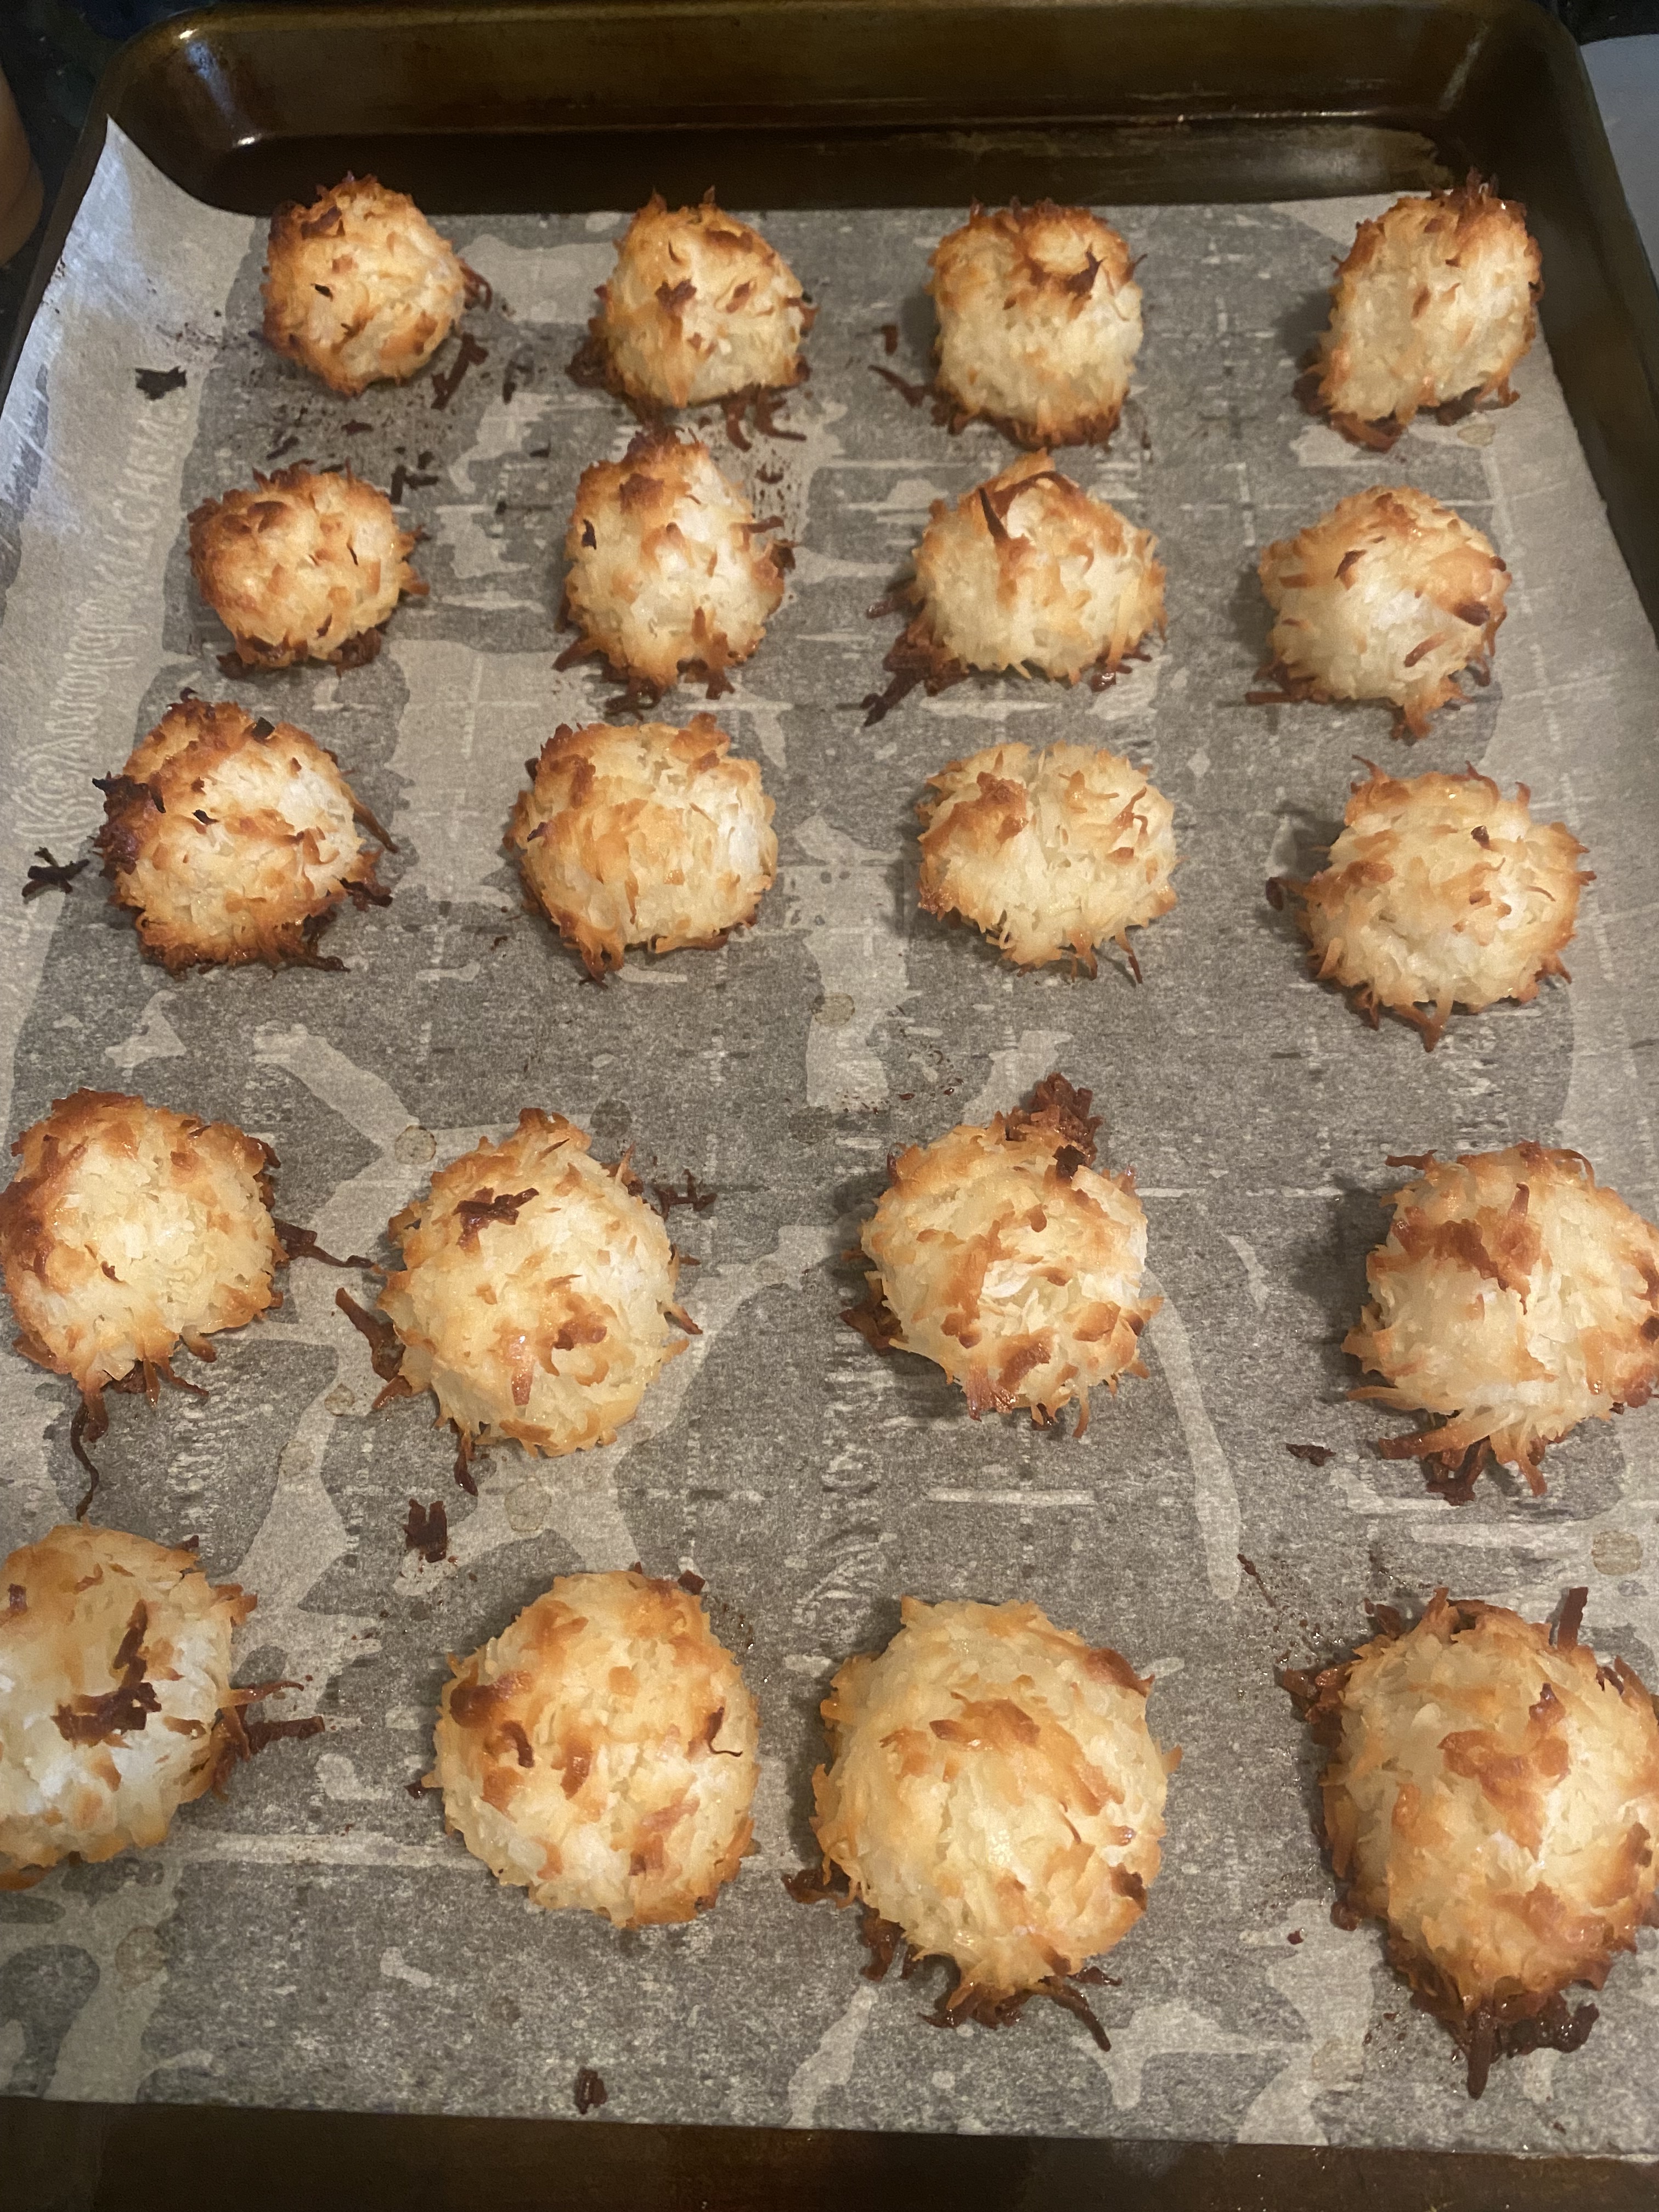
Preheat oven to 350 degrees. Line a baking sheet with parchment paper (you can use non stick cooking spray, like Pam, but I just line with parchment, which works really well).

In a large bowl, whisk together egg whites, sugar and salt until frothy. With a fork, stir in coconut until moistened.

Using a level tablespoon (measuring ones are perfect), pack the mixture into the spoon, so all macaroons are equal size. Drop mixture onto prepared sheet (cookies will not spread). Bake until golden brown, about 25 – 30 minutes. Towards the end, check on them to be sure they don’t burn. I make a little peak with my fingers on the cookies before I bake them (this makes for easier dipping). You can also just leave the top round — this is perfectly fine.

*To melt chocolate on stove top: I bring a small saucepan of water to a rolling boil, and on top of it put a small stainless (oven proof) bowl filled with the chocolate.( works like a double boiler if you don’t have one) When it completely melts, take off heat. Once macaroons are completely cool, you can dip the tops. Just make sure chocolate and macaroons are cooled off first. Just dip top of cookie in chocolate and place on a plate to cool. When I am all done, I refrigerate the macaroons to set the chocolate. You can leave in fridge until you are ready to serve and take out with enough time to bring to room temp. Before serving, I usually use a cool cookie sheet with parchment paper to cool off cookies once they’ve been dipped.

*should yield about 20 – 25 cookies. You can double if you’d like.