Summer Bolognese

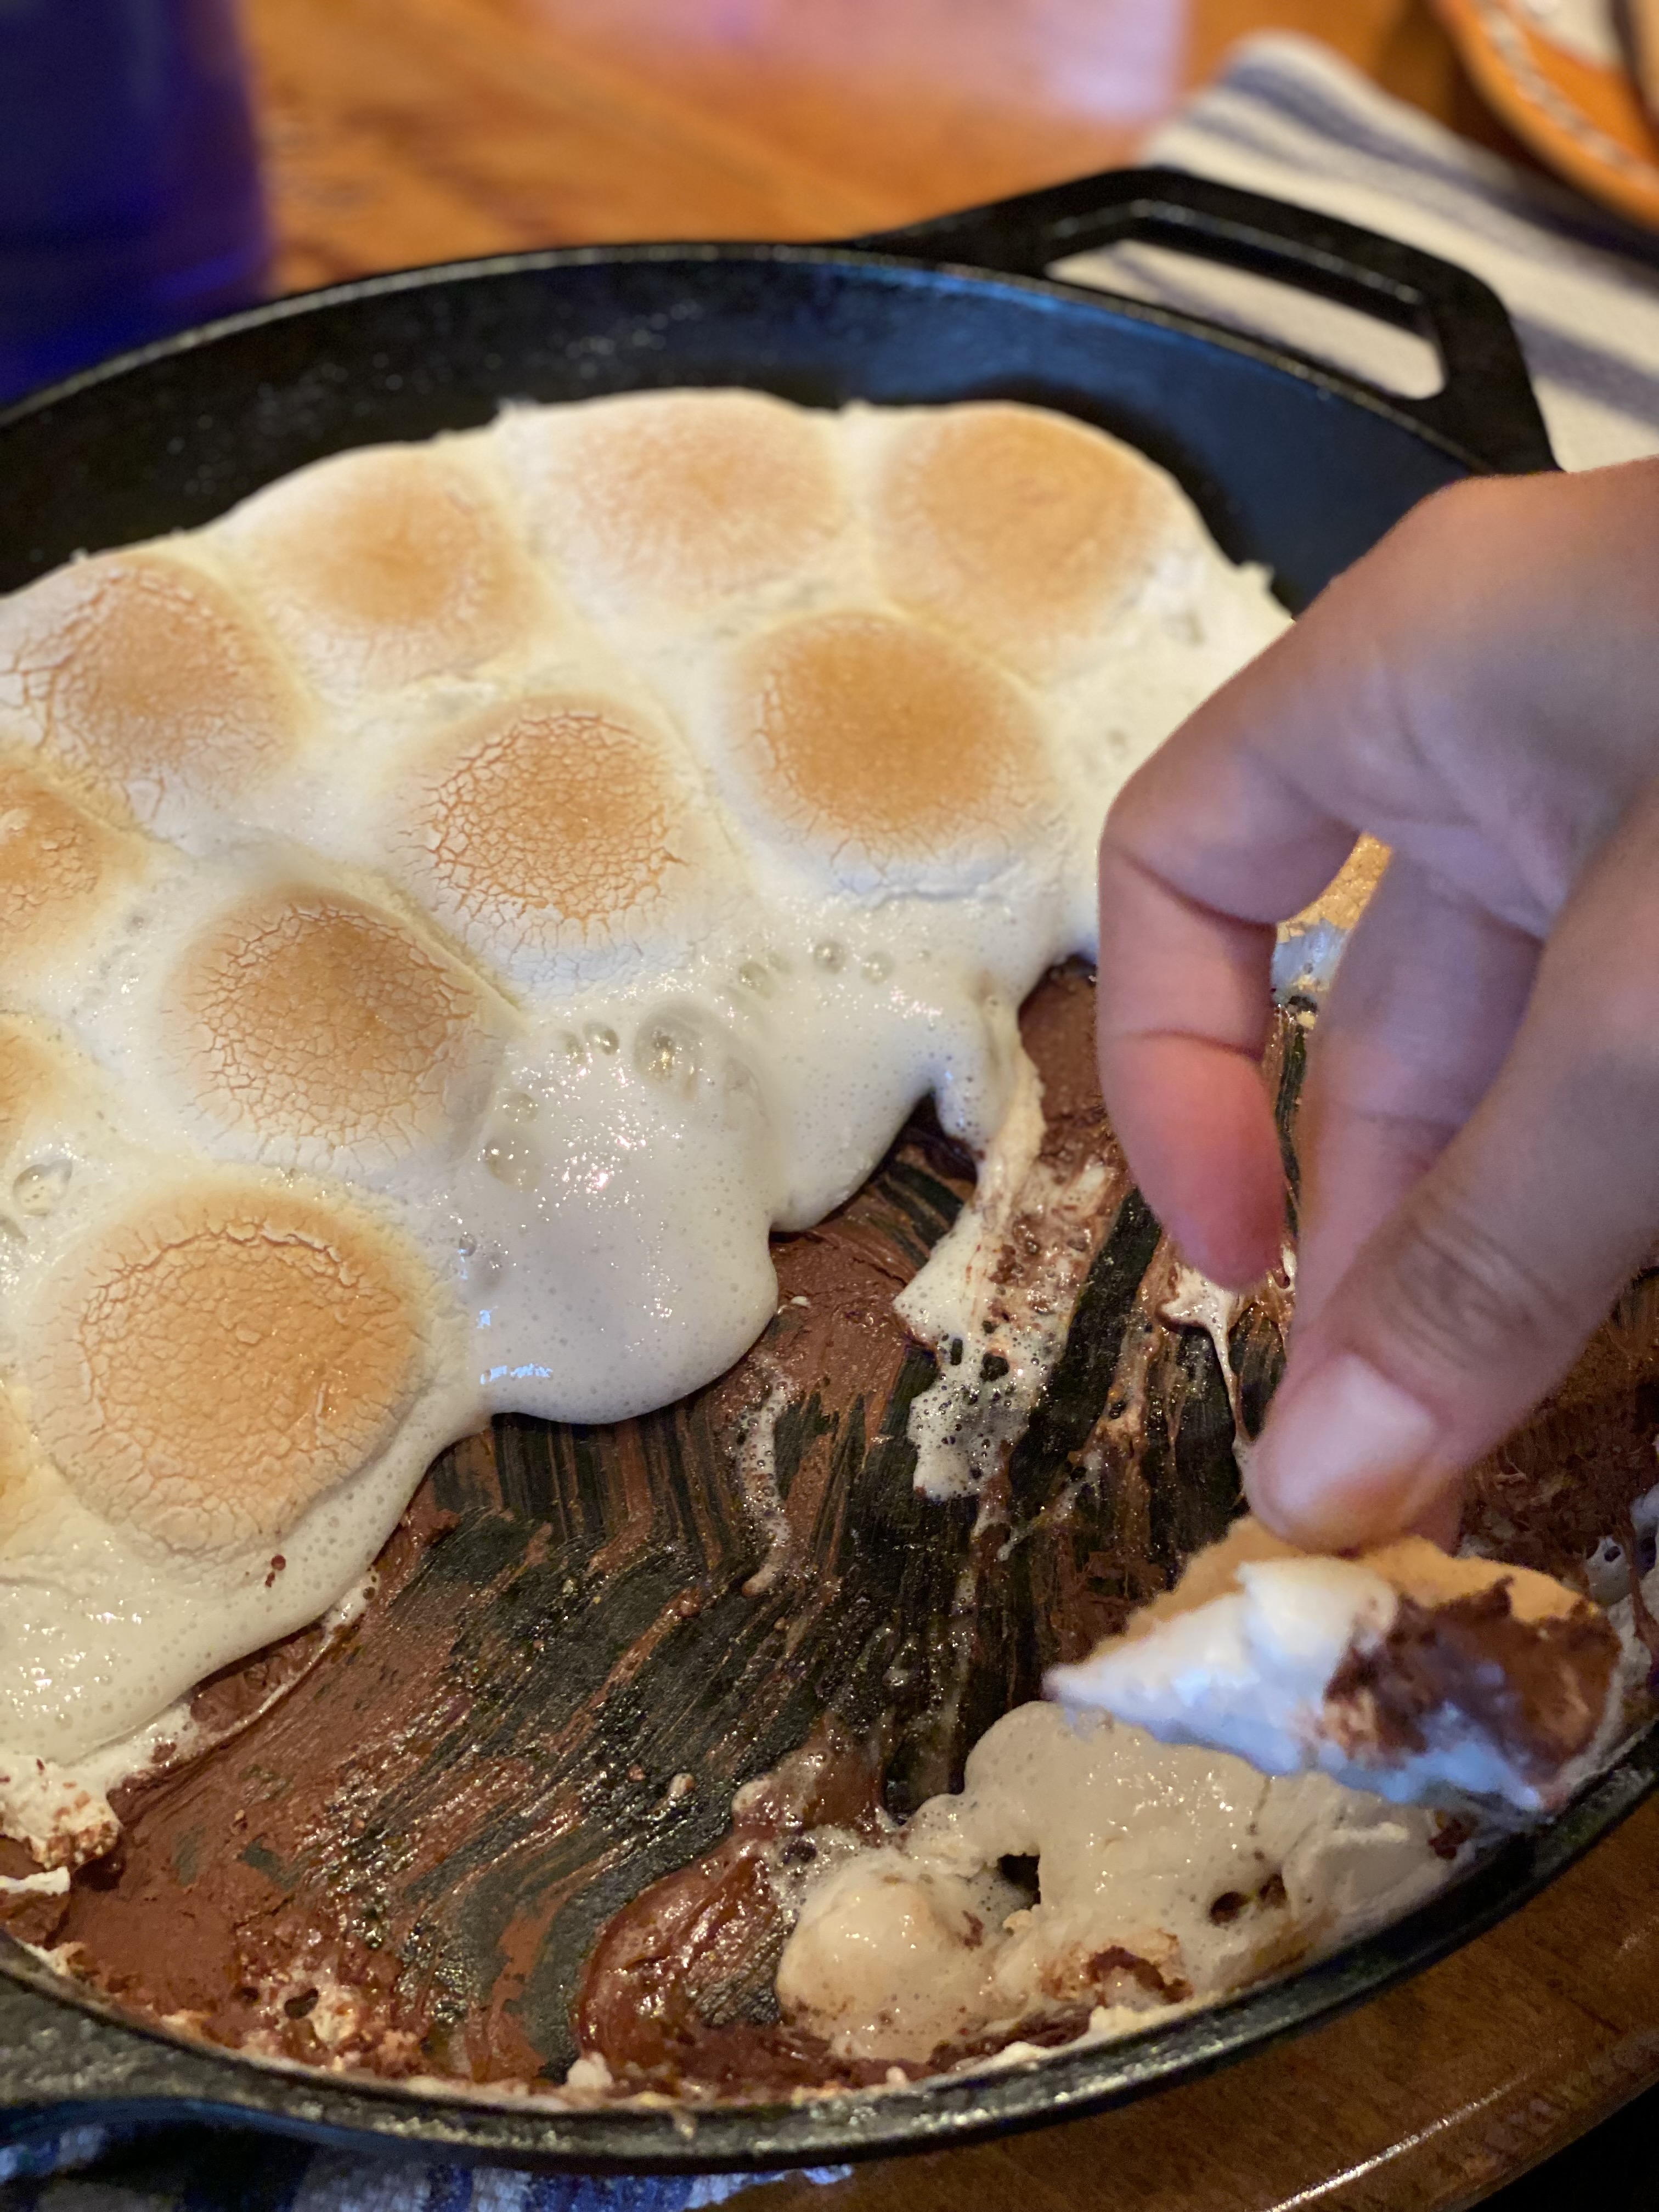
I call this summer bolognese because it’s lighter than my regular bolognese recipe . It’s made with fresh tomatoes which makes all the difference. I made this sauce the other night and I have to say it was just perfect . It cooked up in no time ( about 1/2 hour) and tasted fresh and delicious. Of course if you would like it vegetarian just omit the chicken. I wanted the protein so added a pound of ground chicken you can also use turkey and if you want ground beef. This time I kept it fairly light and used ground chicken.

any kind of pasta you like —

Ingredients:

1/2 cup extra-virgin olive oil

8 garlic cloves– minced– I use a mini food processor always for mincing garlic — just makes it easy

1 lb. ground chicken, turkey or beef

Kosher Salt to taste

1/4 cup dry white wine

4 Tbsp. tomato paste if you use double concentrate use 2

1 lb. cherry tomatoes ( which are abundant and fresh right now)

12 oz. Bucatini or any spaghtetti you like or rigatoni or penne would work here as well

about 1 cup of Pasta Water — which you may or not need

Finely Grated Parmesan for serving

Directions:

In a large skillet or pot heat oil then add garlic and cook till softened ( a few minutes) don’t brown it just soften it — sometimes you’ll need to turn off stove and let it just cook for a couple of minutes to soften.

With pan at medium high add chicken and cook, breaking up chicken for about 5 minutes or until chicken is no longer pink and fully cooked.

Add wine and reduce heat to medium low. Continue breaking up meat till it’s small pieces until wine is evaporated– another 5 minutes or so. Add tomato paste and cook, stirring till absorbed into chicken and cook for another few minutes.

Add tomatoes and let it cook down, stir to coat the tomatoes with the mixture — allow the tomatoes to cook till they are ready to burst — about 5 minutes. I used a masher ( see photo) and I smashed down on the tomatoes and burst all of them. You can leave some whole if you like but I didn’t because this is where the sauce will come from. Stir occasionally on medium low but don’t allow to burn. Allow sauce to thicken for about 5 minutes.

Meanwhile cook the pasta in a large pot of salted water until very al dente ( at least that’s how we like it)

Reserve about 1 cup of cooked pasta water because you may need it if sauce is too thick.

Taste sauce for salt and add accordingly. I probably added a teaspoon or more of Kosher Salt — and some crushed red pepper but that’s totally optional everyone’s taste is different for salt so add to your liking.

Drain pasta and I used tongs and transferred pasta to pan with sauce. Tossing it in and cooking at a low simmer the pasta and the sauce thickened and I added a little pasta water at a time till I reached a perfect consistency . I probably used about 1/2 cup of pasta water. ( which also contains salt so consider this and don’t over-salt sauce — you can always add salt but it’s tough to take away if you make it too salty. The sauce was creamy and delicious .

Remove from heat and if you’d like add fresh basil.

Transfer to pasta bowls and top with Parmesan.

Blackberry Cobbler

before cobbler gets baked , with biscuit topping

before cobbler gets baked , with biscuit topping

finished product - Yum

finished product – Yum

photo (3) It’s the start of summer and it brings me to this delicious dessert filled with the most delicious in season blackberries.  I have posted numerous blueberry cobblers but this one has to be my personal favorite made with Blackberries.  It’s a real deal Old Fashioned Cobbler.  You can really make this with any fruit but I love Blackberries while they’re sweet, plump and delicious! Blueberries and Red Raspberries will also work  well. Or you can mix up the fruits!  I just love blackberries when they’re in season and can’t get enough of them so this time of year I go with just blackberries.

Enjoy!

Ingredients:

1 pound or about 3 1/2 – 4 cups blackberries , cleaned , rinsed and dried

1 tablespoon arrowroot or cornstarch

2 tablespoons fresh lemon juice

1 cup all-purpose flour

3/4 cup sugar, I use regular granulated sugar for cobbler inside and on top I use turbinado sugar. 1/2 cup granulated sugar for inside cobbler and 1/4 cup turbinado sugar for topping

1 teaspoon baking powder

1/4 teaspoon salt

1/2 cup whole milk or you can use low-fat buttermilk

3 tablespoons unsalted butter, melted

3/4 cup boiling water

Directions:

Preheat the oven to 350 degrees.

In a bowl I place the clean blackberries that I’ve washed and dried. I sprinkle them with the arrowroot and lemon juice and mix gently  Set aside.

In a medium size bowl, I sift the flour, 1/2 cup sugar, baking powder and salt. Add the milk and butter. Stir until just combined, don’t over stir, it shouldn’t be smooth. Then by the mound-ful drop dough onto blackberries. I spread around a little bit but don’t completely cover the top of berries. ( see photo) the dough will spread a little once it’s baked.

Pour boiling water over the dough and fruit before you bake it. Sprinkle top with 1/4 turbinado sugar or regular sugar. Raw sugar or turbinado sugar makes it a little crunchier topping. I prefer it to regular sugar for a topping.

*if you are preparing in advance which is what I did today. Prepare up till the boiling water and sugar part. Refrigerate for up to 2 days , bring to room temperature then pour boiling water and top with sugar and bake. I baked for app. 45 minutes till dough gets browned and crackly looking and blackberries are bubbling. ( see photos)

Remove from oven and let sit but serve while it’s still warm with ice-cream for extra added deliciousness!

Happy Summer from my kitchen to yours.

My Version of the famous La Scala Salad

La Scala is a restaurant in Beverly Hills, Ca. that is famous for their chopped salad. The ingredients are yummy and so so easy to make. It’s like eating an Italian Hero in salad form and what’s wrong with that?

It is full of delicious ingredients — lettuce, garbanzo beans/chick peas , cheese and salami and the vinaigrette is savory and perfect. It’s an old school recipe from the 50’s that still holds up by today’s standards. The best part of this salad is you can substitute and add whatever you like I always add tomatoes, if you don’t like salami or pepperoni use turkey or chicken, cucumbers would be good, pickles or artichokes instead of garbanzo beans, some banana peppers or olives and of course romaine instead of iceberg or combine the two. I love a good chopped salad and love iceberg as the base just be sure and chop up good so there are pieces in every bite. I like the salad as is but feel free to experiment. It’s basic and very simple and rumor has it that it’s Kim Kardashian’s fav salad but honestly this salad has been around for around 60 years.

Enjoy!

Ingredients:

Salad:

this is what I used

1 head iceberg lettuce finely chopped

1/4 lb. Italian salami , thinly sliced — julienned or just chop it

1 cup shredded mozzarella cheese

1 can chick peas/garbanzo beans ,rinsed and well drained

Dressing:

1/3 cup olive oil – EVVO extra virgin olive oil always

1/4 cup red wine vinegar

2 tsp. dijon mustard

1/2 tsp. kosher salt and freshly ground black pepper ( around 1/4 tsp.) a few good grinds of the pepper mill

1/4 cup grated parmesan or pecorino romano

Directions:

I used a glass measuring cup to make salad dressing because I wasn’t dressing whole salad for the two of us. I have 1/2 the salad left over for tomorrow and was storing dressing and salad . If salad is dressed it will wilt and I don’t like it like that. So I dressed our salad separately . This salad will serve 4 nicely.

Combine the oil, vinegar, mustard , salt and pepper with a small whisk if you have one . Add in the cheese and continue to whisk. If no whisk a fork will do.

Dressing will last a few days in fridge and I will eat the salad again for lunch tomorrow so that’s just perfect!

Sheet Pan Chicken Fajitas

IMG_7067IMG_7069
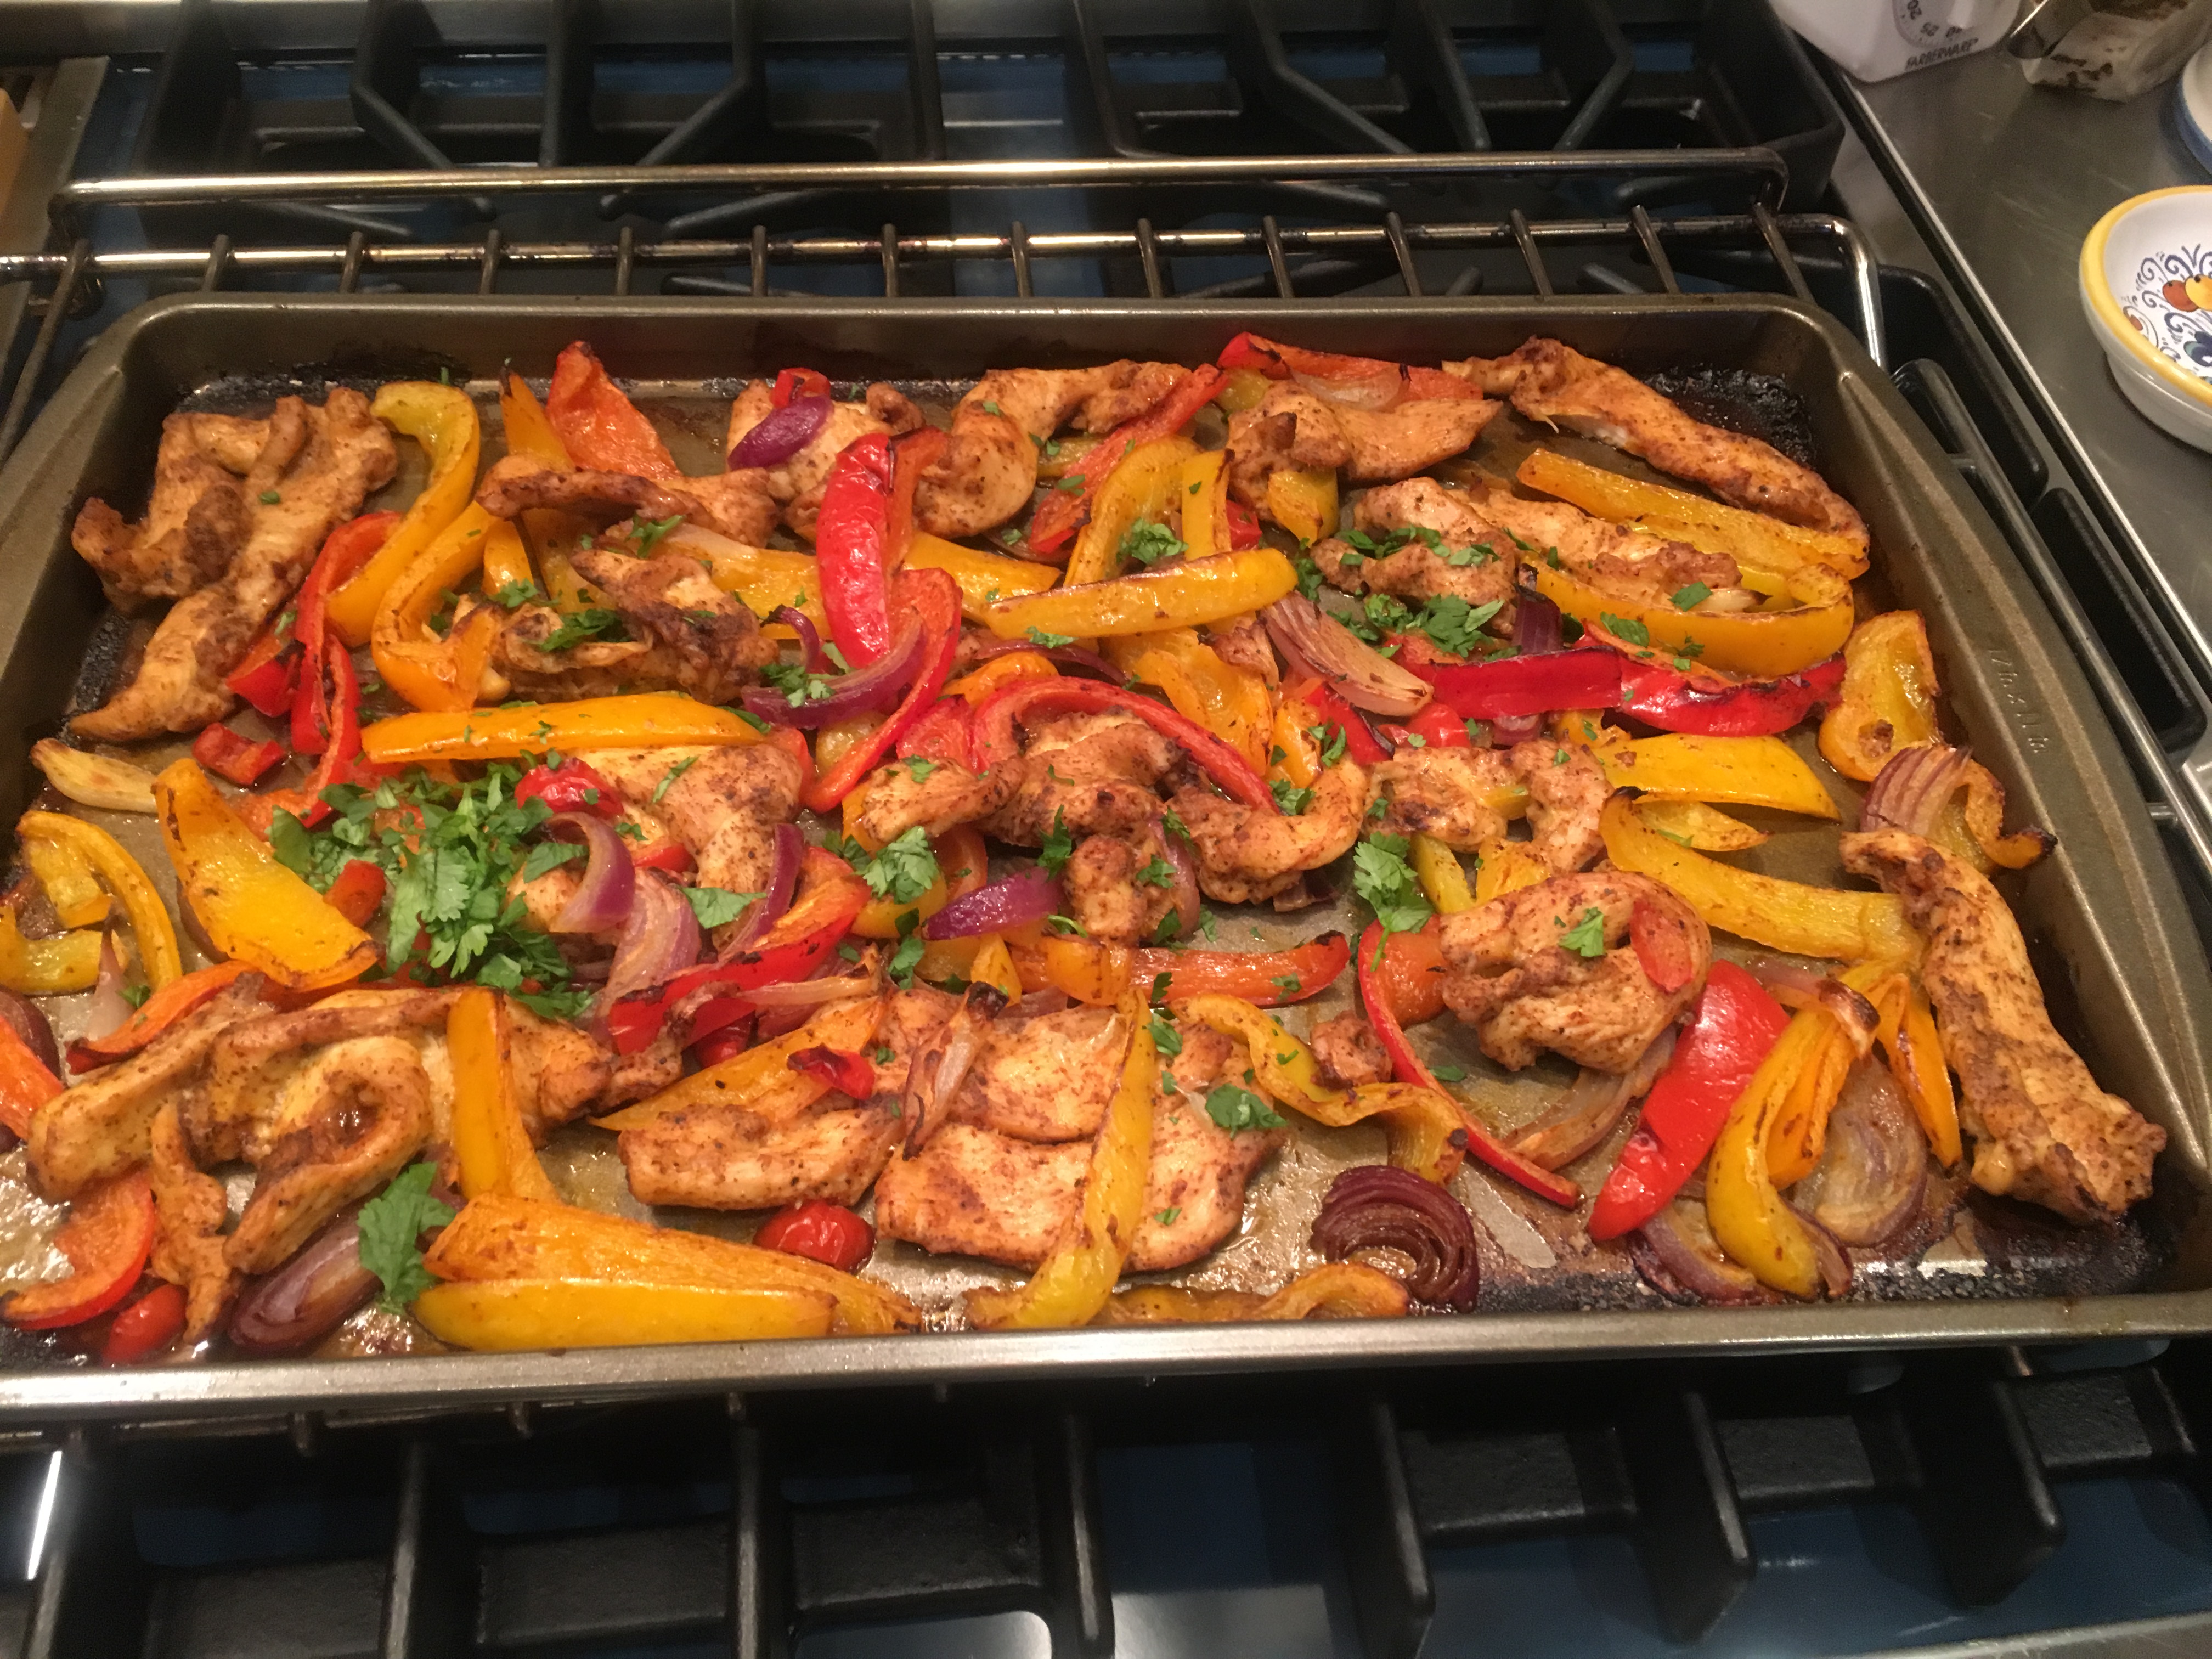
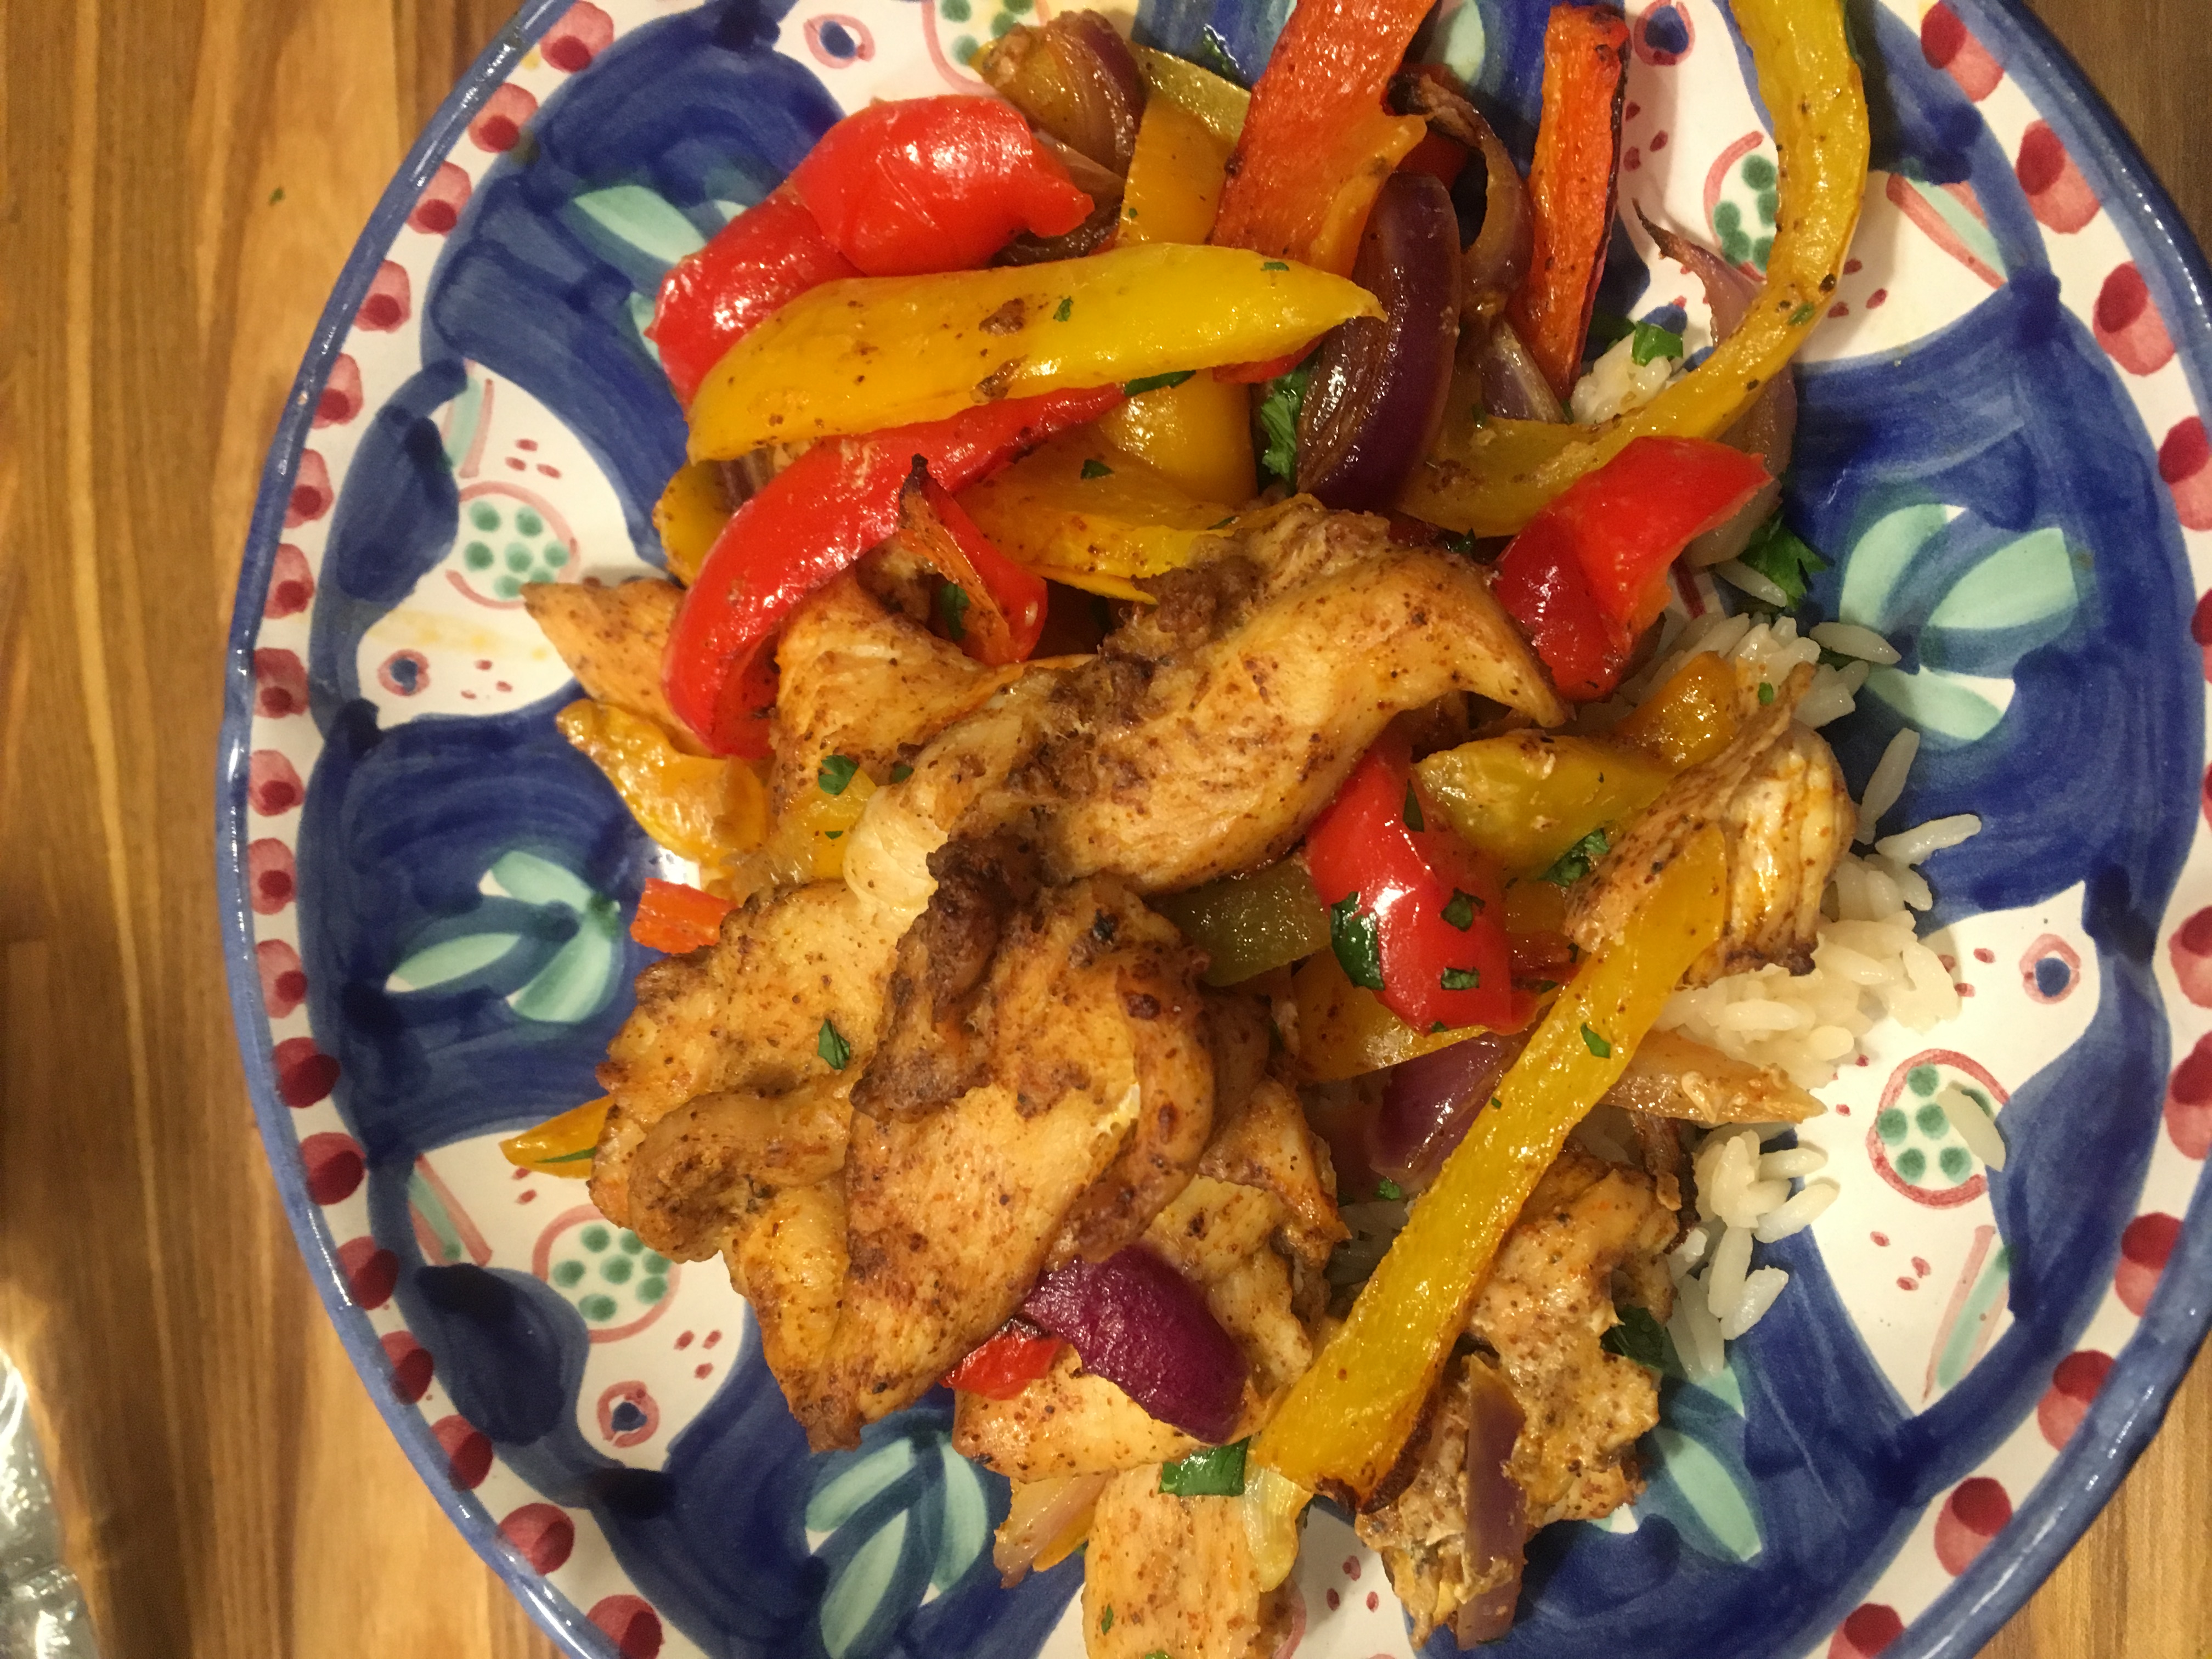
More of my favorite way to cook with Chicken Fajitas made on the Sheet Pan . I made this the other night and it is the easiest and most delicious meal. I am always experimenting with making Chicken Fajitas in new ways and trying to keep the oil down. If you use too little oil they come out tasting dry and that’s no good so use the 3-4 tablespoons of olive oil that I suggest.  This is what I did and I served with small soft tortillas and you can provide any fixings you like. I also served over rice in a bowl which is how I like to eat my fajitas. Obviously what you do with them is totally up to you! A little sour cream and guacamole never hurt anyone either. And buy some tortillas and you have perfection on a plate.

And if you’re ready to fire up the outside grill check out my recipe for chicken fajitas on the grill!

*it is important that all veggies be cut up into fairly uniform sizes this will help cooking process and timing

Enjoy!

Ingredients:

1 1/2 lbs. of chicken breast tenders– or just cut some chicken cutlets into strips

1 yellow bell pepper –sliced into 1/4″ slices

1 red bell pepper–sliced into 1/4″ slices

1 orange bell pepper–sliced into 1/4″ slices

1 small red onion–sliced into 1/4″ slices

3-4 Tablespoons of Extra Virgin Oil –now I have tried 2 Tablespoons and it was a little dry so use your own discretion here –depending on how much chicken you’re using and you’ll want a light glaze all over the chicken and veggies

1 teaspoon of kosher salt –this was enough for us but again use your own discretion

several turns of the pepper mill — freshly ground black pepper always works best

2 teaspoons of chili powder

1/2 teaspoon of garlic powder

1/2 teaspoon of onion powder

1/2 teaspoon of ground cumin

1/2 teaspoon of smoked paprika

Lime for squeezing at the end

*fresh chopped cilantro for garnish and delicious flavor if you like it

*warmed tortillas–if you like

Directions:

Preheat oven to 425 degrees

In a large bowl , combine onion, bell pepper, chicken strips, olive oil, salt and pepper and all the spices. Start with 2 Tbsp. of Olive Oil and add more . I really felt it needed more than 2 Tbsp.

Toss well and combine and allow to sit for a while before cooking. I find that the longer it sits the better it tastes. I prepped and let it sit for an hour or so.

Spray a baking sheet with non stick cooking spray

Spread chicken and onions and everything on baking sheet

Cook at 425 degrees for about 20 minutes, if you’d like to use a meat thermometer here chicken should be 165 degrees. After 20 minutes I turned the oven to broil and cooked for additional 2-4 minutes just letting the veggies get some nice color. Watch it carefully to make sure it doesn’t burn.

I served in bowls over rice with warm mini tortillas and sour cream and guacamole.

*should serve 3-4 nicely with the rice and sides

Enjoy!

S’mores Dip

Melted Chocolate and Toasty Marshmallows!!! This is a hit for your next party or just for your family. Who says it’s only for camping out? This was made in the oven very quickly and came out perfectly delicious and perfect all year round.  A few minutes in the oven and a few minutes to prep and you have a delicious most fun dessert to serve. Serve it with graham crackers or graham cracker sticks and watch it disappear. You can also mix it with peanut butter chips for a little bit different spin on S’mores. All I can say is yum!

Happy Memorial Day and Happy Summer!

Ingredients:

app. 1 regular size bag of  chocolate chips, you can use semi-sweet, milk chocolate, peanut butter chips or any combo.

Marshmallows- start out with a whole bag — you’ll probably use 3/4 of the bag –you can use minis or the large ones but I just used regular sized this time which are readily available

Graham Cracker Squares–for dipping

I used an 8 inch cast iron skillet– it makes for a great presentation and it cooks perfectly– just be very very careful with serving it because skillet will be very hot — careful supervision with this one

Directions:

Pre-heat oven to 350 degrees and spray the cast iron pan with cooking spray ( this will help with clean up)  Pour the chips you’re using in an even layer on the bottom of the skillet.  Bake for3-4  minutes or until chocolate chips are melted . Watch closely because you don’t want to burn. Using an oven mitt –remove the skillet from the oven and stir the chocolate around  then cover the top with the marshmallows completely. Bake for another 4-5 minutes or until marshmallows are browned on top. ( see photo)  Serve immediately with graham cracker squares —only tip is to be very careful , because the dip and the pan will be very hot!!!! you’ll have to supervise with little ones and even some of the over anxious adults. You can let it rest for about 4-5 minutes before serving. But it should be served hot.

*if you don’t have a skillet you may use another oven-safe baking dish like a 9×13 pyrex would work . Chocolate does melt more evenly in cast-iron skillet and it retains heat better. 

*you can adjust the amounts of chocolate and marshmallows to your liking, and the size of the skillet. Some of these photos show the jumbo sized marshmallows which will work just as well or you can cut them in 1/2. 

*use whatever kind of chips you like, and any kind of marshmallows you like — mini marshmallows work well here too.

Summer Pasta with Tomatoes, Eggplant and Stringbeans

IMG_1456Here is a new recipe that I tried last night for Meatless Monday. Sometimes it’s good to lighten up the menu with no meat.   I love when I try something new and it’s so delicious that I know it will stay in the rotation all summer long.This is a delightfully light pasta dish with really no sauce just some delicious fresh vegetables and some amazing fresh burrata. Of course you can leave out the burrata and sprinkle a little parmesan cheese or just leave out the cheese all together. I improvised a lot with this recipe please feel free to do the same.

The beauty of this pasta dish is that it would be delicious served hot off the stove or at room temperature. You can prepare ahead , assemble and just let it sit out while you prepare other dishes if you’re serving to a larger group as a side dish.  It was just the two of us so we ate it hot off the stove as our main meal.

We love cheese in our house so we went with delicious fresh burrata. A little sprinkle of fresh thyme at the end and I sprinkled crushed red pepper at the end because I love a spicy pasta.

*Fresh Burrata is a delicious cheese with a creamy interior. It’s like Mozzarella on the outside.

Ingredients:

8 oz. Pasta — I used casarecce because I love that pasta when I can find it. Fusilli or Penne would work just fine — you can also use whole wheat pasta for an extra fiber boost.

8 oz. French Green Beans if you can find them if not use yellow wax beans or fresh green beans –trim them

2-3 Tablespoons Olive Oil — you’ll start with 2 and you may need a little more this will depend on how dry the eggplant seems while it’s cooking. I used about 2 1/2 Tbsp.

2 cups Chopped Eggplant– I used a regular eggplant and just chopped up into small pieces ( keep it uniform in size) you can use Japanese Eggplant as well. 1 average eggplant should work

1 Tbsp. minced fresh garlic

1 pint cherry or grape tomatoes, halved

1/4 cup dry white wine

2 Tbsp. White wine vinegar

Kosher Salt– I sprinkled about 1/2 tsp. kosher salt on the eggplant and tomatoes but I added more at the end. Salt to taste.

1/2 Tsp. Black Pepper– again to taste

6 oz. Burrata– if you don’t want to use Burrata you can also use fresh Mozzarella just cut into bite-size pieces.

2 Tsp. chopped fresh thyme– of course this is optional but fresh herbs always add a delicious layer of flavor.

Directions:

Cook pasta according to directions on the box. Add green beans for the last 3 minutes of cooking. Reserve 1 cup of the cooking liquid before you drain the pasta.

Heat oil in a large skillet over medium high heat. Add the cut-up eggplant and sprinkle about 1/2 tsp. kosher salt , cook, stirring occasionally until tender — about 5 minutes. Add in the fresh garlic and cook for another minute. Add tomatoes and cook until the juices from tomatoes start to release –another few minutes.

Add the wine, cook and stir often until most of the wine disappears. Add pasta and beans, toss to combine. Add the reserved pasta, cooking liquid– a little at a time– I used almost all of it. It depends on how dry the pasta is. Stir in the vinegar and taste for salt and sprinkle that 1/2 tsp. of freshly ground black pepper here.

Put Pasta in individual pasta bowls and top evenly with burrata and a sprinkle of chopped fresh thyme. I also sprinkled crushed red pepper on mine at the table.

This should serve 4 nicely even with only 8 oz. pasta as a side dish. It was just the two of us so we ate it as a main and there was left-over which will be delicious cold the next day.


Summertime Salad made with Corn and Avocado — and a few other tasty items

This recipe would be amazing with grilled corn but unfortunately my grill is out of commission due to construction on the deck of my house. I know it’s a terrible time to be doing construction on your outside deck in June but suffice to say there was no real choice in the matter.

In any event I would make this with grilled corn and use about 5 ears . I used 2 small cans of corn which worked out or you can use frozen.

I had a ripe avocado and all the other ingredients in the house and I used the red wine vinaigrette from the orzo salad that I made the other night.

It’s perfect for a barbecue and an easy weeknight dinner and you can add any protein you’d like.

Enjoy this delicious salad I served alongside steak and parmesan potatoes and it was perfection.

Ingredients:

3-5 ears fresh corn or the equivalent in canned corn or use frozen and I would use 1 lb.frozen –here’s what the experts say for measuring–fresh to frozen– they say 1 ear is equal to 1 cup–I don’t believe I ever got a full cup out of one ear but one 15 oz. can equals 1 1/2 cups and I used 1 can or 1 lb. frozen is equal to 3 cups. Hope this is helpful and I cut the recipe for the two of us so used a little less. If you’d like you can increase to 5 ears of fresh corn — it gets confusing and don’t be use as much or as little corn as you’d like depending on how many people you’re feeding

1 pint cherry tomatoes–halved app. 2 cups

2 cups packed arugula

1 medium avocado– peeled, pitted and diced

1 small red pepper –cored and finely chopped — use whatever color pepper you have in the house or like ( red, orange or yellow )

4 green onions–finely chopped

*1/4 cup chopped fresh cilantro– totally optional

Dressing: Red Wine Vinaigrette

1/2 cup red wine vinegar

1/4 cup fresh lemon juice

2 teaspoons honey

2 teaspoons kosher salt

3/4 teaspoon freshly ground black pepper

You will have left over dressing and it will keep for a few days in the fridge.

Directions:

If using fresh corn — rub the corn with olive oil and sprinkle salt and pepper on them. Grill the corn for app. 7 minutes, turning every few minutes until ears are lightly browned. Remove from the grill and allow to cool. This can be done ahead of time.

Cut the kernels from the cob and transfer them to a large mixing bowl. Add the cherry tomatoes, arugula, avocado, bell pepper, green onions and if you’re using it cilantro.

In a small bowl, stir together the dressing ingredients and whisk well . Pour about 1/2 cup over the salad and toss to combine. Take a look at salad and if it looks like you covered most of it with dressing it’s probably good. You don’t want to add all the dressing it will be wilt too much. You may like more or less dressing so add at your own taste.

It’s delicious and fresh tasting which is so perfect for this time of year.


Chicken Shawarma

I got this recipe from Pamela Salzman’s cookbook Kitchen Matters. I absolutely loved it. I made the chicken and then proceeded to turn it into a rice bowl. The rice bowl accompaniments can be whatever you like. I use Tzatziki Sauce instead of Tahini white sauce. You can also serve over salad which is quite delicious as well. Greek Salad in particular would be great! Add some delicious pita or Naan bread and it’s perfection! I made a side order of roasted peppers and onions and you can add mushrooms as well. I did this in the oven about an hour before dinner. (cut up peppers and onions add a little olive oil to coat and salt and pepper and 400 degrees for about 45 minutes )Big thumbs up on the peppers and onions in the rice bowl. Feta cheese is a must here! (buy a good one) and pepperoncini in mine!

I cooked on my outside grill but this can be cooked indoors on a baking sheet at 400 degrees for about 35 minutes. Or use a grill pan which would probably cook faster — either way it is delicious.

I also highly recommend marinating for as long as possible. I prepared the chicken in the morning and probably marinated for about 7 hours. Minimum of 1 hour and you can do overnight as well. This marinade was very flavorful.

Thanks to www.pamelasalzman.com

Marinade:

1/4 cup good extra virgin olive oil

1/4 cup freshly squeezed lemon juice– I used 2 average sized lemons

2 teaspoons kosher salt

2 teaspoons cumin

2 teaspoons paprika

1/2 teaspoon ground turmeric

1/8 teaspoon ground cinnamon — I used a heaping 1/8 teaspoon

1/8 teaspoon cayenne pepper– I used a heaping 1/8 here too

Several grinds of freshly ground black pepper –probably 1/4 teaspoon as well

4 minced garlic cloves

2 pounds boneless, skinless chicken thighs

Directions:

prepare the marinade– Combine all the marinade ingredients in a large glass bowl. Add the raw chicken and toss to coat. Marinade in the fridge for as many hours as you can — this was key. Remove the chicken from the fridge about 1/2 hour before cooking.

I cooked on my outside grill for about 7 minutes on each side. I like the outside edges a little crispy since I don’t have a revolving spit to cook my chicken on this is as close as I could get.

I sliced up chicken served it in a rice bowl and we each used different accompaniments. The peppers and onions were perfect with it. Highly recommend it and you can buy store bought tzatziki which would be just fine. Would be good with some delicious toasted pita or naan bread.

Baked Balsamic Chicken Parmigiana

As all of you know from reading my blog and following my recipes I have truly embraced the one pan meals. They are so super easy to prepare and cook not to mention cleaning up is pretty snappy.  I threw this recipe together the other night and I have to say it was pretty tasty.  Juicy roasted tomatoes and balsamic vinegar act as a delicious sauce for this wonderful week-day meal but why not for the weekend as well? You’ll love the tomato balsamic sauce not to mention melted mozzarella cheese! This is a keeper and the little bit of red onion added another delicious layer of flavor to this tasty dish. This is what I did, I actually gave you all a few options in the ingredients dept. so mix and match what works best for you .IMG_0265IMG_0266IMG_0269IMG_0272

Ingredients:

3-4 skinless chicken breasts ( I used 3 breasts for the two of us) 1 nice size chicken breast per person is probably a good guess.

2 Tablespoons Olive Oil

1 Teaspoon Italian Seasonings — if you don’t have this use 1/2 tsp. dried basil and 1/2 tsp. dried oregano

1 Teaspoon Kosher Salt

Freshly Ground Black Pepper to taste

2 Teaspoons of Garlic Powder — divided or use 1 1/2 Tablespoons Fresh Garlic which would probably be 5-6 garlic cloves

1 cup cherry or grape tomatoes which I left whole if you’d like for a mushier sauce you can 1/2 the tomatoes

1/4 red onion, peeled and thinly sliced

1/4 cup balsamic vinegar

1 Tablespoon packed brown sugar–if you want to omit the sugar you can — I used it

3/4 cup to 1 cup Mozzarella Cheese — I used shredded

*you can garnish with fresh chopped parsley or fresh basil

Directions:

Preheat oven to 400 degrees.

Place chicken breasts in a sprayed ( Pam or any other baking spray you like) and drizzle with the olive oil. Season with dried seasonings and if you’re using fresh garlic 1 Tablespoon of it here.

Rub seasonings all over the chicken.  Put tomatoes and red onion around the chicken in the baking dish.

Whisk together the balsamic vinegar, sugar and garlic powder or remaining 1/2 Tablespoon of fresh minced garlic. Pour over the chicken breasts and flip each breast to evenly coat.

Bake in pre-heated oven for app. 20-25 minutes depending on the thickness of your chicken breasts or until chicken is no longer pink in the middle. You can cut into a piece to check for doneness.

When chicken is cooked through sprinkle with cheese and set oven to broil for 4-5 minutes or until cheese is melted .

This would be delicious served over rice or pasta but we just ate it as is and it was pretty delicious on its own.

Sheet Pan Mustard Salmon with Vegetables

Now you all know how very much I love a sheetpan meal. So very easy to prepare and cook and so delicious to eat. This is what I did. You can substitute sweet potatoes if you’d like. I used Broccolini but you can use regular broccoli, cauliflower or asparagus or any veggie you like.

I really slather on the mustard because I love the strong mustard flavor but feel free to add less or more depending on your own taste.

Enjoy!

*this recipe is for 2 people feel free to double up for more — there’s no exact science going on here so feel free to swap in or out what ingredients you prefer

Ingredients:

4 fingerling potatoes or any potatoes you’d like I used yukon gold this time because that’s what I had in the house

app. 3 Tablespoons Olive Oil in total but if you feel you need more– be my guest

Kosher Salt and black pepper to taste

2 Salmon Fillets or 1 piece of Salmon app. 1 lb. ( I used a 1/4 lb. for the two of us and had some left over)

3- 8 Tablespoons Maille Old Style Mustard — I just slathered the top of the salmon

1/2 cup cherry or grape tomatoes

small bunch of Broccolini or it’s equivalent for another vegetable

Directions:

Arrange a rack in the middle of the oven and pre-heat to 400 degrees. I sprayed a rimmed baking sheet with cooking spray.

Place potatoes in a bowl and drizzle with 2 Tbsp. Olive Oil and a little kosher salt and black pepper. Stir to coat and arrange the potatoes cut-side down . Bake for app. 15 minutes . Obviously yukon gold or sweet potatoes you’ll just arrange on baking sheet since you can’t do cut-side down.

Meanwhile pat salmon dry and brush with Mustard.

Toss the broccolini and cherry tomatoes in a clean mixing bowl with 1 Tablespoon of Olive Oil and sprinkle with Salt and Pepper. If it doesn’t look like enough oil add a little bit.

After the initial 15 minutes, remove tray from oven and push potatoes to edges of pan, creating enough room for salmon in the center of baking sheet and arrange the broccolini and tomatoes around the salmon. Using tongs flip over potatoes to cook evenly .

Bake for about 15 minutes depending on the size and thickness of your salmon. If veggies are getting to burnt use tongs and remove and put on plate and cover with foil. It should only be a few more minutes for salmon to be done and I didn’t remove my broccolini because I like it charred.

If you don’t want potatoes you can just cook salmon and vegetables and use rice or leave out the carbs if you so desire. It’s delicious and since I made a little extra salmon it was delicious the next day for lunch.