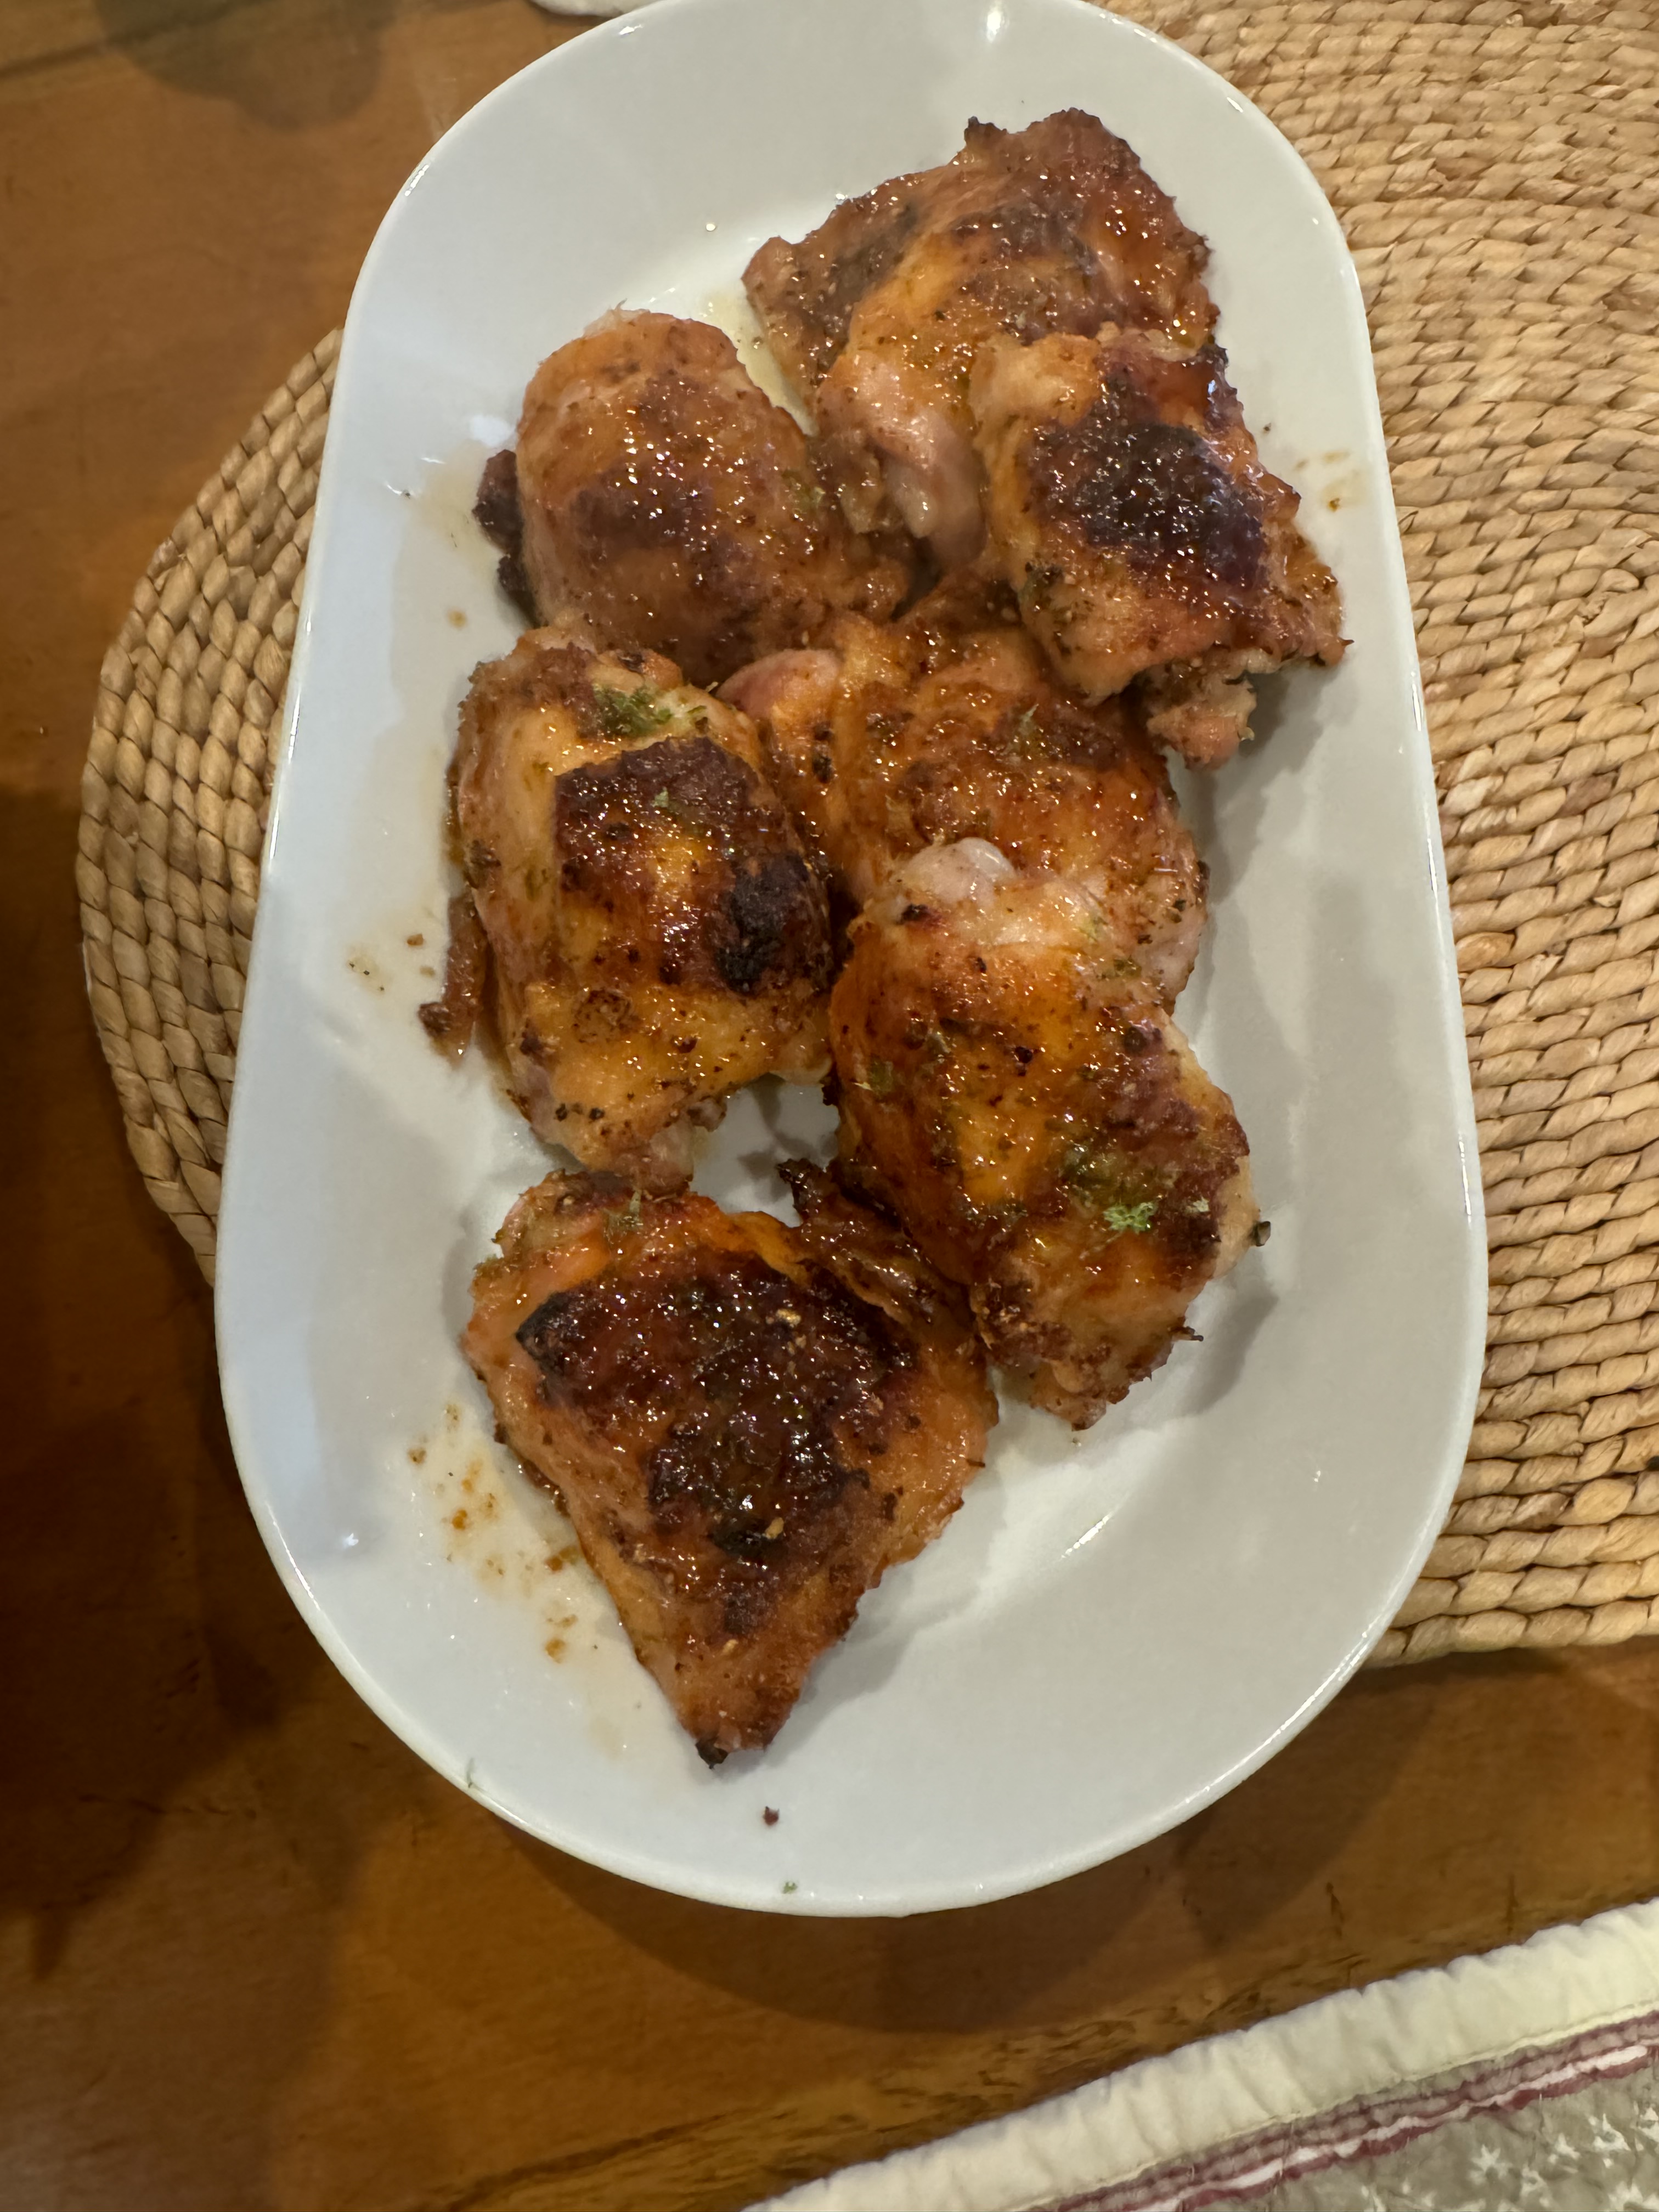
My version of the Jennifer Aniston Salad

This salad has been all over the internet and I have to say it looked absolutely delicious and right up my alley. Upon closer inspection of it I realized that I would make it but with a few changes to better suit my taste. I definitely think it needs dressing but that’s just me, some of you may like this a lot without any dressing and apparently that’s the way Jennifer Aniston ate hers. Also the original version used Bulgur and I used Farro it’s just a little different flavor and taste , you can also use quinoa but I prefer Farro. I would also only use 2 cups cooked Farro , the original calls for 4 cups which I guess would be better for more people. You can substitute any of the ingredients or omit. I made for my daughter and myself and she didn’t want Parsley so I left it on the side so I can taste it with the parsley. I love the mint and thought it was an important flavor but you can play around with it and make it your way. I love chickpeas in my salad so this was a must but if you hate them just omit them. Obviously not an exact science so add more or less of any of the ingredients– this is just a guideline.

We ate a lot of the salad for dinner and still had leftovers.

Ingredients:

2 cups cooked Farro — obviously you can use Bulgur or quinoa or any grain you prefer — follow instructions on the package of Farro — it will probably be 1 cup uncooked farro to two cups water but check your packaging

1/2 cup finely diced red onion

1/2 cup finely chopped parsley

1/2 cup finely chopped mint

1/2 cup or more or less shelled pistachios –leave them whole they’re better this way

2 mini cucumbers — chopped into small pieces ( see photo) 1/2 cup approximately

chickpeas – I used 1 can organic chickpeas — rinsed and drained and I let them dry for a while

1/2 cup or more crumbled Feta — use as much or as little as you like

Dressing Ingredients:

1 whole lemon – juiced — I use a juicer to get every last drop

1/4 cup Olive Oil

Sprinkle of Kosher Salt — to taste

Directions:

Prepare farro according to package directions. I made about an hour or so prior to dinner so it would be cooled down.

Finely dice up all of your herbs and ingredients that require chopping

Put dressing in a measuring cup and with a small whisk whisk it good and add a sprinkle of kosher salt once it emsulifies it is ready – a few quick whisks should do it

Place all ingredients in a large bowl and right before eating dress it and mix well — very delicious and will be in my rotation often.

Italian Wedding Soup made with Chicken Meatballs

It is most definitely soup season again. the chill in the air makes it the most perfect time of year to start making soup for dinner again. even if you live in a warmer climate this is a most wonderful meal. Paired with a salad and some crusty bread you have a very heartwarming meal.

Italian Wedding Soup with Chicken Balls

This is one of my absolute favorite recipes. It is a soup , which is also a full meal. It is hearty and pretty healthy.  It is one of my staples from September through April. It freezes well and you can just take it out of the freezer the night before, and you’ll have a wonderful meal the next evening. When you defrost it you will probably want to add broth/water to it. add a little at a time till you get the consisitency you like. Enjoy:)

Ingredients: chicken meatballs

1 lb. ground chicken–I prefer chicken to turkey but you can use turkey as well!

1/2 lb chicken sausage, casings removed–if you can’t find chicken sausage use pork sausage it’s delicious! 

3 slices whole wheat bread for bread crumbs ( I put into food proccesor with steel blade for crumbs) I remove crusts it should be app. 1 cup of bread crumbs or if you’re feeling lazy try Panko

2 teaspoons minced garlic ( 2 – 3 cloves)

1/4 cup grated Pecorino Romano ( fresh is best) but whatever you have will do

1/4 cup grated Parmesan ( again nothing beats fresh) but whatever you have will do here as well

3 tablespoons milk

1 extra large egg, lightly beaten

1 teaspoon kosher salt

1/2 teaspoon freshly ground black pepper

Soup Ingredients:


2 tablespoons olive oil

1 small -medium yellow onion minced

1 cup diced carrots ( 3 )

1 cup diced celery (2 stalks)

10 cups chicken stock

1/2 cup dry white wine( use whatever you have open)

1 cup small pasta tubetini, ditalini, stars, elbows etc. 

5 ounces fresh spinach, washed and trimmed

*fresh dill ( I love the flavor) add at your own discretion about 1/4 cup minced fresh dill.

Directions:

preheat the oven to 350 degrees  put parchment paper on a cookie sheet.

for the meatballs, place the ground chicken, sausage,bread crumbs, garlic, Pecorino, Parmesan, milk, egg, salt and pepper  all in a bowl and mix well with a fork.  I use a teaspoon, and make 1 to 1 1/2 inch balls and drop onto parchment paper lined cookie sheet. you should have about 30 to 40 small balls. bake for 25 – 30 minutes, until cooked through and lightly browned. set them aside. (I made about 30 balls, they were a little larger this time out)

For the Soup:

 heat the olive oil over medium – low heat in a large heavy bottomed soup pot ( Le Creuset type pot) Add the onion, carrots, and celery and saute until softened, about 10 minutes, don’t brown. Add the chicken stock and wine and bring to a boil, at this point I let soup cook a while to soften the vegetables, app. 1 hour. ( a low simmer) if you’re in a hurry you can probably do the whole soup in 1/2 hour , veggies will be soft enough to eat. if some of the liquid evaporates you can always add a little more broth.

chicken balls out of the ovenItalian Wedding Soup cooking

 Add the pasta to the simmering broth and cook another 6 – 8 minutes, until the pasta is tender. Sometimes I just cook the pasta up in a separate little pot and pour the soup over the pasta when I plate it up, this helps with the freezing just the soup and meatballs and the pasta stays al dente. Add the meatballs and simmer for another minute or so. taste for salt and pepper. Stir in the fresh spinach and cook for another minute or so, the spinach will just wilt. Ladle into soup bowls and serve with freshly grated Parmesan cheese.

Pasta e Fagioli ( Pasta and Bean Soup) Weekend Cooking

019 I have been making this soup forever and it’s a most perfect soup to make during the weekend when you have a little time to cook and gather ingredients. I make a big pot and freeze some for later and keep some in the fridge for lunch the next day. This is really just a tomato base soup with beans and pasta. How bad can that be? unless you hate beans and pasta that is. I usually have ingredients in the pantry and it is a wonderful warm experience, with a nice salad this is a perfect meal. I used to only make this with dry beans but in the name of time and taste I used canned beans and have now always made this with canned.  I must admit this makes it a whole lot easier  and honestly no one knows the difference! It is a wonderful hearty soup halfway between a soup and a pasta no matter how you do the beans!

Enjoy this amazingly delicious comforting soup and did I mention super easy????

Ingredients:

1 medium yellow onion, chopped

2 – 3 tablespoons olive oil

4 garlic cloves, minced

1 28 oz. can chopped tomatoes ( San Marzano)

10 – 12 fresh basil leaves

red pepper flakes

handful of italian parsley, chopped

2 cans rinsed and drained Cannellini Beans

5 cups water or chicken broth or vegetable broth to keep it vegetarian — water works just fine but you’ll have to check your salt and pepper if using broth especially boxed broth which contains salt. Your call– super easy recipe.

app. 1 cup pasta, elbows, tubetti, ditalini, or broken spaghetti

Kosher Salt — to taste

Freshly Ground Black Pepper

Directions:

In a large , heavy stockpot ( Le Creuset) saute onion in olive oil. When onion is golden and transparent, add garlic. Cook for a few more minutes. Add tomatoes and herbs. Add some kosher salt about 1/2 Tablespoon and some grinds of the pepper mill now and you’ll be tasting all along for salt and pepper

Add the beans and the 5 cups of water  and cook over medium heat for 15 minutes – until the beans begin to break down and the soup begins to thicken. Lower heat to a slow simmer, as low as you can.  Stir frequently to prevent it from sticking and burning bottom of the pot. Taste for salt and pepper again.  I always like it to simmer for a long time, an hour would probably do it, but if I have the time I let it sit for as long as I can.  Sometimes after it’s been simmering for a while ,  I turn off the heat and right before serving just bring to a boil and add pasta. Just be careful not to let it burn, stir frequently . If you need more liquid add water a little at a time, I showed a picture of my pot filler which is the greatest thing to have in a kitchen, makes it super easy to fill a pot.

Right before you’re ready to serve bring to a low boil and add the pasta and cook until pasta is al dente, about 5 – 10 minutes depending on type of pasta you’re using. I used ditalini.

Serve immediately in large soup bowls.

Guests can drizzle some good olive oil and grate some Parmesan Cheese over.  Should serve 8 – 10 depending on appetites. I froze remainder for another time.

Sausage, Orzo and Cabbage Soup

This is one of those delicious easy to make super comforting soups. Of course I may have lost some of you with the Cabbage and if you hate it you hate it but if you’re willing to give it a shot this is a super cozy kind of soup which we can all use a little bit of . Made this for Joel and I and had 2 quarts left over for 2 more meals. Perfect dinner served with a nice green salad . I used pork sausage because that’s what I had in the house feel free to use chicken or turkey sausage whatever works best for you. I used a spicy italian pork sausage . I also used a frilly-edged Napa Cabbage . This cabbage is nice and soft and breaks down quickly . If using regular green cabbage you’ll have to cook a bit longer — probably another 15 minutes or so. Of course you can be flexible with your pasta , I used orzo but you can use any small pasta such as ditalini, mini elbows or mini farfalla .

Enjoy this most satisfying soup which is just perfect on a cold wintery day or night.

Stay safe folks.

Ingredients:

2 Tablespoons Olive Oil

1 pound Italian sausage, mild or spicy remove casings

2 cloves garlic minced

1 yellow onion, finely chopped

Kosher Salt

Freshly Ground Black Pepper, start with a pinch , plus add more to taste

1/4 cup Tomato Paste

1 large Napa or Savoy Cabbage, trimmed , quartered and thinly sliced

4 cups Chicken Stock

4 cups Water

1 cup Orzo

1 -2 Parmesan Rinds

*grated Parmesan for serving

Directions:

Heat olive oil in a large heavy bottomed Dutch oven type of pot.( Le Creuset works well here) over medium heat.

Add sausage in a single layer and break up into smaller pieces, stirring occasionally until sausage is cooked through and no longer pink. Remove sausage with a slotted spoon, leaving the rendered fat in the pot.

Add the chopped onion and several big pinches of kosher salt and black pepper. Saute the onions for about 5 minutes then add the garlic and continue cooking for a few mins. Lower the heat and add the tomato paste and continue to cook stirring constantly and scraping the bottom of the pot. Onions will start to caramalize in about 3 more minutes.

Add the cabbage, chicken stock, water, orzo , Parmesan Rinds, and add another big pinch of kosher salt. Bring to a boil and then simmer for about 15 minutes. Continue stirring so pasta doesn’t stick to bottom of pan. Add sausage and continue to simmer for about 15 more minutes or until pasta and cabbage are tender.

Remove an discard rinds. I couldn’t find one of my rinds and it is no big deal. If you use larger ones they’re easier to find. You may find when you spoon out the soup!

Taste for Salt and Pepper

I then turned off heat and let soup sit on the stove till we were ready to eat dinner. I brought to a low simmer and served in bowls with grated Parmesan.

Baked Chicken Caprese

 I sort of threw this together and I have to say this meal came out delicious. I served over zucchini noodles (zoodles) and some sliced roasted fingerling potatoes. Feel free to use pasta and since the sauce is so delicate and light I would use an angel hair type of pasta.

This was a lightened up version of a Chicken Parmigiana and it satisfied my yen for Chicken Parmigiana but much lighter than the usual fare.

Enjoy!

Please follow me on Instagram @cookingwithcandi

Ingredients:

3-4 Chicken Breasts — I used 4 Thinly sliced Chicken Breasts

2 Tablespoons Olive Oil

3/4 Teaspoon dried Basil

3/4 Teaspoon Dried Oregano

1/4 Teaspoon Garlic Powder

1 Teaspoon Kosher Salt

1/2 Teaspoon Freshly Ground Black Pepper

1 -2 Cups Fresh Tomatoes– I used Campari Tomatoes and sliced in 1/2 I preferred a larger tomato here since they really break down and make a sauce from the heat . If you can’t find Campari Tomatoes use 2 pints of grape tomatoes and slice in half.

1/3 cup Red Onion — diced

3 Tablespoons Balsamic Vinegar

2 Tablespoons Brown Sugar

1 – 2 cups Shredded Mozzarella– if you’d like you can also use Fresh Mozzarella –sliced

Directions:

Preheat oven to 425 degrees.

Place Chicken Breasts in a large baking dish or cast iron skillet. Sprinkle with Olive Oil, basil, oregano, garlic powder , salt and pepper

Place halved tomatoes and diced red onion all around the chicken

Sprinkle with balsamic vinegar and brown sugar

Bake for 18-20 minutes depending on the thickness of the breasts. I did app. 18 minutes because these were thin sliced breasts — thicker ones will take a few minutes more

After chicken is cooked through (peek at it with a little slice )sprinkle with the cheese

Set oven to broil and place baking pan on the top rack. Broil for about 5 minutes, or until cheese is melted .

I served with Zucchini noodles and roasted fingerling potatoes.

Delicious!!!


Simple Red Chili — Turkey or Beef

It’s definitely that time of year when you wake up and there is a chill in the air and that signals chili weather in my book . Chili is not an exact science and you can feel free to make substitutions where you like. Obviously the toppings are optional and at your own discretion. Chili is just so easy to make. It sits on the stove or your slow cooker and when you’re ready to eat it, it’s all done. I like chips , taco shells or small soft tortillas with this. I love fresh jalapeno on the side chopped up,  chopped red onion , guacamole, refried beans, etc.  I usually make this one day ahead for a special event. This allows the flavors to all meld together and then I just reheat–couldn’t be easier.

Can easily be made on the stove-top or slow cooker — 2 hours on high and 4 hours on low. It was perfect. First you’ll want to brown up the meat in a pan on the stove. Then dump all ingredients into the slow cooker ( spray first with cooking spray) stir it all up and set it and forget it till you’re ready to eat it. I made this chili in the morning yesterday and it was perfect! With enough leftover for 2 more meals!

This recipe will probably serve 6-8

Ingredients:

2 lbs. ground beef or ground turkey–If I am using ground turkey I prefer ground dark meat if you can find it. It’s much more flavorful . You can use white meat turkey but try for 85/15. That’s 85% white meat with 15% fat. I just find the O% fat to be very dry. Of course these are all personal choices.

2 cloves garlic, minced

1 can (12 – 14 oz) tomato sauce, and then about 1 –  2 cans of chicken broth or water –start with  1 can of broth and only add if you need more

1 can (Ro-tel) diced tomatoes and chili peppers — If you can’t find Ro-tel brand use any brand that has diced tomatoes and chili peppers — again a 14 oz. can

1 can (15 oz.)red kidney beans, drained and rinsed

1 can (15 oz.) pinto beans, drained and rinsed or Cannellini Beans — whichever doesn’t really matter —

1 can yellow corn (optional, but I always like to add it in. If you like corn use a large can (14 oz) if you don’t want as much corn use a small can

1 small can (4 oz.) poblano green chilis, cut up or diced (also in Mexican aisle) if you can’t find just omit it

1 teaspoon ground oregano (I use Mexican oregano. Use it if you can get it. If not, regular is fine.)

1 tablespoon ground cumin

2 tablespoons chili powder

1/2 teaspoon cayenne pepper (I like the heat. This is optional. You can also take down to 1/4 teaspoon.)

1 teaspoon kosher salt (then you will taste for additional salt. I added more when I tasted it . You’ll have to do so at your own discretion

Grated shredded cheddar or jack cheese for serving

diced red onion and diced fresh jalapeno for serving

Tortilla chips, guacamole, sour cream and salsa for serving I also use hot sauce at serving time for those who like it hot and spicy.

*cilantro for topping (I love cilantro so I chop it up and leave it out for individual garnish.)

Directions:

Place the ground beef or turkey in a large stock pot (Le Creuset) and put in the garlic. Cook over medium heat until meat is browned. Drain off any excess fat.  Add in the tomato sauce, chili powder, cumin, oregano, salt and cayenne add all the other canned ingredients –beans, corn etc. Stir together well and bring to a low boil and then turn it down and simmer away for at least an hour. I use the 15 oz. can of tomato sauce as a measuring cup and add 1 can of chicken broth or water , if you’ll need more liquid you can always add a little broth/water at a time. Let simmer for an hour or so, covered, occasionally stirring, and adding liquid if necessary. See note above if you’re using slow cooker.  I usually add salt at this point. Simmer for  hour or so covered. It can simmer for a long while, if you so desire. I actually let it low simmer for a few hours and then if you’re cooking on stove top I heat it up and let it simmer for another hour or so right before serving. Slow cooker is a great way to go here.

Serve with assorted toppings I’ve listed. Cheese, jalapenos, chips, guacamole, salsa, chopped red onions, sour cream  and cilantro. We love small soft tortillas on the side of our chili or chips depending on my mood and what I have in the house.

Chicken with Peach and Sriracha

I posted this recipe once before a while back from Jessica Seinfeld’s cookbook Food Swings. I am re -writing it and re-posting it because I just re-discovered it on my site and it is quite delicious and I think it’s very easy to make and very few ingredients. I usually make it with coconut rice and that recipe is on my site as well, or just plain jasmine rice always works or brown rice or any kind of rice for that matter. Very delicious and add any veggies you’d like. I love recipes where I can add everything to one pan for an easy delicious meal. Feel free to add mushrooms, onions, red bell peppers, box choy, or some shredded brussels available in a bag now. I recommend using chicken thighs for this recipe as they tend to stay nice and tender. Chicken breasts may become dry by the time it has cooked so for me not the best option for this recipe.

It’s a new year so let’s start cooking some new dinner recipes even if they are great “old” recipes.

http://www.jessicaseinfeld.com

Stay Safe Stay Home and Be Well.

Ingredients:

I used all chicken thighs — but you can use whatever you like app. 2 – 2 1/2 lbs. of chicken. I actually made 1 1/2 lb. for the two of us with a little left over for lunch. I used the same amount of sauce. You can add drumsticks, wings , whatever chicken parts you’d like.

1/4 teaspoon kosher salt

1/2 cup peach jam or preserves

1 Tablespoon grated fresh ginger–Using a vegetable peeler , peel the ginger and cut off any small knobs before you peel. (start out with app. a 2 ” piece of ginger–that should do it)

1 Tablespoon Sriracha Hot Sauce — this recipe is not spicy despite the use of this sauce

1 Tablespoon tamari or soy sauce — I like to use reduced sodium but use whatever you have

3 scallions, thinly sliced

*1/4 cup chopped peanuts, salted regular Peanuts for serving and this is optional

Directions:

Pre heat the oven to 425 degrees — rack should be in the center of the oven

Pat chicken dry with some paper towels.

I sprayed my rimmed baking sheet with cooking spray –this is a very sticky sauce and you’ll want to spray well if no cooking spray line with aluminum foil

In a large bowl, mix together the peach preserves, Sriracha and soy sauce. Add the chicken pieces and toss to coat.

Arrange the chicken on rimmed baking sheet or a large baking dish and pour any remaining sauce over the chicken pieces. I also added a little water (1/4 cup) to sauce in pan

Roast for 35- 40 minutes depending on the size of your chicken pieces. After 20 minutes check to make sure sauce isn’t burning and if it’s very dry add a little more water to pan. Sauce simmers away but you don’t want it to burn. Continue to roast for another 20 minutes or so until the chicken is cooked through. I used a meat thermometer and it was at 165 degrees so the chicken was done.

Cook the coconut rice if you’d like or any other kind of rice . Plate up the chicken over the rice and spoon any sauce over the chicken. Sprinkle with the scallions and chopped peanuts if you’d like and Enjoy!


Butternut Squash and Farro Salad

This salad came together in a wonderful way. I have made Butternut Squash Salads before but not this way. I am not gonna lie it has a bit of prep work, some of which can be done ahead of time. You can make it all ahead of time and just put together right before you’re going to eat it. I was serving for lunch so just woke up early and did it all except for the Farro which I made the night before. I know this salad seems complicated but it’s really not. I promise.

This salad is delicious as is for the vegetarians or add some grilled chicken, steak or fish for a complete meal. I added grilled chicken for this lunch.

As long as you don’t dress the salad you’ll have yummy leftovers. Arugula may get wilted so I don’t add till right before serving.

Delicious meatless meal as is.

This is how I did it — Enjoy!

Ingredients:

1 lb. butternut squash — cubed into small 1/2″ cubes ( see photo)

1 cup Farro cooked — I probably used about 1 1/2 cups for salad

4 Tablespoons sherry vinegar– divided

Cayenne Pepper

1/2 cup dried cherries or raisins / craisins , cranberries or whatever dried fruit you prefer– I used cherries because I like them bestie a salad but golden raisins or any dried fruit would be fine

1/2 cup walnuts, toasted and coarsely chopped

2 large shallots, sliced thinly

5 Tablespoons olive oil plus — 3 for dressing and 2 for butternut squash / shallots

Kosher Salt and freshly ground black pepper

3 oz. smoked gouda — small diced pieces — you can use whatever cheese you like and as much or as little as you like I happen to buy smoked gouda and it worked out perfectly

Arugula — I prefer baby arugula if you can find it — I used app. 3 cups but feel free to add as much or as little as you like here

Salad Dressing:

4 Tablespoons Sherry vinegar – divided — 2 for soaking dried fruit and then 2 more for dressing

  • see directions below

2 teaspoons grainy mustard

3 Tablespoons of Olive Oil

pinch of Cayenne Pepper

Kosher Salt and Pepper

combine all ingredients whisk together and emulsify and add a pinch of cayenne pepper and a little salt and pepper

Directions:

Pre-heat oven to 375 degrees. Toss squash and sliced shallots in a bowl with about 2 Tablespoons Olive Oil add salt and pepper and spread evenly onto a sprayed baking sheet. Bake until tender and browned , about 30 – 40 minutes . Set aside to cool when done.

Put the cherries or whatever dried fruit you’re using in a small shallow bowl with 2 Tablespoons of the Sherry Vinegar and let sit for at least 15 minutes– let them soak just toss them every once in a while. Remove the cherries after 15 minutes and drain them with a bowl underneath to reserve the liquid — you should have 2 Tablespoons and add 2 more Tablespoons of sherry vinegar and follow above directions for the dressing.

Cook the Farro — I made 11/2 cups and that’s all you really need is 1 to 1 1/2 cup cooked farro

Let the farro and the squash cool down completely. Mix in a big bowl with cheese, walnuts, dried fruit, and right before serving add the arugula so it doesn’t wilt . Add as much or as little of the arugula as you want.

I let everyone add their own dressing or you can dress salad and serve. I also added grilled chicken which of course is your call.

I would say this salad serves 4-6 .

Maple – Dijon Chicken with Brussels Sprouts and Butternut Squash.

Here’s a recipe that I absolutely loved making and loved eating! Tasty and Easy and anyone can do it. All it took was a few pantry ingredients that almost everyone has in their home.

I just love one sheet meals — another reason to go out and buy a large sheet pan if you haven’t done so already. 18 x 13 is the size you’ll need because if you crowd the ingredients they end up steaming and not really roasting. Roasting is what you’re after here.

I chose Chicken Thighs because they can stand up to the cooking time along with the veggies. I didn’t use Drumsticks but you certainly can use both. If you insist on white meat you’ll have to remove chicken earlier than veggies or you’ll have dried out chicken for sure.

Enjoy this lovely sheet pan meal and add Brown Rice or White Rice or Rice Pilaf or any rice is kind of perfect here. Basmati and Jasmine are also perfect.

Please follow my blog on Instagram @cookingwithcandi— thanks

Ingredients:

2 Tablespoons Reduced Sodium Soy Sauce

4 Tablespoons Dijon Mustard, plus 1 Tablespoon

3 Tablespoons Pure Maple Syrup, plus 1 Tablespoon

6 large bone in chicken thighs skin on ,or use 4 thighs and 4 drumsticks or whatever pieces you’d like

Kosher Salt and Freshly Ground Black Pepper

app. 12 ounces butternut squash, peeled, seeded and cut into 3/4 inch cubes

app. 12 ounce Brussels Sprouts, trimmed and halved

6 sprigs of fresh thyme or dry thyme if you don’t have fresh

2 Tablespoons Olive Oil

and you’ll need some cooking spray — you can use Olive Oil spray or just regular spray

Directions:

Preheat the oven to 425 degrees. Spray an 18 x 13 inch large rimmed sheet pan

In a bowl that is large enough to put the chicken thigh in combine the soy sauce, 4 Tbsp. of the Dijon Mustard and 3 Tbsp. of the pure Maple Syrup and 2 Tablespoons of Soy Sauce

Season the chicken all over with Salt and Pepper and then I like to dip my chicken into the mustard mixture and place on prepared baking sheet

In a large bowl combine the Brussels sprouts, butternut squash, thyme, and olive oil, season with a sprinkling  of salt and pepper here too. (lightly)

Arrange the vegetables on the baking sheet around the chicken. Pour any left over Dijon-Maple -Soy sauce over the chicken and pour any remaining sauce over the veggies.

Bake until the chicken is cooked through and the veggies are tender, app. 35-40 minutes. Look at the chicken after 30 mins. I cooked for 35 minutes and it was browned up rather nicely.

Meanwhile, whisk together the remaining 1 Tbsp. Dijon and 1 Tbsp. Maple Syrup and remove chicken from oven.

Brush the remaining mixture over the chicken. Bake a few more minutes till browned and perfect looking if not browned nicely you can place under broiler for a minute or so. I have never had to do this but some ovens are different than others.

*next time out I am going to try this sauce on boneless , skinless chicken thighs — it’s gotta be good!

Serve alongside some brown rice or any rice you’d like.

Amazingly Delicious.

Maple Dijon Chicken with Brussels and Butternut Squash

Making Pizza at Home with store bought dough in a sheet pan

Making pizza at home with store bought dough is one of my favorite things to do. It’s easy once you get the hang of the dough and I found a few tricks along the way which help make it easier. The real trick to the dough is letting it rise and come to room temperature. If you try to work with cold dough out of the fridge it won’t work . You will need a rimmed sheet pan as well. I keep some dough in the freezer and take it out the night before and let it defrost in the fridge and the next day about 4 hours before I am using I place it on the counter ( in the sun even better) and let it rise and come to room temperature. There are many places to buy dough and you’ll have to find the best one by your home. I buy in Whole Foods when I am in Colorado and in NY Trader Joes , Whole Foods and your local pizza place or bakery will probably be happy to sell you a ball of dough. .Dough will need at least 3 – 4 hours to rise outside of the fridge. Nothing will happen to it so just set it out on the counter — I open the bag and let it rise away. My ingredients are simple and if you follow instructions you should be fine. Don’t be discouraged if the first few times it doesn’t come out perfectly — it took me a few times with the dough to really get the hang of it. Give it a try!

This is what I do and these are my instructions:

Ingredients:

1 bag Pizza Dough — for 4 people I make for 2 and we always have extra slices

16 oz. Pizza Sauce — if I have homemade I use that if not I always have a jar of Raos Arrabiata or Marinara on hand

Italian Seasonings — dry app. 2 tsp. you’ll have to eyeball it

flour for stretching dough — this is a must

Olive Oil Spray for spraying baking sheet — I like this better than using olive oil — either one will work on baking sheet

Parmesan Cheese

Shredded Mozzarella — app. 8 oz. more or less

Directions:

Let dough rise. Read notes above. Keeping the store bought dough on a counter for at least 3 hours or more. It will keep rising in the bag so I usually open the bag to give it room to rise. If you’re defrosting it do so overnight in fridge and then take it out the next day. You’ll notice it rising in fridge ( at least it should)

Pre-heat oven to 450 degrees — very important to get oven hot so make sure you’re oven is pre-heated

Spray baking sheet with Olive Oil Cooking Spray or using a brush lightly coat bottom of baking sheet with Olive Oil . I use a 12x 17 rimmed baking sheet . You don’t need a pizza stone.

Stretch the dough. On a clean surface ( counter top ) I put down a light amount of flour (enough for both sides) and you can always add more , the flour will help to expand the dough. Place raw dough on top of flour, coating each side. Begin stretching the dough by pinching the outside in a circular motion to spread it out. I put my fists under the dough to stretch ( you don’t need a rolling pin) You can alternate between pinching the dough with your finger, pressing it out on your work surface, and using your knuckles to pull the dough from underneath in circular motions. Usually a few motions will get the dough stretching. When it’s large enough gently transfer to the prepared sheet pan. I spread it out thin in center and more dough around perimeter ( crust) if there are holes in your dough pinch together dough or fold over the dough in that spot and get rid of them . I spread it out all the way to cover entire baking sheet . Don’t worry about your dough being a perfect shape. All pizza is delicious and beautiful.

Bake the naked pizza dough in the oven at 450 degrees for 7 minutes. During this time prep your toppings. I am sort of a purist so it’s sauce, cheese , and seasoning. Never add the toppings to raw pizza dough.

After par-baking the pizza dough, remove from oven and raise temperature of oven to 500 degrees. ( make sure it gets to 500) I add my sauce — spreading it out on dough, I leave a little room around perimeter ( see photo) , dried Italian seasoning ( if you’re using) parmesan cheese and mozzarella cheese . Obviously if you have other toppings you want to use this is the time to add.

Bake the pizza at 500 for another 10 minutes — all ovens vary so check on it after 7 minutes.

I like my cheese fully melted and a little brown in spots. Let it cool off for a few minutes before slicing .

I use a pizza cutter and get 8 slices .

Let me know how this comes out — tag me on Instagram story — I would love that.

these are some photos from current pizzas and past pizzas–sometimes they come out better looking than other times but they always taste incredible! No such thing as an ugly pizza in my book.