Crispy Parmesan Sweet Potatoes

Thanks to my friend Leslie for this delicious recipe. So great when friends share their delicious recipes with you and you love the recipe so much that you are making it on repeat and now I’m sharing with all of you.

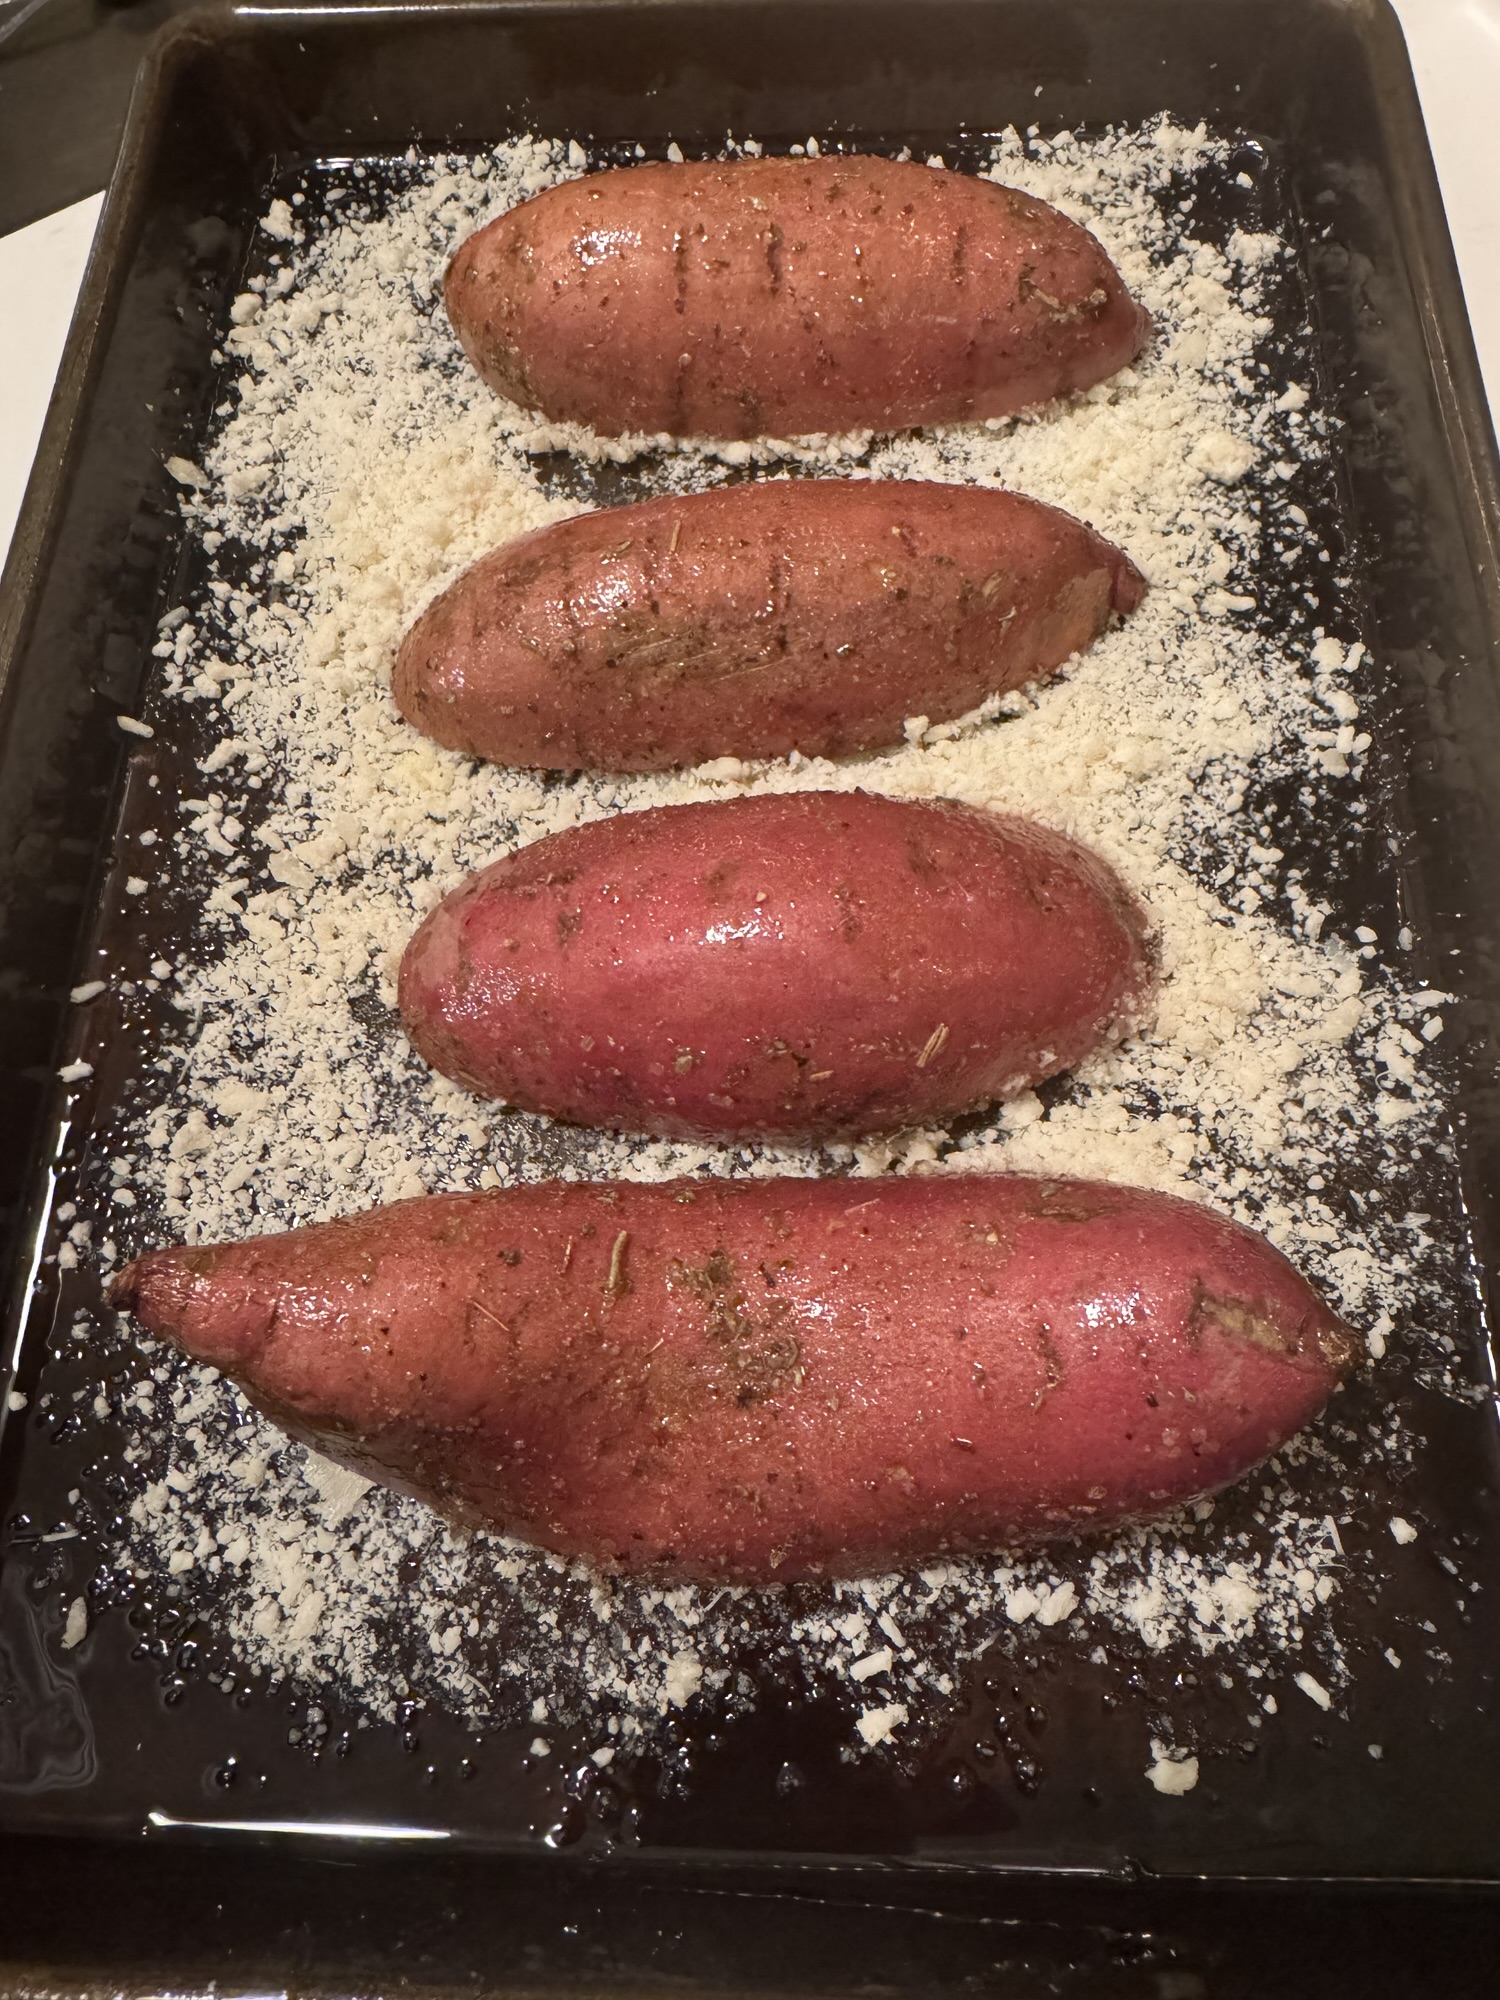
These are cheesy and crispy on the outside and soft and mushy on the inside — just like a sweet potato should be.

The first time I made these I didn’t use parchment paper but I think I would use all the time in the future. I sprayed the baking sheet and it was fine and came out easily enough but I believe parchment paper is the way to go– I would however still lightly spray the bottom of your baking pan before placing the parchment paper which can help it stay in place . Parchment paper is designed to be non-stick so spraying it would be redundant. As you can see in photos some of the cheese fell off but it’s ok because they were delcious anyway.

This is easy to make and delicious to eat and highly recommend if you love Sweet Potatoes and you love Parmesan Cheese.

*little hack that I was unaware of that I’m passing on to all of you– when I went to my local cheese shop to buy grated parmesan cheese the owner happened to be there and he told me after I use grated cheese put it in the freezer , it will not freeze. When I need it again just take out of freezer and use and return un used cheese to freezer. It will not go bad!!!!!! as it often does once it is opened and expiration date is only for a few weeks. This is a great little hack one I will use from now on.

Ingredients:

4 small sweet potatoes -just buy potatoes that can be cut in 1/2 the long way sometimes it’s tough with “knobby” ones

2 Tbsp. Olive Oil

1/2 tsp. garlic powder

1/2 tsp. Italian seasoning

1/2 cup -3/4 cup finely shredded parmesan

Kosher Salt and Coarse Black Pepper

Directions:

Pre-heat oven to 400 degrees and line a baking sheet with parchment paper or just spray with baking spray

In a small bowl I mixed olive oil, garlic powder and Italian seasoning

Place your cut sweet potatoes in a large enough bowl to fit all of them — pour olive oil mixture over them mix well getting olive oil all over the sweet potatoes — sprinkle with some salt and pepper and let them sit for a minute while you prep pan

Sprinkle parm cheese evenly onto prepared baking sheet – place sweet potato halves cut side down on top of parmesan

bake for 30-40 minutes till sweet potatoes are tender and bottom layer of cheese is crusty and deeply browned.

Remove and let cool a little bit before serving!

I wish I had better pictures but you get the picture.

img_5356
img_5358-1

Happy Holidays to all.

Chicken with Peach and Sriracha

I posted this recipe once before a while back from Jessica Seinfeld’s cookbook Food Swings. I am re -writing it and re-posting it because I just re-discovered it on my site and it is quite delicious and I think it’s very easy to make and very few ingredients. I usually make it with coconut rice and that recipe is on my site as well, or just plain jasmine rice always works or brown rice or any kind of rice for that matter. Very delicious and add any veggies you’d like. I love recipes where I can add everything to one pan for an easy delicious meal. Feel free to add mushrooms, onions, red bell peppers, box choy, or some shredded brussels available in a bag now. I recommend using chicken thighs for this recipe as they tend to stay nice and tender. Chicken breasts may become dry by the time it has cooked so for me not the best option for this recipe.

It’s a new year so let’s start cooking some new dinner recipes even if they are great “old” recipes.

http://www.jessicaseinfeld.com

Stay Safe Stay Home and Be Well.

Ingredients:

I used all chicken thighs — but you can use whatever you like app. 2 – 2 1/2 lbs. of chicken. I actually made 1 1/2 lb. for the two of us with a little left over for lunch. I used the same amount of sauce. You can add drumsticks, wings , whatever chicken parts you’d like.

1/4 teaspoon kosher salt

1/2 cup peach jam or preserves

1 Tablespoon grated fresh ginger–Using a vegetable peeler , peel the ginger and cut off any small knobs before you peel. (start out with app. a 2 ” piece of ginger–that should do it)

1 Tablespoon Sriracha Hot Sauce — this recipe is not spicy despite the use of this sauce

1 Tablespoon tamari or soy sauce — I like to use reduced sodium but use whatever you have

3 scallions, thinly sliced

*1/4 cup chopped peanuts, salted regular Peanuts for serving and this is optional

Directions:

Pre heat the oven to 425 degrees — rack should be in the center of the oven

Pat chicken dry with some paper towels.

I sprayed my rimmed baking sheet with cooking spray –this is a very sticky sauce and you’ll want to spray well if no cooking spray line with aluminum foil

In a large bowl, mix together the peach preserves, Sriracha and soy sauce. Add the chicken pieces and toss to coat.

Arrange the chicken on rimmed baking sheet or a large baking dish and pour any remaining sauce over the chicken pieces. I also added a little water (1/4 cup) to sauce in pan

Roast for 35- 40 minutes depending on the size of your chicken pieces. After 20 minutes check to make sure sauce isn’t burning and if it’s very dry add a little more water to pan. Sauce simmers away but you don’t want it to burn. Continue to roast for another 20 minutes or so until the chicken is cooked through. I used a meat thermometer and it was at 165 degrees so the chicken was done.

Cook the coconut rice if you’d like or any other kind of rice . Plate up the chicken over the rice and spoon any sauce over the chicken. Sprinkle with the scallions and chopped peanuts if you’d like and Enjoy!


Pure Wow Dump Cake aka Chocolate Bundt Cake

IMG_5877 pre glaze
IMG_6406 Heavier Type Glaze–same glaze just waited till cake was completely cooled down for a few hours. Yum!
IMG_5879 post glaze but most of the glaze will disappear into the cake unless you make a heavier frosting type glaze.

IMG_5875  If you’re looking for a last minute easy delicious cake for the holidays this could be the one. I love a great bundt cake and I love that they are now calling Bundt Cakes Dump Cakes. You really just throw it all together and bake it! It’s so easy anyone can do it and look good doing so. I got this particular Dump Cake from a blog I love to follow–Pure Wow so that’s why the name pure wow dump cake. Originally posted a few years back and am re-posting for those of you who haven’t seen it.   I made a change in that I added my vanilla glaze because I love a good chocolate cake infused with a glaze. It’s not really a frosting and it sinks into the cake which just gives it a little more “pure wow ” factor.  I included recipe for my Vanilla Glaze.

Just go out and buy a really good Bundt Pan, it’s a worthwhile investment. You’ll also need a cooling rack while you’re at it.

Happy Holidays from my kitchen to yours.

http://www.purewow.com

Ingredients:

2 cups sugar

3/4 cup brewed coffee

2 ounces unsweetened chocolate

1/4 cup cocoa powder

1 stick unsalted butter

2 cups all-purpose flour

1 1/2 teaspoons baking soda

1 1/2 teaspoons baking powder

1 teaspoon salt

1 cup buttermilk ( I do buy low-fat buttermilk, if you can find it)

2 eggs — room temperature for baking always (unless otherwise specified)

1 1/2 teaspoons pure vanilla extract

Vanilla Glaze Ingredients:this is totally optional

2/3 cup of confectioners sugar

4 teaspoons whole milk ( and maybe a touch more)

1 teaspoon vanilla extract

Directions:

Preheat the oven to 350 degrees.

Grease a Bundt Pan with non-stick spray ( I love Baker’s Joy)

In a medium size heat safe bowl, combine the sugar with the coffee, chocolate, cocoa powder and butter. You can heat in the microwave or on the stove top over a pot of simmering water ( about 5 minutes) that’s what I do. I mix occasionally until the butter and the chocolate are fully melted and the sugar dissolves.

In a large bowl, whisk the flour with the baking soda, baking powder, and salt to combine. Add the chocolate mixture to the dry ingredients and mix to combine. I let the chocolate mixture cool just a touch first.

Now add the buttermilk, eggs and vanilla and mix with a spoon until the batter is smooth and fully combined.

Pour the mixture into the prepared bundt pan and bake until a toothpick inserted into the center comes out clean, 40- 50 minutes. I let the cake sit for at least 15 minutes and while it’s still warm I inverted it onto a cooling rack ( which is essential to baking , so if you don’t own one get one)

I let the cake cool completely before glazing it. The glaze will melt right into the cake if you do too early. This cake was super light and super moist. I served with raspberries/strawberries and it would be awesome with some home-made whipped cream.

Saucy Stuffed Shells – Baked and Meatless

Shells 007
Shells 009

  I just love a baked pasta — nothing like it for good old fashioned comfort food. This recipe is delicious and perfect comfort food for those cold winter nights. I wanted a crowd pleaser that was vegetarian and something that can easily be made ahead and frozen and that would appeal to both kids and adults equally.

     I served with a salad with my Homemade Maple Syrup Salad Dressing ( see on blog) and it was really pretty awesome. Took a few hours to prepare, mostly because I made my own sauce ( Sunday night sauce) but feel free to use a jar of prepared sauce if you’d like. This is a perfect meal to make ahead of time, and just pop into oven.

*This dish will stay fresh in the freezer for up to 3 months. Assemble the shells with the cheese and cover tightly and freeze. When you’re ready to eat, you can bake from frozen but be sure to add another 30 minutes to the cooking time. You can also freeze individual sized portions of leftover shells that have already been cooked. Reheat previously baked shells in the microwave in 90 second intervals until heated through. 

Perfect for Christmas and New Years.

Of course if you love it with meat you can make a meat sauce and follow same directions.

Happy Holidays to all — and visit me on Instagram @cookingwithcandi

Ingredients:

1 box Jumbo Shells ( you won’t use all but a lot of them break, etc.)

1 lb. Ricotta ( I used Part Skim)

1 Egg

1 lb. Mozzarella Shredded ( I used Part Skim) if you can obtain fresh mozzarella and shred it that would make it even better! whatever works for you

1 cup grated Parmesan ( any kind you like)

1/4 cup chopped flat leaf parsley

Salt and Freshly Ground Black Pepper

*marinara sauce or any red sauce I made my own and use my own recipe. If buying sauce and there are some delicious good sauces out there, you’ll need at least 1 large jar of Sauce and my go-to if not using my own is Raos Marinara.   It’s nice to have a little extra sauce in case you need it when you re-heat the stuffed shells. 

Directions:

Preheat oven to 375 degrees.

Prepare Pasta , cook for between 12 and 15 minutes, you’ll want them soft but not undercooked at the center. Drain pasta and cool for easy handling.

Combine ricotta, 1/2 of the mozzarella, 1/2 of the Parmesan, parsley and egg in a bowl. Taste for Salt and Pepper.

When shells have cooled down, fill them with rounded spoonfuls of cheese mixture and arrange them seam side down in casserole dish. I used a 9 x 13 Pyrex and spray with cooking spray. Top Shells with remaining sauce and remaining mozzarella and grated cheese. Place shells in very hot oven . You can turn on broiler for last few minutes , it should be slightly browned and bubbly. Let cool for a few minutes before serving.

Delicious!

Clams and Spaghetti–White Sauce

I made this recipe for the first time back in 2014 and highly recommend it for a quick and delicious meal.IMG_6286IMG_6287 (2)IMG_6283 (2)
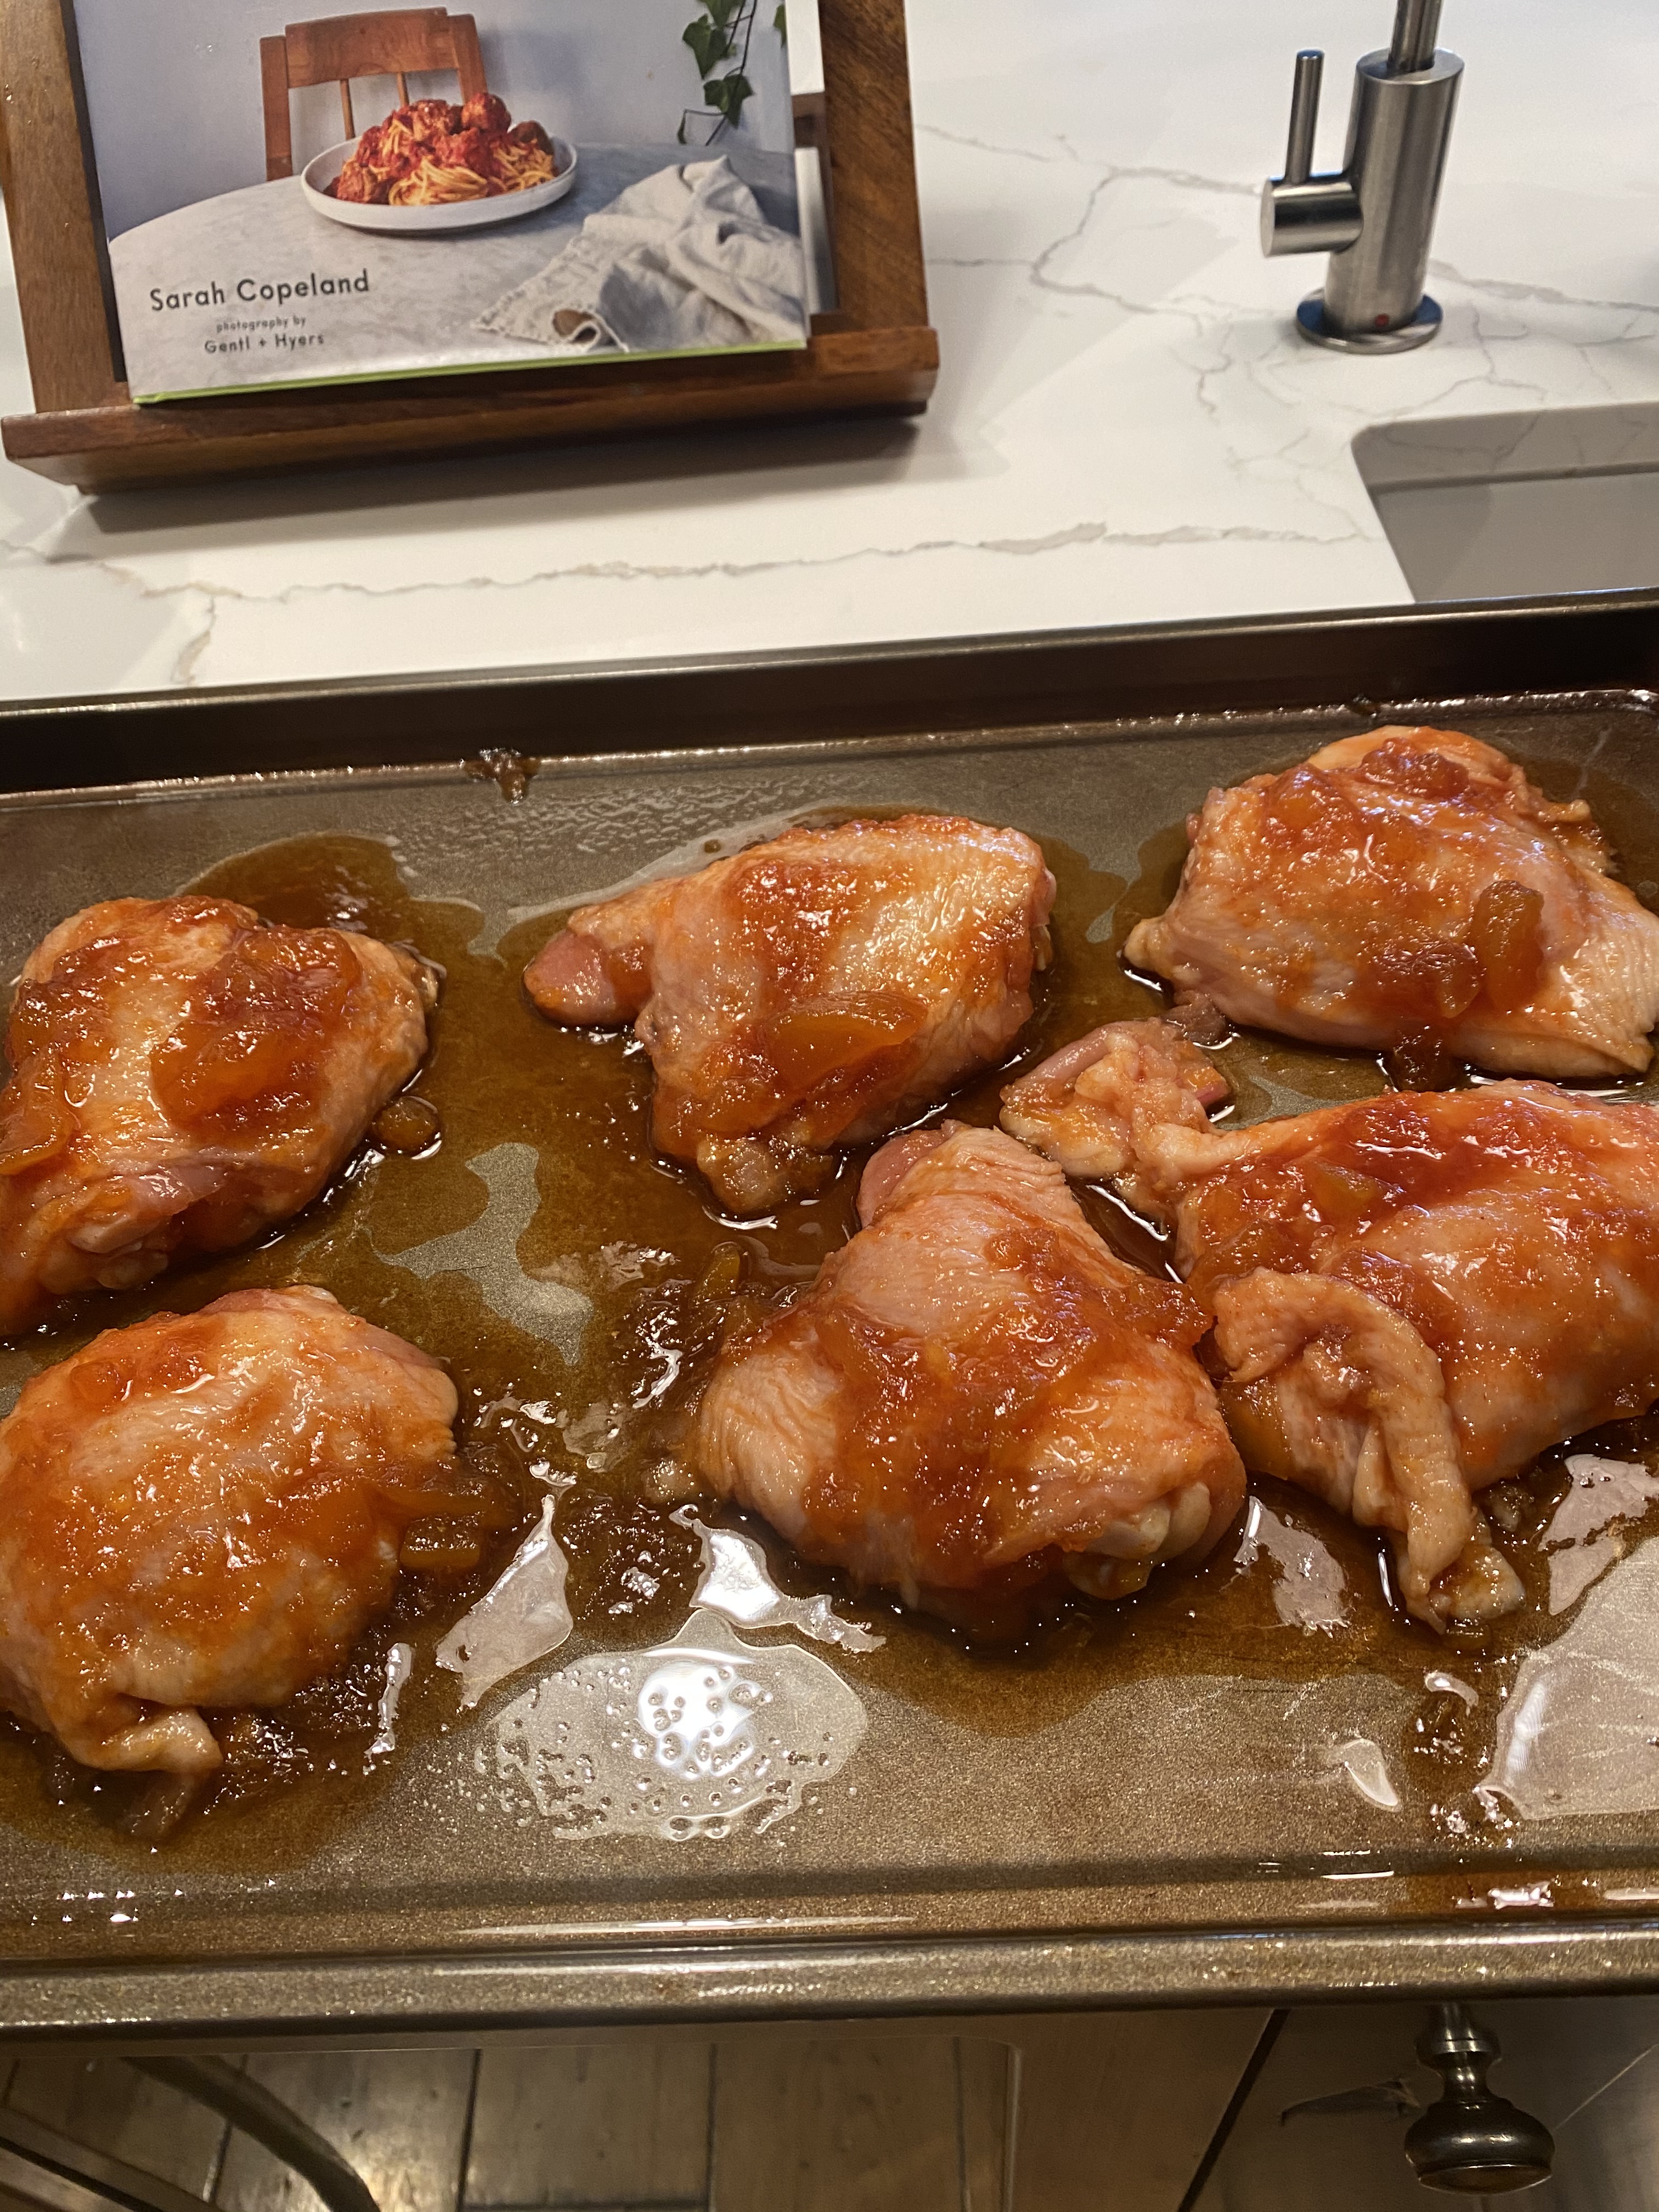
It is super easy and not intimidating at all. I got the recipe from Jessica’s Seinfeld’s book The Can’t Cookbook even though I know how to cook.  

Pick up Clams at your local fish store and just follow instructions for cleaning. I love Clams and Spaghetti and this is so easy to make you won’t believe it!

Perfect for Christmas dinner or any time —

http://www.doitdelicious.com this is Jessica Seinfeld’s site or you can just buy the book “The Can’t Cookbook”.

Ingredients:

2 dozen littleneck clams

3 cloves garlic

app. 1/4 cup chopped fresh flat-leaf parsley

1 cup dry white wine, such as Sauvignon blanc. I actually used what I had open which was a Pinot Grigio

1 box spaghetti, you can use any kind of spaghetti you like. I actually had bucatini style in the house so that’s what I used

3 Tbsp. Olive Oil

*if you’d like a little heat and you should know your audience because mine didn’t so I put on table for those who wanted to add heat. If you are adding add app. 1/4 tsp. crushed red pepper

Kosher Salt , to taste. I have to say I added almost no extra salt at all.

You’ll need a large deep pot to cook clams in. I used my Le Creuset Pot.

Directions:

I placed my clams in a colander and I put the colander in a larger bowl in the sink and I filled the bowl with cold water. I let the clams soak for a few minutes, then rubbed with my fingers to dislodge any dirt; then drained the clams. Throw away any clams that remain open or were smashed. ( my clams were pretty clean) I purchased them clean from Whole Foods. Any Fish Store will clean them for you, but always run them through this process to remove any residual sand, etc.

Smash the garlic and chop it . Chop the Parsley. Measure the Wine. Place all your ingredients near to the stove.

Cook Pasta according to directions on box.

Place a large pot on the stove and turn the heat to medium. Pour in 2 Tbsp. of Olive Oil until it heats up and shimmers ( a few minutes) Add chopped garlic to the pot, and cook , stirring , for at least a minute, until you can actually smell the garlic breaking down. Don’t Burn!!!! Now add the wine and the clams and cover the pot with a tight-fitting lid and you’ll want a fairly high flame, probably medium-high . Cook clams until they open, I probably cooked for about 10 – 12 minutes. Looked so beautiful! Add the parsley and the red pepper now if you’re using. Throw away any unopened clams, they are no good.

Once pasta is al dente and drained I transferred to a large serving bowl and added 1 Tbsp. of Olive Oil to pasta, top with clams. Sprinkle if you’d like a tiny bit of coarse salt now if you feel it needs it. I did not need to add any additional salt or pepper. Adjust to your taste.

Amazing!!!! and did I mention Super Easy!!!!!

Italian Wedding Soup made with Chicken Meatballs

It is most definitely soup season again. the chill in the air makes it the most perfect time of year to start making soup for dinner again. even if you live in a warmer climate this is a most wonderful meal. Paired with a salad and some crusty bread you have a very heartwarming meal.

Italian Wedding Soup with Chicken Balls

This is one of my absolute favorite recipes. It is a soup , which is also a full meal. It is hearty and pretty healthy.  It is one of my staples from September through April. It freezes well and you can just take it out of the freezer the night before, and you’ll have a wonderful meal the next evening. When you defrost it you will probably want to add broth/water to it. add a little at a time till you get the consisitency you like. Enjoy:)

Ingredients: chicken meatballs

1 lb. ground chicken–I prefer chicken to turkey but you can use turkey as well!

1/2 lb chicken sausage, casings removed–if you can’t find chicken sausage use pork sausage it’s delicious! 

3 slices whole wheat bread for bread crumbs ( I put into food proccesor with steel blade for crumbs) I remove crusts it should be app. 1 cup of bread crumbs or if you’re feeling lazy try Panko

2 teaspoons minced garlic ( 2 – 3 cloves)

1/4 cup grated Pecorino Romano ( fresh is best) but whatever you have will do

1/4 cup grated Parmesan ( again nothing beats fresh) but whatever you have will do here as well

3 tablespoons milk

1 extra large egg, lightly beaten

1 teaspoon kosher salt

1/2 teaspoon freshly ground black pepper

Soup Ingredients:


2 tablespoons olive oil

1 small -medium yellow onion minced

1 cup diced carrots ( 3 )

1 cup diced celery (2 stalks)

10 cups chicken stock

1/2 cup dry white wine( use whatever you have open)

1 cup small pasta tubetini, ditalini, stars, elbows etc. 

5 ounces fresh spinach, washed and trimmed

*fresh dill ( I love the flavor) add at your own discretion about 1/4 cup minced fresh dill.

Directions:

preheat the oven to 350 degrees  put parchment paper on a cookie sheet.

for the meatballs, place the ground chicken, sausage,bread crumbs, garlic, Pecorino, Parmesan, milk, egg, salt and pepper  all in a bowl and mix well with a fork.  I use a teaspoon, and make 1 to 1 1/2 inch balls and drop onto parchment paper lined cookie sheet. you should have about 30 to 40 small balls. bake for 25 – 30 minutes, until cooked through and lightly browned. set them aside. (I made about 30 balls, they were a little larger this time out)

For the Soup:

 heat the olive oil over medium – low heat in a large heavy bottomed soup pot ( Le Creuset type pot) Add the onion, carrots, and celery and saute until softened, about 10 minutes, don’t brown. Add the chicken stock and wine and bring to a boil, at this point I let soup cook a while to soften the vegetables, app. 1 hour. ( a low simmer) if you’re in a hurry you can probably do the whole soup in 1/2 hour , veggies will be soft enough to eat. if some of the liquid evaporates you can always add a little more broth.

chicken balls out of the ovenItalian Wedding Soup cooking

 Add the pasta to the simmering broth and cook another 6 – 8 minutes, until the pasta is tender. Sometimes I just cook the pasta up in a separate little pot and pour the soup over the pasta when I plate it up, this helps with the freezing just the soup and meatballs and the pasta stays al dente. Add the meatballs and simmer for another minute or so. taste for salt and pepper. Stir in the fresh spinach and cook for another minute or so, the spinach will just wilt. Ladle into soup bowls and serve with freshly grated Parmesan cheese.

Sheet Pan Chicken Thighs with Mustard -Lemon and Garlic with Brussels

Very delicious weeknight meal for the family or for just you! It’s easy and all in one pan with Brussels and red onions. Easy to put together, just try and marinate chicken for how ever long you can — at least 30 minutes and up to 48 hours in the fridge. The marination process is key — I did it for about 6 hours in fridge and removed from fridge to bring to room temperature before cooking.

I don’t recommend using chicken breasts in this recipe as they tend to dry out. So use chicken thighs to get juicy and delicious tasting chicken.

Enjoy this meal bursting with flavor!

You’ll need a rimmed sheet pan, a large glass bowl, a small bowl, and I recommend using a kitchen thermometer which if you don’t have one you should own for cooking chicken.

Ingredients:

2 pounds of chicken thighs ( about 6 ) bone in , skin on

3 Tablespoons Olive Oil ( divided)

1 Tbsp. Italian Seasoning ( available dry in most supermarkets)

2 tsp. Kosher Salt

app. 1/2 ground black pepper

2 Tbsp. fresh Lemon Juice

1 heaping Tbsp. Dijon Mustard

1 heaping Tbsp. stone ground Mustard

app. 10 oz. Brussels sprouts trimmed and cut in half if very large cut in 1/4s and if very small leave whole

1 Red Onion cut into 8 wedges

6 cloves garlic minced

Directions:

To marinate the chicken, pat dry the chicken and put in a large bowl. In a smaller bowl add 1 Tbsp. Olive Oil, Italian seasoning, 1 teaspoon kosher salt, freshly ground black pepper, lemon juice , dijon mustard, stone ground mustard. I whisk it all together and pour over the chicken in bowl and with clean hands squish around the chicken and cover and place in the fridge. Take out of fridge and bring to room temperature before putting into the oven (probably a 1/2 hour)

Pre heat oven to 400 degrees

I spray baking sheet with cooking spray first, then place trimmed and halved Brussels sprouts on the sheet pan. I then put 6 garlic cloves in mini processor and add 2 Tablespoons of Olive oil to processor and when this is done pour over the Brussels and coat well and sprinkle the remaining 1 tsp. kosher salt and some freshly ground black pepper to them.

Place marinated chicken thighs skin side up on the sheet pan moving Brussels and onions around so the chicken touches the sheet . (see photo)

Bake uncovered at 400 degrees F. for 30 minutes then crisp the skin up and brown it under the broiler. I did it for about 4 minutes till I obtained a nice crispy skin. Check chicken temperature before serving but it should be 165 and perfect!

Served over rice and it was delicious.

img_5094
img_5096
img_5092

Easy Chicken Soup with Orzo and Lemon

photo 4 (24) photo 5 (27)I literally started this soup at 5 p.m. and app. one hour later I was eating it.  Now that’s always a good thing in my book. Usually I slow cook my broth etc. and it takes hours ( Homemade Chicken Soup ) but this time there was no time, I wasn’t feeling great and wanted that homemade flavor without all the work . You can certainly cook your own chicken if it works out for you time wise. This would also be perfect with leftover chicken. I bought a rotisserie chicken and this is what I did. For those of you who saw it on Instagram and Facebook–this one’s for you. One more little thing, the fresh dill is the secret ingredient and gives it that wonderful layer of flavor, don’t skip it. I also squeezed fresh lemon into each bowl of soup , this added yet another wonderful layer of flavor to this soup. This is also a fairly low-calorie soup because whole soup is made with only 1/2 cup of orzo and it was plenty. I used these vegetables this time but feel free to add parsnips, mushrooms, kale or any other veggies you like.

Ingredients:

1 Rotisserie Chicken, skin removed and shredded .

1 tablespoon olive oil

1 leek, white and pale green parts only, halved lengthwise, then sliced crosswise about 1/2″ thick

2 stalks celery, sliced into 1/2″ thick slices (app.)

2 large carrots cut into 1/2″ rounds. I found beautiful organic baby carrots and used them, it’s about 2 large carrots but feel free to use a little more or less.

1/2 cup of orzo

6 – 8 cups chicken broth, if you have homemade broth/stock good for you and use it. If not the box ones are awesome. Low-Sodium is good here if you’re concerned about the salt.

Kosher Salt and Freshly Ground Black Pepper

app. 1/4 cup of chopped fresh dill

*Lemon halves for serving

Directions:

Heat olive oil in a large heavy pot over medium heat. Add the leek, celery and carrots. Cook veggies, stirring often, until vegetables are soft, 10-15 minutes. I threw a little salt and pepper in to vegetables during this period, you can taste for salt and pepper again.

Add 6 cups of chicken broth and bring to a boil. Then lower to a simmer for about 20 minutes, just till carrots are soft.

After about 20 minutes, I added 1/2 cup of orzo and cooked for 8- 10 minutes. Taste for Salt and Pepper. I added another 2 cups of broth after the orzo cooked. If you need more broth prior to this you can easily add before the orzo as well.

I then added the shredded chicken and dill and I also added a bit more of the chicken stock at this point since broth cooked down a bit. You can always add a little water if you’ve run out of broth.  I heated soup a bit more and served with lemon halves, squeezing a bit of lemon into each bowl of chicken soup before serving.

this was last night’s soup and I obviously didn’t have fresh Dill in the house which I missed but wanted to make this soup and had all other ingredients — sometimes this happens and it was totally delicious and no one missed the Dill but me.

  Spaghetti Carbonara–After Thanksgiving Pasta

It’s December 1 and we’re back home after a wonderful time at our daughter and son in laws house for Thanksgiving in Washington D.C. While I didn’t make the whole dinner I helped out where I could and somehow ended up in the market numerous times. It’s Sunday and I want to eat home tonite so I decided to make dinner.

Now I was really craving pasta but absolutely had to make it from what I had in my house because I am not going near a supermarket for at least a few more days. So few ingredients for such a perfect pasta.  I had pasta, eggs, and I always have pancetta in my freezer.  Real carbonara recipes do not contain cream contrary to many recipes , however I did have a tiny bit of heavy cream in the fridge and I like the silky texture of it so I added a little bit, it is totally optional as recipe shows but I like it.  This is a wonderful warming pasta for the cold nights ahead.

*serves between 4-6 depending on who’s eating it

Ingredients:

1 lb. dry spaghetti ( I love bucatini or perciatelli ) I like the ropey pasta , but use whatever you have in the house, any spaghetti will work.

2 tablespoons extra-virgin olive oil

4 oz. chopped pancetta ( I buy it already diced and keep it in the freezer)

2 garlic cloves, finely chopped

2 large eggs beaten

1/2 cup freshly grated Parmigiano-Reggiano , plus more for serving

Freshly ground black pepper

Directions:

I like to prepare the sauce while the pasta is cooking to ensure that the pasta will be hot and ready when the sauce is finished.

Cook pasta according to box directions for al dente. Reserve about a cup of pasta water for thinning out sauce.

Heat the olive oil in a deep skillet over a medium heat.

Add the pancetta and sauté for about 3 minutes, until it is crisp and the fat is rendered. Toss the garlic into the fat and sauté for a minute or so till it softens.

Add the hot drained pasta to the pan and give it a good toss for a few minutes , you’ll want pasta to be coated in the bacon fat. Beat the eggs and parmesan together in a mixing bowl, stir well to prevent lumps. Remove the pan from the heat and pour the egg/cheese mixture into the pasta, whisking quickly until the eggs thicken but do not scramble (that is why you do this off the heat) Thin out the sauce with a bit of the reserved pasta water until it reaches desired consistency. Season the carbonara with several turns of freshly ground black pepper and salt for taste.

Add more cheese at table if you’d like!

Simple and Delicious!

Banana Pudding from Magnolia Bakery – One of my Top Ten Desserts that you don’t even bake

Since the first time my daughter Jenn made this dessert we have added it to our Thanksgiving Table. Just what you need after that big dinner is this dessert!!! We love it and can’t get enough of it. Whether you’ll be making it for Thanksgiving or anytime just be prepared to fall in love with it. Completely decadent and totally ridiculous in calories and richness it is love at first bite.

It is actually a subtle taste of bananas, but I wouldn’t make this if I didn’t like bananas. I happen to just adore bananas and I absolutely love love this pudding. I cannot have it in the house because I will continually find an excuse to go into the fridge and eat it till it’s pretty much all gone.  As full as I was last year and swearing I wasn’t going to eat another thing for at least a week, when I saw this  pudding I knew I was going to eat it.  I find it impossible to resist and I know others who suffer from this same fate. If you’re in the market for a purely decadent rich over the top dessert then this is it for you. Probably up there on my top ten desserts ever. This is from the More from Magnolia Cookbook so how could it be bad?

*this recipe really needs time , so you must start the day before to let initial pudding set, and then you’ll need at least 4 more hours minimum before serving. So you must factor time into your prep of this awesome pudding but it’s so worth it.

Happy Thanksgiving from our house to yours.

Ingredients:

1 14 ounce can sweetened condensed milk

1 1 /2 cups ice-cold water

1 3.4 ounce package instant vanilla pudding mix ( preferably Jell-O brand)is there another brand?

3 cups heavy cream

1 12 ounce box Nabisco Nilla Wafers ( no substitutions) is there another brand?

4 cups sliced ripe banana

Directions:

In a small bowl, on the medium speed of an electric mixer, beat together the sweetened condensed milk and cold water until well combined, about 1 minute. Add the pudding mix and beat well, about 2 minutes more.* Cover and refrigerate for 3 – 4 hours or overnight, before continuing. It is very important to allow the proper amount of time for the pudding mixture to set.

In a large bowl, on the medium speed of an electric mixer , whip the heavy cream until stiff peaks form. Gently fold the pudding mixture into the whipped cream until well blended and no streaks of pudding remains.

To assemble the dessert, select a large, wide bowl ( preferably glass) with a 4 – 5 quart capacity. Arrange one-third of the wafers to cover the bottom of the bowl, over-lapping if necessary, then one-third of the bananas and one-third of the pudding. Repeat the layering twice more, garnishing with additional wafers or wafer crumbs on the top layer of the pudding . ( Just crush up a few remainder cookies in food processor) Cover tightly with plastic wrap and allow to chill in the refrigerator for *4 hours–or up to 8 hours, but no longer! Serve and behold the love!

Serves anywhere from 12- 15

It’s a large dessert and a substantial one. It stands alone beautifully!