Here I am at 7:45 a.m. having my coffee and getting ready to do some serious cooking in the slow cooker. It snowed here last night and we will spend the day on the mountain skiing. What could possibly be better than to come home to a meal cooking and your house filled with the wonderful aroma of shortribs in the slow cooker? It’s worth the effort in the morning if you have the time. If you’ve never used a slow cooker get out there and buy one, it’s a wonderful investment!

cookingwithcandi's avatarCooking with Candi

Short Ribs being seasoned

I like to think of slow cooking as backwards cooking or pajama cooking. I wake up , am having my coffee in my pajamas and chopping vegetables and searing meat first thing in the morning. The good news is that it’s all pretty much done at the end of the day at the time that you’re usually making a mess and just beginning to prepare dinner. The aroma that fills your house is so amazingly delicious. It’s an awesome way to return from your day to dinner cooking and all the prep out of the way. Although, I have to say looking a short rib in the eye first thing in the morning is not always fun.   I  purchased the short ribs, and wanted to cook them Sunday for dinner. I love this recipe,  the ribs literally fall off the bone, they cook for 8 full hours. I…

View original post 639 more words

Baked Ziti (my way) with Turkey Bolognese

Chanukah 021Chanukah 022Chanukah 023Chanukah 041I was having some family for Chanukah but Joel asked if we could make it Italian food instead of the usual Chanukah fare and I must still be in my Roman state of mind so  I agreed and this is how I did it. I started with my Turkey Bolognese sauce. ( Look up Turkey Bolognese on my blog ) . This is much easier than lasagna, and I made Bolognese sauce the day before assembling baked ziti. I also put the Bolognese sauce over some shredded zucchini in addition to baked ziti for those who wanted lighter fare.  Then I followed the rest of the directions for my baked ziti. You can make this meatless by using marinara sauce of your choice.  This is a perfect satisfying Sunday Dinner, and great for a crowd. A cheesy comforting meal if ever there was one.  So here’s to an Italian Chanukah! Happy Chanukah everyone!

Ingredients: for baked ziti

(turkey bolognese is a separate recipe)

1 lb . Ziti or ziti type pasta I actually used tortiglioni noodles

1 15 oz. tub of Whole Milk Ricotta or Part Skim ( not fat free)

1 1/2 lb. Mozzarella Cheese, Grated

1/2 cups Grated Parmesan Cheese

1 whole egg

Turkey Bolognese Sauce or any other sauce you prefer ( I used my recipe and it yielded enough sauce for Baked Ziti and Zucchini)

Salt and Pepper

Directions:

Preheat oven to 375 degrees.

In a bowl mix together the ricotta cheese, 2 cups of the grated Mozzarella, Parmesan, egg and salt and pepper. Stir ingredients together until just combined.

Cook the pasta and cool it off slightly. I make it al dente because you will be cooking again, don’t overcook the pasta . Pour the pasta into the bowl with cheese mixture and toss to slightly combine. Add the cooled meat sauce and toss to combine.

Spray your casserole dish with Pam and spread a thin layer of sauce on the bottom of your pan first.   Add half the coated pasta to your casserole dish.  Spoon some remaining sauce over the top, then top with half the remaining mozzarella cheese, Repeat with another layer of the coated pasta, the sauce and the remaining mozzarella. I baked it for about 1/2 hour or until bubbling and cheese is melted. Remove from oven and let stand a few minutes before serving.

* I do it in 2 layers but you can do it in one big layer and just top with cheese, I just give it more cheese this way. Your call. No wrong or right way with this recipe.

*this recipe will nicely serve 8 – 10 people. I didn’t double it but you can easily.  I served alongside my Italian Salad and shredded zucchini with Bolognese. Perfect!

Italian Chopped Salad

Chanukah 005Chanukah 038I love a chopped salad as much as the next one, and I especially love an Italian chopped salad with delicious Italian ingredients. This was my take on Giada de Laurentis’s  Antipasto Salad.  Delicious ingredients , and I made my dressing the day before , cut salami and cheese the day before. Just had to assemble salad the day we were eating it. When you do all the prep before it’s pretty easy . Also if you just like to use one kind of lettuce use whatever you like. I like a combo of iceberg and romaine lettuces in here and sometimes I just use romaine . It’s key to chop/shred lettuce into bite size pieces.

Ingredients:

1 head romaine lettuce cut into bite size pieces or whatever lettuces you like

1/2 head iceberg lettuce , shredded or chopped upChanukah 017

1 cup rinsed canned red kidney beans, patted dry

1 cup rinsed canned garbanzo beans, patted dry

8 ounces of hard salami, cubed–use a really good salami. If you have an Italian deli near you that’s the best .

6 ounces of provolone cheese, cubed–also use as good a provolone as you can find.

baby plum tomatoes or cherry tomatoes cut into small pieces

*of course some chopped up green or black olives would be really nice

Red Wine Vinaigrette:

1/2 cup red wine vinegar

3 tablespoons fresh lemon juice

1 teaspoon honey

2 teaspoons kosher salt

1 cup olive oil

Freshly Ground Pepper to taste

Mix the vinegar, lemon juice, honey and salt in a blender. With the machine running , stream the olive oil in gradually. Taste for salt and pepper to taste.

Banana Cake with Cream Cheese Frosting (very easy)

I love Banana Cake and since I always seem to have rotting bananas in the house it’s the perfect thing to make. I have tried so many recipes over the years and have posted mostly loaf style banana breads. I decided to make this one a sheet cake in a 9×13 Pyrex and I also decided to frost it with a delicious cream cheese frosting! I think this is a super easy cake to bake, perfect for beginner bakers. The orange zest gives it a distinct flavoring, it met with raves in my house tonite. Making it in the sheet cake style takes out the room for error. A 9 inch round cake would be perfect as well and you can frost just the top or sides and top. Just follow the same directions. I baked cake in the afternoon and frosted it that night for the next day. I kept it in fridge overnight, and took it out of fridge for a few hours so frosting and cake would be at room temperature. Give this one a go!

*would also make great cupcakes

Chanukah 002Chanukah 006Chanukah 009Chanukah 050

Ingredients:

3 very ripe bananas , mashed

1/2 cup light brown sugar, lightly packed

1/2 cup vegetable oil

3/4 cup sugar

2 extra-large eggs, at room temperature

1/2 cup sour cream

1 teaspoon pure vanilla extract

Grated Zest of 1 orange (don’t leave this out, it really adds distinct flavoring)

2 cups all-purpose flour

1 teaspoon baking soda

1/2 teaspoon salt

1/2 cup chopped walnuts ( optional) I didn’t use this time but nice to decorate the top with a few walnut halves as well. Totally optional. You can sprinkle chopped walnuts on the top of cake as well. I didn’t,  I left it simple and clean .

Cream Cheese Frosting:

8 ounces cream cheese, at room temperature

6 tablespoons ( 3/4 stick) unsalted butter, at room temperature

1 teaspoon vanilla extract

2 1/2 cups sifted confectioners sugar

Directions:

Preheat the oven to 350 degrees. Spray a 9x 13 Pyrex pan.

In the bowl of an electric mixer fitted with the paddle attachment, mix the mashed bananas, sugar, and brown sugar on low-speed until combined, scrape down the sides of the bowl. With the mixer on low, add the oil, eggs ( one at a time) sour cream , vanilla and orange zest. Mix until smooth.

In a separate bowl, sift together the dry ingredients. Flour, baking soda and salt. With the mixer on low, add the dry ingredients and mix until just combined. Pour the batter into the prepared pan and bake for 40 – 50 minutes. I baked for about 40 minutes, toothpick or cake tester should come out clean from the center of cake. I would watch cake the last 10 minutes or so for doneness.

To make the frosting. Mix the cream cheese , butter and vanilla in the bowl of an electric mixer with the paddle attachment on low-speed until just combined. Do not whip. Add the confectioners sugar and mix until smooth. Spread the frosting thickly on the top of the cake. Cake must be completely cool before frosting. Frosting is super delish! and I just put a few walnut halves or sprinkle chopped nuts over cake, if no nut allergies present.

*this cake also bakes up beautifully in 9 inch round cake pan. It will look a little fancier on the cake plate this way. For today I just did a good old fashioned sheet cake. ( no room for error)

What a perfect soup for a rainy cold day . This soup warms the soul and tastes delicious. Serve with a salad and a nice crusty bread with a little hard cheese and you have a truly fulfilling meal.

cookingwithcandi's avatarCooking with Candi

I have the funniest story about me and this soup. The first time I made it, I received the recipe from a friend. I didn’t see that it said .5 lbs. of mushrooms and I thought it was 5 lbs! So you can only imagine how much chopping I was doing. I had never seen a recipe say .5 instead of 1/2 lb! Joel happened to be in the kitchen and he kept saying that is an awful lot of mushrooms, and until I looked at it carefully I hadn’t seen that it said .5 . Who writes .5 ? Well, we had enough mushroom barley soup for the whole winter and then some–it expanded to a huge amount, and I had to keep adding liquid, it was hysterical. Once I realized what I had done, I had a good laugh, but the soup was still pretty tasty. I will write it it the way…

View original post 533 more words

Chicken with Mushrooms

Fall NY 2012 031Fall NY 2012 032Fall NY 2012 036Fall NY 2012 041Just going to say that we just finished this meal and I was so impressed with myself that I cooked it! It was amazingly delicious, thanks to Ina Garten’s new cookbook “Foolproof” , this chicken and mushroom dish was 5 star for sure. I only used 1 chicken but followed directions as if I was cooking 2, so I obviously had a lot of sauce left over. I served over rice pilaf and it would be awesome with a green vegetable but I never did get to pick anything up so we just had the chicken and rice  . Perfect over rice , couscous or orzo, because the sauce is so so yummy.  I don’t know about you but I am always on the search for new ways to cook chicken. This is a winner and not crazy difficult, while there are some moving parts you’ll want to pay attention while you cook.  You can assemble this recipe in advance and then just throw it in the oven before dinner. This is for 2 chickens , you can easily cut it in 1/2 . This is a perfect dinner party meal, served with a salad and a nice crusty bread you’re good to go. I will most definitely make this for company , it is a home run hit. Thanks again Ina.

This recipe comes from Ina Garten’s new cookbook “Foolproof”.

Ingredients:

2 chickens cut up in eights ( app. 3 – 4 lb. chickens)

Kosher Salt and Freshly Ground Black Pepper

All-purpose flour for dredging and 1/4 cup for sauce at the end

1/2 cup olive oil

8 whole garlic cloves

1 1/2 lb. cremini mushrooms ( You can use assorted wild mushrooms as well, porcini would work well here) I prefer cremini so I just used cremini. I sliced mushrooms .

8 sprigs of fresh thyme ( I didn’t have fresh so just sprinkled some dry) if you use fresh tie it together with kitchen string

1/4 cup dry sherry

1 tablespoon minced garlic ( about 3 cloves)

2 cups Pinot Grigio ( or white wine that is open)

2 cups chicken stock

3 tablespoons unsalted butter, at room temperature

Directions:

Preheat the oven to 325 degrees.

Pat the chicken dry with paper towels and sprinkle both sides liberally with salt and pepper. Place 1/2 cup flour in a bowl and dredge the chicken in the flour. In a large ovenproof pot ( Le Creuset), heat the oil. Add the chicken in batches without crowding them, brown lightly over medium – high heat for 3 – 5 minutes on each side. Remove the chicken to a plate and continue until all the chicken is browned. I use tongs so as not to pierce the skin and let out any of the juices.

Add the whole garlic cloves, mushrooms and thyme to the pot and cook over medium heat for 5 minutes, stirring occasionally. Add the sherry and cook for another minute, scraping up the brown bits. Add the minced garlic and cook for a few more minutes. Add the wine, chicken stock, 1 tablespoon salt and 1 teaspoon pepper and bring to a simmer. Add the chicken ( large pieces first) , cover, and place in the middle of the oven for 30 – 35 minutes, until the chicken is cooked through ( about 165 degrees on a meat thermometer)

Remove the chicken to a bowl , if you used fresh thyme discard it now .  With a fork mash together the butter and 1/4 cup flour and add it to the sauce. Simmer, stirring constantly , over medium heat for 5 minutes, until slightly thickened. Season to taste ( you want a lot of flavor, it should be highly seasoned) put the chicken back in the sauce and serve hot.

If you love Split Pea Soup , here you go. This one is creamy without using cream, and can easily be made vegetarian. Perfect for the cold nights ahead. You can make ahead and just heat up. Perfect!

cookingwithcandi's avatarCooking with Candi

I love almost all soups, stews, etc.  I find them so warm and inviting to eat. The flavors are all melded together and it is all usually very healthy ingredients which you are in control of that go into a freshly made soup. As a kid you couldn’t get me to eat Split Pea Soup, as an adult I love it. Maybe it’s the color? the texture? I can’t get Joel to go near it, but he’s allergic to almost anything that looks this green with a lot of references to the Exorcist which I could live without that visual. In any event it’s a warm, cozy soup. Very healthy, and you can leave out the chorizo or add it as you like. Last time out I added it. Very filling, it’s a meal for me with a nice piece of bread.

Ingredients:

1 cup chopped yellow onions (  1…

View original post 334 more words

Mustard Roasted Chicken

I just bought the newest cookbook from Ina Garten titled “Foolproof” . I love her recipes and couldn’t wait to try them. I made her Crispy mustard Roasted Chicken and while it was amazing, it was super super salty. Even for Joel who loves a lot of salt. I went back and read the recipe again and noticed that she never said anything about what kind of Panko , just 2 cups panko. Her recipes while amazing can be a little salty but this was crazy salty. I finally figured out that it should be Plain panko crumbs and I would add 1 teaspoon of salt and taste crumbs and then add the other teaspoon. I think if you start out with plain panko crumbs you’ll be fine following the rest of the recipe. I remade it with plain panko and it was delicious. I also think that if you use seasoned panko you can just omit the salt all together. I was gun-shy about the salt though, so I added 1 teaspoon at a time as I said. Go for it, and her book is fabulous as ever.

Ingredients:

4 garlic cloves

1 tablespoon minced fresh thyme leaves ( I used a teaspoon of dried thyme)

2 cups Plain Panko Crumbs ( Japanese bread flakes)

2 teaspoons kosher salt ( make sure if you’re adding salt you are using plain panko)

1 teaspoon freshly ground black pepper

1 tablespoon grated lemon zest ( 2 small lemons)

2 tablespoons olive oil

2 tablespoons unsalted butter, melted

1/2 cup Dijon Mustard

1/2 dry white wine, if you’re buying to cook with use Pinot Grigio it’s the dryest, if not use whatever is open unless it’s super fruity

1 3 1/2 – 4 lb. chicken cut up in 8’s

Directions:

Preheat the oven to 350 degrees

Place the garlic, thyme, 2 teaspoons salt, and 1 teaspoon pepper in a food processor fitted with the steel blade and process until the garlic is finely minced. Add the panko, lemon zest, olive oil, and butter and pulse a few times to moisten the panko. In a shallow bowl, whisk together the mustard and wine.

Pat the chicken dry with paper towels. Sprinkle chicken with salt and peppr ( I omitted this step or it would have been way to salty) using the plain panko it would be fine, but the 2 teaspoons of salt should be enough. Taste the crumbs before salting the chicken . Dip each piece in the mustard mixture to coat on all sides, and then place skin side down only into the crumb mixture, pressing gently to make the crumbs adhere. Place the chicken on a sprayed cookie sheet crumb side up. Press the remaining crumbs on to the chicken pieces.

Bake the chicken for 40 minutes. Raise the heat to 400 degrees and bake for another 10 minutes, until the crumbs are browned and the chicken is cooked through.

*if you’d like to make in advance, prepare the chicken without baking it. Refrigerate till ready to use and then bake before dinner.

Serves 4 nicely

Learning something new at any age – Pizza

While back in NY for the Fall I always try to expand my horizons and take as many new cooking classes as possible. I have wanted to take a pizza making class for some time now. I signed up at ICE for their Best Home-Made Pizza Class . Class was taught by Greer Nuttall and she was an excellent teacher, well versed in the subject, interesting and very patient. Working with dough is always an adventure, but somehow when you’re doing it with other people in a fun atmosphere it is a tad less intimidating. Dough can be very intimidating to work with, whether it be challah, pie or pizza. You definitley get a feel for it after a while and I highly recommend giving it a go . I will admit that it is a whole lot easier to just go and buy the pizza dough, and it is so readily available . You can walk into your favorite pizza place and they will sell you the dough, and you can cut it into smaller pieces and freeze what you don’t use. Making dough can take several hours just to rise. So if you’re in a rush, and who’s not these days? just buy the dough and make your own pizza. I’ll never tell. Invest in a Pizza stone and some parchment paper.

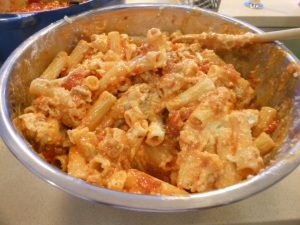
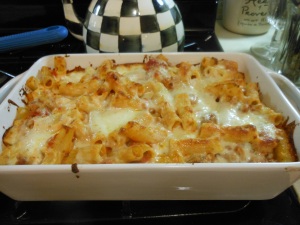
We made a thin pizza crust and a thick pizza crust. I prefer the thin, but I’ve never met a pizza I didn’t like. We made so many pizzas between all of us, I couldn’t believe how much pizza we were eating for lunch!!!! It was delicious.

These were a few of my favorite toppings, I am not going to get into the making of dough on this blog. If you are really interested in it, you can take a class or just try your hand at it at home. I am not that proficient in it myself, and not ready to teach that particular skill.

These recipes are from my class and originally from Nick Malgieri’s Baking Classes. I must also say that practice makes perfect so I better start practicing my pizza making skills.

Pancetta and Cheese Pizza Topped with Rucola and Tomato Salad:

Rucola Salad:

1 bunch rucola ( or arugula) rucola is a bit more tender

1 pint grape tomatoes ( sliced in 1/2)

Salt and Pepper

1 teaspoon garlic grated with the microplane ( you must get one if you don’t have already)

2 teaspoons red wine vinegar

3 tablespoons extra virgin olive oil

Pizza:

2 thin pizza crusts

1/2 lb. pancetta ( buy the diced kind) so easy to use ( you’ll need 2 packages )

1 lb. fresh mozzarella , coarsely grated or diced

1/2 cup Pamigiano Reggiano cheese, finely grated

Fresh Ground Pepper

2 Tablespoons Olive Oil

Directions:

Half an hour before you intend to bake the pizzas, set racks in the upper and lower thirds of the oven and preheat to 450 degrees. I use a pizza stone in my house, but you can just put on a piece of parchment paper.

For the salad, combine the rucola and halved tomatoes in a bowl and refrigerate. Whisk the salad dressing ingredients and set aside until needed.

Quickly cook the pancetta to render some of the fat and with a slotted spoon lay on some paper towels to drain.

Scatter the cheeses on the crust and top with pancetta. Grind pepper all over the pizza and drizzle with olive oil.

Bake the pizzas for about 30 minutes, checking the progress by lifting the crust with a spatula to check on how the bottom is coloring up. After about 10 minutes , switch the pizzas on the racks so each will have the benefit of both top and bottom heat.

Bake the pizzas until the tops are sizzling and the bottoms are dark brown.

Remove from the oven , slide pizzas to cutting boards and use a pizza wheel to cut into wedges. Toss the salad with the dressing and scatter it on the pizza, or serve alongside. Enjoy!

Pizza Margherita:

This pizza was created in the 1880’s by Raffaele Esposito in honor of Queen Margherita of Italy, the colors of the pizza reflect those of the Italian Flag.

Two thin pizza crusts

2 – 3 cups chopped, well drained canned tomatoes

Salt and Pepper ( Sea Salt is best on Pizza , won’t make dough soggy)

2/3 cup finely diced or grated fresh mozzarella. Drizzle with 3 – 4 tablespoons olive oil

Directions:

Half an hour before you intend to bake the pizzas, set racks in the upper and lower thirds of the oven ( as before) and preheat oven to 450 degrees

Evenly scatter the tomatoes on the crusts to within 1  1/2 inch of the edge of the pizza. Salt and lightly pepper and scatter with the cheese . Drizzle with olive oil.

Bake the pizzas for about 30 minutes, checking on it’s progress as I said in the Rucola Pizza.

After the pizzas are baked, cut them and sprinkle each with 1/2 cup gently torn leaves of fresh basil. Do not chop the basil with a knife because it will turn brown.

Pizza Bianca ( all cheese pizza)

2 thin pizza crusts

scatter 1 cup ricotta on each crust and spread without covering completely. Sprinkle with 1/2 cup each grated Parmigiano Reggiano and fresh mozzarella. Drizzle each pizza with a tablespoon of oil and if you like 1/2 cup crumbled Gorgonzola. Bake as above.

*if you like spicy, you can put some red pepper flakes in a little oil prior to scattering on pizza.
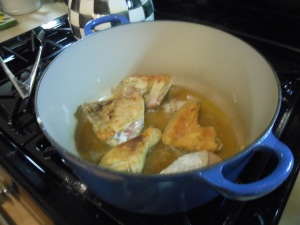
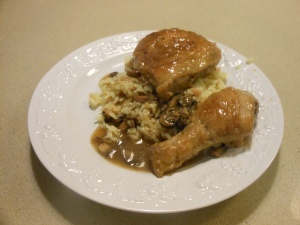
Banana Pudding from Magnolia Bakery – One of my Top Ten Desserts that you don’t even bake

Completely decadent and totally ridiculous in calories and richness, and I love it. It’s so very delicious. My daughter Jennifer has made this dessert numerous times over the last few years. It is actually a subtle taste of bananas, but I wouldn’t make this if I didn’t like bananas. I happen to just adore bananas and I absolutely love love this pudding. I cannot have it in the house because I will continually find an excuse to go into the fridge and eat it till it’s pretty much all gone. Jenn made it for dessert on Thanksgiving, it was one of 3 majorly desserts and it is really over the top. As full as I was and swearing I wasn’t going to eat another thing for at least a week, when I saw this  pudding I knew I was going to eat it.  She left the uneaten portion of it in my house and I couldn’t believe it I had to wake up to that bowl in the fridge. I find it impossible to resist, and I know others who suffer from this same fate. If you’re in the market for a purely decadent rich over the top dessert then this is it for you. Probably up there in my top ten desserts ever. This is from the More from Magnolia Cookbook so how could it be bad?

*this recipe really needs time , so you must start the day before to let initial pudding set, and then you’ll need at least 4 more hours minimum before serving. So you must factor time into your preparing of this awesome pudding.

Ingredients:

1 14 ounce can sweetened condensed milk

1 1 /2 cups ice-cold water

1 3.4 ounce package instant vanilla pudding mix ( preferably Jell-O brand)is there another brand?

3 cups heavy cream

1 12 ounce box Nabisco Nilla Wafers ( no substitutions) is there another brand?

4 cups sliced ripe banana

Directions:

In a small bowl, on the medium speed of an electric mixer, beat together the sweetened condensed milk and cold water until well combined, about 1 minute. Add the pudding mix and beat well, about 2 minutes more.* Cover and refrigerate for 3 – 4 hours or overnight, before continuing. It is very important to allow the proper amount of time for the pudding mixture to set.

In a large bowl, on the medium speed of an electric mixer , whip the heavy cream until stiff peaks form. Gently fold the pudding mixture into the whipped cream until well blended and no streaks of pudding remains.

To assemble the dessert, select a large, wide bowl ( preferably glass) with a 4 – 5 quart capacity. Arrange one-third of the wafers to cover the bottom of the bowl, over-lapping if necessary, then one-third of the bananas and one-third of the pudding. Repeat the layering twice more, garnishing with additional wafers or wafer crumbs on the top layer of the pudding . ( Just crush up a few remainder cookies in food processor) Cover tightly with plastic wrap and allow to chill in the refrigerator for *4 hours–or up to 8 hours, but no longer! Serve and behold the love! My camera broke on Thanksgiving and I took these pictures with my Iphone, sorry I don’t have more.

Serves anywhere from 12- 15

It’s a large dessert and a substantial one. It stands alone beautifully!