Mediterranean Shrimp –Roasted with Feta

IMG_8507 IMG_8500IMG_8506IMG_8493 IMG_8497 IMG_8494 IMG_8498 IMG_8486 IMG_8487 IMG_8490
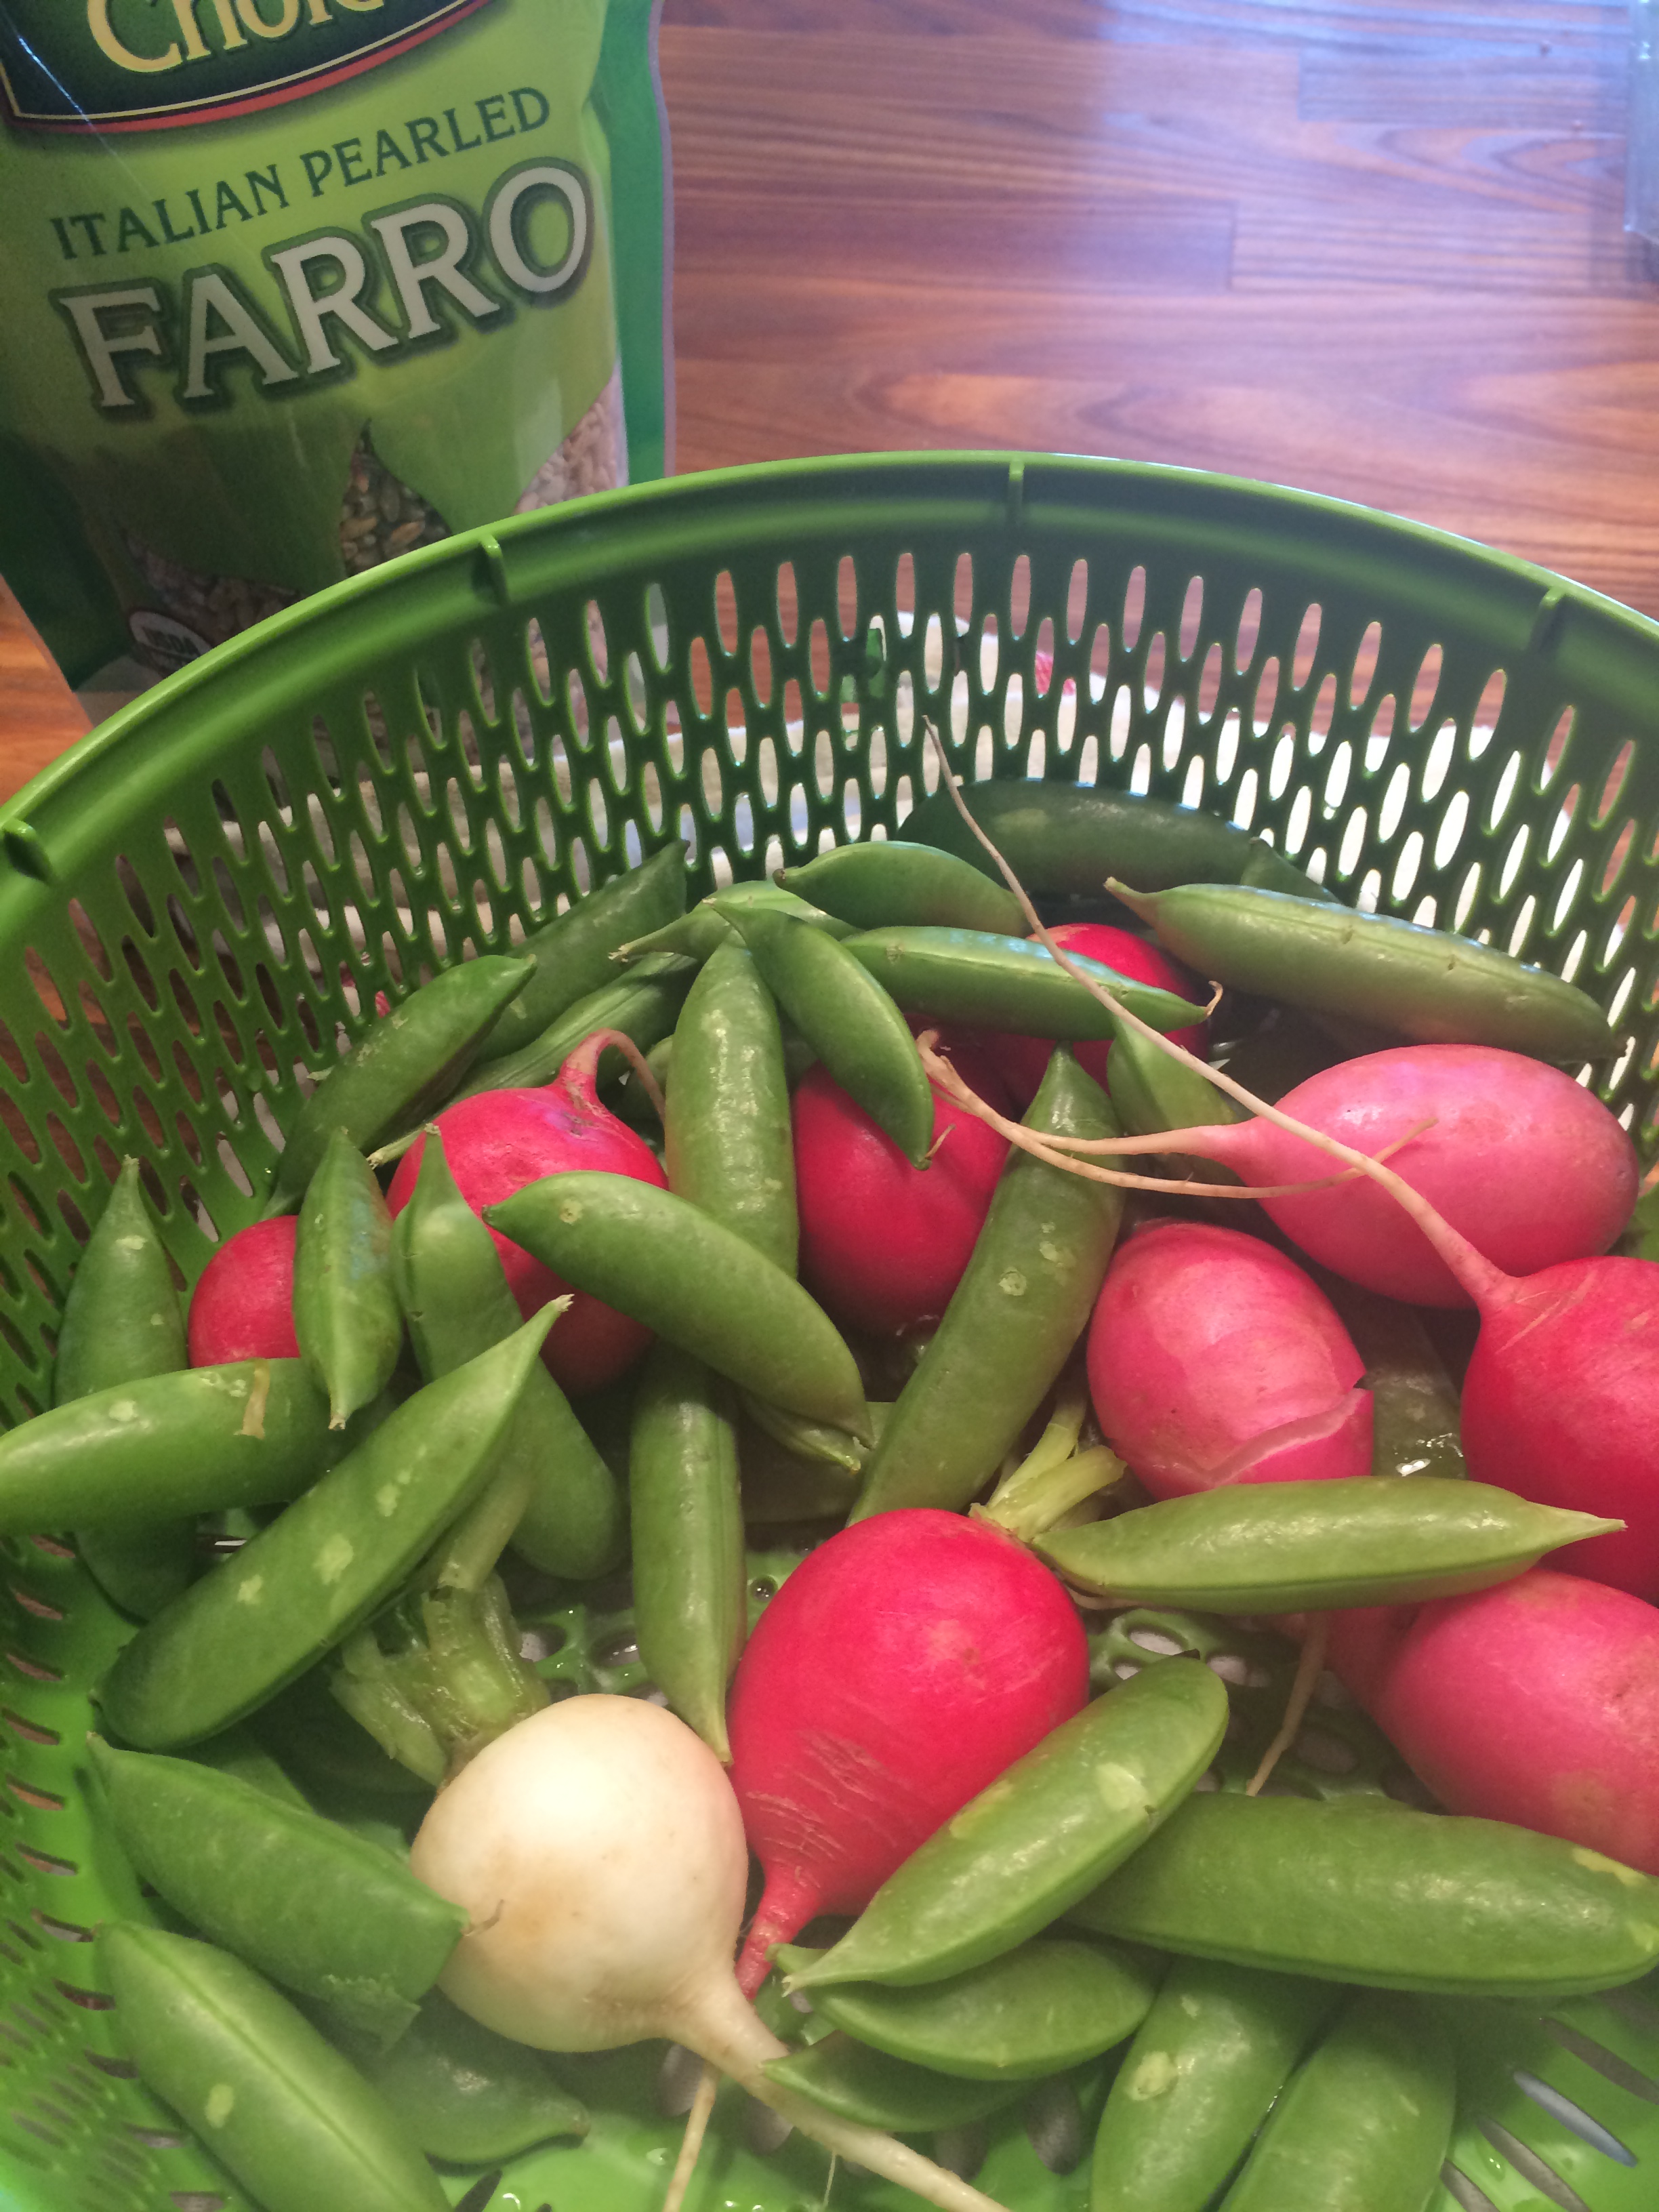
Most outstanding shrimp recipe from Ina Garten. All the tastes of the Mediterranean in one dish. It’s roasted shrimp with feta, fennel, tomatoes, lemons, Pernod,  wine and other good things. This was really so very delicious we ate it 2 nights in a row. It doesn’t need rice or pasta but if you’re having 6 people you can stretch it by adding the starch.  I used 1 1/4 lbs.  of shrimp and we had dinner for 2 nights. It was the first time making recipe so I wanted to use the right amount of ingredients. You can easily cut this in half for two people. This recipe as is will generously serve 4.

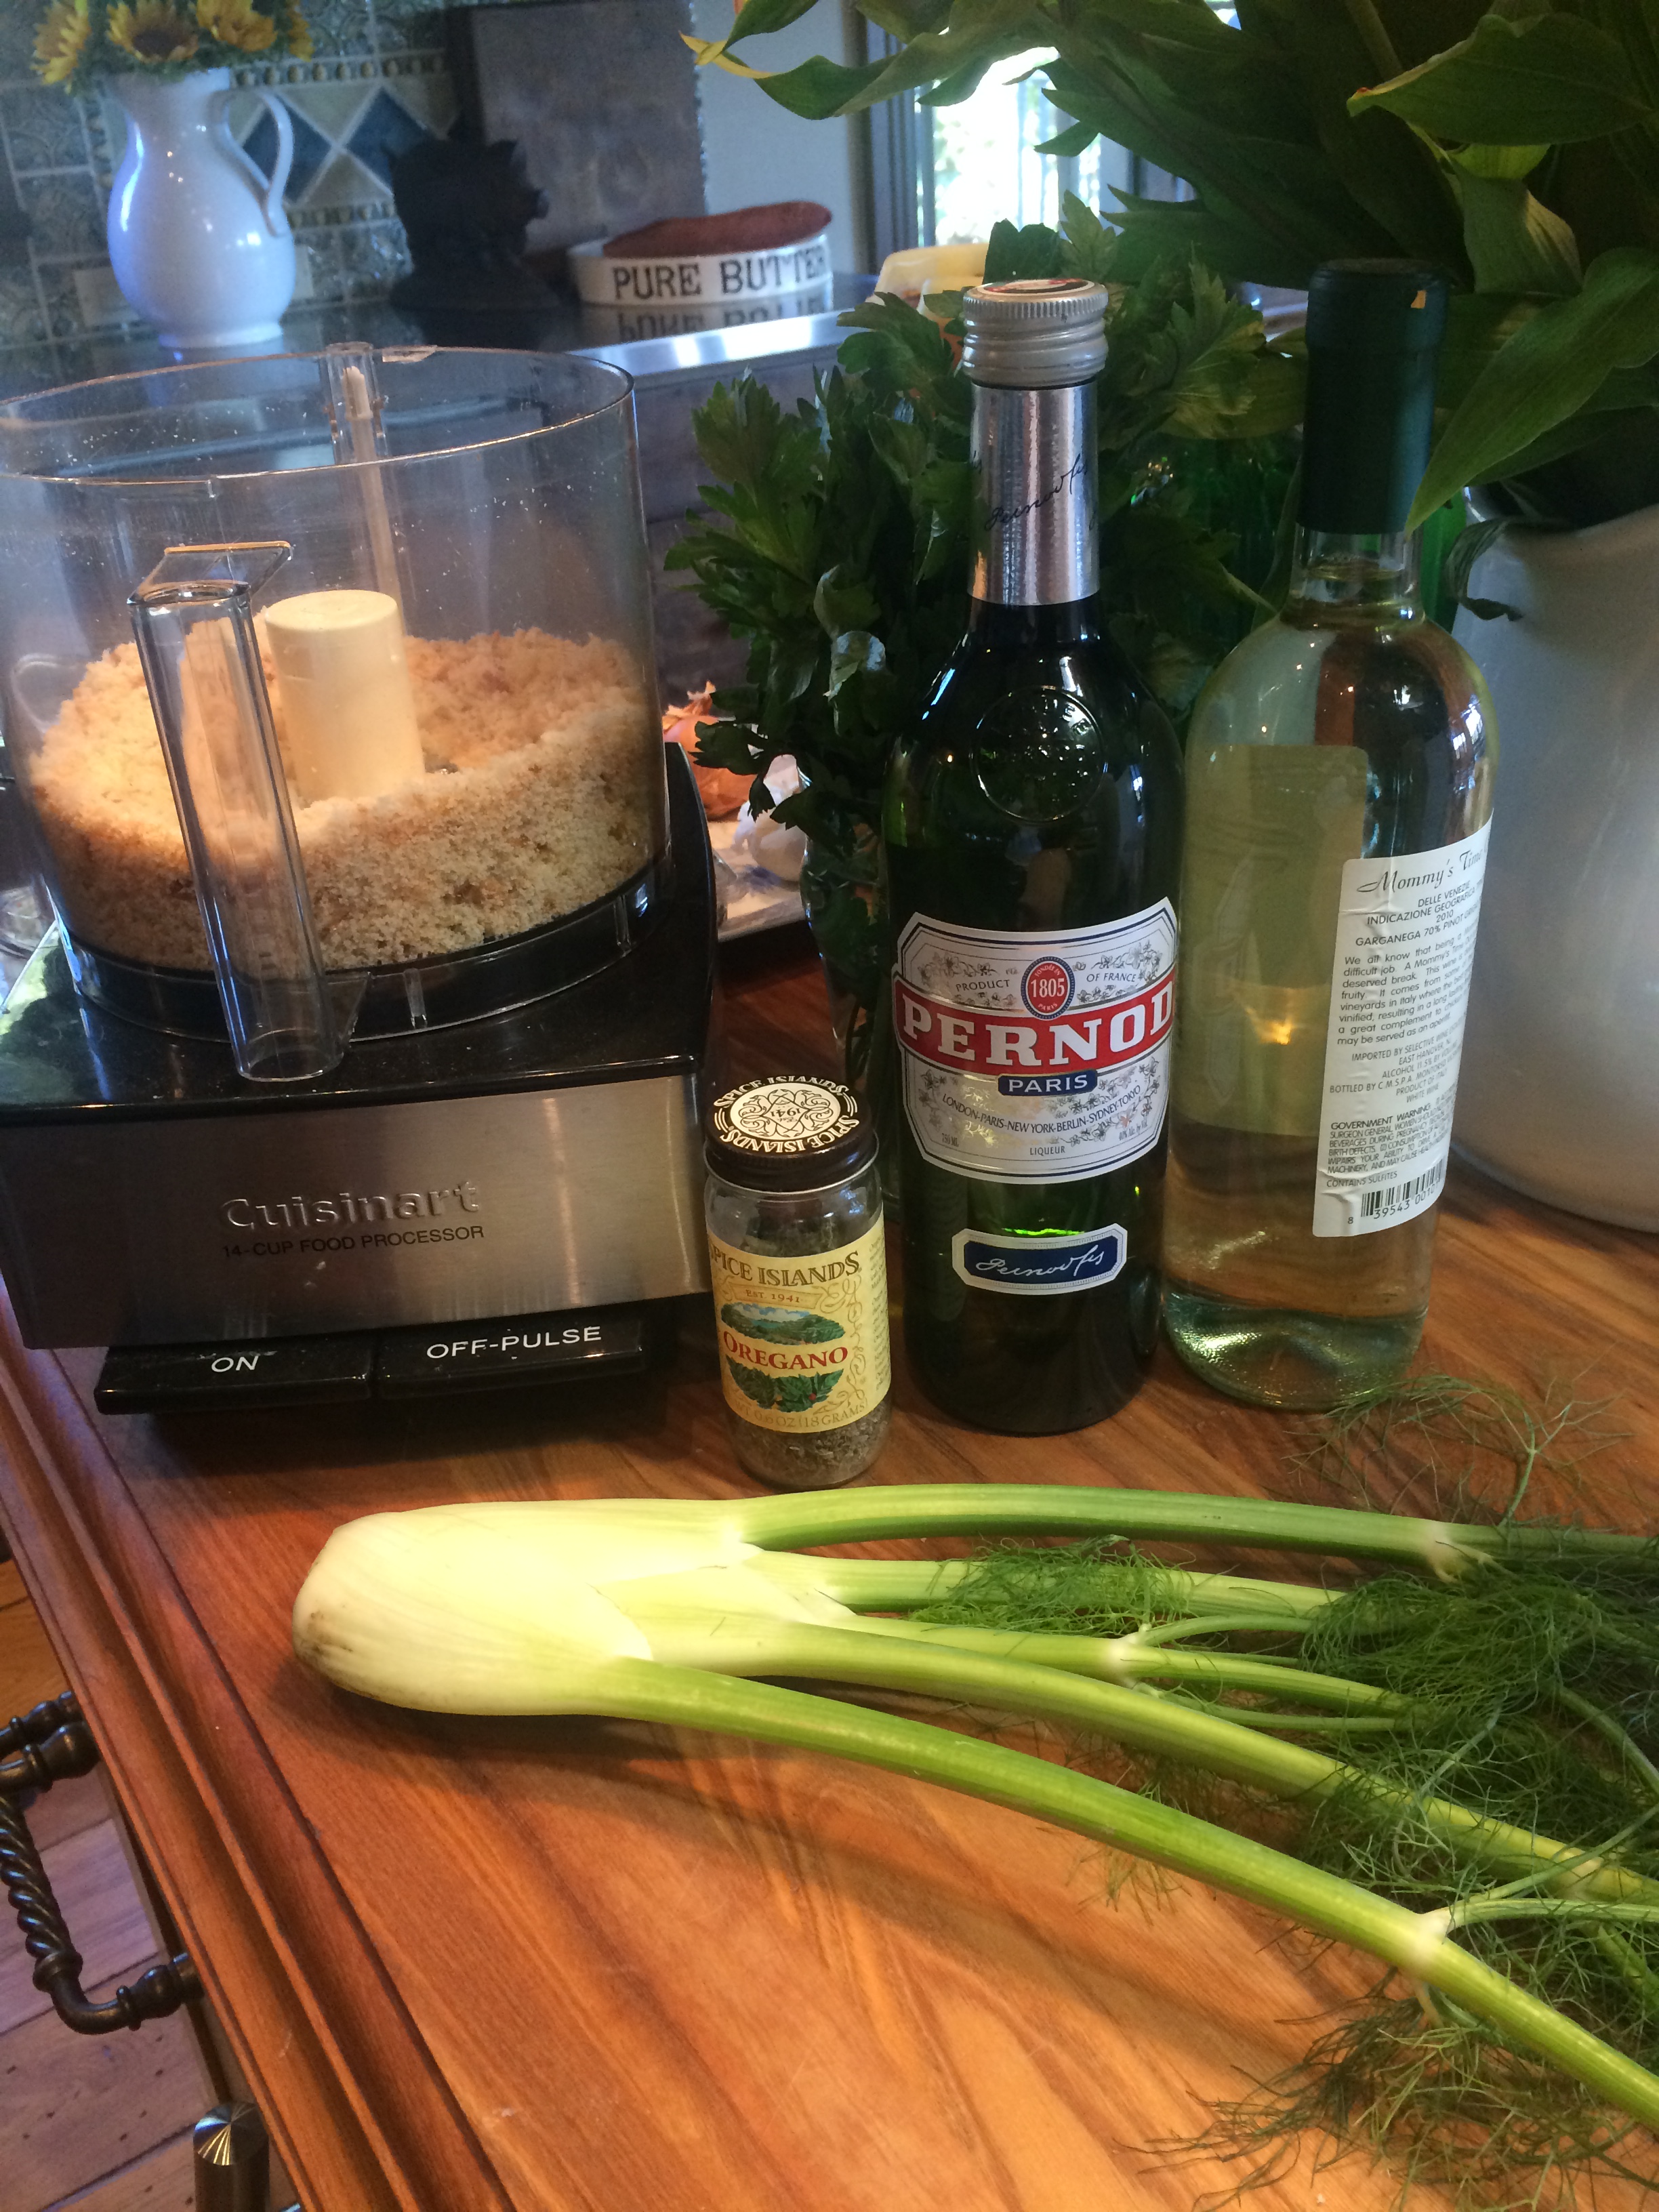
There are a lot of ingredients and I had to buy a bottle of Pernod but don’t let this discourage you.  You’ll also need a 12″ heavy ovenproof skillet and there is a lot of prep but you’ll look like a pro when this dish comes out of the oven. It really wasn’t difficult and have your fish store prepare shrimp. (Peel and de-vein) if you’d like you can leave tails on but I didn’t and it was perfectly fine.

Ingredients:

4 tablespoons olive oil, divided into 2 tablespoons each

1 1/2 cups medium-diced fennel

3 cloves garlic, minced

1/4 cup dry white wine

1 14 1/2 oz. can diced tomatoes

2 teaspoons tomato paste

1 teaspoon dried oregano

1 Tablespoon Pernod ( available in most liquor stores)

1 teaspoon kosher salt

1/2 teaspoon freshly ground black pepper

1 1/2 lbs ( app. 16 per pound) peeled and de-veined shrimp ( I prefer Mexican White and can usually obtain them) Talk to your local Fish Store.

4 -5 ounces good feta cheese, coarsely crumbled

1 cup fresh bread crumbs , yes I made them myself in the food processor–just throw 3 slices of white bread into food processor with crusts on and chop! it’s so much better than store-bought, just saying.

3 Tablespoons minced fresh parsley

2 lemons–1 for zesting and juicing and 1 cut into wedges to serve with dish

Directions:

Prepare shrimp and set aside, I like to place clean shrimp on paper towels to dry them before cooking.

Pre-heat the oven to 400 degrees.

Spray 12″ skillet with cooking spray for easier clean-up. Heat 2 Tablespoons of olive oil over medium-low heat. Add the chopped fennel and sauté for about 10 minutes, until the fennel is softened. Add the garlic and cook for a quick minute. Add the wine and bring to a boil, scraping up any brown bits for about 2-3 minutes and the liquid is reduced by about half. Add the tomatoes with their liquid, tomato paste , oregano, Pernod, Salt and Pepper to the skillet. Simmer over medium-low heat , stirring occasionally, for about 15 minutes.

While the shrimp is cooking combine the bread crumbs, parsley, and lemon zest with the remaining 2 Tablespoons of Olive Oil and set aside.

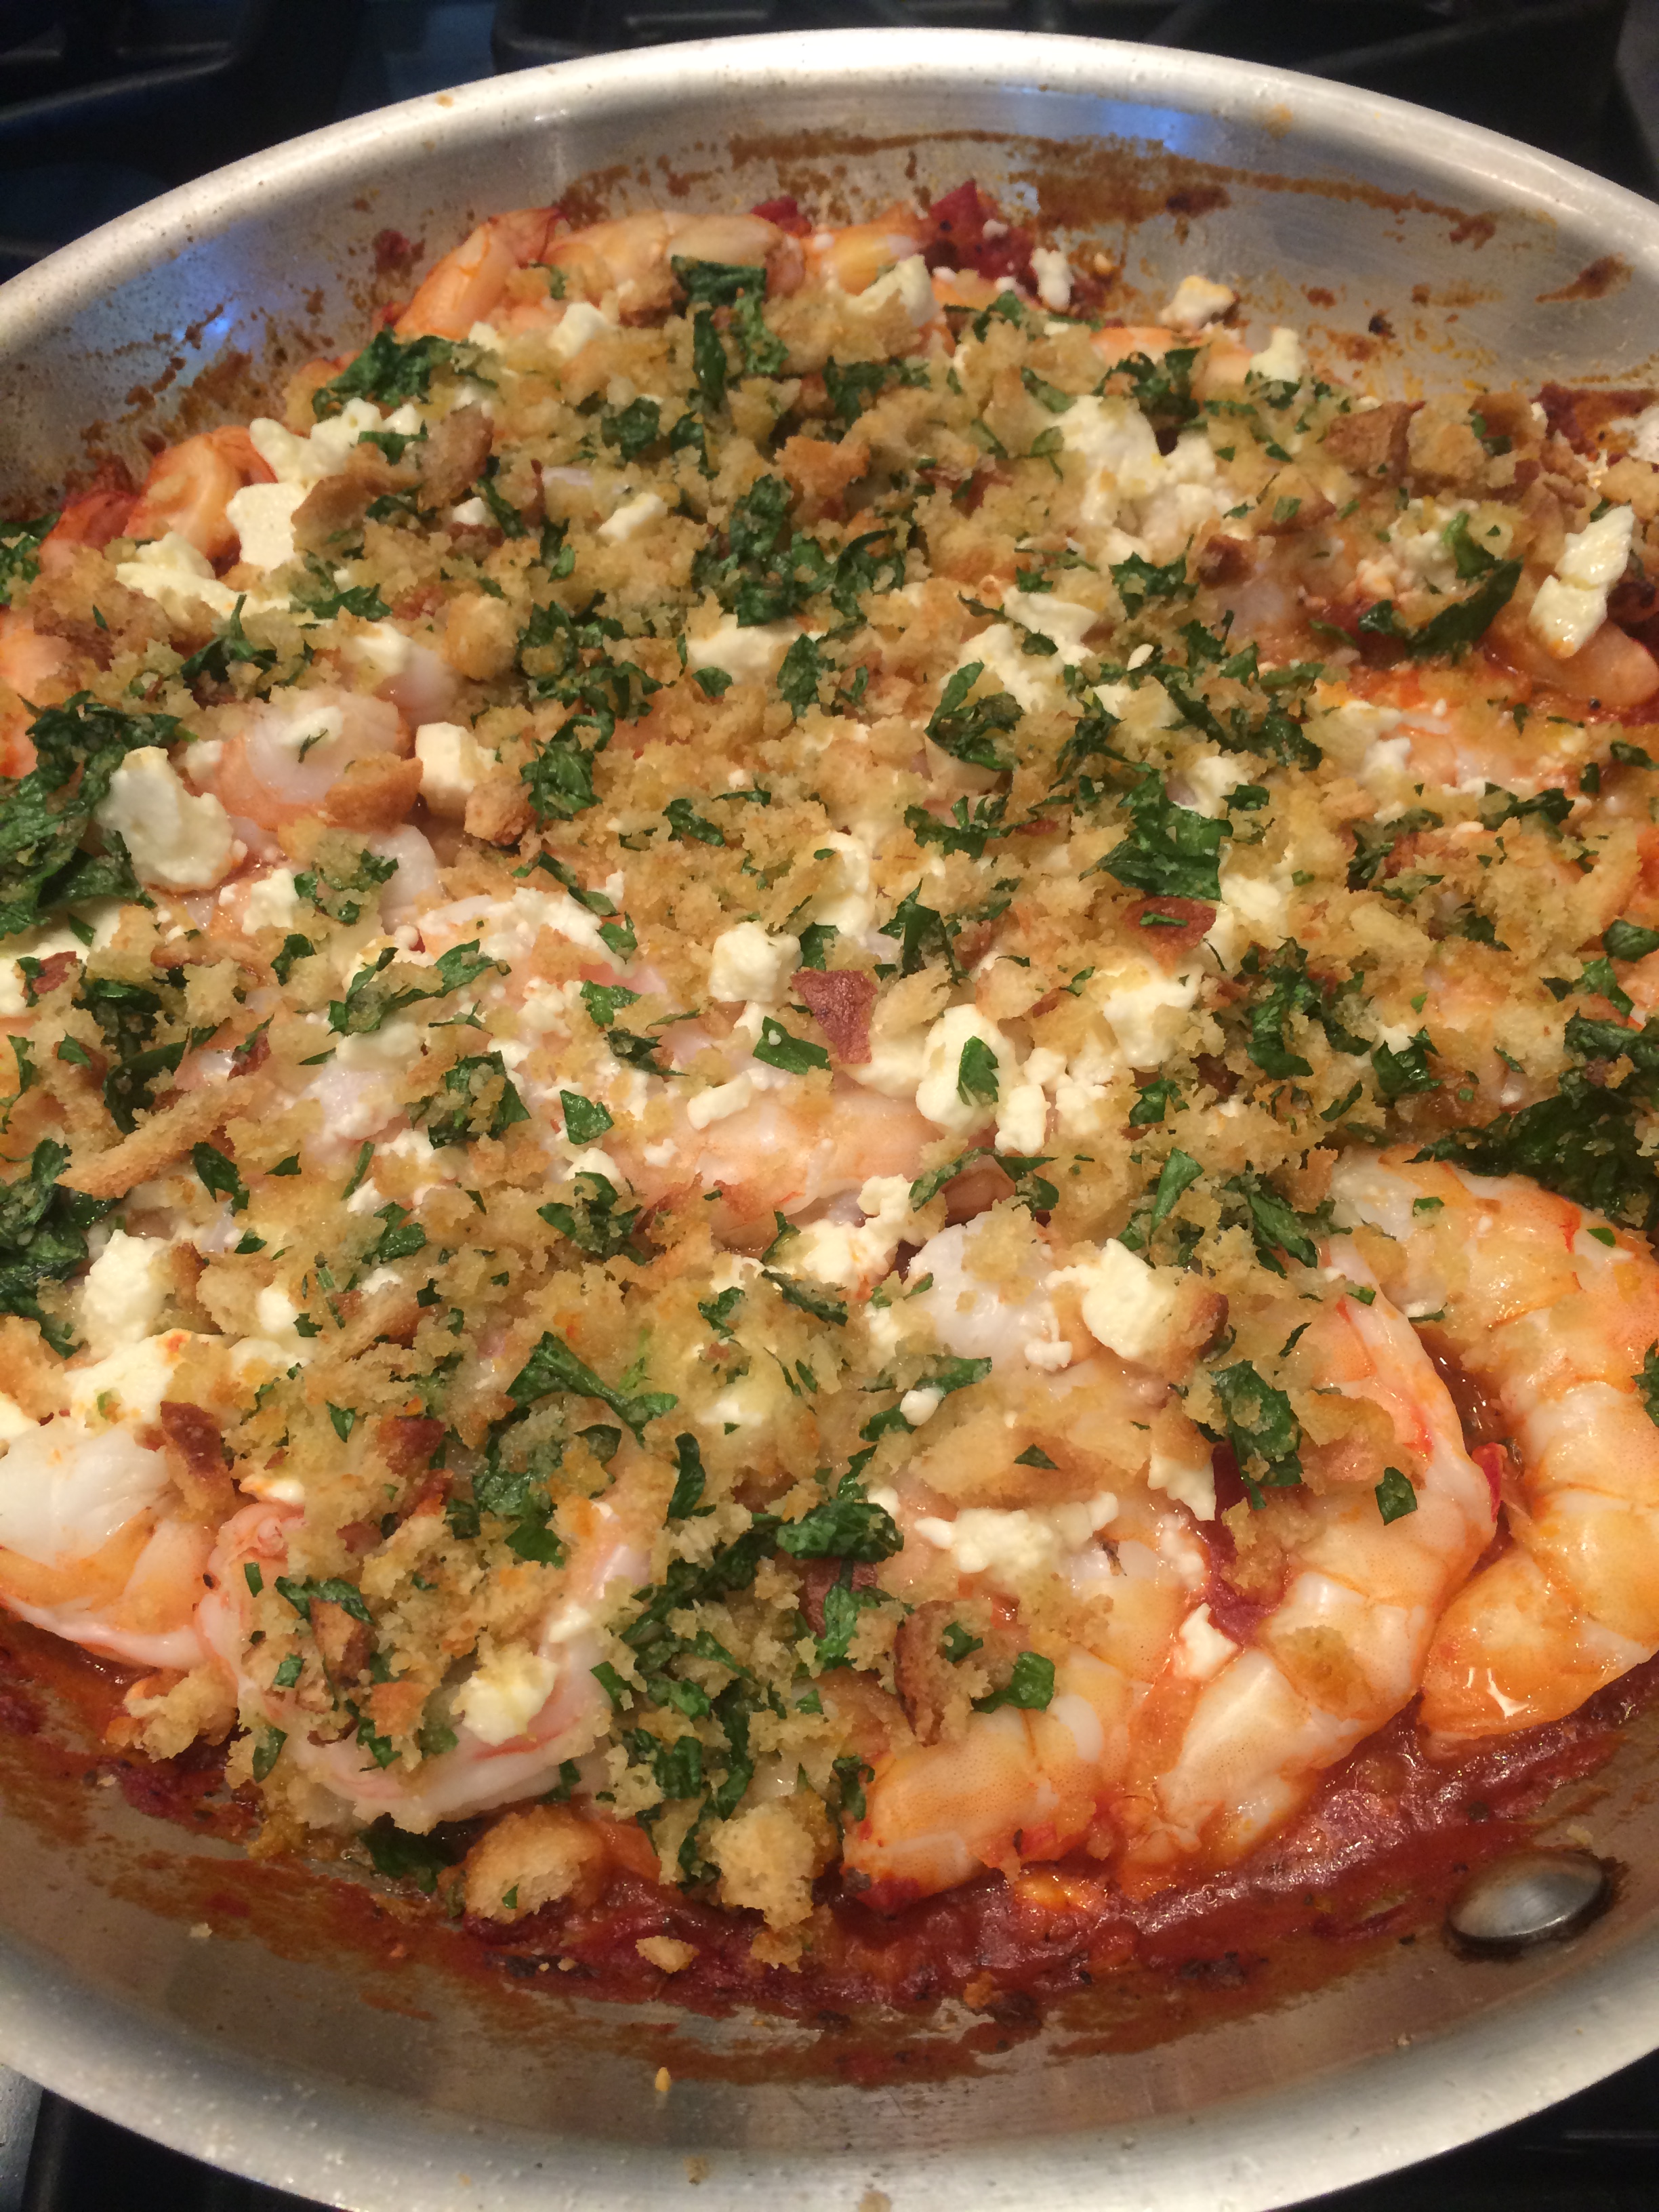
Turn off the heat and arrange the shrimp (see photo) in one layer over the tomato mixture in the skillet. Scatter the feta evenly over the shrimp. Then sprinkle the bread crumb mixture over the shrimp.

Bake in 400 degree oven for app. 15 minutes, until the shrimp are cooked and the bread crumbs are golden brown. (you can cut into a shrimp and make sure it’s opaque at this time)

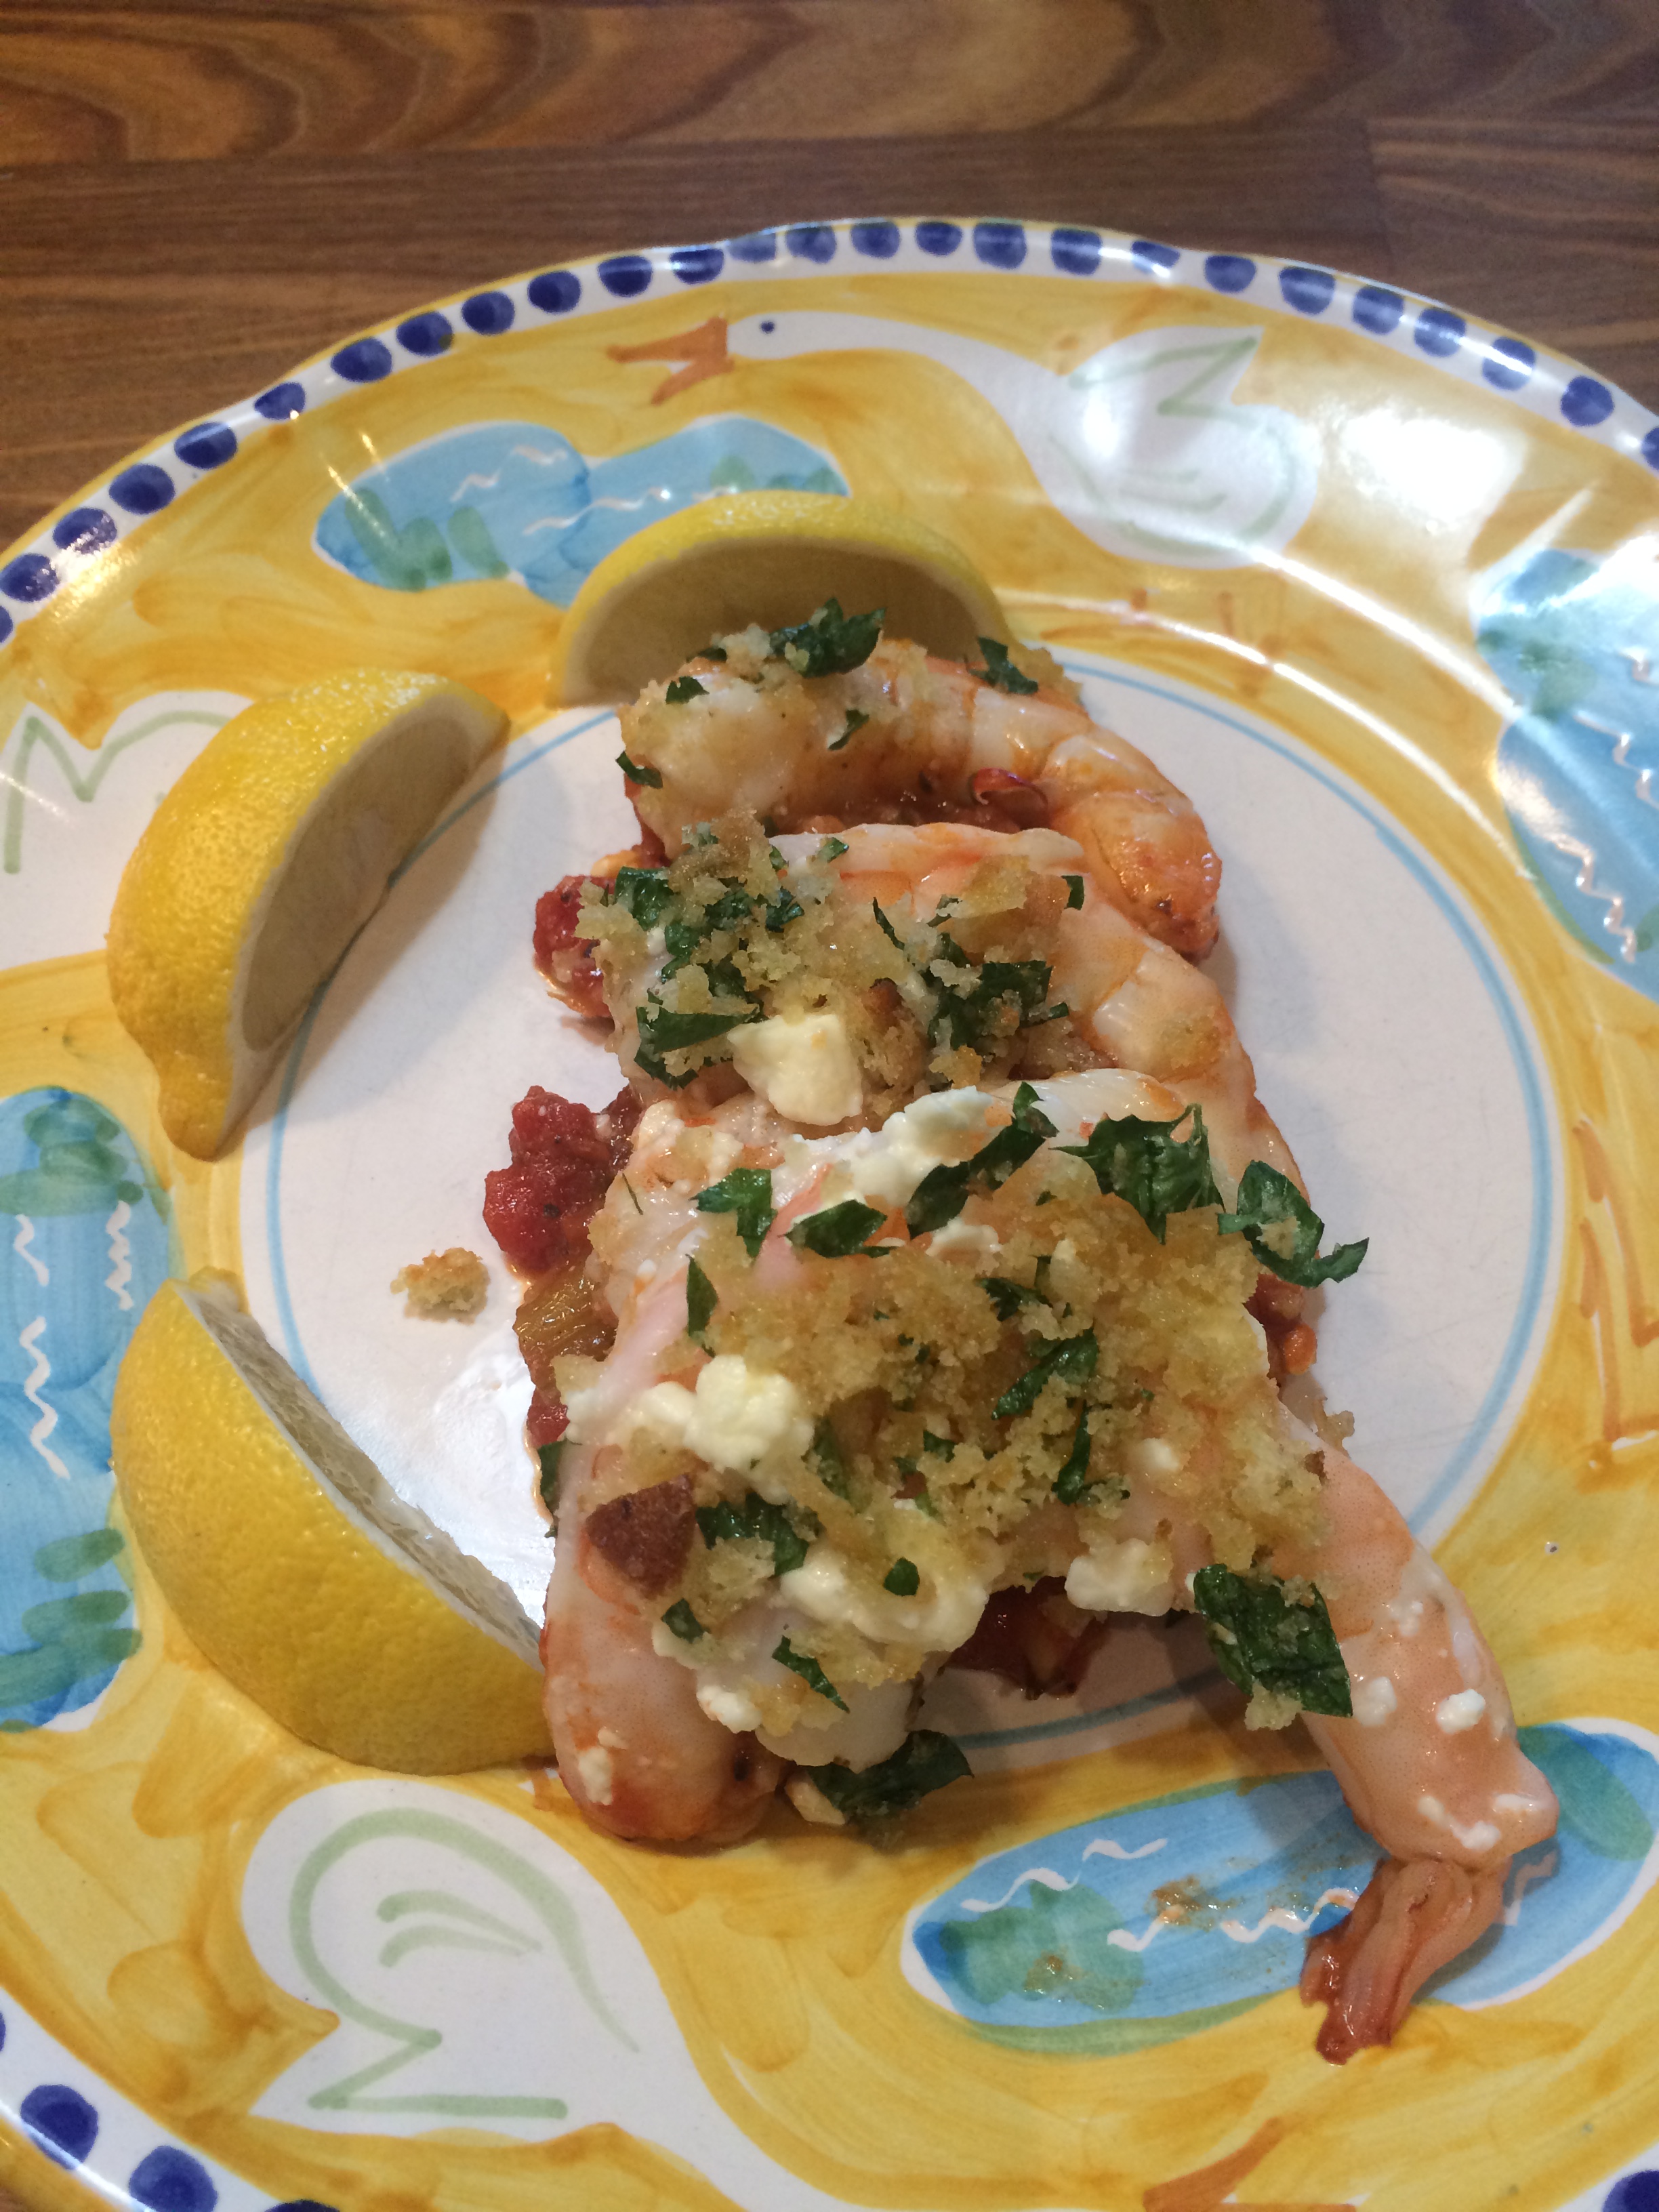
Remove from oven and squeeze the juice of 1 lemon (I used zested lemon) over the shrimp. Serve hot with the remaining lemon cut into wedges.

Summer Salad–Farm Fresh Farro

photo 5 (4)photo 4 (65)photo 2 (69)photo 3 (4)During the summer months in Colorado I am usually outdoors on a hike or my bike and while out there I can’t help but be inspired by all the beauty surrounding me here in the mountains. One of the things I often think about while out there is what I am going to make for dinner. Our daughter Kerri was out here visiting and while she is out here I am always on the search for some new vegetarian recipes to try out.  The inspiration for this salad came from some beautiful radishes from the farmers market and some fresh sugar snap peas. During the summer months with all the beautiful fresh vegetables available it’s super easy to throw together these salads. The fresh parmesan pieces give it the extra kick and salt it needs, use as much or as little as you like. I prefer pearled farro for this recipe.

*original recipe from Jessica Seinfeld website Do it Delicious

Ingredients:

1 cup pearled farro

1 cup sugar snap peas

4 large radishes

2 scallions

1/4 cup mint leaves loosely packed

1/4 cup parmesan pieces

3 tablespoons fresh lemon juice

2 tablespoons olive oil

1/2 teaspoon kosher salt

1/4 teaspoon freshly ground black pepper

Directions:

Follow directions on the box of farro or fill a saucepan to about an inch from the top. Bring to a boil, and add the farro and cook until tender but still chewy, about 10 minutes. Drain in a strainer and run under cold water to cool down. Drain out excess water and let sit while you prep the rest of the salad.

Wash the snap peas and radishes. Remove the stems from the snap peas, cut them crosswise into 1/2″ pieces and add to a medium bowl. Trim the stems off the radishes and remove the root ends. Slice the radishes in half , then slice crosswise into thin half moons. Add the radishes to the bowl. Trim the ends of the scallions, wash and then slice the white and light green parts of the scallions into small rounds. Add to the bowl. Tear the mint leaves and add to the bowl. Take the parmesan and crumble into the bowl, you can use your hands or a knife to crumble parmesan. Add the cooled farro to the bowl.

Add the lemon juice, olive oil, salt and pepper to the bowl. Taste for seasonings. Mix and allow to sit for a bit before serving. I made ahead and stored in fridge. I removed before serving for a while to bring to room temperature.


Devil’s Chicken on the Grill

IMG_0575

chicken flattened out right before cooking

IMG_7439

look at the color of the skin on this chicken, no black!!! just golden and brown

IMG_0572

marinade for chicken

IMG_7440 IMG_0574We absolutely love spatchcocked chicken. Simply delicious made in the oven and on stove top (see recipe for Spatchcocking the Chicken) . In any event I hadn’t ever made it on the grill and I wanted to . It came out just perfect, just wish I had better photos. We started eating it before I could photograph so I kind of assembled it and snapped. Next time I will take better photos and add them because this will be a staple in our house.

As you know we love spicy food but you don’t need to use crushed red pepper you can just season with salt , pepper and paprika, garlic powder whatever you’d like . This is how I did it and for those of you who do like it a little spicy this was perfect. It wasn’t really all that spicy at all just a hint of kick.

You will ask your neighborhood butcher to please remove the backbone of your chicken unless you’re good with the kitchen shears and can take it out by yourself. I prefer having butcher do it . (see photo) Chicken will still be in one piece or you can have them cut it into two pieces, it doesn’t really matter which way. I kept it as one whole chicken.

Ingredients couldn’t be simpler, I’m sure you have all ingredients but the chicken.

Ingredients:

2 cloves garlic–chopped

1 Tablespoon fresh thyme leaves ( app. 10 sprigs) removed from sprigs and chopped

3 Tablespoons fresh lemon juice ( 1 nice size lemon)

2 Tablespoons Extra-Virgin Olive Oil

1 1/2 teaspoons kosher salt

3/4 – 1 teaspoon crushed red pepper ( use as little or as much as you’d like I used 1 teaspoon)

1/2 teaspoon freshly ground black pepper

1 whole chicken with back-bone removed and flattened as much as possible, if you’d like you can have chicken cut into 2 halves.

Directions:

In a small bowl , add chopped garlic, chopped thyme along with lemon juice, oil, salt, red and black pepper. Whisk all ingredients together. Rinse the chicken and pat dry with paper towels.

Put chicken on a baking tray and cover with marinade , I used a pastry brush to get marinade all over the chicken. Let chicken sit in marinade at least an hour and up to 24 hours.

Heat the grill ( spray grill first with cooking spray or oil the grates).

I turned heat on grill up all the way , once grill got very hot I turned it down to medium-low and placed the chicken on grill skin-side down, closed the cover and cooked it low and slow for about 22 minutes. You can check on chicken by lifting up with tongs , be sure to check up on it often to make sure you have no flare-ups with your grill. Flip chicken over and cook for another 20-25 minutes. You can cut into chicken to make sure it’s done. This method worked perfectly for me , as all grills are different you will have to see how long it will cook on yours. I did it 22 minutes per side and it seemed to work out perfectly.

Orzo with Lemon Shrimp and Spinach

photoDSCN0367DSCN0363DSCN0372DSCN0384DSCN0390By now you all know how very much we love shrimp. It comes in handy to have an ex-shrimp monger on hand to clean and devein my shrimp. I love cooking it but not so much cleaning and deveining it. Joel not only obtains the best shrimp around but he really does do a great job of cleaning and deveining. ( I think it’s in his DNA) In any event we make a pretty good team when it comes to shrimp dishes.
So now on to this delicious dish. I didn’t feel like grilling and this dish was calling out to me. I saw Giada de Laurentiis make a shrimp scampi on her show and she made it with arugula , it looked so awesome and light I figured I’d do it my way and make it with spinach even though I knew Joel wouldn’t eat the spinach. Our friend Drew was over and he loves spinach so we ate Joel’s spinach, once again it’s his loss. This dish was pretty easy to pull together once shrimp was prepped. Not a whole lot of ingredients, and whole thing took about 1/2 hour.  This dish was very light in flavor and a perfect summer night meal, doesn’t have to be served super hot , can be room temperature. Thanks again to Giada for the wonderfully inspiring recipe.

*once the shrimp is prepared this dish is a snap. Have your fish store clean and de-vein your shrimp for you.

Ingredients:

Vinaigrette:

1/3 cup olive oil

zest of 2 large lemons ( try to use organic if you’re zesting and eating the peel) and scrub those lemons well

1/2 cup fresh lemon juice ( from the 2 large lemons you just zested)

1/2 teaspoon of kosher salt

1/2 teaspoon of freshly ground black pepper

In a small bowl, whisk together the olive oil, lemon zest and lemon juice, salt and pepper until smooth and set aside.

Ingredients:

1 lb. orzo

1 lb. shrimp , I used large under 10’s, peeled and deveined  ( you can have fish monger do this )

2 tablespoon olive oil

1 large shallot , chopped

app. 1 more teaspoon kosher salt

1/2 cup dry white wine ,  ( I used what I had on hand)

6 ounces of spinach , I used baby spinach, use whatever greens you like. Giada used arugula .

Directions:

Cook orzo according to directions. Drain and reserve 1 cup of the pasta water.

Place shrimp in a bowl and sprinkle with kosher salt and some freshly ground black pepper . Heat the 2 tablespoons of olive oil over medium high heat. Add the chopped shallots and cook until soft for a few minutes. Add the shrimp, cook shrimp until they turn pink and are just cooked through depending on the size of your shrimp. When shrimp is cooked through remove the shrimp from the skillet. Increase the heat to high and add the 1/2 cup of wine, allow to boil up and scrape up all the brown bits from the bottom of the pan, cook for another minute or so until most of the liquid has evaporated.  Then add orzo to the pan along with the vinaigrette and the spinach and let it wilt down.  I added most of the reserved pasta water , you’ll use as much or as little as you need, I used whole cup of reserved pasta water. Add the shrimp back in and toss well until all the ingredients are well coated. Serve up and enjoy.

7-UP Bundt Cake

IMG_7176 IMG_7179 IMG_7183IMG_7238 IMG_7237 IMG_7234 IMG_7222Now you have to wonder how a cake like this ever get discovered in the first place? Baking with actual drinking soda sounds both disgusting and intriguing but I was up for the task. I promise you it was delicious. IMG_0563 IMG_0561  I gave up drinking soda a few years ago and now I’m going to put it in a cake? But that’s exactly what I did. I had to wonder how a cake like this came to be,  was someone drinking 7-UP and spilled 3/4 of a cup in by accident? OMG it’s a lot to think about it but all I can say is WOW! I did a little research on the recipes and there are quite a few out there, most of these “soda” cakes seem to hail from the South.  Baking is a little tricky up here at high altitude but it went well. Bundt cakes make you look like a rock-star baker. I made a few changes to recipe adding vanilla extract and lemon extract. Lemon extract was the key for me. I kept the glaze simple but there are some awesome renditions out there.

Somehow these ingredients produce a delicious lemony moist cake!

Julia Child once said “A party without cake is just a meeting” my exact sentiment.

Ingredients:

1 1/2 cups butter, softened ( a little trick I discovered is using soft butter spread, easier to measure out and no melting required, just leave it out to really soften before using) if you use regular butter just soften it up in the microwave for a few seconds.

3 cups sugar

5 eggs ( always try to use room temperature eggs)

3 cups flour

2 Tablespoons Lemon Extract

1/2 Teaspoon Vanilla Extract

3/4 cup 7UP or any carbonated lemon-lime beverage of your choice

*optional you can add zest of 1 lemon and 1 lime , I did it without doing this extra step and it was all good. For an extra zing of flavor you can add it.

Lemon Glaze:

2/3 cup powdered sugar ( confectioners sugar)

1 Tablespoon Lemon Juice ( juice of a fresh lemon)

Directions:

Preheat oven to 325 degrees.

You will probably cook cake for about 1 1/4 hours. I would check on cake with a cake tester after the hour.

Cream butter and sugar for about 20 minutes in an electric mixer with paddle attachment, I know this seems like a very long time but according to many different renditions of this recipe I have read it seems that the cake will come out lighter if you do this.

Add eggs one at a time, beating after each egg

Add flour and lemon extract and vanilla extract

Fold in 7UP –meaning simply take bowl off electric mixer stand . Pour soda in slowly and gently fold in with a rubber spatula.

Pour into a well-greased (sprayed with cooking spray) Bundt Pan or Tube Pan, I used a Bundt.

Make Lemon Glaze-mix the powdered sugar and lemon juice together with a whisk.

I removed bundt cake from pan after about 10 minutes, let cool.

When cake is cooled, drizzle with Lemon Glaze

Michele’s Ramon Noodle Salad – Perfect Summer Salad

photoI have already posted my version of a Napa Noodle Salad, which we all love and totally enjoy all summer long. Here is a new spin on it.  So whether you love the other one or never even tried it this one is definitely worthy and will be a part of my Summer Salad Repertoire.   Thanks again Michele! And by the way Joel loved it, and it contains Broccoli Slaw!!!! this was a major shock for sure. Maybe the tide is turning? This is not vegetarian but my Napa Noodle Salad is so just substitute that dressing. Enjoy!

Ingredients:

1 cup of olive oil ( you can use a little less)

1/2 cup sugar

1/2 cup apple cider vinegar

2 – 3 packages slaw of any style or mix. Michele used 2 12 oz. bags broccoli slaw and one bag regular cole slaw (these bags of slaw are available in almost every supermarket now in the lettuce section) 3 bags will serve 12 nicely and there is enough dressing for 3 .

2 packages beef flavored Ramon noodle soup mix ( I know this is a bummer for the vegetarians out there)

1/2 cup sunflower seed kernels

1/2 cup slivered almonds

1 tbsp. soy sauce

Directions:

Prepare dressing by combining oil, sugar, vinegar, soy sauce and two flavor packets from soup mix. Whisk well and chill. Make the dressing early in the day and whisk it a few times throughout the day.

Before you’re ready to serve , crush the ramen noodles. Then combine slaws, seeds, almonds, and noodles.

Dress salad 10 minutes before serving. Put together the salad right before serving so everything stays crunchy.   Enjoy!

Summer Blueberry Cake

I just keep finding new recipes for blueberries. I love blueberries and they are so abundant right now and in peak season. I love them right out of the containers, and I love them in muffins, pies, cakes and cobblers. Here is another delicious cake which you can freeze and a few months from now when fresh blueberries aren’t really around ,you will bring back that summer day that you baked this. I cut this in 1/2 , 1/2 for now and 1/2 for when I return in the winter. You can always make this with frozen berries but I have never done so. To me it’s all about cooking with fruits and vegetables that are seasonal.  There really is nothing like fresh seasonal fruits and vegetables, and I can’t get enough of them . This is a fairly easy cake to bake. I baked it for 45 minutes, and the tester came out clean. You’ll have to check your own oven for cooking time . It can vary from 40 – 50 minutes depending on your oven.

I found this recipe on one of my favorite cooking blogs , Smitten Kitchen. I may have made a few changes which I often do, but it is pretty much the same.


Ingredients:

2 cups all – purpose flour, plus another tablespoon to dust blueberries with

1 tablespoon baking powder

1 teaspoon table salt

2 sticks unsalted butter ( softened) YIKES

3/4 cup light brown sugar packed

1/2 cup sugar ( regular granulated sugar)

3 large eggs ( room temperature)

1 cup buttermilk ( I used low-fat buttermilk)

1/2 cup fresh blueberries

Topping:

1/2 cup fresh blueberries

1/4 cup granulated sugar

1/2 teaspoon ground cinnamon

Directions:

Adjust oven rack to middle position and preheat oven to 350 degrees. Spray and lightly flour a 9 x 13 baking pan. ( I prefer Pam baking spray)

Whisk 2 cups flour, baking powder, and salt together in a medium size bowl. With electric mixer, beat butter and sugars on medium high-speed until fluffy. Add eggs one at a time, beating until each egg is just incorporated. Don’t overbeat. Reduce speed to medium and beat in 1/3 of the flour mixture, and beat in 1/2 of the buttermilk. Beat in another 1/3 of the flour and the remaining milk, and then the remaining flour mixture. Toss  blueberries with a tablespoon of flour just lightly dust them. Using a rubber spatula, gently fold in 1/2 of the blueberries. Spread batter into prepared dish.( see photo)

For the topping:

Scatter remaining 1/2 of the blueberries over the top of the batter. Stir sugar and cinnamon together in small bowl and sprinkle all over the top of the batter. Bake until cake tester or toothpick comes out clean in center of cake. I cooked for 45 minutes. It should take anywhere between 40 – 50 minutes. Cool in pan for about 1/2 hour, then turn it out of baking dish or cut out pieces. I turned it out, cut in 1/2 and froze 1/2 of it for the cold months. This is a delightful cake served for dessert, and so perfect for breakfast and a great afternoon snack with ice coffee .

I threw in a photo of me and my grandson, Riley who was out here at the time.

Breakfast in a Jar–Overnight Oats

IMG_8325
IMG_8278
IMG_8270
IMG_8271

This has become one of my favorite go to breakfasts. It is packed with nutrition and delicious not to mention so very filling.  Low in fat and low in sugar. Fiber from the chia seeds and anti-oxidants from the blueberries!  I make 2 of them at nighttime and my breakfast is ready and waiting for me in the morning and then I have one for the next morning. No fuss at all, easy simple ingredients and substitute any fruit you like. I happen to love blueberries but bananas would work as well as peaches, etc. If you don’t like nuts or chia seeds just omit or use any kind of seeds (flax) or nuts you like. Awesome! I used a mason jar because they have such a good lid and you can shake it up and close tight. Take it with you on the go , before the gym, before ski , before a hike and before a bike ride! My new favorite breakfast. If you’re not doing any of those activities it’s still a great go-to breakfast. Enjoy!

Follow me on Instagram @cookingwithcandi

Ingredients:

1/2 cup old-fashioned oats

1 Tbsp. slivered almonds

1 Tbsp. Chia Seeds

1 Tsp. Brown Sugar (now this is such a little bit of sugar but if you like a substitute you can do what ever makes you happy) I personally like the brown sugar flavor

dash of cinnamon

app. 1/3 cup of blueberries

3/4 cup of milk ( any milk you like) I use fat-free and 2% depending on what I have in the house.

Directions:

Load it all in the mason jar and shake it up good.

Place in the refrigerator overnight and there you have a delicious healthy breakfast ready for you before you start your

Blackberry Clafouti (Blackberry Cake)–Simple and Easy to make

I made this cake because I love blackberries and I had all the ingredients in my house. If you like blackberries, this is a light cake which will be perfect for dessert and not too heavy at all.  Clafouti is actually french for a cake made with cherries. If it’s made with blackberries or other berries it is called a Flaugnarde, which sounds super fancy and difficult to make and this is anything but that so we’ll just call it Clafouti! We aren’t going to get too technical here and I hope I don’t offend the French chefs out there. This is pretty much the same as the cherry Clafouti which I plan on baking soon and will post that once I’ve cooked that, but we have to wait for the cherries to be super ripe.  This cake is so very easy to make, requires no fancy equipment, and you can whisk ingredients in one bowl. Just use a pie baking dish to bake in. I had a glass dish and am happy that I did, because I could see the blackberries in the cake. This cake would be a most amazing breakfast type of cake–not too thick, but sort of like a blackberry muffin flattened out. Blackberries are so plump and delicious right now, you gotta cook this as soon as possible.

*In order for the blackberries not to sink in cake, I made sure they were dry after rinsing and then I put in a bowl with some flour and coated the berries in flour before adding them , not too heavily floured just a dusting.  It came out perfectly. I have made it where I forgot to dust with flour and they did sink. It didn’t look as pretty but it tasted just fine.

Ingredients: 

1 stick unsalted butter

1 cup sugar plus 1/4 cup of sugar for top of cake

1 cup Self-Rising Flour  Presto), sifted

1 cup whole milk

2 cups blackberries, fresh or frozen (I used fresh)

* A little extra flour for dusting the blackberries before baking with them (see note)

Directions:

Preheat oven to 350 degrees. I sprayed the baking dish with baking spray but you can also butter it.

Rinse and pat dry the blackberries. Melt the butter in microwave. Pour 1 cup sugar and flour into a mixing bowl. Slowly whisk in the milk and mix well. Then pour in the melted butter and whisk it all together well.

Dust blackberries with a little bit of flour and mix well. Pour the batter into the prepared baking dish. Sprinkle blackberries over the top of the batter, distributing evenly.  Sprinkle 1/4 cup sugar over the top.

Bake in the oven at 350 degrees for about 1 hour or until golden.  Yum!

A Real Deal Blueberry Cobbler

I recently found this recipe and realized it was a combination of 2 separate recipes–one for the blueberry filling and one for biscuits. When combined, this is a true cobbler and not a crisp. Yum!

Make it for company and at least six people so you have a teensy bit left over , these leftovers are just amazing the next day and hard to resist eating !

Use fresh blueberries which are in abundance now and if you want to make this in the winter and blueberries aren’t around you can always use frozen blueberries. It’s almost a must to serve this with vanilla ice cream, as it complements it so well! If you’d like, you can make this a day ahead for sure, I’ve even frozen it. It comes out perfectly. Now is the time to try and bake this delightful dessert with all of the beautiful blueberries out there.

Ingredients:

1 pound blueberries or 3 1/2 cups – obviously fresh is best but if you want you can use frozen blueberries

1 tablespoon cornstarch or arrowroot

2 tablespoons lemon juice (fresh)

1 cup all -purpose flour

3/4 cup sugar ( you can use turbinado (raw ) sugar as well ( divided)

1 teaspoon baking powder

1/4 teaspoon salt

1/2 cup milk ( don’t use fat free, if you must, use 2%) I prefer whole milk in baking or low-fat buttermilk always works.

3 tablespoons butter, melted

3/4 cup boiling water

Directions:

Preheat the oven to 350 degrees. Spread the blueberries in an ungreased but sprayed ( I always use Pam to help with the clean-up) 8 or 9 inch square baking pan. Sprinkle with cornstarch
and drizzle with lemon juice. Set aside.

In a medium size bowl, combine the flour, 1/2 cup sugar, baking powder and salt. Add the milk and the butter.

Stir until just combined ( shouldn’t be smooth) then drop mounds of dough onto the blueberries.

Pour boiling water over the dough and fruit. Sprinkle top with remaining 1/4 cup sugar.

Bake until the biscuits are golden brown and the blueberries are bubbly. 45- 60 minutes.

Serve warm or at room temperature. If you are preparing ahead , either frozen or in fridge, take out of freezer or fridge and bring to room temperature, I then put in oven till it starts to bubble.

Should serve 8