Pasta with Sausage, Beans and Greens

I love pasta and am always on the lookout for new and delicious ways to prepare it. This recipe is the real deal and reminded me of many a pasta dish I enjoyed in Italy.  If Joel liked greens more I would have added more kale and as it is he always wonders why I contaminate the pasta with all the beans and green stuff. If I were making for myself I would have added more kale or whatever greens you like. It’s not the most simple recipe as it has a few steps but thoroughly worth the effort involved. I loved the way the beans gave it so much flavor. I used Paccheri Pasta — I was able to pick up a homemade version of this pasta.  It’s just a smooth, giant rigatoni with thinner walls . It soaked up the beans and broth ! I used a can of cannelinni beans but fava beans would be a nice change or chickpeas. I used Italian spicy sausage but you can try spicy lamb sausage as well or any sausage you would like.

Now if you leave out the sausage it can be made completely vegetarian!

Enjoy!!

Ingredients:

1/2 cup olive oil

8 oz. spicy Italian sausage, casings removed

1 15 oz. can cannellini beans (white kidney) rinsed and drained. You can use fava or chickpeas

1/2 cup dry white wine if no wine in the house try chicken broth

12 oz. paccheri, rigatoni or any tubular pasta–try a homemade pasta from your local market

6 cups (lightly packed) torn escarole, baby kale, regular kale, Swiss chard leaves, regular kale even spinach will work–whatever you like

Kosher Salt

Freshly Ground Black Pepper

1/2 cup + 1/4 cup of finely grated Parmesan

Directions:

Heat the olive oil in a heavy bottomed pot over medium-heat. Add sausage to pot and cook breaking up with a wooden spoon, stir occasionally until browned and cooked through, app. 10 mins. Transfer with a slotted spoon to a separate plate.

Add white beans to pot (drained and rinsed) and cook tossing occasionally, I mashed some beans with the back of a wooden spoon. So about 1/2 the beans mashed and the rest I left whole. Cook beans till slightly browned for about 5 minutes. Transfer 1/2 of this mixture to plate with sausage. Leave the other 1/2 in pot. Add the wine to the pot, bring to a boil and cook until liquid is almost all gone–about 2 minutes. I sprinkled a little kosher salt in to the bean mixture at this point. You’ll taste again for salt .

Meanwhile, cook your pasta in a large pot of boiling salted water, stirring occasionally, cook until very al dente, a few minutes less than you would normally cook. Don’t overcook!

I used a pasta insert to cook my pasta . I reserved a few cups of the cooking water –you’ll need it. Don’t throw it down the drain. Drain Pasta and then transfer pasta to pot with beans and add your greens and 1 cup of pasta water . Your heat should be on low under the pot just so it’s cooking without burning. Cook and stir often until greens are wilted , pasta is al dente and sauce is thickening up probably 5 minutes or so. Stir and Stir. Add another 1/4 cup of pasta water, then gradually add in 1/2 cup of grated cheese, tossing until melted and cheese dissolves into a beautiful glossy sauce. Thin out the sauce with more pasta water if too thick. Taste for salt  and I put a little freshly ground black pepper in at this point.

Now add in reserved sausage and beans. Delicious pasta right here right now in your pot! and so professional looking and tasting.

Sprinkle with extra cheese if you’d like and crushed red pepper if you’d like.

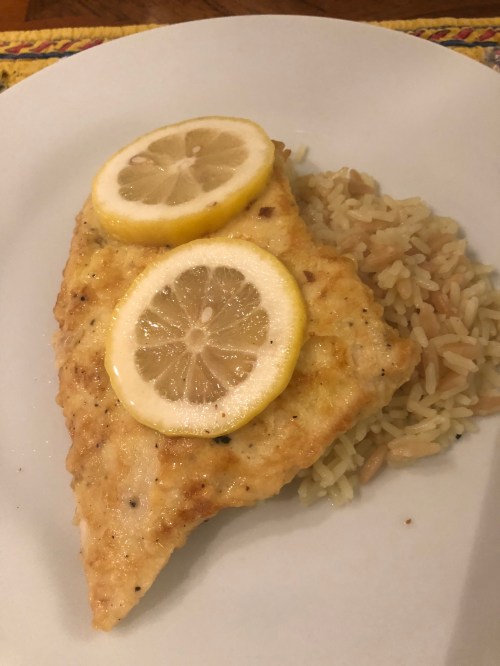
Pasta was rich and tasty served hot off the stove.


Instant Pot Chili

If you’re like me and keep hearing about the wonders of this Instant Pot this is for you. The Instant Pot is a Pressure Cooker, Multicooker and Instant Pot all in one plus its a slow cooker! I bought 2 new cookbooks and this recipe came out of the book “Comfort in an Instant”by Melissa Clark ( one of my personal favorite chefs) . It’s Chili time of year and I really believe it’s Chili time of year all year round! Once I figured out my new Instant Pot and all it’s settings I was good to go and this was my Baby Step into the world of the Instant Pot. I made it on Halloween since I was home with all the trick or treaters and I was able to cook without having to attend to the pot. This recipe was titled Easy Weeknight Chili. If you cook it in the instant pot alone it is ready in under an hour. I had time so I did the first 3 steps and then turned the Instant Pot into a slow cooker for 3 hours! It’s great! I sautéed and cooked all in the 1 pot. Next time I will use the pressure cooker so watch for those recipes if you’re into the Instant Pot.

The book is titled “Comfort in an Instant” by Melissa Clark available on Amazon if you would like to see the full recipe it’s in the book.

Ingredients:

2 Tablespoons of extra-virgin Olive Oil

1 lb. ground beef and I added 1/2 lb. ground pork ( you don’t have to but it gave the beef a wonderful layer of flavor which is obviously richer than just ground beef)Don’t use the lean version of ground beef , beef should be at least 85% lean and 15% fat. It’s your call about the pork . I would use 1 1/2 lbs. of meat

2 teaspoons kosher salt

1 large onion, diced

1 green pepper , diced

1 jalapeno pepper seeded ( if desired you can leave some seeds which will make it spicier) and diced up

4 garlic cloves , minced

1 Tablespoon Tomato Paste

2 Tablespoons Chili Powder

1 Teaspoon dried Oregano

1/2 Teaspoon ground cumin

1 28 oz can or box of diced tomatoes — original recipe calls for 1 can but I doubled it and it was just fine!

2 15 oz. cans of kidney beans, drained and rinsed

app. 1/2 cup chopped fresh cilantro

Fresh Lime Juice

Toppings:– these are just suggestions

Sour Cream

Salsa

Red Onions , diced

Cubed Avocado

Cilantro

Jalapeno –extra diced

I used Soft Tortillas because I had them but you can use Tortilla Chips as well

*you can also serve over rice or as a taco filling which is what Joel did with the soft tortillas.

*Just be sure you sear the meat because you don’t want steamed meat . Follow instructions and do the meat in 2 batches

*Chili freezes extremely well so double down if you’d like and freeze the remainder

Directions:

Using the saute function ( set on high) heat 1 Tablespoon of the oil in the pressure cooker pot. Add half the meat, spread it over the oil, and let it brown without stirring ( this is key) saute for 5-7 minutes. Give the meat a good stir after 5 minutes and continue to cook for 1 minute. Using a slotted spoon transfer the meat to a plate and season with 1/2 teaspoon of the Kosher Salt. I didn’t need any more oil so if you do add another tablespoon of olive oil to the pot. Repeat till the rest of the meat is browned, and add 1/2 teaspoon of kosher salt to this as well. Remove all the meat and you should have enough fat and oil to continue cooking veggies.

Stir the onion, bell pepper, diced jalapeno, garlic and 1/2 teaspoon of the salt to the pot until softened, app. 5 more minutes.

Stir in the tomato paste, chili powder, oregano, and cumin and cook until fragrant, about 1 more minute. Stir in the meat and any juices from the plate along with the tomatoes, beans, and remaining 1/2 teaspoon kosher salt.

After this step I turned my Instant Pot into a slow cooker by setting the button to Slow Cook for 2-3 hours ( I did 3 because I had the time) on high setting. You can set on low setting for 4-5 hours.

When finished and ready to serve I plated up in big bowls( see photo) added a squeeze or two of lime juice and we added our own toppings.

EnjoyIMG_2878IMG_2882IMG_2883! we did.

I added my photo from Halloween I gave out the candy in my Chefs Jacket and Hat figured it was appropriate.


Chicken Tortilla Soup

img_3215

This soup has always been a favorite of mine and I usually try to order it when it’s offered on a menu. I am a big fan of Mexican Food and have always wanted to try to make my own Chicken Tortilla Soup .This is a super easy version using a store-bought rotisserie chicken and a packet of Taco Seasoning.  Now that the weather has turned super cold it’s a perfect time for heart warming meals. I started cooking soup in the afternoon, prep was pretty quick and I let it simmer for an hour and then turned off stove while we went out. When we got home I turned on the stove and continued cooking soup. I cut up avocado, chopped up some cilantro, put sour cream and cheese into some little bowls and in less than 1/2 hour we were sitting eating this delicious and tasty soup! Joel even ate the avocado!!!! This is big!!! He loved the soup. It’s very filling.

I use crispy tortillas if that’s what I have in the house. It is delicious with soft corn tortillas sliced up and added into the soup at the end also. I love when the crunchy chips go soft in the soup with the melted cheese– I could go on and on about this soup. Tonite I used soft tortillas.

If you have the time I suggest making this soup, it is so easy with a prepared chicken or you can make your own chicken .  The prep is about 15 minutes using store-bought chicken and cooking is about 1 1/2 to 2 hours for soup.  I just think soup tastes better the longer it sits. I prefer making it in the early part of the day and letting it sit on the stove for a while.

This is a big soup and will probably serve 6-8 nicely. I have a container in my freezer and 4 of us ate this soup.

Look for my slow cooker version also on my blog.

Enjoy!

Ingredients:

1 Rotisserie Chicken from your favorite supermarket

1 Tablespoon Olive Oil

1 Packet of Taco Seasoning — this is really easy , use whatever brand you like

1 cup diced onion

3 cloves garlic, peeled and minced

1 diced green pepper

1 diced yellow, red or orange pepper

1 10 oz. can  Rotel brand Tomatoes and Green Chiles–just a suggestion

1 can enchilada sauce– green or red ( in Mexican Food section of your supermarket) its a small sized can

1 15 oz. can of whole-kernel corn  – drained

32 ounces Chicken Broth

3 Tablespoons Tomato Paste

4 cups hot water

2 cans Black Beans , drained and rinsed unless they’re organic and then you don’t have to rinse but I always do anyway

3 Tablespoons Cornmeal –mixed with water ( see instructions)

5 Soft Corn Tortillas (I use the small ones) cut into uniform strips or crunchy tortilla chips–use as many or as little as you like–or skip all together for a lighter version.

Toppings:

*optional and use whatever you like — these are just some suggestions

Sour Cream

Cilantro

Grated Cheese –Monterey Jack is a good choice here or Mexican Blend Grated Cheese

Cut-Up Avocado

Salsa or Pico De Gallo

Diced Red Onion

Diced Fresh Jalapeno

Hot Sauce like Cholula is my favorite go to sauce

Directions:

I took skin off chicken and shredded most of the chicken meat.

Heat 1 Tbsp. Olive Oil in a large Pot –dutch oven is great here (Le Creuset) add onions, peppers, and minced garlic. Stir and begin cooking, then add the packet of Taco Seasonings if it’s very dry and hard to stir you can add a little more olive oil. Add in the shredded chicken and stir it all up.

Pour in Rotel, chicken stock, tomato paste, enchilada sauce, water , black beans and corn. Bring to a boil, then reduce heat to a simmer. Simmer for app. 45 minutes to an hour, uncovered.

In a little bowl mix 3 cornmeal with a small amount of water , just enough to mix it into a paste like consistency. Pour into the soup, then simmer for an additional 30 minutes at least, I cooked for another hour. I always believe the soup is best when it sits for a long time.

Check seasonings, adding more salt if you need it , I added kosher salt because I felt it needed it. Taste has to be your guide but be sure not to undersalt, you don’t want this to be bland. Turn off heat and allow to sit for about 20 minutes.

Five minutes before serving, gently stir in the tortilla strips if you’re using them.

Ladle into bowls, then top with your favorite toppings and there you go! I think the chips/tortillas make this soup along with the cilantro and avocado. Let your taste be your guide here.


Pumpkin Cupcakes with Cream Cheese Frosting–Fall Treats

photo (4)photo (16) photo (17) photo (18) photo (19)There are a few things I really love to eat. Mostly anything sweet and mostly dessert. Anyone who knows me well knows that I have an incredible sweet tooth. Funny that my name is Candi and I love candy, cookies, cakes and ice cream so very much. I would probably pass on most entrees and just cut to dessert if I had my way . When I was a kid I would gladly trade a sandwich for dessert any day of the week. Some things never change. I’d like to believe that my tastes in dessert have changed a wee bit and that I have a bit more of a sophisticated palate now but not when it comes to candy,  I still love junk candy as much as I did when I was 6. However my taste in cake has definitely improved with age. I don’t think I would have enjoyed pumpkin cake as a kid but I really love it now. Anything baked with pumpkin gets high marks in my book and if you put cream cheese frosting on it it’s off the charts.   It’s just the right amount of sugar and spice! Perfect Fall Cake and it may just find its way to my Thanksgiving Table. It really is a very easy recipe to follow ,  I made cupcakes but you can easily make this in a Pyrex 9 x13 inch pan as a sheet cake and frost it and decorate with candy corn or those little candy pumpkins!

Now you can make these without frosting and just eat like muffins with a little smear of cream cheese which wouldn’t be too bad either.

Happy Halloween Everyone!!!

Shopping List:

1 can Pumpkin ( not pumpkin pie filling just Pumpkin) 15 oz. size

cream cheese  and paper liners for cupcakes

Staples: (things you should have in your Pantry and fridge all the time)

all-purpose flour, sugar, baking powder, baking soda, cinnamon, ground cloves, salt, vegetable oil, eggs, confectioner’s sugar, unsalted butter, vanilla extract, and milk

Ingredients:

2 cups of all-purpose flour

1 cup of sugar

2 tsp. baking powder

1 tsp. baking soda

1 tsp. cinnamon

1 tsp. ground cloves if no ground cloves you can substitute with pumpkin pie spice or nutmeg. I prefer cloves.

1 tsp. salt (regular table salt)

1 cup vegetable oil

1 can Pumpkin (not pumpkin pie filling) Pure Pumpkin

4 eggs ( room temperature please)

Cream Cheese Frosting:

2 cups of confectioner’s sugar

1/3 cup softened butter ( unsalted)

1 tsp. vanilla extract

4 oz. softened cream cheese ( soften in microwave) not melted just softened or you can leave it out for a bit and it will soften up.  I actually used light cream cheese not fat free please. I mean the amount of calories is staggering, but you’re only going to eat 1 cupcake right? how many calories can possibly be in that????? Don’t tell me , I don’t want to know.

1 Tbsp. Milk ( I used skim plus)

Directions:

Preheat the oven to 350 degrees. I mixed all dry ingredients together then mixed in eggs ( one at a time) and can of pumpkin and vegetable oil. Mix till combined, don’t overmix. No need to sift, just put dry ingredients in a bowl first and whisk together with a whisk , get some air in there.

Pour into a greased muffin pan about 3/4 full.  I always use little paper liners and bake at 35o degrees for 20 – 30 minutes . Be careful not to over bake so the cake stays moist.  I baked for 26 minutes. I started checking on them after 20 minutes.

Allow cupcakes to cool completely before frosting. I made my frosting in my electric mixer while cupcakes were cooling.

Frost Cupcakes / Cake  and if you’d like decorate with some of those little Halloween Candies like candy corn or those little pumpkin shaped candies sold this time of year. Enjoy!

*should make about 16 cupcakes , I made 12 and a mini loaf.

Creamy Butternut Squash Soup (no cream)

This is by far one of my most favorite recipes ever! Super Easy and Super Delicious and did I mention Super Easy?

It’s definitely fall and my first soup of the season  is almost always butternut squash soup. I’ve simplified the recipe along the way so that now it is just the way Joel and I like it. it’s pretty easy as long as you buy the squash pre – cut (available in every supermarket, and corner produce store). I just made my first batch of the season, and the squash is sweet and delicious. I always add a little butter to it, but you can totally leave it out. It tastes so creamy you’ll swear there’s cream in it, but really, there is none.  I love a little freshly grated nutmeg in it too, but you can certainly just sprinkle in a very little bit of already grated nutmeg. I hope your family and friends enjoy this as much as my family does! It’s always on my table for Thanksgiving. A delightful way to start a dinner, or a delicious main dish served alongside  a beautiful salad and bread. This can easily be made vegetarian by substituting chicken broth for vegetable broth, which is how I make it on Thanksgiving for Kerri, who is vegetarian.

*This can be made without cream so easily–but if you want a touch of richness you can add a little heavy cream into soup and mix in before serving. Totally not necessary but just saying.

And clearly this recipe can be cut in 1/2 for a smaller group

Follow me on Instagram @cookingwithcandi

Ingredients:

4 pkgs. (approx. 4 lbs.) butternut squash (it’s doesn’t have to be exact)

3 tablespoons olive oil

1 large spanish onion, chopped

8 – 10 cups chicken or vegetable broth

*1 -2 tablespoons unsalted butter (for this serving size, I use 2 but it’s totally optional)

Kosher salt and freshly ground black pepper

*use whole nutmeg – you just grate a little in for flavor. I always tend to use whole, but grated will do. It’s just a touch of it–if I had to guess, I’d say 1/4 teaspoon to 1/2 teaspoon depending on your taste

*if you really want to top it off with a touch of cream you can . Just add a little heavy cream to the soup and blend it right in at the end. Honestly it’s not necessary but it def adds a a layer of richness!

Directions:

In a heavy Le Creuset (or any other ample size large pot), I heat 3 tablespoons of olive oil. When oil is heated, put in onion and about 1/2 tablespoon of kosher salt. Sweat out the onions until they are translucent (approx. 5 – 8 minutes). If you’re using the butter, add it now too. I then add all of the butternut squash and mix the onions, oil and butter as best I can all over the squash. Next, add enough broth to cover the squash (I used approx. 10 cups of chicken broth to cover). I keep the remaining half a box of broth in case I need it later. Return to a low boil, then bring to a simmer. I let it cook a very long time–at least an hour until soft–and then I turn off the heat and let it sit for a while. I like to make it early and let it sit for as long as possible, because the squash gets very soft. Then right before I am about to serve, I use an immersion blender and blend it into a beautiful smooth soup. If you need more broth, add it as you blend. This is also your salt, pepper and nutmeg moment. Season to taste and blend just until smooth. I leave it in the pot until I need it and then gently warm it up. This soup will keep in the fridge for a few days. It can be frozen as well. Upon defrosting you may need to add more broth. Sometimes I serve this soup with beautiful croutons if I can find them in specialty stores, but it is delicious and beautiful on its own, and very good for you! My family loves it , and I hope yours does too.

*should serve 10 – 12 as appetizer

Cauliflower Fried Rice

I picked up a couple of bags of cauliflower rice last time I was in the supermarket and I made a cauliflower pizza one night and then I made this rice last night. The original recipe was posted back in October 2018. I have to admit that since you can now find  cauliflower already chopped up and ready to use there is no excuse not to make this. I used to have to chop the cauliflower in my processor which was time consuming and I would have to dry it on towels as it was always slightly watery. Now it’s available in pre-prepared cauliflower rice packages and this is a “game changer”. Both Green Giant chopped cauliflower in a bag as well as at Trader Joe’s and Whole Foods. The pre-chopped bags come in 16 ounce size bags which is what I used for this recipe.  You can buy extra bags and keep them frozen!  It’s wildly popular so grab it while you can and get a few extra bags while you’re at it. Of course you can always chop your own if you don’t have access to any of these products.

This was so delicious I have added chicken and shrimp but you can certainly leave it vegetarian and add more vegetables or tofu.  There are so very many variations on this theme, feel free to go wild with it. It’s a low carb alternative to regular rice and a delicious healthy way to do so. I served it up in a large bowl and it was really a filling delicious dinner. Of course because of quarantine due to Corona I haven’t shopped as much and only had frozen peas not peas and carrots and it was perfectly fine. If and when you get your food delivery just pick up some of these ingredients and you won’t be sorry.

Today I will heat up leftovers for lunch since we are all eating at home now and maybe throw a fried egg on it!

Follow me @cookingwithcandi on Instagram and if you do make one of my recipes please post and tag me — I love hearing from all of you and let’s face it what else do we have to do these days? and social media helps to keep us all social.

Stay safe and be smart my friends.

Ingredients:

1 bag chopped cauliflower rice ( I found Green Giant brand and used it) I used a 16 oz. bag  you can use up to 24 oz. Or 1 medium head of cauliflower.

2 Tablespoons reduced sodium soy sauce- you may want to add more at the end , you’ll wait and taste–add to your own liking and you can even leave it on the table and have everyone add to their own liking

1 Tablespoon Sesame Oil

2 Tablespoons vegetable oil, plus a little bit for eggs as well. You can cut the oil down on eggs if you’d like. I felt like I needed the 2 tbsp. of oil for onions , etc. You can start 1 tbsp. and add as you need.

1/8 teaspoon ground ginger– you can use fresh if you prefer

2 large eggs-beaten

1 cup frozen peas and carrots –I had it in the house and how easy was this? you can use broccoli or corn or all.

1 onion diced

2 cloves garlic -minced

1/8 teaspoon freshly ground black pepper , about 6 grinds on the pepper mill will do

*pinch of crushed red pepper

*chicken, shrimp whatever protein you like . I used thin chicken cutlets that I  cooked in a pan ( sprinkle with salt and pepper first) and in a little vegetable oil just cook till ready. if I were making for more people I would probably add about 1/2 lb. of cutlets diced up. Cook breasts and then cut up or cut up and cook quickly in a pan they will finish cooking in the rice.

2 green onions (scallions) thinly sliced

*salt and pepper to taste — you may want to add a little but don’t add till the end and you’ve tasted it. I added a little sprinkling of salt and pepper.


Directions:

If you must make the cauliflower rice, take out the processor, pulse cauliflower in the large bowl of a food processor until it resembles rice, about 3 minutes, set aside. If you bought the bag–you’re ready.

In a small bowl, whisk together soy sauce, sesame oil, ginger and a little black pepper

Heat about 1/2 Tbsp. of vegetable oil in a medium skillet over low heat , add beaten eggs and cook until cooked through. I didn’t scramble , I made a large pancake. About 2-3 minutes per side, flipping once. Let cool completely before dicing into small pieces, set aside to cool.

Heat 1- 2 Tablespoons Vegetable Oil in a large skillet or wok over medium high heat. Add garlic and onion to the skillet and cook, stirring often, until onions become translucent, at least 5 minutes. I like my onions translucent for this recipe. Lower the heat and stir in peas and carrots (and any other veggies you’d like) and cook until vegetables are tender, about 5 minutes. I ended up using the 2 Tablespoons of oil, do what works best for you.

Stir in the cauliflower, diced up eggs, green onions and soy sauce mixture. Cook, stirring constantly, until heated through and the cauliflower is tender, about 5 minutes . Taste for soy sauce and add if necessary. I didn’t add any salt because the soy sauce was salty enough. After the first five minutes of cooking I throw in the cooked protein that I am using and continue to heat it all up stirring as I go. If you ‘d like you can also add more soy sauce at this point. Just heat till hot and serve.

This is a very loose recipe so please feel free to experiment.


Chicken Francese

IMG_2508IMG_2509photoI am so sorry that I haven’t been posting a lot of new recipes lately. We have been busy moving into our new apt. in Manhattan. My kitchen is a small city kitchen but I have had no problem cooking in it . It is just a matter of organization and not having a whole lot of people in the kitchen while I cook. I accepted a smaller kitchen because I really liked other things about this apt. It’s all about the compromise, especially in NYC real estate. That being said I am enjoying living in Manhattan for the first time in my life. I have always spent a lot of time here but never lived here before.  At this point in our lives we decided it was now or never, so it’s now . Food Shopping is a whole new ball game as pretty much everything gets delivered. Since I really like to see what I’m cooking I often go and pick out everything and it all gets delivered to my doorstep — how perfect!

Anyway this is a new recipe for me and it was in the New York Times last week’s food section and it is a perfect Monday Night Meal. Perfect Weeknight Meal. I served alongside some rice and a green salad with a few tomatoes!

Love Love and very light!

Ingredients:

2 eggs

2 Tablespoons Milk — I used Skim Plus or use Whole

1 teaspoon kosher salt plus you may want more for extra seasoning

1/2 teaspoon freshly ground black pepper plus more for extra seasoning as well

1 cup all-purpose flour

1/2 cup olive oil

1/2 cup vegetable oil

4- 6 boneless, skinless chicken cutlets. Buy the thinly sliced ones.

3-6 tablespoon unsalted sweet butter –you can use a little less if you’d like . Start with 3 with the lemons and then don’t add the extra 3 just add 1 or 2 and it should be fine.

1 lemon, thinly sliced seeds removed

freshly squeezed juice of 1 lemon

1/2 cup dry white wine

2 cups chicken stock

3-4 Tablespoons freshly chopped parsley

Directions:

In a wide shallow bowl, whisk eggs, milk, salt and pepper until blended. Place the flour in a separate bowl. Line a baking sheet with paper towels.

In a wide large skillet heat the olive oil and vegetable oils over medium heat until the oil shimmers

Working in batches because we don’t want to overcrowd the pan. Lightly dredge the chicken in flour and shake off any excess. Dip into the egg batter, let excess batter drip back into the bowl and place in the skillet. Fry cutlet, turning once until golden brown on both sides. Adjust the heat so the cutlets cook slowly and evenly with a steady bubbling of oil. I turned after app. 4 minutes. You will be cooking further so don’t worry if not cooked completely through. You don’t want to overcook.

After you finish cooking cutlets and remove to paper towel lined pan, remove the pan from the heat and pour off the oil. Wipe out the pan with a dry paper towel. Return the pan to the heat.

If you’d like to brown the lemon slices you can melt 3 Tablespoons of butter and then scatter the lemon slices turning occasionally until they’re golden and browned around the edges, app. 5 mins. Then remove the lemon slices and set them aside.

Add 3 Tablespoons butter, the wine and the lemon juice and bring to a boil. Boil until the liquid looks a little syrupy, app 3-4 minutes. Pour in the stock and continue to bring to a boil and cook until slightly thickened into a sauce, app. 5 minutes. When you place cutlets back into pan it will thicken more) Taste and adjust the seasonings with lemon, salt and pepper, it should be quite lemony and not super salty. I added a little kosher salt and a little more lemon juice because I had an extra lemon in the house.

Reduce the heat, and tuck the cutlets into the sauce and add the lemon slices and simmer very gently and the chicken pieces are heated through, app. 4 minutes. Turn the cutlets over occasionally in the sauce. Place the browned lemon slices on top. Sprinkle with chopped parsley ( which if you’re wondering why they’re not in the picture) I forgot to sprinkle on top!!! Too anxious to taste this I guess. I plated up some rice pilaf and the chicken and placed some lemon slices on top. I served with a green salad but any green vegetable would would be lovely.


Chicken Marsala

Chicken Marsala

The other night I prepared a version of Chicken Marsala which came out totally delicious, and worthy of posting this recipe. I am always trying out new recipes for this dish. I combined about 3 recipes and I must say this final recipe worked out just perfectly.

Ingredients:

1/4 cup all purpose flour for coating

1 teaspoon kosher salt

1/4 teaspoon freshly ground black pepper

1/2 teaspoon dried oregano

I used 1 package thin chicken cutlets ( 5 pieces ) about 1 1/2 lbs.

4 tablespoons butter

1/4 cup olive oil

8 ounces Cremini Mushrooms sliced (stemmed) obviously if you like a lot of mushrooms add more!

1/2 cup Marsala ( you can buy in supermarket in the oil or vinegar section usually)

1/4 cup Sherry ( I used what I had in the house , it’s not really cooking Sherry but it was fine)

1/2 cup chicken stock

*1/4 cup chopped flat leaf parsley ( I didn’t have so I didn’t use)

Directions:

In a shallow bowl or large plate, mix together the flour, salt, pepper, and oregano. coat chicken pieces in the flour mixture.

In a large skillet, melt butter in olive oil over medium heat. When oil is hot place chicken in the pan and lightly brown. A little hint, don’t futz with the chicken , place it in ( make sure the oil is very hot) and let it be , turn after about 5 minutes, it should be a light golden brown, then do the same for the other side. Use tongs , try not to pierce the skin of the chicken. Remove chicken to a plate, I take paper towel and blot it.

Lower the heat, put mushrooms in pan. I sprinkle a little salt on the mushrooms. Cook mushrooms for about 5 minutes till their moisture has evaporated, and then de-glaze the pan with the sherry, Marsala,  and the chicken broth. Let it cook for another few minutes. The sauce will reduce slightly. Return the chicken to the pan, cover the pan and simmer gently for about 10 minutes, turning once. Before you serve sprinkle some chopped parsley on it if you like. I served over brown rice.

Chicken Marsala

Sheet Pan Chili Honey Chicken with Peppers and Onions —

Just because they are my most favorite flowers– peonies

IMG_0818


By now you all know how very much I love Sheet Pan Meals. It makes for delicious dinners and easy clean-up and that’s always a win win for me. This was very easy to assemble and cooks in under an hour. Oven to Table in under an hour is my kind of meal. Of course you can substitute other veggies if you don’t like peppers. I finally got Joel to eat cooked peppers and onions and I try to use them as often as possible. It’s amazing to me that it took him this long to start to enjoy vegetables but I couldn’t be happier. He also eats Brussel Sprouts as well! I think Brussels would be good here as well as Broccoli ( but he won’t eat Broccoli) . I served over Brown Rice and it was just perfect. I used 1 Tablespoon of Sriracha which gives it a little hint of spicy.  I wouldn’t omit it because all the flavor of this recipe is in the honey/chili combo. You can put a little less Sriracha if you like.

Enjoy!

Ingredients:

6 smallish chicken thighs–bone in , skin on

1 Tablespoon Olive Oil

1 red bell pepper, cut up into medium sized pieces — see photo

1 yellow bell pepper, cut up as above

1 green bell pepper, cut up as above– any 3 peppers will do if you don’t want to use green use orange red or yellow or any combo is just fine

1 red onion, cut up as shown in photos, medium sized pieces

Sauce:

1/4 cup Honey

1 Tablespoon Soy Sauce

1 Tablespoon Sriracha or any hot chili sauce you like

Juice of 1 lemon

5 cloves of garlic –minced

Pinch of Kosher Salt

Directions:

Pre-heat oven to 400 degrees

Spray a large sheet pan with non-stick spray–this sauce does get sticky so either spray or cover sheet with aluminum foil first

In a bowl , whisk the ingredients for the sauce and set aside.

Season the chicken with salt and pepper and place 1/3 of the sauce in a gallon size plastic bag  and add the chicken. Squish around the sauce till it’s all over the chicken and place in fridge for about 30 minutes or longer.

Cut up the veggies and place in a bowl. Pour 1 Tablespoon of Olive Oil over the vegetables.  It’s a little oil for a lot of vegetables but it works. You’ll be using the sauce on the veggies.

After 30 minutes–transfer the chicken to the sheet pan and roast just the chicken for about 15 minutes.

After 15 minutes remove the chicken from the oven and arrange veggies around the chicken (see photo). Drizzle the remainder of the sauce over the vegetables and the chicken. Mix with a spoon.

Return to oven and bake for about another 15 minutes, my chicken was done at this point because I had smallish thighs . I removed the chicken placed on a plate and covered with aluminum foil. I continued cooking the veggies for another 10 minutes because I like them cooked well. When veggies were done to my liking I removed from the oven and added chicken to hot baking sheet and mixed veggies up with a spoon over the chicken. I served over rice, quinoa or anything you’d like.

*You will have to experiment with cooking times for veggies and chicken depending on the size of your chicken thighs and your oven.

Baked French Toast — all time best

DSCN4275

DSCN4288

DSCN4283

DSCN4274

DSCN4270

DSCN4302

DSCN4294  
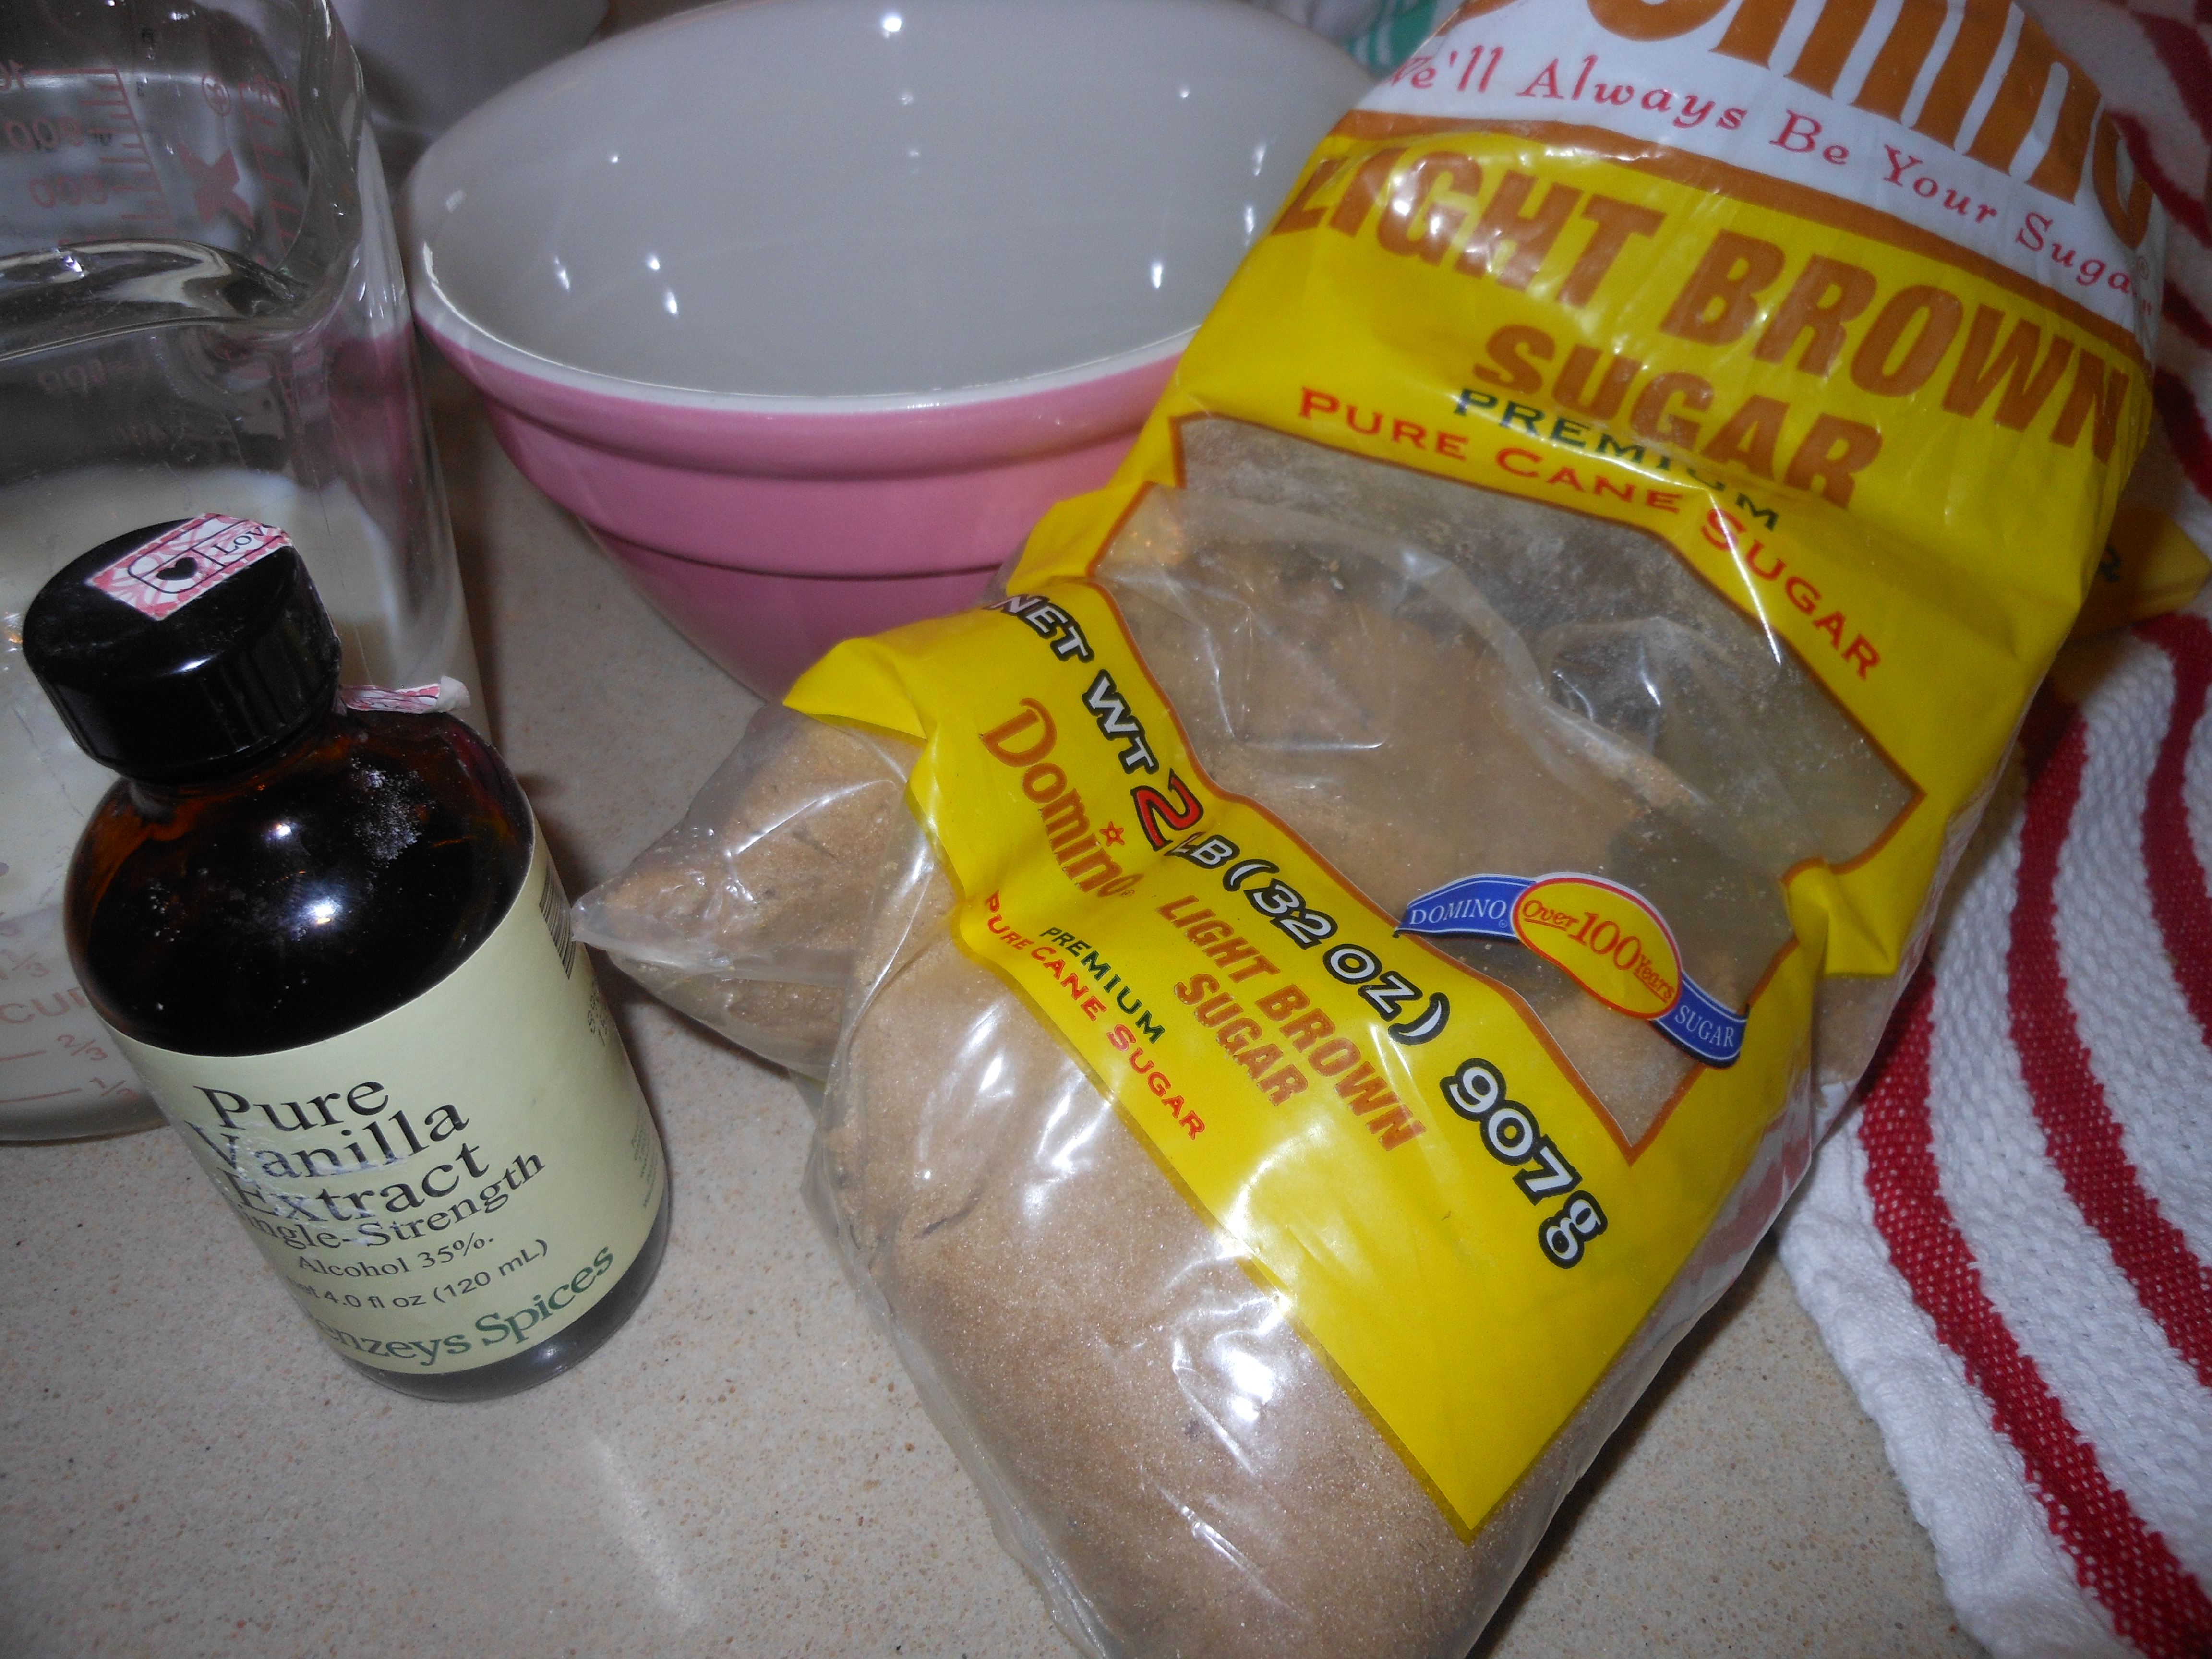
Now that Rosh Hashana is over it’s time to think about Yom Kippur coming up on October 9. If you’re debating on what to make and have never made this delicious French Toast now may be a good time. Truly easy and everyone will thank you.

I posted this originally back in October 2011 for Yom Kippur break fast and every Break Fast it is on the table, it’s almost a law in our family now! It is truly one of the best French toast recipes I’ve ever made.  I include it every year since my friend Ilene Stern gave it to me. I never have a single piece left. Delicious and decadent, perfect brunch and breakfast food. I almost always include it in my Mother’s Day Brunch as well. Once you’ve made this recipe there is no turning back  your whole family will love it and you’ll have to make it every time.

The only downside is that you must prepare and refrigerate the night before without cooking it, you cannot cook this dish till you’re ready to eat it, the bottom will get hard like a caramel candy would. So cook right before you’re going to serve. Enjoy!

*recipe as is should serve 6- 8 if you have more people make 2 trays!

Ingredients:

1 cup packed light brown sugar

1 stick unsalted butter

2 tbsp. corn syrup ( I use Karo Original light corn syrup)

5 eggs (room temperature please)

1 1/2 cups milk ( you can use low-fat, I use Skim Plus)

1 tbsp. vanilla

1 package of sliced cinnamon bread. ( Pepperidge Farm is fine) if you can get thick slices it’s great , but the thin kind will work just double stack them it will be fine) You probably will use 12 slices of bread per tray. You will have 6 stacks of 2 slices each, 12 slices total, or 6 thick slices of cinnamon bread. If you can’t find just cinnamon bread use raisin cinnamon bread it’s easier to find .

Directions:

Melt butter, add brown sugar and corn syrup and combine well. Spray a 9×13 baking dish, Pyrex works well here. Pour butter mixture into baking dish and arrange bread slices flat in the mixture ( you will double stack the thin sliced bread) Unless the bread is 1″thick you will be doubling the standard sliced bread. Squeeze the bread to fit–it should hold 12 slices ( 6 double stacks), 3 on each side of a 9×13 baking dish.

In a blender mix the eggs, milk and vanilla and pour over the bread slices, covering them completely. Cover and refrigerate overnight. The bread will absorb all the liquid by the morning, so if you need to travel with it will be fine.

Uncover and bake in a preheated 350 degree oven for 30 minutes. Once it’s out of the oven you can dust with powdered sugar, but not necessary. Serve right from the baking dish.

*if you let this sit out too long before serving, the bottom may get hard like a praline candy. It never ever lasts long enough for this to happen at my table.

Easy Fast to all .

Follow me on Instagram @cookingwithcandi