Category Archives: vegetarian

Traditional Ashkenazi Charoset–Apple/Walnut

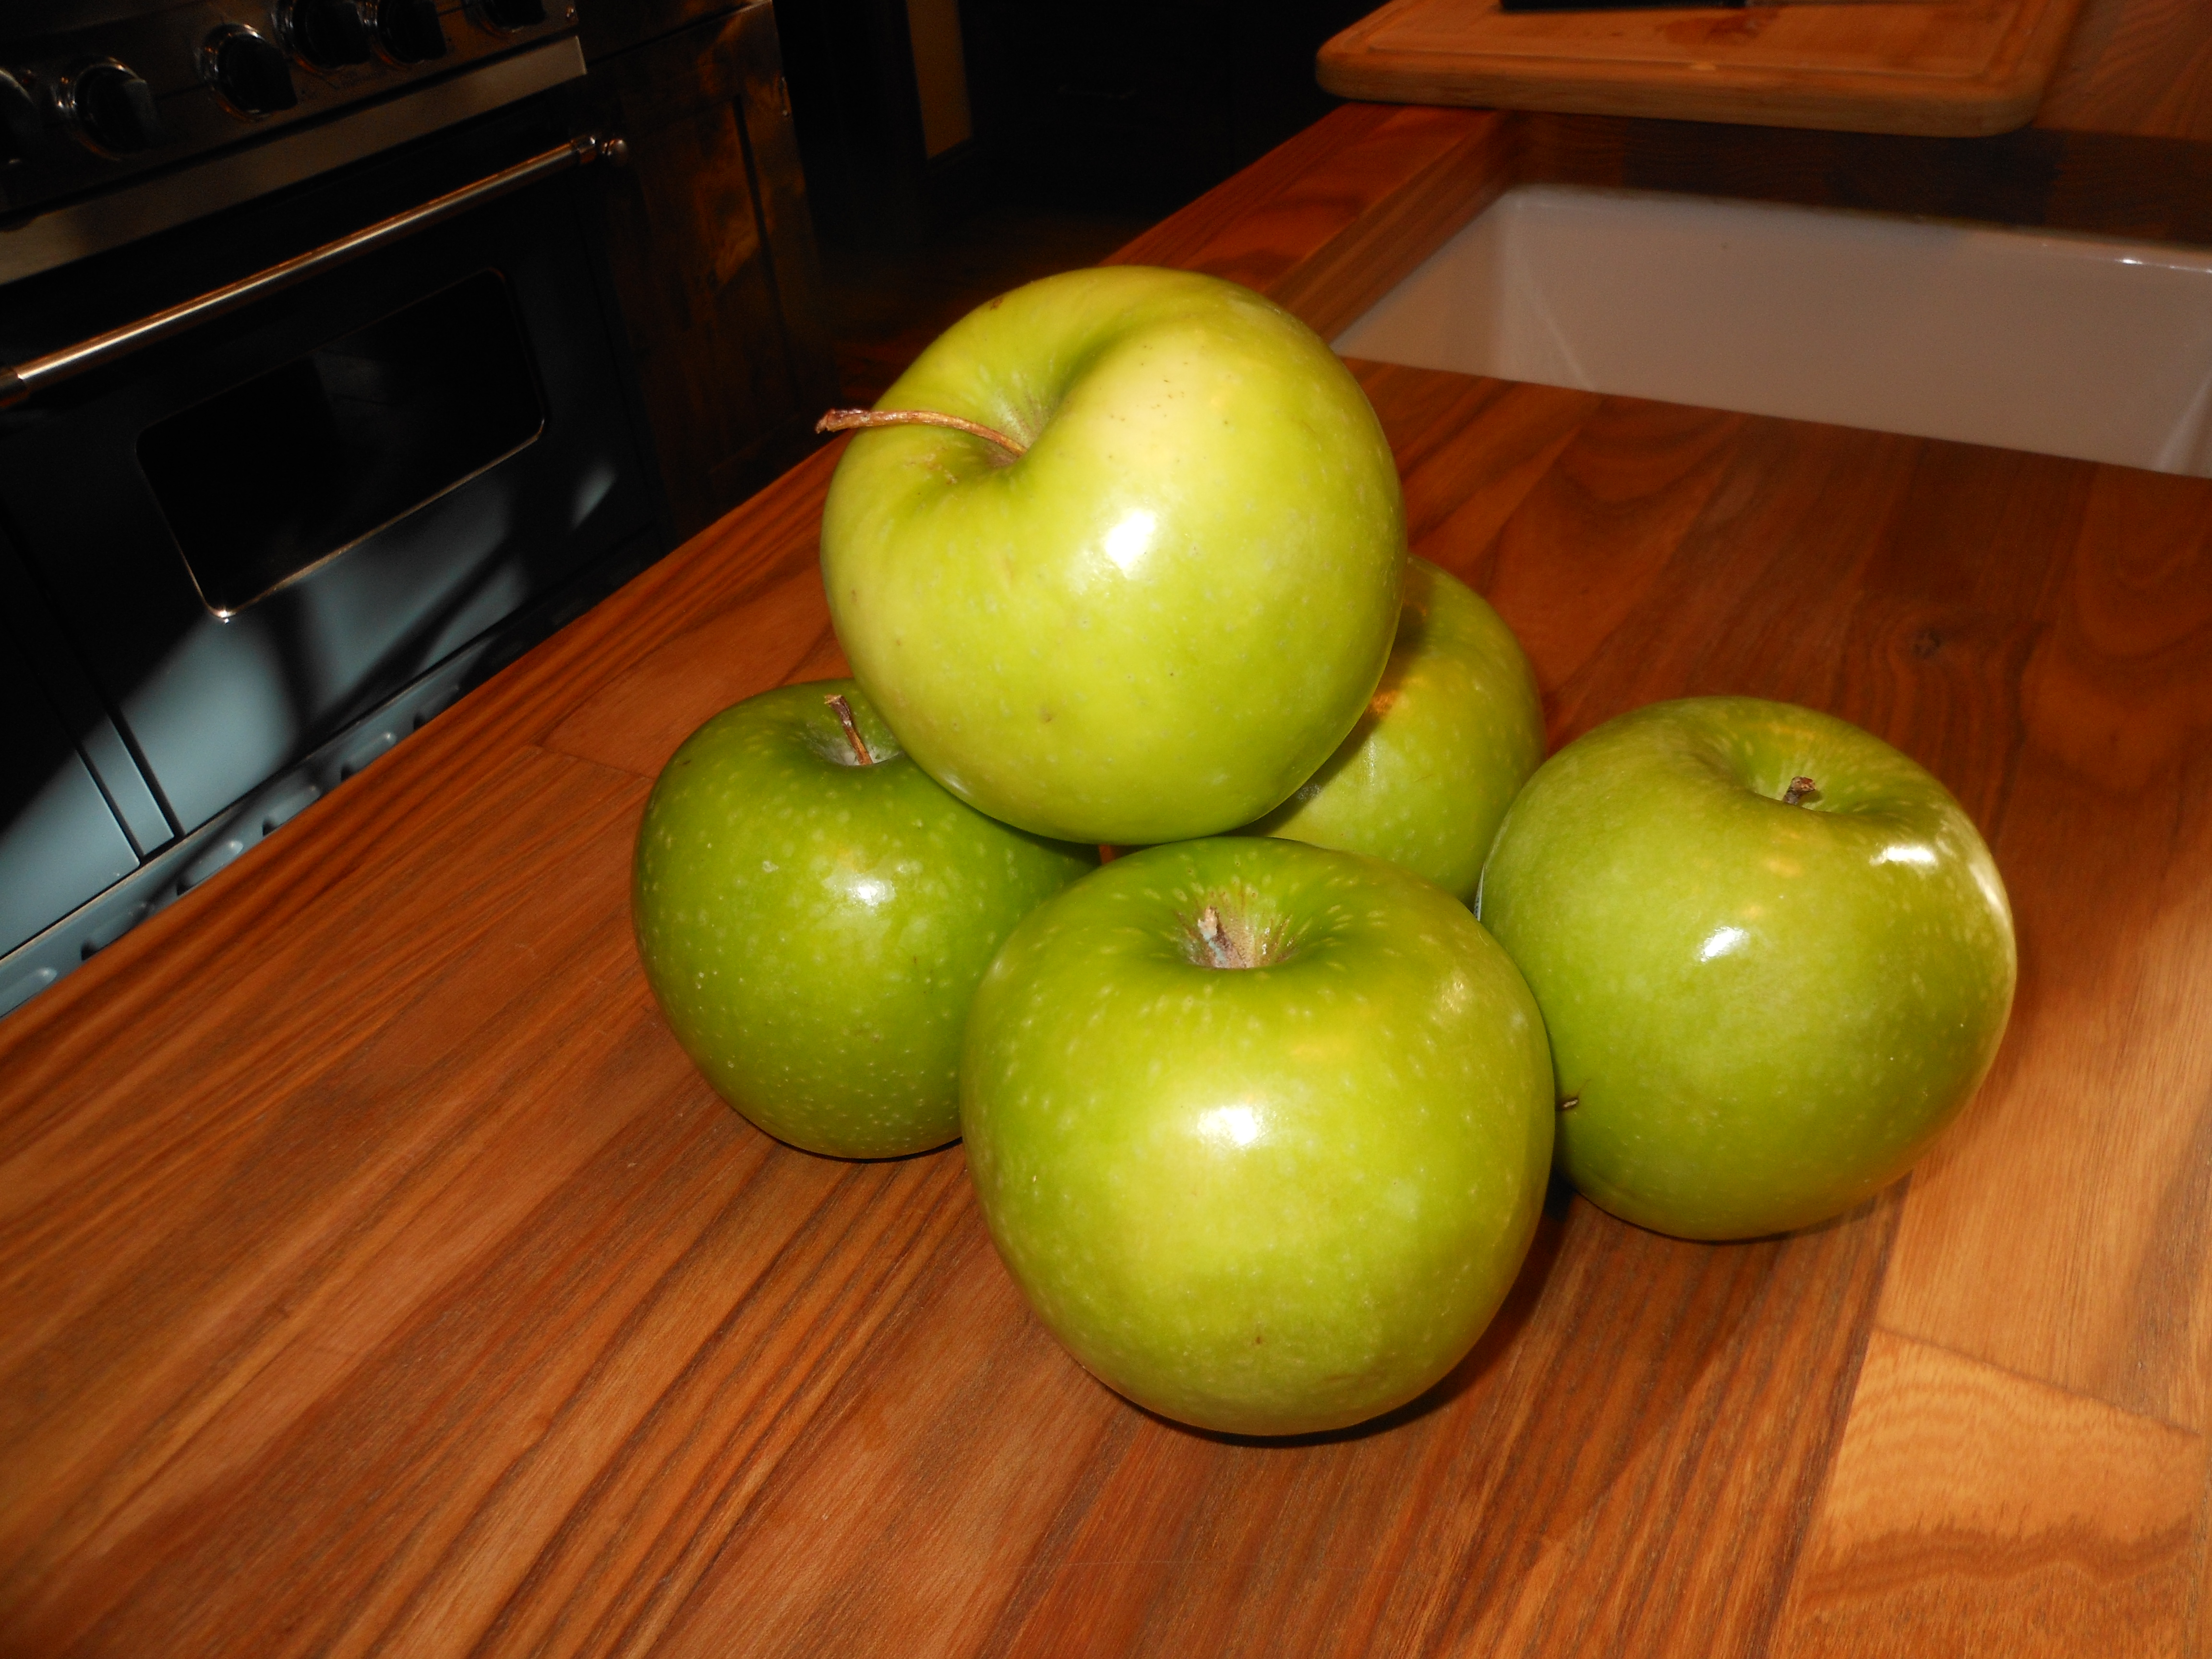
DSCN2703This is my easiest Charoset to make — all in the food processor.   It’s traditional in the sense that it’s an Ashkenazi (Eastern European) recipe. I add a little brown sugar instead of white sugar and it gives it just a bit more character. Remember, while a reminder of the mortar used in making bricks for Pharaoh, charoset is really just a sweet condiment of apples and wine! And we love it on Matzoh!

Have a Sweet Passover !

Ingredients:

3 medium Fuji apples (or any other kind you like), peeled, cored and finely diced (use processor to make your life simpler) I usually use whatever is in the house, but on Passover I go through so many apples, so buy what you like (I always like Granny Smith because they are nice and tart)

1 1/2 cups walnuts, chopped (buy them pre-chopped)

1/2 cup sweet red wine such as Manischewitz Extra Heavy Malaga or just Concord Grape is fine

*20 pitted dates, chopped; or 1/2 cup golden raisins (optional)

1 1/2 teaspoons ground cinnamon

1 tablespoon packed brown sugar

*for a bit of extra added flavor you can add 1/2 teaspoon of powdered ginger (optional)

Directions:

After chopping apples, stir all ingredients in a large bowl. Keep in refrigerator ’til ready to serve. Serve at room temperature. You can also pulse everything together in processor, just be very careful not to over-process. I often do this to save time. You don’t want it too fine, so just go gently with the processor if you go that route. I do it in the processor, and I know exactly how I like it to come out, so go easy with the chopping.  If it’s a little dry or too thick, you can always add more wine. I find this always tastes better after it sits and allows the wine  to really soak and ripen for 24 hours. Before serving, check for consistency and add a little more wine, if necessary.

Farro Salad

This is a delicious farro salad made with arugula — this salad is similar to my take on Jennifer Aniston’s Salad but with arugula and shaved warm instead of feta. This is light and yummy and you can add a protein and make it a dinner salad if you’d like. Original recipe credit goes to the chef Charlie Bird on this one.

You can obviously add what you like and remove what you don’t like . Feel free to swap cheeses, or onions for radishes, etc and chopped up dates would be just fab.

Enjoy!

Follow me on Instagram @cookingwithcandi

Ingredients:

1 cup Farro– I use pearled farro

1 cup apple cider not apple cider vinegar

2 cups of water

2 teaspoons kosher salt, and more to your own liking

2 bay leaves

1/4 cup extra -virgin olive oil* you can double if you’d like for a bit more dressing

1/4 cup fresh lemon juice-  * you can double if you’d like for a bit more dressing

app. 1/2 cup shaved Parmesan Cheese , I used a vegetable peeler but I do know you can buy Parmesan Cheese shaved this way ( time and mess saver)

app. 1/2 cup shelled Pistachios–I used salted pistachios and chopped them myself. You can use raw pistachios but they’re a tad tasteless or you can leave them whole up to you or substitute with any other nut you prefer or omit totally if you prefer gutless

app. 2 cups Arugula

app. 1 cup torn Basil Leaves or 1 cup chopped basil

app. 1 cup Mint leaves-cut up into smaller pieces– I prefer to chop it

2 large radishes sliced thinly or rough chopped–optional and you can use red onion here as well — sliced thinly or chopped into small pieces — totally optional but I love the crunch and the flavor of a fresh radish

app. 1/2 cup sliced grape or cherry tomatoes — totally optional

Directions:

Farro:

In a medium saucepan, bring farro,  apple cider , dash of kosher salt , 2 bay leaves and 2 cups of water to a simmer. Simmer until farro is tender and liquid evaporates, about 30 minutes. If farro is cooked but there is still water I put in a colander/strainer and leave it till it cools down. If on the other hand the water evaporates before the farro is done, you’ll have to add a little more water. You can always strain it so no worries–but don’t overcook. Let farro cool down and discard the 2 bay leaves.

Salad:

In a salad bowl (large enough to fold in arugula and mix) whisk together the olive oil and lemon juice, I use a small wire whisk, it’s an amazing kitchen tool.

Salad is always best at room temperature so if you do refrigerate, just bring to room temperature before serving. If you’d like you can put farro and parmesan in the bowl with some dressing and allow it to sit,  this would be the salad base and it can sit for a few hours out without refrigeration. I usually just mix all ingredients starting with the farro then add in everything else gently toss with some dressing and if people want more dressing it’s available. Add nuts at the end so they retain their crunch !

IMG_1779IMG_1780

Spinach and Artichoke Dip – Game Day Dip

Game Day is finally here, it’s two days away. If you’re looking for a delicious dip , this is it. This recipe belongs to my daughter Jenn, she always makes it and it is always delicious. It goes perfectly with any kind of chip , or you can toast pita bread and cut into triangles. I know it’s fattening, but what the hell ? Superbowl comes but once a year right? This is a Super Snack, and if you like you can use Lite Mayo and Lite Sour Cream, just not fat free, it won’t work out well at all. This is just a great dip to make anytime of the year, and ingredients are super easy to obtain. Just make sure you squeeze out the excess water from the spinach.

Ingredients:

1 box or bag of frozen chopped spinach * (defrosted)  drained and squeezed out of all liquid, this is the most important thing here is to get the spinach as dry as possible.

1 Can Artichokes drained and coarsley chopped ( if you can buy them quartered already do so)

1 1/2 cups Mayonnaise ( Lite is fine)

3/4 cup Sour Cream ( Lite is fine)

3/4 cup Shredded Parmesan Cheese (not grated)

* In order to get spinach as dry as possible, I put it in colander to defrost, or leave it out for a few hours. I then literally squeeze it out to get all the liquid out of it, you don’t want it wet, the liquid will ruin the dip. So first defrost, then drain it, then wring it out with your clean hands.

Directions:

Mix together all ingredients and put in a nice oven proof dish that you’ll want to serve it in and bake at 350 degrees till brown and bubbly , about 30 – 35 minutes.

Kung Pao Chicken

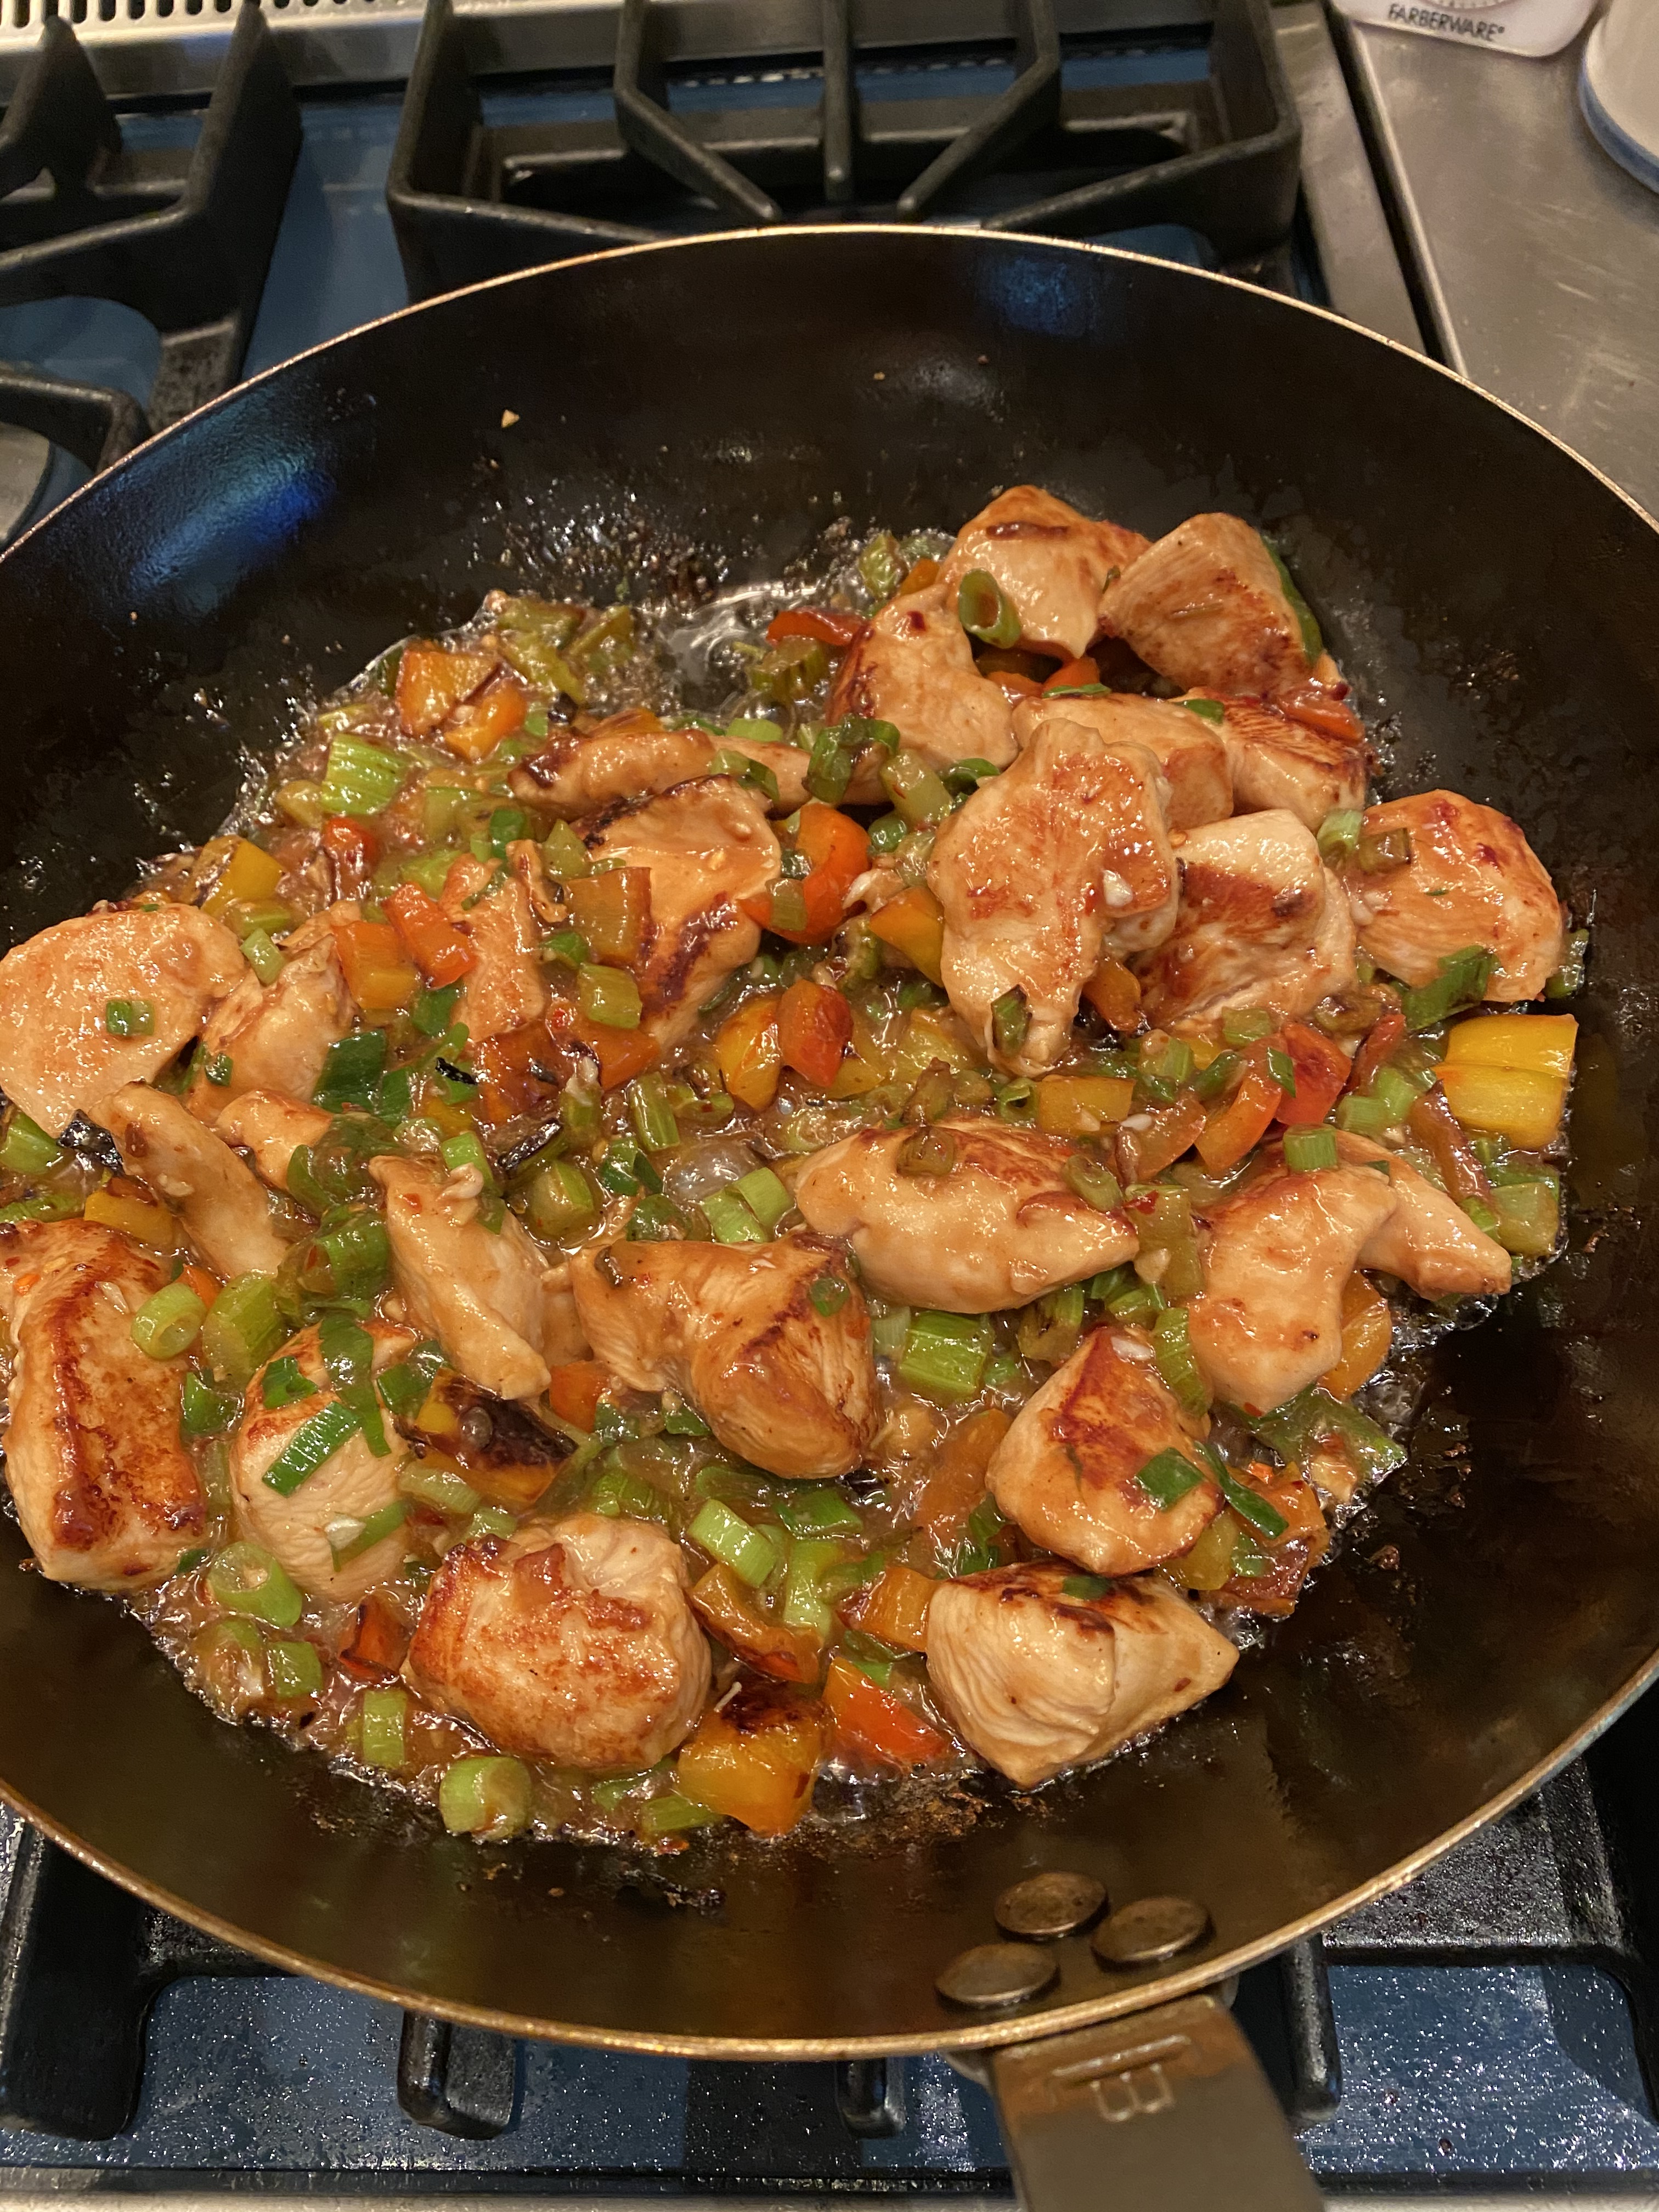
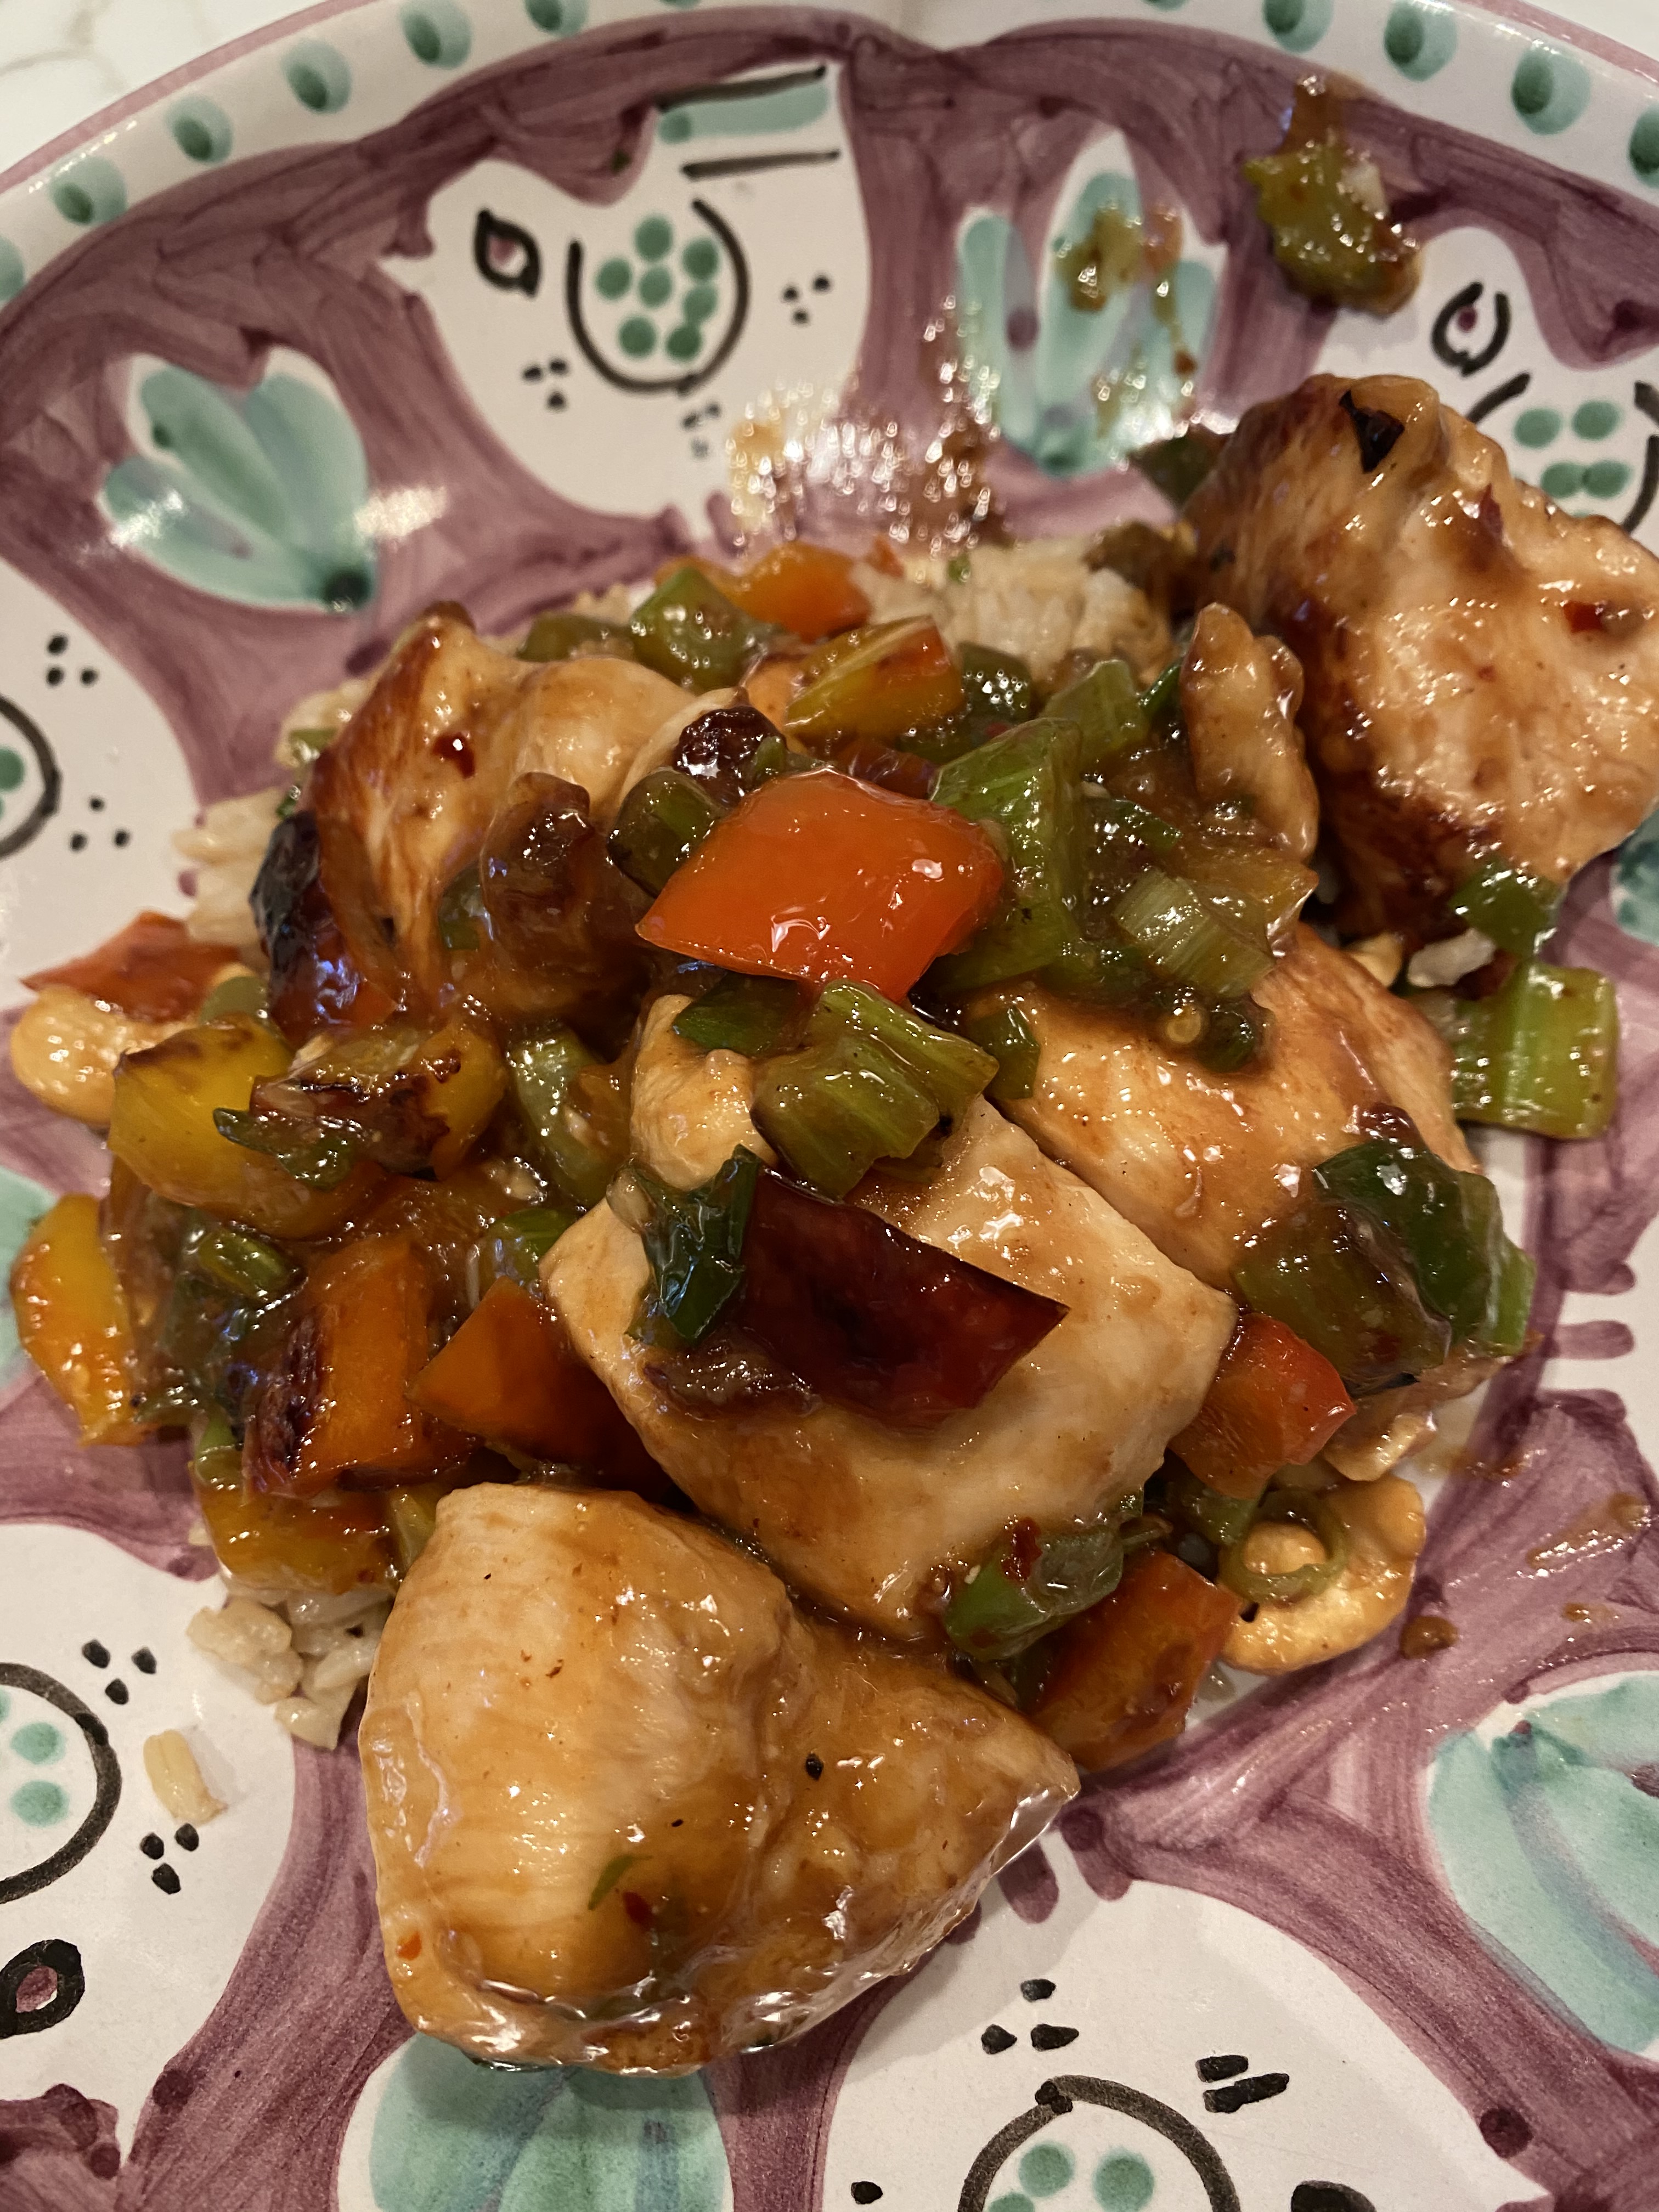
Kung Pao Chicken is one of my favorite Chinese food staples in the restaurant and takeout. I decided to make it myself and this is what I did.

It really came together rather quickly even though there are so very many ingredients.

Really delicious and served over brown rice or white rice or any rice or no rice.

Enjoy!

Ingredients:

For the Marinade:

2 Tablespoons Soy Sauce

1 Tablespoon Dry Sherry

2 Teaspoons Corn Starch

1- 1 1/2 Chicken Tenders or Breasts cut into app. 1 -2 ” chunks– boneless and skinless chicken breasts

For the Sauce:

1 Tablespoon Balsamic Vinegar

2 Tablespoons Soy Sauce

1 Tablespoon Hoisin Sauce

1 Tablespoon Asian Sesame Oil

1 Tablespoon Corn Starch

1/2 Teaspoon crushed red pepper flakes — use less if you like it very mild–this did not make it spicy hot but use at your own discretion

1/4 teaspoon ground ginger

1/3 cup water

For The Stir-Fry Chicken

3 – 3 1/2 Tablespoons Vegetable Oil

3 cloves garlic –minced

1 large red bell pepper , diced

2 stalks celery — I diced but you can slice thinly into small pieces do whatever you prefer with it

1/4 teaspoon kosher salt

5 scallions, white and green parts — I diced but you can slice thinly here too

1/3 cup whole roasted unsalted cashews


Directions:

Marinate the chicken . In a medium size bowl, whisk together the soy sauce, dry sherry and cornstarch until the cornstarch is dissolved. Add the cut up chicken and toss to coat. Let it stand at room temperature for at least 15 minutes, stirring occasionally. I did this step and then proceeded with the rest of the recipe.

Prepare the sauce: In another medium bowl whisk together all of the sauce ingredients until the cornstarch is dissolved.

Heat a large non-stick skillet or a regular skillet ( spray first with cooking spray) Heat till very hot then add 1 Tablespoon of the oil and swirl to coat. Add the bell pepper, celery and salt . Cook and stir frequently until slightly softened and starting to brown, app. 5 minutes. Transfer the vegetables to a large bowl and set aside.

Add an additional 1 Tablespoon of the vegetable oil to the pan and set over high heat again. Add half of the chicken ( don’t crowd it) and brown on one side about 2 minutes. Turn the chicken pieces and continue cooking for another 2 minutes — just till chicken is cooked through. Transfer this chicken to bowl with vegetables. Add another tablespoon of vegetable oil to the pan and add the remaining chicken and cook the same way as first batch. Add app. 1/2 Tablespoon more oil to the pan along with the garlic and scallions and cook stirring the chicken for another minute. ( if pan still has enough oil you can omit this 1/2 Tablespoon of Oil)

Add the rest of the chicken and vegetables to the pan along with the sauce. Reduce the heat to low and cook until chicken and vegetables are cooked through and the sauce is nice and thick about a minute or two depending on the size of your chicken chunks. Stir in the nuts — I keep them whole or you can chop up. Taste and adjust seasonings but I thought it was just perfect. The sauce will thicken as it sits so if necessary put a few tablespoons of water if too thick.

I served over rice and we ate it right away so sauce was just perfect. If you prepare early the sauce may thicken.

Loved this recipe and will definitely add to my rotation . It seems like a lot of work but honestly it came together rather quickly.


Pasta e Fagioli ( Pasta and Bean Soup) Weekend Cooking

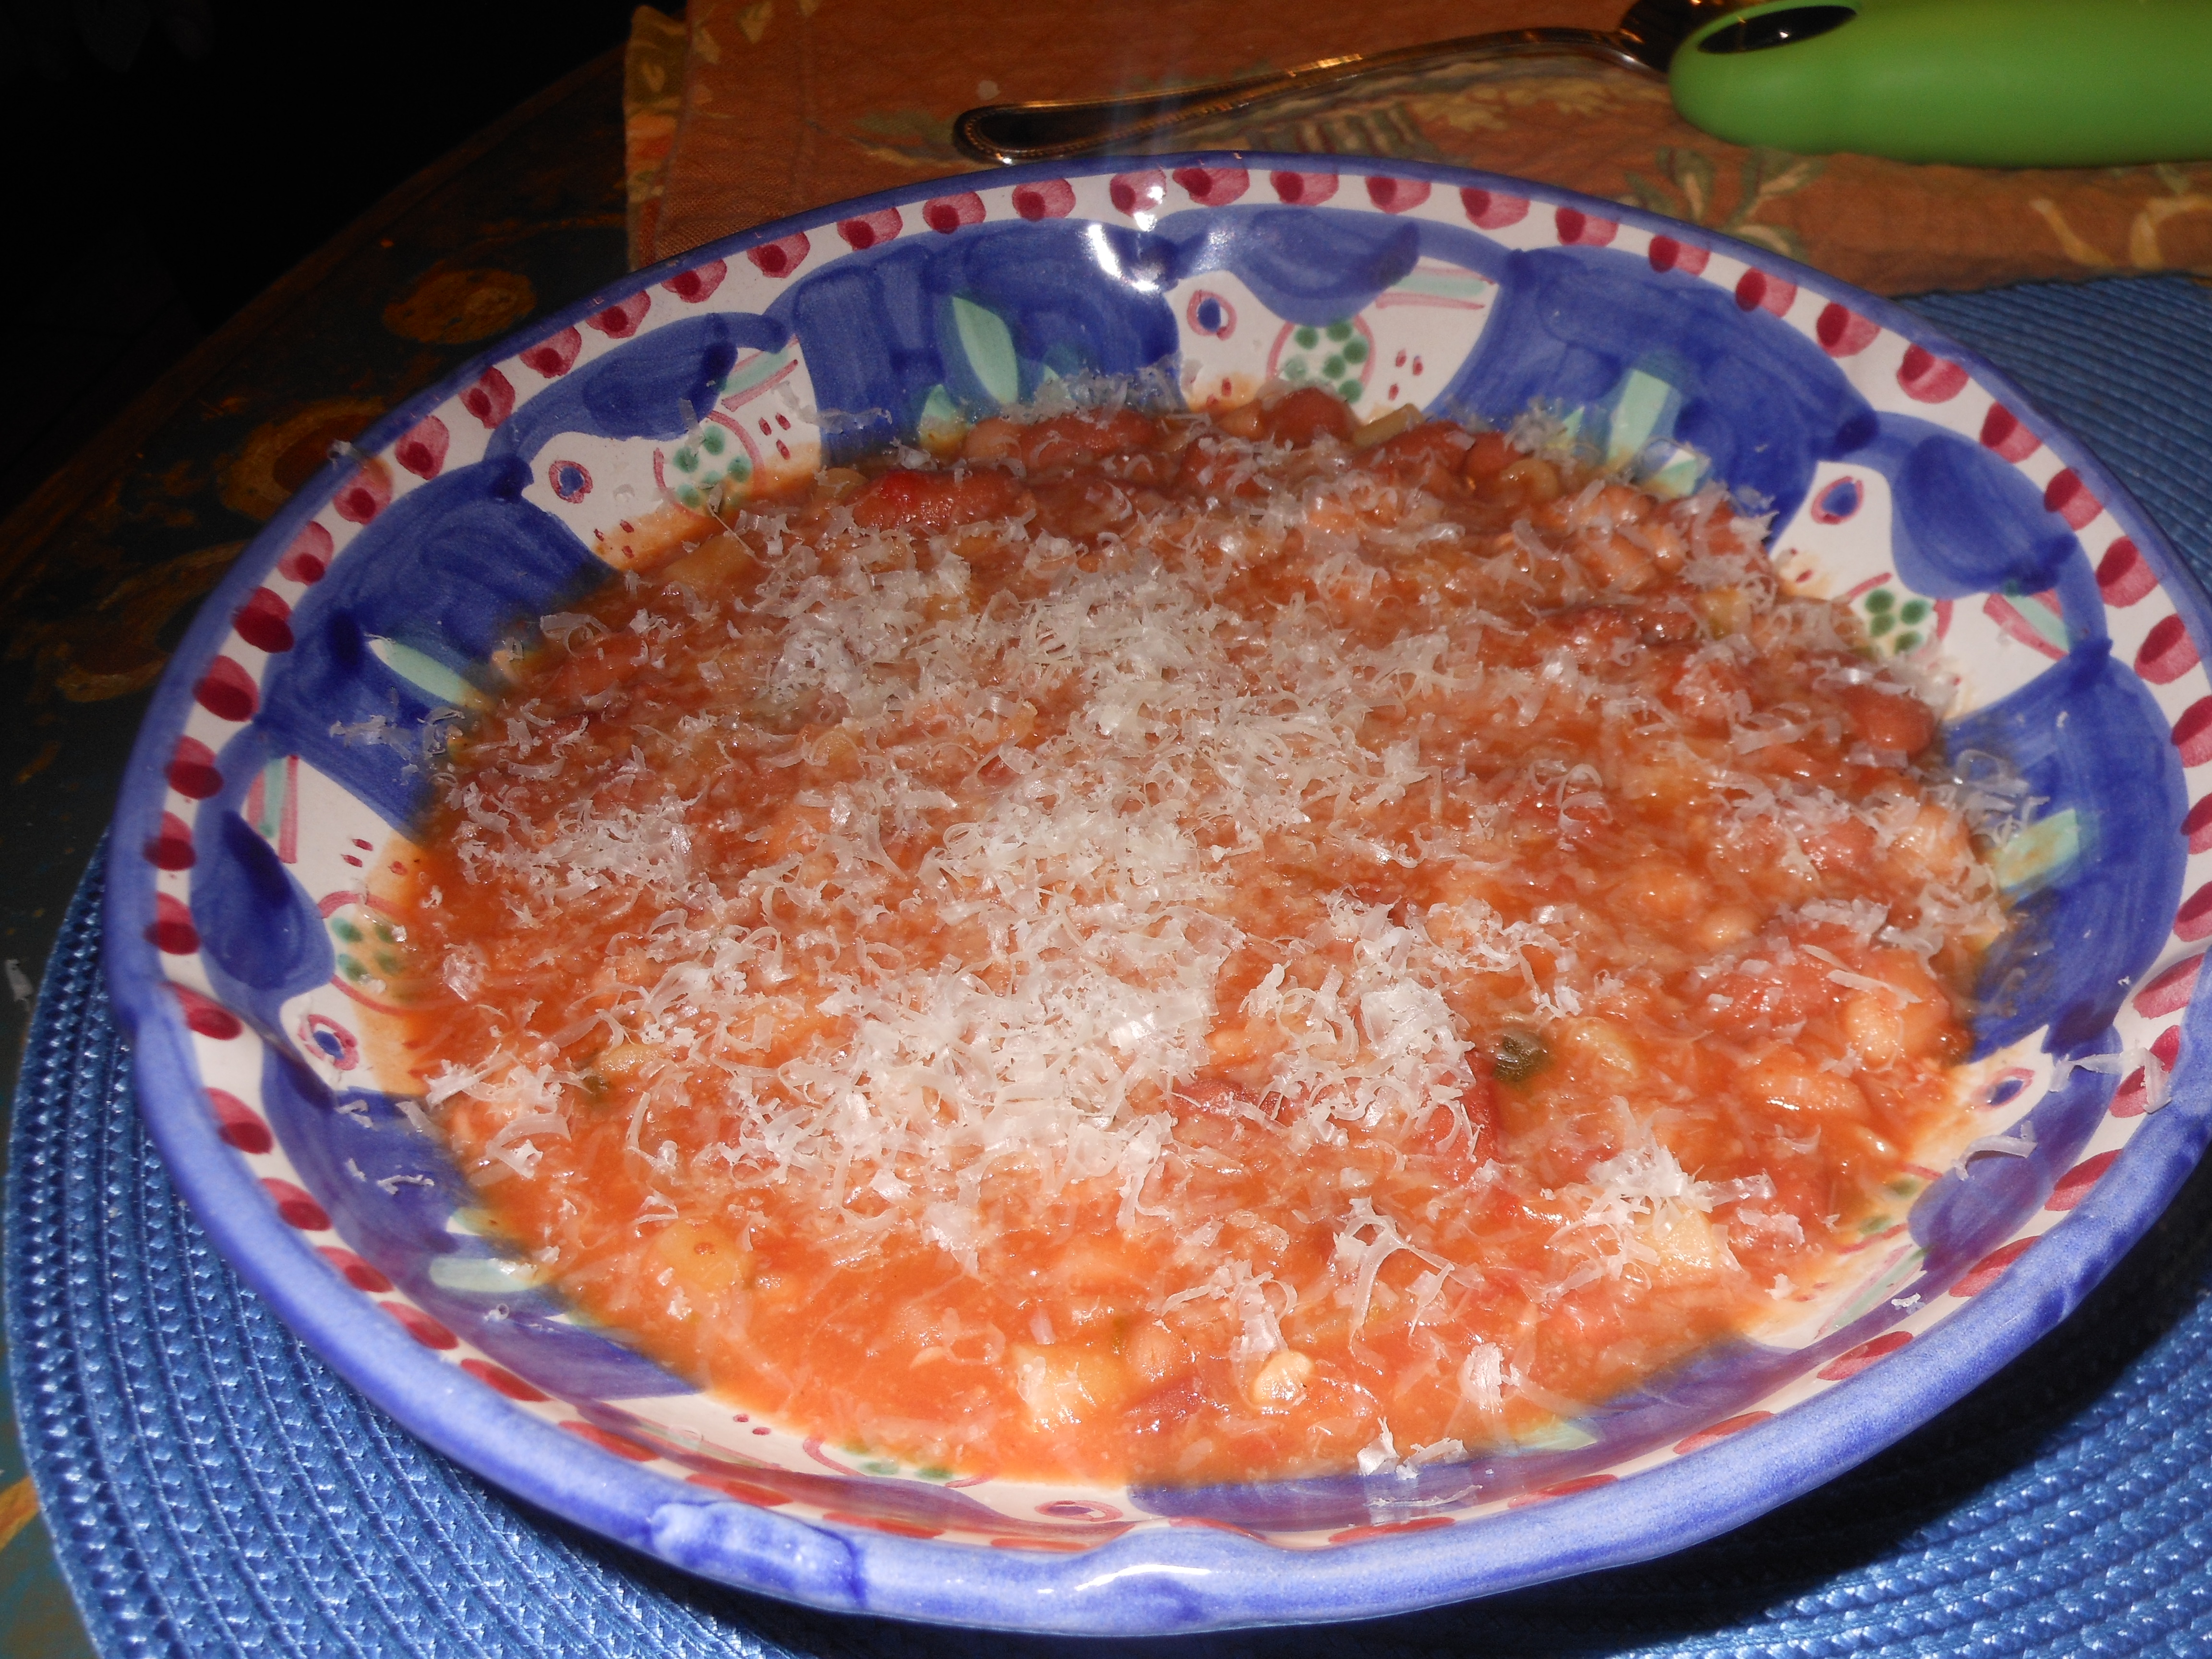
019 I have been making this soup forever and it’s a most perfect soup to make during the weekend when you have a little time to cook and gather ingredients. I make a big pot and freeze some for later and keep some in the fridge for lunch the next day. This is really just a tomato base soup with beans and pasta. How bad can that be? unless you hate beans and pasta that is. I usually have ingredients in the pantry and it is a wonderful warm experience, with a nice salad this is a perfect meal. I used to only make this with dry beans but in the name of time and taste I used canned beans and have now always made this with canned.  I must admit this makes it a whole lot easier  and honestly no one knows the difference! It is a wonderful hearty soup halfway between a soup and a pasta no matter how you do the beans!

Enjoy this amazingly delicious comforting soup and did I mention super easy????

Ingredients:

1 medium yellow onion, chopped

2 – 3 tablespoons olive oil

4 garlic cloves, minced

1 28 oz. can chopped tomatoes ( San Marzano)

10 – 12 fresh basil leaves

red pepper flakes

handful of italian parsley, chopped

2 cans rinsed and drained Cannellini Beans

5 cups water or chicken broth or vegetable broth to keep it vegetarian — water works just fine but you’ll have to check your salt and pepper if using broth especially boxed broth which contains salt. Your call– super easy recipe.

app. 1 cup pasta, elbows, tubetti, ditalini, or broken spaghetti

Kosher Salt — to taste

Freshly Ground Black Pepper

Directions:

In a large , heavy stockpot ( Le Creuset) saute onion in olive oil. When onion is golden and transparent, add garlic. Cook for a few more minutes. Add tomatoes and herbs. Add some kosher salt about 1/2 Tablespoon and some grinds of the pepper mill now and you’ll be tasting all along for salt and pepper

Add the beans and the 5 cups of water  and cook over medium heat for 15 minutes – until the beans begin to break down and the soup begins to thicken. Lower heat to a slow simmer, as low as you can.  Stir frequently to prevent it from sticking and burning bottom of the pot. Taste for salt and pepper again.  I always like it to simmer for a long time, an hour would probably do it, but if I have the time I let it sit for as long as I can.  Sometimes after it’s been simmering for a while ,  I turn off the heat and right before serving just bring to a boil and add pasta. Just be careful not to let it burn, stir frequently . If you need more liquid add water a little at a time, I showed a picture of my pot filler which is the greatest thing to have in a kitchen, makes it super easy to fill a pot.

Right before you’re ready to serve bring to a low boil and add the pasta and cook until pasta is al dente, about 5 – 10 minutes depending on type of pasta you’re using. I used ditalini.

Serve immediately in large soup bowls.

Guests can drizzle some good olive oil and grate some Parmesan Cheese over.  Should serve 8 – 10 depending on appetites. I froze remainder for another time.

Karyn’s Cranberry Crisp- Thanksgiving

Fully Cooked Cranberry Crisp

This recipe has been around pretty much my whole married life. If there is a turkey on the table, there is cranberry crisp next to it.  It originated from my bestie Karyn. We make it for Passover with matzoh farfel since we love it so much.  It’s so sweet and delicious that it could really be a dessert. We love it with our meal; love the sweet and savory thing. You can’t eat too much of it, it is so rich. It is also very dangerous to have in the fridge the next day, so try to give it to everyone who wants to take home leftovers. This tastes good either hot out of the oven or at room temperature and pretty darn good straight out of the fridge the next day! Some people may even want to make it as dessert and serve with vanilla ice cream, but the Kolen family likes it on the table with dinner.  We always serve it as a side dish and it is awesome however you serve it. Thanks again, Karyn. Truly one of the best recipes ever!

I suggest reading through the entire recipe before making it as you should always do with every recipe anyway!

Ingredients:

4 medium apples ( I use all different kinds)

1 can (1 lb.) whole cranberry sauce

1 tsp. cinnamon

1 cup uncooked quick rolled oats

1/2 cup flour

1 cup dark brown sugar, firmly packed

1/2 cup unsalted butter–melted

*for a larger crowd you can easily double this recipe — as is should serve 8 -12– make in a larger baking dish or split into two baking dishes

Directions:

Preheat oven to 350 degrees and spray 9×13 baking dish with Pam.

Peel apples, slice them, then arrange in baking dish. Sprinkle with cinnamon. Spoon cranberry sauce over the apples.

Separately, stir rolled oats, flour, and brown sugar together. Melt Butter and let it just cool for a few minutes then mix in with oats and brown sugar till nice and crumbly.  Sprinkle this over cranberry layer. Bake at 350 degrees until apples are cooked and top is lightly browned. The entire mixture will be bubbling and your house will smell divine. You will bake about 40 minutes to an hour. You can make ahead of time, and then on the day you need it, just heat it up until it bubbles.  I usually make this a few days ahead, because it’s that much less that I’ll have to do the day of. This can definitely be made ahead of time  so you can  make it way ahead and freeze it.  If you freeze it, take it out of freezer a day before you need it, and then heat it up the day of. (Make sure it’s completely defrosted and at room temperature before heating up)

When you re-heat , pre-heat oven to 350 degrees and cover with foil for first 1/2 hour and then remove foil for last 1/2 hour till it starts to bubble.

Enjoy!

Thanksgiving Corn Bread Pudding

This has to be one of my all time favorite side dishes for Thanksgiving. It really would be great any time of year but for some reason it only gets made for Thanksgiving. It’s super easy and super delicious. My friend Audrey gave this recipe to me many years ago, and it has become a staple on our thanksgiving table ever since. It just wouldn’t be Thanksgiving without it. It is a favorite in our family. Can be doubled easily, just make sure your baking dish is large enough.

Enjoy!

Ingredients:

1/2 cup butter (unsalted) 1 stick

1 8 oz. sour cream (lite is OK  but not fat-free)

1 8 oz.  can sweet corn (drained)

1 8 oz. can creamed corn

1 8 oz. pkg. corn muffin mix

2 eggs, lightly beaten

Directions:

Preheat oven to 350 degrees.

Melt butter, mix in beaten eggs, then add the rest of the ingredients.

Pour into glass baking dish (Pyrex is good and I spray it first with a good cooking spray like Pam or Bakers Aid ) 9 x 12 works fine, it’s not a very deep pudding.

Bake at 350 degrees for 35 minutes.

Creamy Butternut Squash Soup (no cream)

This is by far one of my most favorite recipes ever! Super Easy and Super Delicious ! If you’ve been following me since the early days you’ve probably made this recipe by now. It’s perfection in a bowl . I’ve simplified the recipe along the way so that now it is just the way Joel and I like it. it’s pretty easy as long as you buy the squash pre – cut (available in every supermarket, and corner produce store). I just made my first batch of the season, and the squash is sweet and delicious. I always add a little butter to it, but you can totally leave it out. It tastes so creamy you’ll swear there’s cream in it, but really, there is none.  I love a little freshly grated nutmeg in it too, but you can certainly just sprinkle in a very little bit of already grated nutmeg. I hope your family and friends enjoy this as much as my family does! It’s always on my table for Thanksgiving. A delightful way to start a dinner, or a delicious main dish served alongside  a beautiful salad and bread. This can easily be made vegetarian by substituting chicken broth for vegetable broth, which is how I make it on Thanksgiving for Kerri (our daughter) who is a vegetarian.

*This can be made without cream so easily–but if you want a touch of richness you can add a little heavy cream into soup and mix in before serving. Totally not necessary but just saying.

And clearly this recipe can be cut in 1/2 for a smaller group– I usually use 2 packages of squash for 6 servings.

*feel free to put croutons on top or sprinkle some pepitas on top . It’s delicious just the way it is!! and wonderful for lunch the next day and will freeze beautifully.

Follow me on Instagram @cookingwithcandi

Ingredients:

4 pkgs. (approx. 4 lbs.) butternut squash (it’s doesn’t have to be exact)

3 tablespoons olive oil

1 large spanish onion, chopped

8 – 10 cups chicken or vegetable broth

*1 -2 tablespoons unsalted butter (for this serving size, I use 2 but it’s totally optional)

Kosher salt and freshly ground black pepper

*use whole nutmeg – you just grate a little in for flavor. I always tend to use whole, but grated will do. It’s just a touch of it–if I had to guess, I’d say 1/4 teaspoon to 1/2 teaspoon depending on your taste

*if you really want to top it off with a touch of cream you can . Just add a little heavy cream to the soup and blend it right in at the end. Honestly it’s not necessary but it def adds a a layer of richness!

Directions:

In a heavy Le Creuset (or any other ample size large pot), I heat 3 tablespoons of olive oil. When oil is heated, put in onion and about 1/2 tablespoon of kosher salt. Sweat out the onions until they are translucent (approx. 5 – 8 minutes). If you’re using the butter, add it now too. I then add all of the butternut squash and mix the onions, oil and butter as best I can all over the squash. Next, add enough broth to cover the squash (I used approx. 10 cups of chicken broth to cover). I keep the remaining half a box of broth in case I need it later. Return to a low boil, then bring to a simmer. I let it cook a very long time–at least an hour until soft–and then I turn off the heat and let it sit for a while. I like to make it early and let it sit for as long as possible, because the squash gets very soft. Then right before I am about to serve, I use an immersion blender and blend it into a beautiful smooth soup. If you need more broth, add it as you blend. This is also your salt, pepper and nutmeg moment. Season to taste and blend just until smooth. I leave it in the pot until I need it and then gently warm it up. This soup will keep in the fridge for a few days. It can be frozen as well. Upon defrosting you may need to add more broth. Sometimes I serve this soup with beautiful croutons if I can find them in specialty stores, but it is delicious and beautiful on its own, and very good for you! My family loves it , and I hope yours does too.

*should serve 10 – 12 as appetizer

Kasha Varnishkes–Jewish Comfort Food

This is truly traditional Jewish comfort food made with buckwheat grains and bowtie noodles. I love it and grew up eating it and  try to make it a few times a year. It is super easy and super tasty. If you’ve never made it why not start now. It’s a wonderful side dish to any meal and it can be vegetarian for all of those who need some extra vegetarian dishes on their tables just substitute vegetable broth for chicken broth.

Kasha comes in a box. There are different types of Kasha and almost all will work. I use medium or coarse granulation.  Wolff’s brand is really wonderful so look for it and for this recipe I follow the directions on the Wolff’s box of Kasha. I actually had to order it on Amazon last year since I couldn’t find it in Colorado.

If you’re looking for an easy side dish to put together now is the time to look at this great recipe. This is also our go to the night before Yom Kippur. It’s tradition and delicious and comforting all at the same time.

Ingredients:

1 package bowtie ( farfalle ) noodles (app. 3/4 lb.)

1 white/yellow onion thinly sliced or you can use chopped onions , entirely up to you.

app. 2 tablespoons vegetable oil  you may need a  little more and may want a bit more to drizzle at the end plus more — probably 1/4 cup in total

Kosher Salt and Freshly Ground Black Pepper–to taste

*1 small box button mushrooms sliced 8 ounce box — mushrooms are totally optional but sometimes I feel like they add a little something

1 cup kasha, medium or coarse granulation– I use Wolffs Kasha and follow instructions on the box which I have written below

1 egg for kasha as per instructions on the box

2 cups chicken or vegetable broth as per box instructions

Directions:

Cook the pasta according to directions on box for al dente.

Saute’ the onions in vegetable oil , salt and pepper until they just start to soften, about 5 minutes. I use a medium size frying pan large enough to add in the pasta, and make sure you have a tight fitting lid.

Add the mushrooms and sauté until they start to soften as well, a few more minutes , set aside. Place mushrooms and onions in a bowl and you’ll use same frying pan to cook kasha.

Coat the kasha in a slightly beaten egg. You’ll just place kasha in a bowl and put beaten egg on grains. This will help the grains not to stick to themselves while you are cooking them. Make sure the grains are completely coated with egg.  Put the kasha in the same frying pan, set over a fairly high heat. Flatten, stir, and break up the egg-coated kasha with a fork or wooden spoon for a few minutes till toasted and the egg has dried on the kasha and kernels are brown and mostly separate. Kasha instructions for cooking are usually on the box as well. Then I pour in the broth that I am using, a little margarine/butter is OK as well ( app. 2 Tbsp) bring to a boil, cover tightly, lower flame to simmer and cook for 10 minutes till kasha is fluffy–these are the directions on the box that I follow .

Add back in the mushrooms and onions and combine with chicken broth. Cook box of Bow Tie Pasta according to directions on box al dente.

Bring to a boil and cook over low heat covered tightly. Check on it after 10 minutes or so to make sure the kernels are tender and the liquid has absorbed. If not, cover and continue steaming for another few minutes till all liquid is absorbed.

Adjust seasoning with more salt and pepper if you’d like, mix in cooked pasta, and if you’d like drizzle a little more oil on it. I like to do it all in a large enough frying pan to hold pasta . You can always mix in pasta in a large bowl separately. I like it in frying pan on stove top till I serve it. You can always make ahead and heat up in oven at 350 degrees in a pyrex dish,  you’ll most likely need to add a little oil if you do so.

*Wolff’s Kasha has directions for cooking kasha on the box. It’s pretty much the same , I just add in the mushrooms and onions for more flavor.

*should serve 8 people

Chickpea, Feta and Tomato Salad (with cukes) Raw and Vegetarian

Chickpea, Feta, and Tomato ( with cukes) Salad

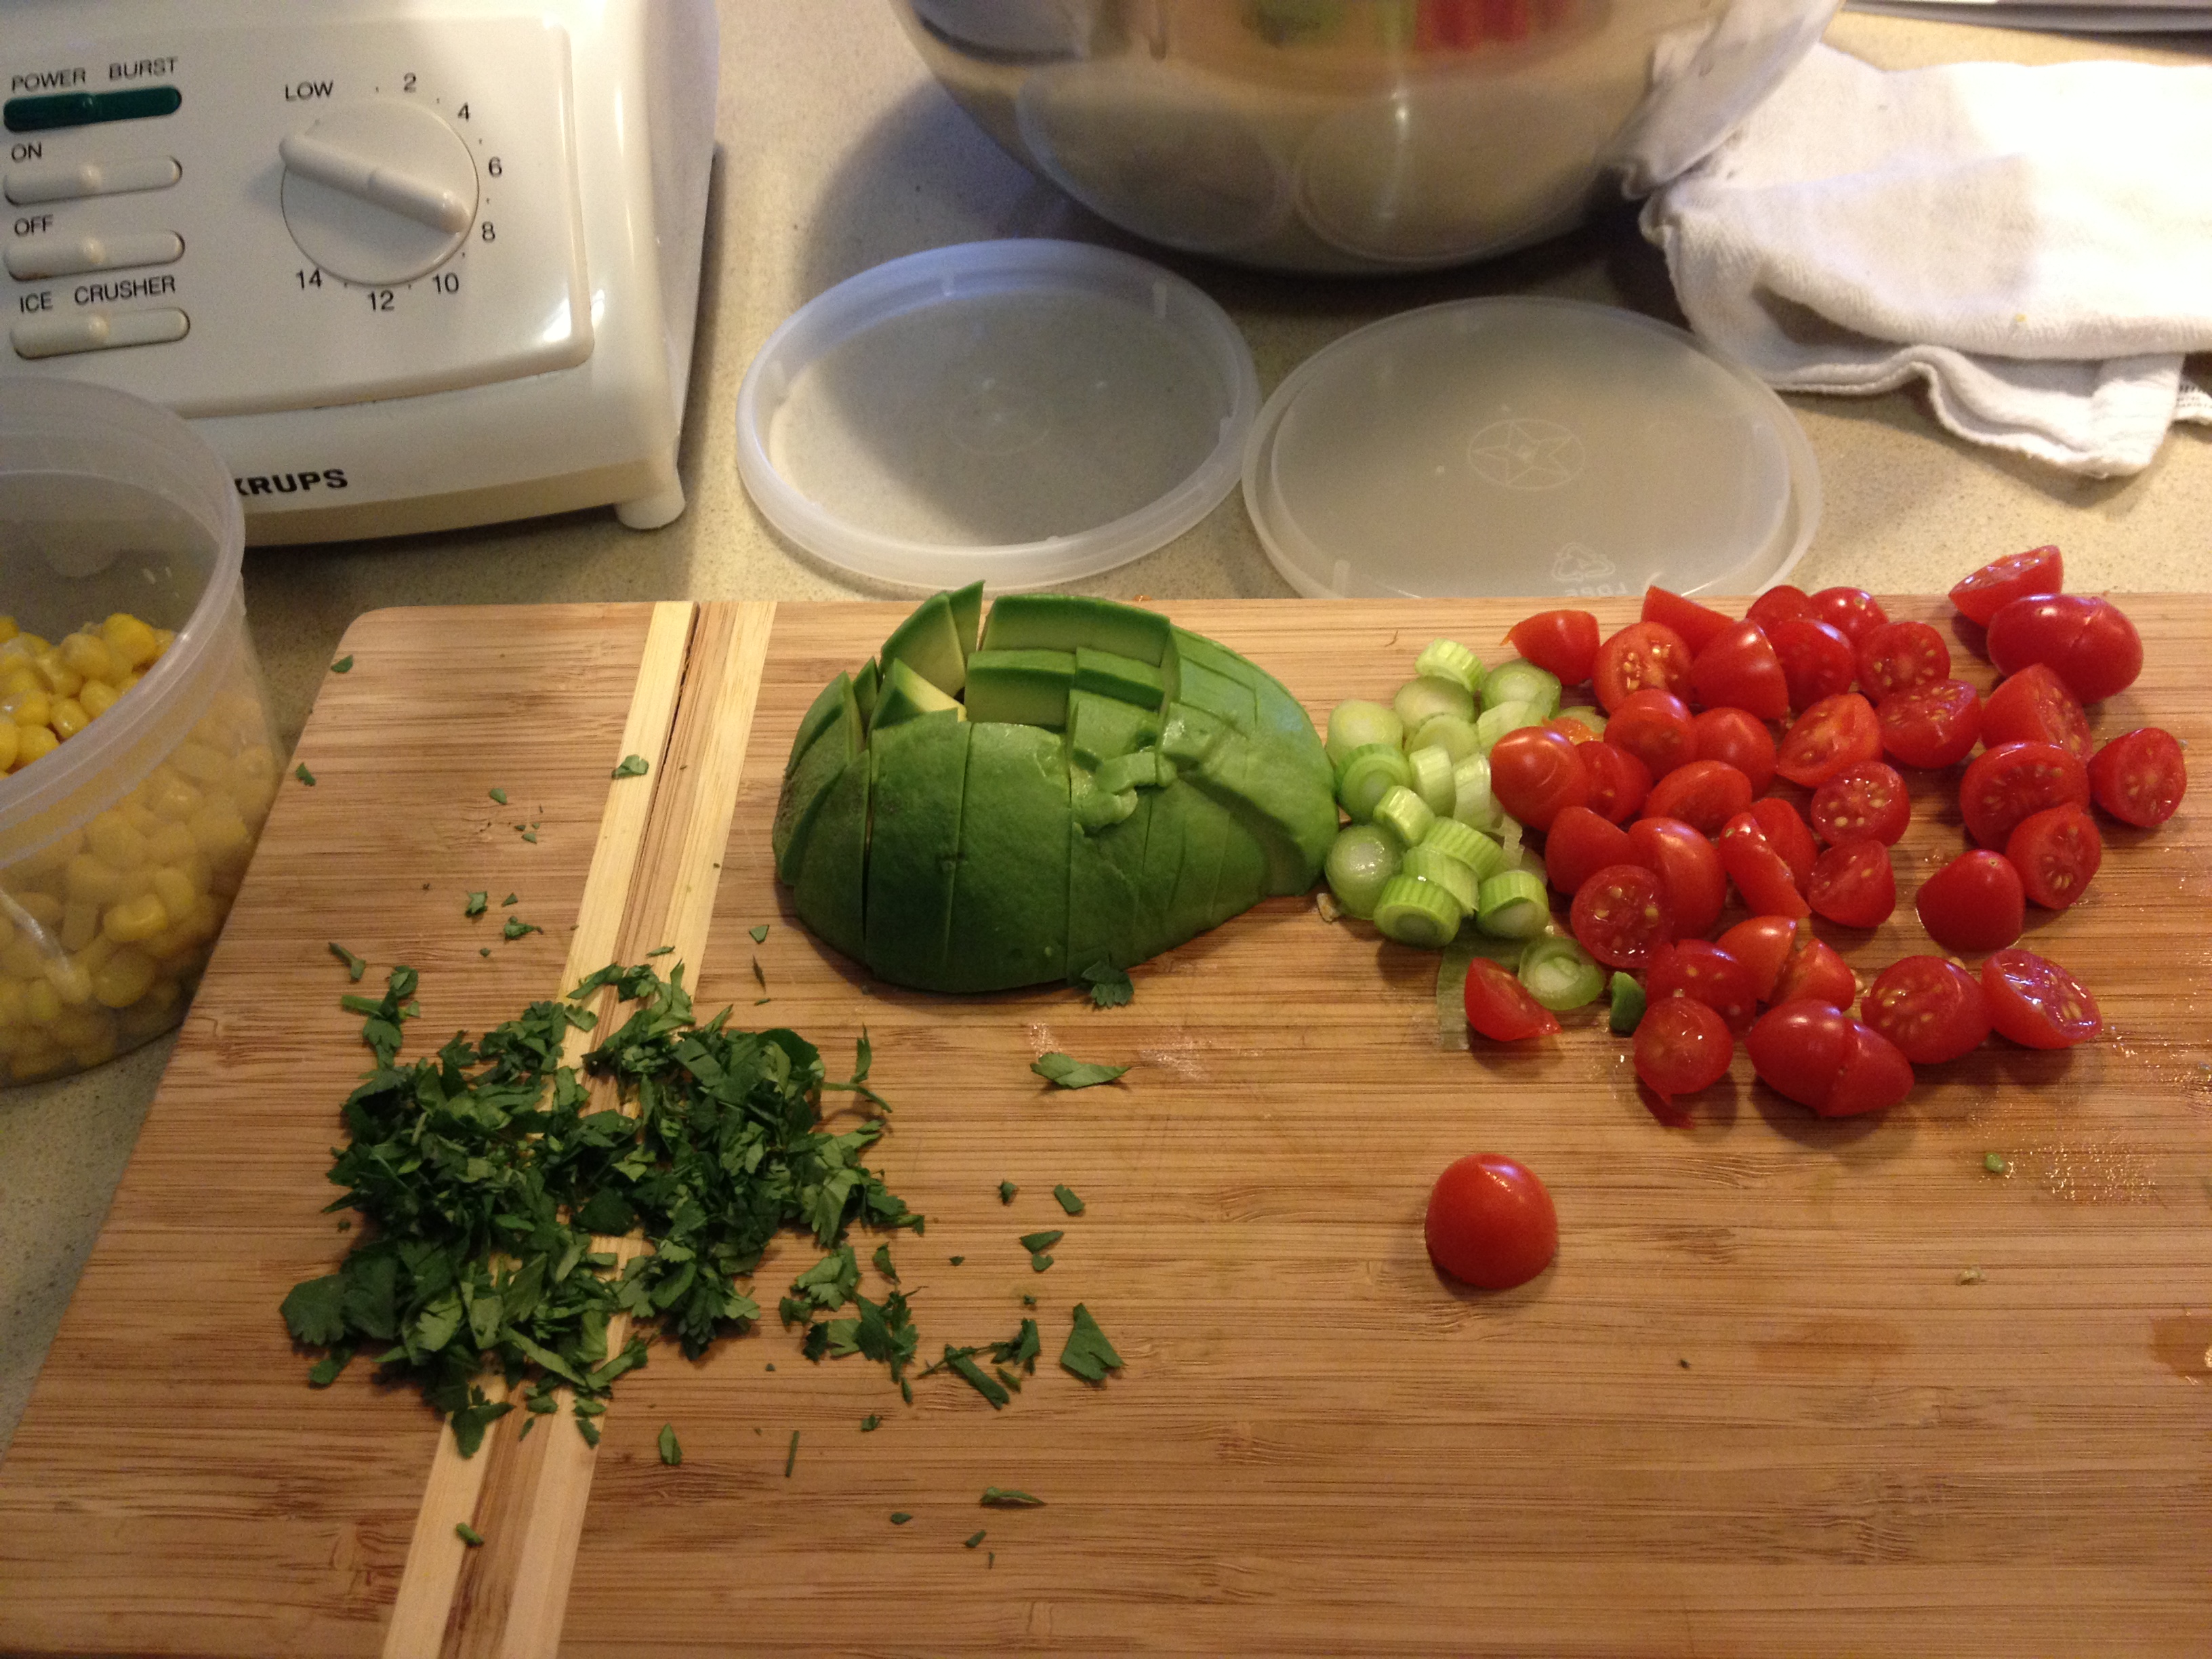
I served this salad with my Easiest Chicken Ever, it is fresh tasting , and crunchy. very easy and can be made throughout the year. it is very good using heirloom tomatoes, which I couldn’t find this time out.  It’s also perfect with small, grape tomatoes, which can be found everywhere, at any time. Enjoy! pretty low in calories as well. 🙂 Just saying…. this is a delightful fresh tasting side dish and perfect for any bbq or dinner you may be having.

INGREDIENTS:

1 can (15 oz) chickpeas, rinsed and drained (try and buy the organic ones)

1 pint cherry, grape or heirloom (if in season) tomatoes. (If you are using the little ones, cut them in 1/2. If you are using the larger ones, slice.)

2 oz (approx. 1/3 cup or to your liking) feta, crumbled or cubed

2 tablespoons fresh lemon juice (approx. 1 average lemon)

kosher salt

freshly ground black pepper

dried oregano gives it a real mediterranean flavor use as little or as much as you’d like

DIRECTIONS:

Combine everything in a bowl and season with salt and pepper and oregano to taste, flavors will come together nicely , I let it sit out for app. 1/2 hour before serving, give it a mix from the bottom before serving. Taste for seasoning.

*Should serve approx. 4

*Very low in calories (yeah!)