Tag Archives: Pizza

Making Pizza at Home with store bought dough in a sheet pan

Making pizza at home with store bought dough is one of my favorite things to do. It’s easy once you get the hang of the dough and I found a few tricks along the way which help make it easier. The real trick to the dough is letting it rise and come to room temperature. If you try to work with cold dough out of the fridge it won’t work . You will need a rimmed sheet pan as well. I keep some dough in the freezer and take it out the night before and let it defrost in the fridge and the next day about 4 hours before I am using I place it on the counter ( in the sun even better) and let it rise and come to room temperature. There are many places to buy dough and you’ll have to find the best one by your home. I buy in Whole Foods when I am in Colorado and in NY Trader Joes , Whole Foods and your local pizza place or bakery will probably be happy to sell you a ball of dough. .Dough will need at least 3 – 4 hours to rise outside of the fridge. Nothing will happen to it so just set it out on the counter — I open the bag and let it rise away. My ingredients are simple and if you follow instructions you should be fine. Don’t be discouraged if the first few times it doesn’t come out perfectly — it took me a few times with the dough to really get the hang of it. Give it a try!

This is what I do and these are my instructions:

Ingredients:

1 bag Pizza Dough — for 4 people I make for 2 and we always have extra slices

16 oz. Pizza Sauce — if I have homemade I use that if not I always have a jar of Raos Arrabiata or Marinara on hand

Italian Seasonings — dry app. 2 tsp. you’ll have to eyeball it

flour for stretching dough — this is a must

Olive Oil Spray for spraying baking sheet — I like this better than using olive oil — either one will work on baking sheet

Parmesan Cheese

Shredded Mozzarella — app. 8 oz. more or less

Directions:

Let dough rise. Read notes above. Keeping the store bought dough on a counter for at least 3 hours or more. It will keep rising in the bag so I usually open the bag to give it room to rise. If you’re defrosting it do so overnight in fridge and then take it out the next day. You’ll notice it rising in fridge ( at least it should)

Pre-heat oven to 450 degrees — very important to get oven hot so make sure you’re oven is pre-heated

Spray baking sheet with Olive Oil Cooking Spray or using a brush lightly coat bottom of baking sheet with Olive Oil . I use a 12x 17 rimmed baking sheet . You don’t need a pizza stone.

Stretch the dough. On a clean surface ( counter top ) I put down a light amount of flour (enough for both sides) and you can always add more , the flour will help to expand the dough. Place raw dough on top of flour, coating each side. Begin stretching the dough by pinching the outside in a circular motion to spread it out. I put my fists under the dough to stretch ( you don’t need a rolling pin) You can alternate between pinching the dough with your finger, pressing it out on your work surface, and using your knuckles to pull the dough from underneath in circular motions. Usually a few motions will get the dough stretching. When it’s large enough gently transfer to the prepared sheet pan. I spread it out thin in center and more dough around perimeter ( crust) if there are holes in your dough pinch together dough or fold over the dough in that spot and get rid of them . I spread it out all the way to cover entire baking sheet . Don’t worry about your dough being a perfect shape. All pizza is delicious and beautiful.

Bake the naked pizza dough in the oven at 450 degrees for 7 minutes. During this time prep your toppings. I am sort of a purist so it’s sauce, cheese , and seasoning. Never add the toppings to raw pizza dough.

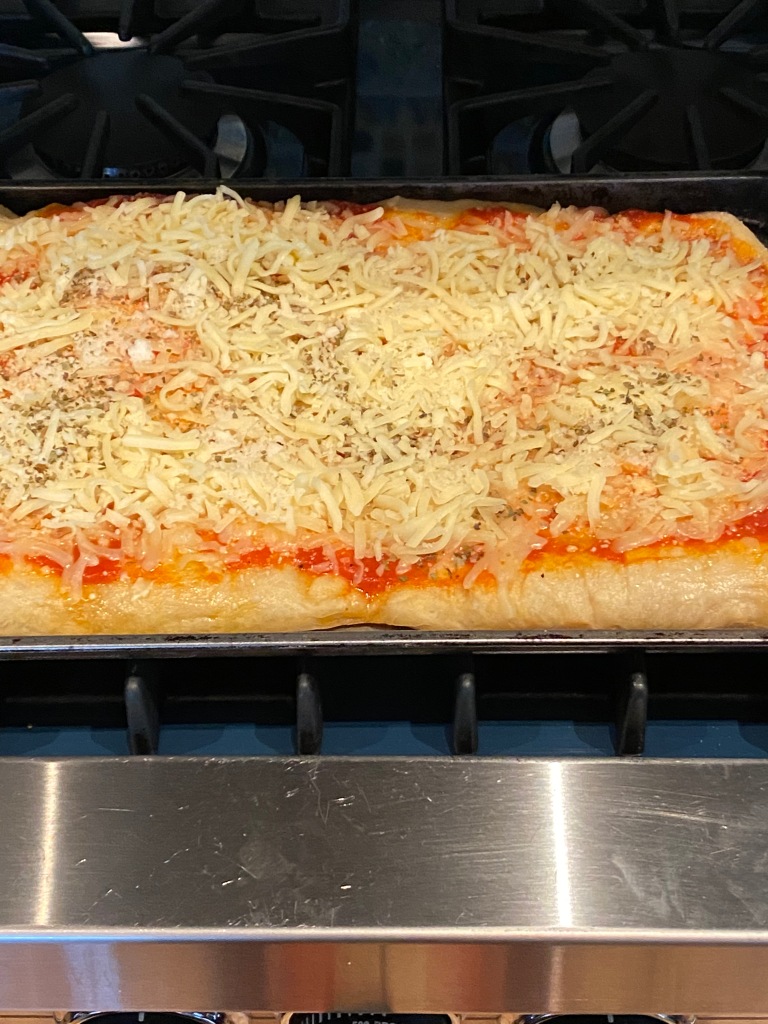
After par-baking the pizza dough, remove from oven and raise temperature of oven to 500 degrees. ( make sure it gets to 500) I add my sauce — spreading it out on dough, I leave a little room around perimeter ( see photo) , dried Italian seasoning ( if you’re using) parmesan cheese and mozzarella cheese . Obviously if you have other toppings you want to use this is the time to add.

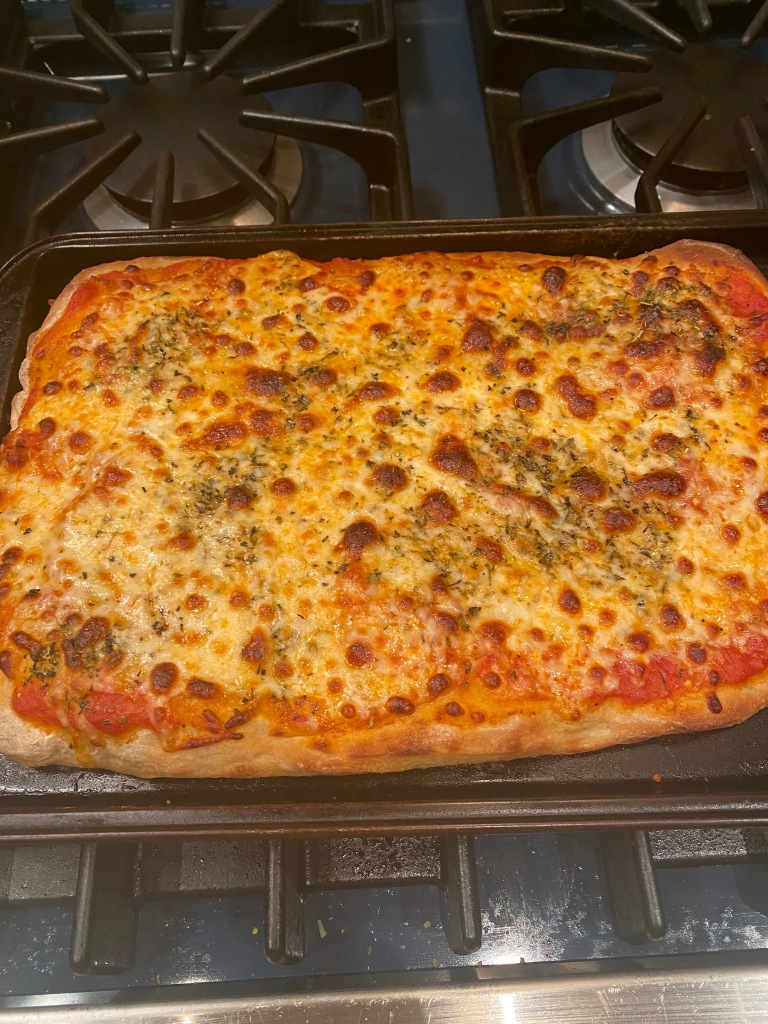
Bake the pizza at 500 for another 10 minutes — all ovens vary so check on it after 7 minutes.

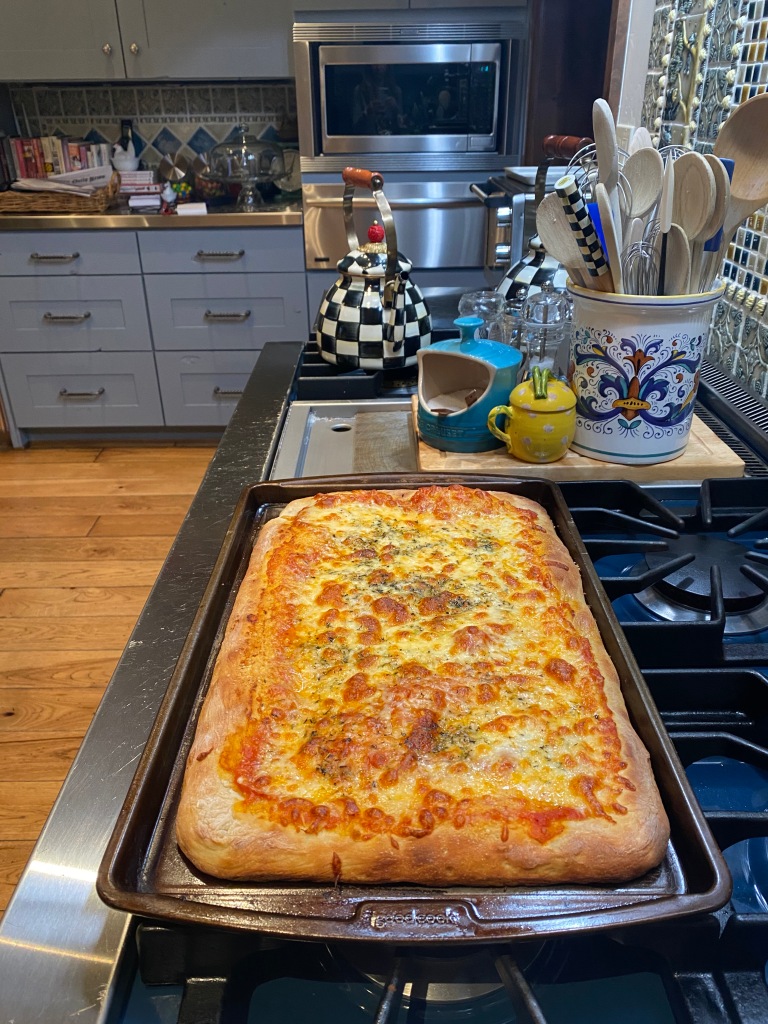
I like my cheese fully melted and a little brown in spots. Let it cool off for a few minutes before slicing .

I use a pizza cutter and get 8 slices .

Let me know how this comes out — tag me on Instagram story — I would love that.

these are some photos from current pizzas and past pizzas–sometimes they come out better looking than other times but they always taste incredible! No such thing as an ugly pizza in my book.

Learning something new at any age – Pizza

While back in NY for the Fall I always try to expand my horizons and take as many new cooking classes as possible. I have wanted to take a pizza making class for some time now. I signed up at ICE for their Best Home-Made Pizza Class . Class was taught by Greer Nuttall and she was an excellent teacher, well versed in the subject, interesting and very patient. Working with dough is always an adventure, but somehow when you’re doing it with other people in a fun atmosphere it is a tad less intimidating. Dough can be very intimidating to work with, whether it be challah, pie or pizza. You definitley get a feel for it after a while and I highly recommend giving it a go . I will admit that it is a whole lot easier to just go and buy the pizza dough, and it is so readily available . You can walk into your favorite pizza place and they will sell you the dough, and you can cut it into smaller pieces and freeze what you don’t use. Making dough can take several hours just to rise. So if you’re in a rush, and who’s not these days? just buy the dough and make your own pizza. I’ll never tell. Invest in a Pizza stone and some parchment paper.

We made a thin pizza crust and a thick pizza crust. I prefer the thin, but I’ve never met a pizza I didn’t like. We made so many pizzas between all of us, I couldn’t believe how much pizza we were eating for lunch!!!! It was delicious.

These were a few of my favorite toppings, I am not going to get into the making of dough on this blog. If you are really interested in it, you can take a class or just try your hand at it at home. I am not that proficient in it myself, and not ready to teach that particular skill.

These recipes are from my class and originally from Nick Malgieri’s Baking Classes. I must also say that practice makes perfect so I better start practicing my pizza making skills.

Pancetta and Cheese Pizza Topped with Rucola and Tomato Salad:

Rucola Salad:

1 bunch rucola ( or arugula) rucola is a bit more tender

1 pint grape tomatoes ( sliced in 1/2)

Salt and Pepper

1 teaspoon garlic grated with the microplane ( you must get one if you don’t have already)

2 teaspoons red wine vinegar

3 tablespoons extra virgin olive oil

Pizza:

2 thin pizza crusts

1/2 lb. pancetta ( buy the diced kind) so easy to use ( you’ll need 2 packages )

1 lb. fresh mozzarella , coarsely grated or diced

1/2 cup Pamigiano Reggiano cheese, finely grated

Fresh Ground Pepper

2 Tablespoons Olive Oil

Directions:

Half an hour before you intend to bake the pizzas, set racks in the upper and lower thirds of the oven and preheat to 450 degrees. I use a pizza stone in my house, but you can just put on a piece of parchment paper.

For the salad, combine the rucola and halved tomatoes in a bowl and refrigerate. Whisk the salad dressing ingredients and set aside until needed.

Quickly cook the pancetta to render some of the fat and with a slotted spoon lay on some paper towels to drain.

Scatter the cheeses on the crust and top with pancetta. Grind pepper all over the pizza and drizzle with olive oil.

Bake the pizzas for about 30 minutes, checking the progress by lifting the crust with a spatula to check on how the bottom is coloring up. After about 10 minutes , switch the pizzas on the racks so each will have the benefit of both top and bottom heat.

Bake the pizzas until the tops are sizzling and the bottoms are dark brown.

Remove from the oven , slide pizzas to cutting boards and use a pizza wheel to cut into wedges. Toss the salad with the dressing and scatter it on the pizza, or serve alongside. Enjoy!

Pizza Margherita:

This pizza was created in the 1880’s by Raffaele Esposito in honor of Queen Margherita of Italy, the colors of the pizza reflect those of the Italian Flag.

Two thin pizza crusts

2 – 3 cups chopped, well drained canned tomatoes

Salt and Pepper ( Sea Salt is best on Pizza , won’t make dough soggy)

2/3 cup finely diced or grated fresh mozzarella. Drizzle with 3 – 4 tablespoons olive oil

Directions:

Half an hour before you intend to bake the pizzas, set racks in the upper and lower thirds of the oven ( as before) and preheat oven to 450 degrees

Evenly scatter the tomatoes on the crusts to within 1  1/2 inch of the edge of the pizza. Salt and lightly pepper and scatter with the cheese . Drizzle with olive oil.

Bake the pizzas for about 30 minutes, checking on it’s progress as I said in the Rucola Pizza.

After the pizzas are baked, cut them and sprinkle each with 1/2 cup gently torn leaves of fresh basil. Do not chop the basil with a knife because it will turn brown.

Pizza Bianca ( all cheese pizza)

2 thin pizza crusts

scatter 1 cup ricotta on each crust and spread without covering completely. Sprinkle with 1/2 cup each grated Parmigiano Reggiano and fresh mozzarella. Drizzle each pizza with a tablespoon of oil and if you like 1/2 cup crumbled Gorgonzola. Bake as above.

*if you like spicy, you can put some red pepper flakes in a little oil prior to scattering on pizza.