Un-Stuffed Cabbage

photo 3 (4)photo 2 (2)photo 3 (4)photo 3 (5)photo 4 (3)photo 2I love stuffed cabbage and my Grandmother made the most amazing stuffed cabbage ever . I love stuffed cabbage but do not feel like dealing with the actual stuffing of the cabbage, it is way too labor intensive for me.  I have made several variations of this and found this one to my liking the best. You can play with the ingredients which is what I did . Original recipe is from Kosher by Design and it is perfect for Passover by just leaving out the rice and substituting matzoh meal in its place. Most perfect for Rosh Hashana and use rice.  Basically this is meatballs in a sweet and sour sauce with cabbage . I doubt very much that Joel would ever eat real “stuffed cabbage” but he liked this. The cabbage cooks down so much that you don’t even realize you’re eating cabbage. I also used 1/2 chicken ground meat and 1/2 beef ground meat , this is entirely up to you. I wouldn’t do all chicken because it might be a bit dry, you can definitely make this with turkey but use dark meat turkey or the balls will also be very dry. You can also make this ahead for the holidays which is always a very good thing and feel free to freeze it.  This is the original recipe adjust amounts for how much you’re making – this recipe is for 3 lbs. if you’re making for less people and only use 2 lbs. of meat you can cut ingredients accordingly.  You’ll want to use a large pot for this recipe. Enjoy!

For Passover substitute matzoh meal for rice.

Happy Passover for those who celebrate.

Follow me on Instagram @cookingwithcandi

Ingredients:

Meat

3 lbs. ground meat– I used chicken and beef (dark meat turkey is best here) white meat turkey tends to be very dry. Mixed with beef it’s fine but if using alone you’ll need to use dark meat ground turkey.

2 large eggs, lightly beaten. Use room temperature eggs they work best.*see my post about eggs–a little note on my blog.

3/4 cup uncooked long grain white rice, for Passover use matzoh meal and omit the rice

1/4 cup water

1 onion finely chopped

Kosher Salt to taste–app. 1/2 to 1 tablespoon

Pepper to taste–app. 10 grinds on a pepper mill, or app. 1/4 of a tablespoon

*garlic powder if you like

Sauce:

2 packages of shredded cabbage, probably about 1 head of cabbage finely shredded, no need to do it when you can buy it pre-shredded (not red cabbage)

1 Tablespoon Vegetable Oil

Kosher Salt to taste ( app. 1/2 tablespoon)

1 1/2 tablespoons Kosher Salt

1 1/2 cups tomato juice

4 8 ounce cans tomato sauce ( or 32 ounces)

1/2 cup brown sugar ( use whichever brown sugar you have in house , it won’t make a difference. Light or Dark, I actually used dark.

1 cup sugar

3 lemons squeezed , I got about 1/2 cup , they were smallish lemons

1/2 cup raisins

Directions:

In a large mixing bowl combine the meat, eggs, water, rice and onions. Season with Salt and Pepper , and if you like garlic powder. Gently mix by hand, and I do mean gently, if you over do it the meat will be like concrete. Set aside.

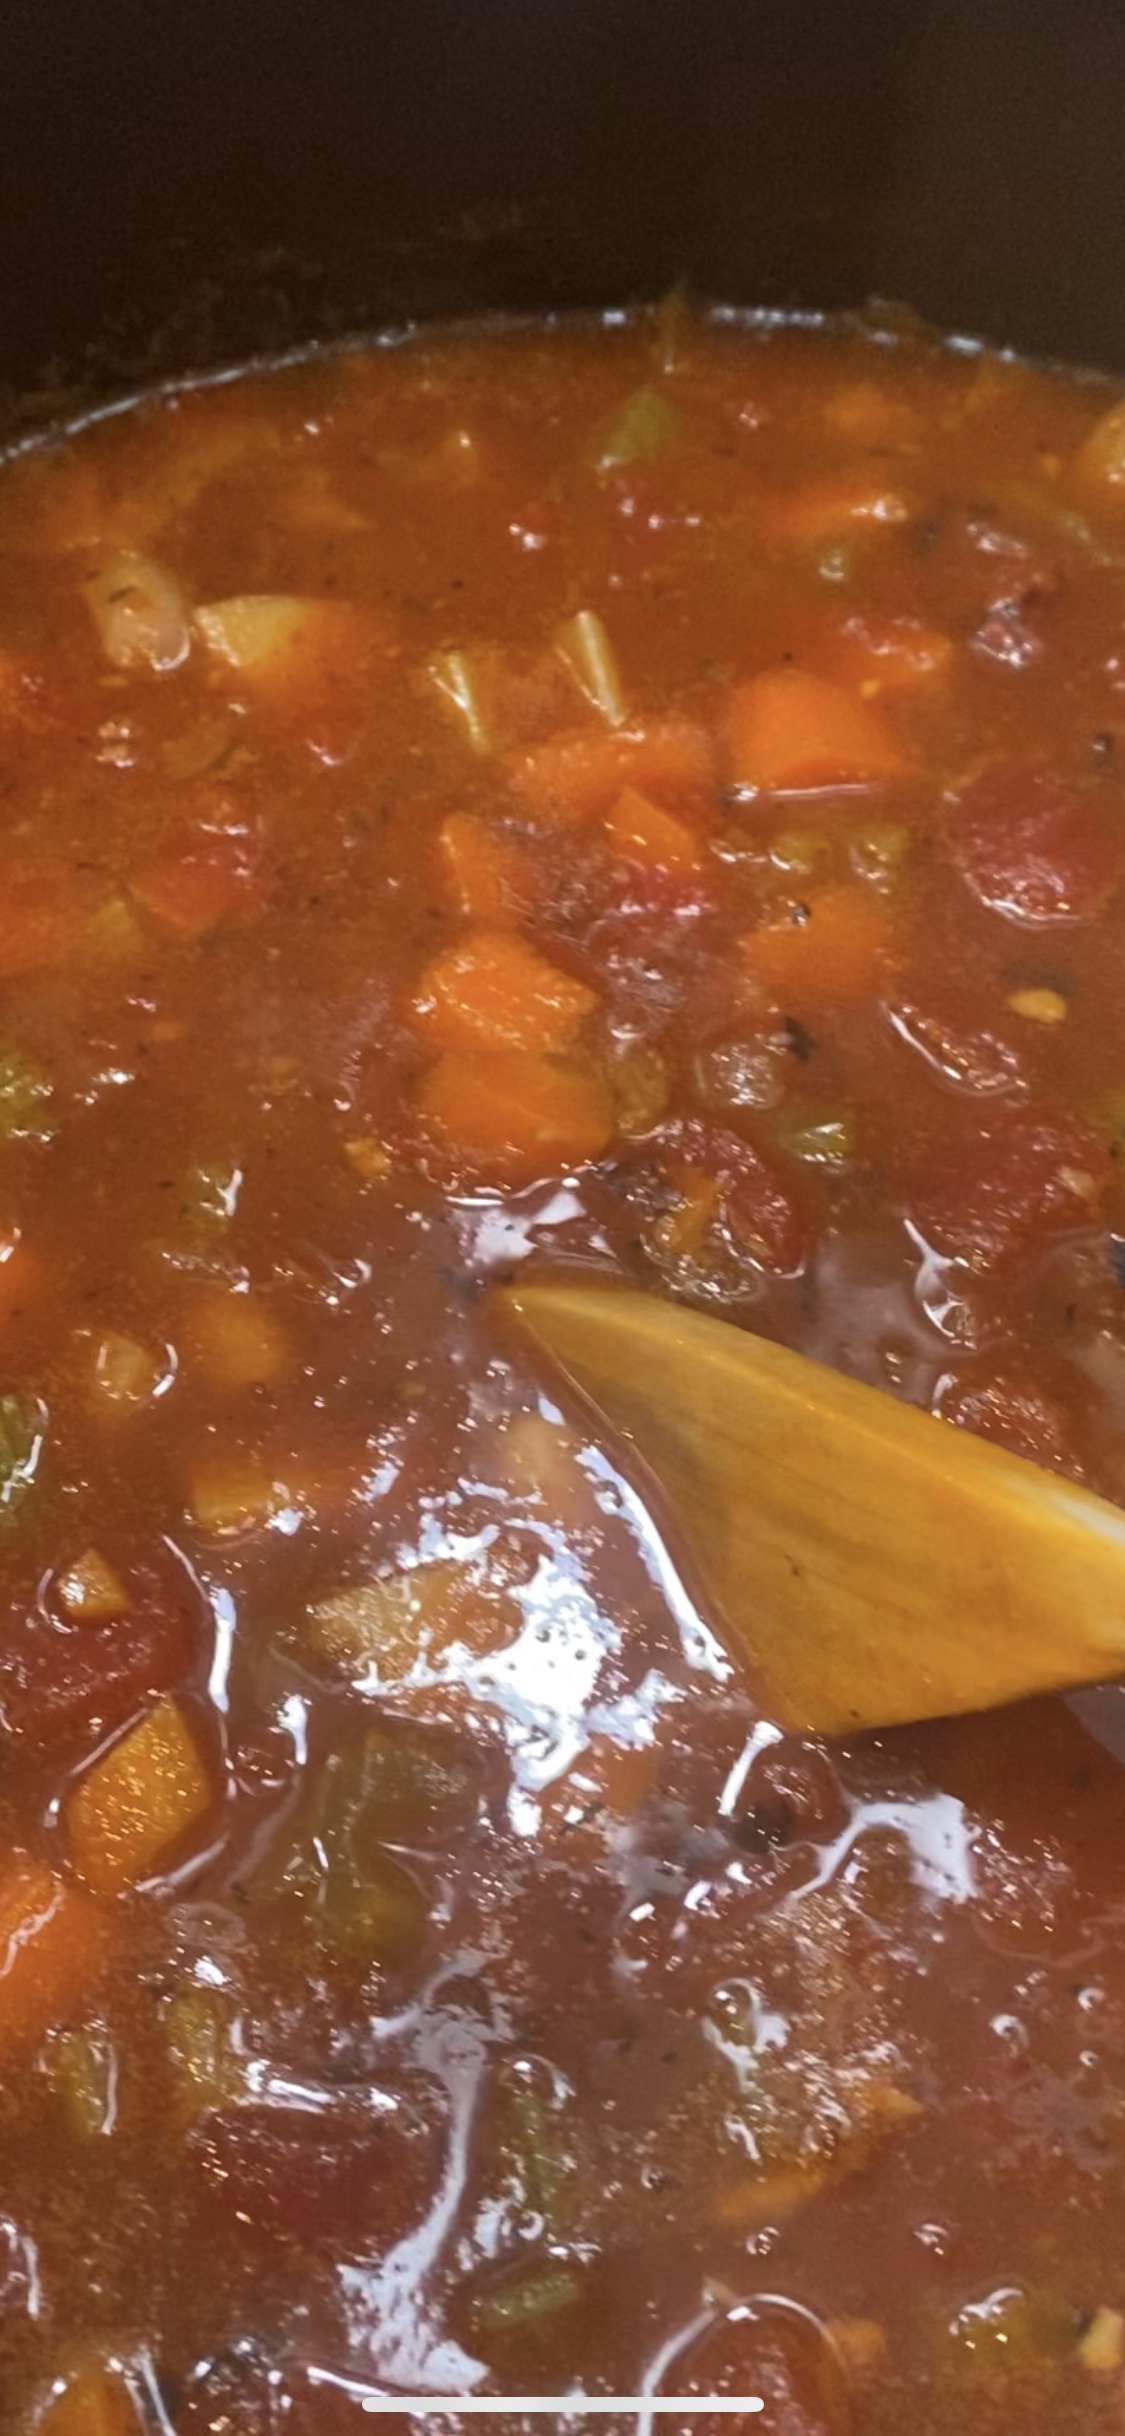
Heat the oil in a large pot over medium heat. Add the shredded cabbage and about 1/2 tablespoon of kosher salt. Simmer for 10 minutes. Add the tomato juice, tomato sauce, brown sugar, sugar, lemon juice and the raisins. Stir till well combined and continue cooking sauce at simmer setting.

Gently form meatballs out of the meat mixture, I made a rather nice size meatball, not too large and not too small. Make whatever size you’d like. Just do not over-handle the meat because it will cause meat to toughen. Add to cabbage mixture, just drop into the hot sauce and do not stir, you can pile them on top of one another because they will cook down.

I left it to simmer for about 1 1/2 hours . I didn’t touch the meat balls for at least the first 1/2 hour, you’ll want them to cook through and form into nice balls before you stir, so just leave them to cook. After the first 1/2 hour or so you can gently stir and move the meatballs around. They don’t require a lot of stirring around .

This dish brought back memories of my childhood and was a most satisfying main dish.

Passover 2024

Passover is right around the corner. This year Passover will start on the evening of Monday April 22 and end on Tuesday April 30. It’s a great time to sit down with family and friends and celebrate. First Seder is April 22 and the second Seder is April 23. This also happens to be a Jewish leap year which must be the reason for the latesness of Passover this year. Because the lunar year is about 11 days shorter than the solar year, so an extra month is added to certain years to make up the difference. Seven leap years will happen in a 19 year cycle, and it can cause passover to start after the second full moon, the last time this happened was in 2016 , and since the dates are determined by the Hebrew calendar which is based on lunar cycles it is pretty late this year. It’s a holiday commemorating the emancipation of Jewish people from slavery in ancient Egypt.

There are many traditional foods during Passover and I will share my recipes with you. Everyone has special foods and traditions that they like to follow. Certain foods are always expected on the table along with a new one here and there. Traditionally Charoset, Gefilte Fish, and Matzo Ball Soup are on the table . Brisket or Chicken with a multitude of side dishes.

If you do observe Passover, I hope you have a wonderful Holiday and I hope you enjoy these recipes.

I will be posting my favorite tried and true recipes for the rest of the week — any questions you can email me or DM me on Instagram or FB. I will be as helpful as I can be.

Enjoy and Happy Pesach!

This is a list of some of the recipes I will be posting. If you’re interested in any of them you can go to cookingwithcandi.com and put the name of the recipe in the search box. You can also just google the recipe along with Cooking with Candi that always works. As I said starting tomorrow I will be posting some of these wonderful recipes.

These are some of my go-to’s and all recipes are on my website @cookingwithcandi

Homemade Chicken Soup with not Homemade Matzoh Balls

Traditional Ashkenazi Charoset

Passover Popovers

Slow Cooked Brisket

Happy New Year Brisket

Un-Stuffed Cabbage — one of my personal favorites in place of Sweet and Sour Meatballs and it cooks on the stovetop so it frees up the oven !

Grandma Regina’s Farfel–My Grandma Regina lives on through this recipe and it is always on our Seder Table — it’s a little tricky to make but totally worth the effort

Honey Roasted Chicken

Chicken Marbella-– we love this Silver Palate staple and it is almost always on our seder table

Old School Meatballs–Sweet and Sour and delicious also made on the stovetop so frees up the oven

Apricot Honey Mustard Chicken

Peach Farfel-– a must — just ask anyone who’s ever made it

Bree’s slow cooked skirt steaks— I sometimes make this in place of Brisket– using the slow cooker for the steak or the brisket frees up your oven for other items

Karyn’s Cranberry Apple Crisp for Passover — a must have for every table — made especially for Passover and you can make it for dessert if you prefer!

Judy’s Apple Matzoh Kugel for Passover

Sweet Matzoh Pudding

Spinach Soufflé for Passover–so very easy and it’s vegetarian but it contains dairy so if you’re kosher this won’t work for you

Passover Cobbler

My Favorite Macaroons — Traditional Style for Passover and always on my table

Julie’s Brownies for Passover

Chocolate Bark Surprise

Marcy’s Matzoh Crunch Candy— super delicious and easy to make and very addictive — a most amazing Passover Dessert

Meringue Cookies

Ellen’s Passover Apple Cake

Matzoh Brei

Enjoy! and watch for my recipes but feel free to peek ahead and look at them.

Farro Salad

This is a delicious farro salad made with arugula — this salad is similar to my take on Jennifer Aniston’s Salad but with arugula and shaved warm instead of feta. This is light and yummy and you can add a protein and make it a dinner salad if you’d like. Original recipe credit goes to the chef Charlie Bird on this one.

You can obviously add what you like and remove what you don’t like . Feel free to swap cheeses, or onions for radishes, etc and chopped up dates would be just fab.

Enjoy!

Follow me on Instagram @cookingwithcandi

Ingredients:

1 cup Farro– I use pearled farro

1 cup apple cider not apple cider vinegar

2 cups of water

2 teaspoons kosher salt, and more to your own liking

2 bay leaves

1/4 cup extra -virgin olive oil* you can double if you’d like for a bit more dressing

1/4 cup fresh lemon juice-  * you can double if you’d like for a bit more dressing

app. 1/2 cup shaved Parmesan Cheese , I used a vegetable peeler but I do know you can buy Parmesan Cheese shaved this way ( time and mess saver)

app. 1/2 cup shelled Pistachios–I used salted pistachios and chopped them myself. You can use raw pistachios but they’re a tad tasteless or you can leave them whole up to you or substitute with any other nut you prefer or omit totally if you prefer gutless

app. 2 cups Arugula

app. 1 cup torn Basil Leaves or 1 cup chopped basil

app. 1 cup Mint leaves-cut up into smaller pieces– I prefer to chop it

2 large radishes sliced thinly or rough chopped–optional and you can use red onion here as well — sliced thinly or chopped into small pieces — totally optional but I love the crunch and the flavor of a fresh radish

app. 1/2 cup sliced grape or cherry tomatoes — totally optional

Directions:

Farro:

In a medium saucepan, bring farro,  apple cider , dash of kosher salt , 2 bay leaves and 2 cups of water to a simmer. Simmer until farro is tender and liquid evaporates, about 30 minutes. If farro is cooked but there is still water I put in a colander/strainer and leave it till it cools down. If on the other hand the water evaporates before the farro is done, you’ll have to add a little more water. You can always strain it so no worries–but don’t overcook. Let farro cool down and discard the 2 bay leaves.

Salad:

In a salad bowl (large enough to fold in arugula and mix) whisk together the olive oil and lemon juice, I use a small wire whisk, it’s an amazing kitchen tool.

Salad is always best at room temperature so if you do refrigerate, just bring to room temperature before serving. If you’d like you can put farro and parmesan in the bowl with some dressing and allow it to sit,  this would be the salad base and it can sit for a few hours out without refrigeration. I usually just mix all ingredients starting with the farro then add in everything else gently toss with some dressing and if people want more dressing it’s available. Add nuts at the end so they retain their crunch !

IMG_1779IMG_1780

Lemon Orzo with Feta

I love this recipe from Ina Garten’s Modern Comfort Food Book.

This is a delicious side dish for Chicken , fish ,and meat. I particularly like it with Roast Chicken. In the photo I posted here I served it with onion crusted chicken, oven roasted string beans, and homemade cranberry sauce. It was sort of perfect.

Get a good block of Feta or buy the crumbled one . I diced up a block of Greek Feta Cheese and it was just perfect but a nice crumbled one would work equally as well.

If you compare my recipe to Ina Garten’s original recipe you’ll notice I have omitted the salt, it was too salty for me. I tasted for Salt and Pepper when finished and added a little bit to the orzo when I cooked it. Everyone has a different palate for Salt so my suggestion is to taste at the end and add then, this recipe is easy to add at the end. Same goes for pepper just add to your own taste. Feta was plenty salty.

Simple to make and Delicious to eat .

Enjoy!

Ingredients:

1 cup Orzo

2 teaspoons grated lemon zest

2 Tablespoons Freshly squeezed Lemon Juice

2 Tablespoons good Olive Oil

1 Tablespoon minced fresh dill

1 cup small diced Feta ( try a good greek Feta ) or crumbled Feta Cheese

*kosher salt and freshly ground black pepper to taste– see note above

Directions:

In a large saucepan , bring 2 quarts of water to a boil, and cook the orzo according to package directions al dente.

Once orzo is cooked and drained transfer to a bowl and stir in the lemon zest, lemon juice, olive oil , dill, fold in the feta and taste for salt and pepper. I added no salt but about 1/4 teaspoon of freshly ground black pepper. This is up to you . Serve hot or at room temperature .

Curried Salmon Rice Bowl

I have been experimenting with a lot of Indian style food recently . You’ve all seen some of my favorites so far. This one was so delicious and I just love the curry flavor. Obviously not everyone is into the curry flavor but if you are and are looking for something new and fairly easy to make — this one’s for you.

I did it over rice and you can use any type of rice you like or any grain would also be pretty delicious. I also use Spicy Curry which isn’t so spicy but I like it a lot. You can use any curry powder you’d like. The chick peas added a delicious layer of flavor and we love cilantro but feel free to omit if you don’t like.

This would be most perfect served with some warm Naan Bread as well but we didn’t have any in the house so we passed on that. This recipe is for 4 people and honestly the prep was quick and cooking time was about 1/2 hour all in. I cut whole recipe in 1/2 for the two of us and had a little salmon left over which I ate cold for lunch the next day and it was outstanding.

Enjoy! and please let me know how this comes out if you try it and like it. By the way Joel ate his whole bowl and didn’t even pick out the chickpeas which sort of amazed me.

Ingredients:

Salmon Ingredients:

1 1/2 lbs. Salmon — I had a little leftover and ate it for lunch the next day so add a little extra salmon

2 Tbsp. Curry Powder — I used Spicy Curry Powder but any Curry Powder will do

2 Tablespoons Olive Oil

Sauce and Rice Bowls:

1 Tablespoon Olive Oil

1 yellow onion thinly sliced

1 bell pepper ( I used red but any color will do)

6 cloves garlic, minced

2 Tablespoons freshly chopped ginger

Kosher Salt and freshly ground black pepper to taste

2 Tablespoons Curry Powder

1 14oz. can Chickpeas, rinsed and drained

1 14 oz. can full fat coconut milk

1 lime, juiced

1 handful chopped fresh cilantro if you like

Steamed White Rice or Brown Rice or Jasmine or any grain you’d prefer

Directions:

Preheat the oven to 475 degrees. Line a baking sheet with foil or just spray with cooking spray.

Place one of the oven racks as close to the top as possible – about 6 ” from the heat source

Place the salmon skin side down on the baking sheet. Combine the curry powder and olive oil to make a paste. Rub the paste liberally over the top part of the salmon. Bake for about 10 minutes depending on the thickness of your salmon ( maybe a little more or less). When cooked remove from the oven and set aside. ( salmon will continue to cook a bit so don’t over cook)

Heat a large skillet over medium heat and add the olive oil. Once it’s hot add in the sliced onions and chopped bell pepper and cook until softened — about 5 minutes. Add the minced garlic and ginger and season with some kosher salt and coarse black pepper. Add in the Curry Powder as well ( 2 Tablespoons) Cook for a few minutes. Stir in the drained , rinsed chickpeas and the coconut milk and lime juice. Stir and bring to a simmer. Simmer for about 5 minutes. Stir in the fresh cilantro if you’re using.

I flaked pieces of the salmon and put over the rice and spooned the curry sauce over it — so delicious.

Tik Tok Pasta

Originally posted a year ago and it’s a good time to make this because all the hoopla has died down and feta much easier to come by. It’s a perfectly easy recipe to follow and you and your family will enjoy.

This recipe has hit the internet and gone viral to the point that you can’t find a block of feta in the market. The reaction has been crazy. There are many versions of this recipe and I chose to go with Melissa Clark’s version because I think she’s just one of the best chefs out there and hers was the one pot version which is always a win win in my book. It couldn’t possibly be easier to make and ingredients are usually readily available, I had to hit 3 stores to find the feta ! Assuming you can get the feta this is a wonderful recipe and Joel gave it a 10. Perfectly vegetarian and perfectly yummy.

It is probably one of the richest pastas ever but the flavors were amazing. You will be using the pasta dry so no need to cook that separately .

Enjoy and Thanks to Melissa Clark @nytimescooking

Ingredients:

1 8 oz. block of feta cheese

2 pints cherry tomatoes (leave whole)

5 cloves garlic, peeled and left whole — use 5 nice size cloves or a few more if small

Fresh Rosemary and Thyme– I used a few sprigs of thyme and a few sprigs of Rosemary — the Rosemary I removed from the stem the thyme I used sprigs. These are pretty strong herbs so you don’t want to use too much. Just enough to give it that wonderful flavor ( see photos) 12 ounces dried pasta–I used Orecchiette but any type of pasta will do — Farfalle pasta would also be perfect

Olive Oil– see Directions

3 cups boiling water

Kosher Salt — app. 1 teaspoon

*Crushed Red Pepper

Directions:

Heat oven to 400 degrees

I sprayed a large baking dish with cooking spray first, then place feta, tomatoes, garlic and herbs in baking dish and I drizzled olive oil over cheese and tomatoes — just enough to lightly glaze the tomatoes and a little on the feta itself ( see photo)

Bake for 40 minutes till tomatoes and feta break down.

After 40 minutes, I removed from the oven and very carefully added the box of pasta , boiling water, teaspoon salt, and a few pinches of crushed red pepper* which of course is optional. Cover tightly with aluminum foil and return to oven for 18 minutes.

Remove from oven after 18 minutes, stir, then cover again and let sit for at least 10 minutes. I probably let it sit for 20 minutes because some of my pasta was still very hard. By the end of the 20 minutes it was perfect al dente and I mean perfect. It could be that I am at altitude so after 10 minutes check for the doneness of the pasta it should be al dente ( have some bite ) Also be careful of eating the whole garlic cloves unless you want to .

Served with a green salad and it got a 10 from Joel.

White Bean Soup with Turkey and lots of other good stuff

This soup recipe was inspired by Melissa Clark’s Lemony White Bean Soup with Turkey and Greens. I changed the recipe around to suit my taste by all means check hers out as well @nytimes.com/recipes .

I like my soups thicker so I pureed 1 can of beans with a little broth and this had the desired effect. Don’t skimp on the squeeze of lemon it brightens up the flavor perfectly.

I really enjoyed this soup and it was excellent as lunch the next day . I just added a little water and heated it up and it was perfection in a bowl.

You can freeze up to 3 months and when you defrost you’ll just add a little water or broth to bring it back to the perfect consistency.

I served with some very delicious corn bread that I made . ( just a suggestion)

This is what I did.

Ingredients:

3 Tablespoons Olive Oil

1 large onion , diced

1 large carrot, peeled and diced

app. 1/2 bag baby spinach or regular spinach

1 Tablespoon Tomato Paste

1 Teaspoon Ground Cumin

1/4 teaspoon red-pepper flakes

1 lb. ground turkey

3 minced garlic cloves

1 Tablespoon finely grated fresh ginger

1 Teaspoon kosher salt, plus more to taste

1 quart chicken stock– I used a little more to puree beans or just puree beans without broth — it will be fine. I happen to have some extra broth on hand.

2 15 ox. cans white beans, drained and rinsed — Cannellini or small white bean or Navy Beans

1/2 Lemon — squeezed

Directions:

Heat a large soup pot ( Le Creuset) over medium-high heat for a minute or so and add the 3 tablespoons olive oil, heat for another minute or so. Add diced onion and carrot, saute until very soft and onions are translucent , app. 10 minutes. ( don’t burn)

When the onion is golden, add tomato paste, cumin and red-pepper flakes to the pot, saute until paste darkens, a few minutes more.

Add turkey, garlic, ginger and 1 teaspoon kosher salt, saute and break up the meat, until turkey is well incorporated , app. 7 – 10 minutes.

While this was cooking , I took 1 can of beans , ( rinsed and drained) and pureed along with a little broth in the food processor.

Keep the other can of beans whole after you rinse and drain.

Then add the stock and the whole beans and pureed beans and bring to a simmer. Let simmer until soup starts to thicken, tasting for salt as you go. I do this for at least an hour. I prefer a thicker broth and the pureed beans gave me this. You can always add more stock , a little water or even a splash of white wine to thin out the broth.

I like my soup to sit for a while and I kept it on a low simmer . Right before serving I added app. 1/2 bag of baby spinach. ( any greens will do but I prefer spinach because it’s soft and and takes no time. If you use Kale or a tougher green like collard greens it will take longer to soften up — maybe another 15 minutes or so.

I then squeezed 1/2 lemon into the soup pot, tasted for salt and it was done.

I served with a little grated parmesan cheese and next time I make this I think I will cook up some small pasta ( ditalini type ) and add to the soup bowl for a very filling meal.

This was delicious and I served with freshly made corn bread.

Shrimp and Orzo in One Pan

This recipe is from the NYT Cooking blog courtesy of Ali Slagle and a big thanks out to her . I always read the NYT Cooking it’s really got the most amazing recipes and some of the best chefs out there participate. This recipe caught my eye because of our love of Shrimp. 

I also made  changes which just worked out best for me. That’s the beauty of cooking you can make changes which better suit you. However the recipe is perfect as is. I used very large shrimp but you can use whatever size suits you and your budget. I used an under 10 Mexican White Shrimp. If you’re buying ask them to clean and de-vein them — Joel did mine.

It’s a spin on a scampi and I love cooking in one pan.

Ingredients:

1 – 1 1/2 lb large shrimp, peeled and de-veined

4 Tablespoons Extra Virgin Olive Oil

1 Tablespoon fresh Lemon Zest plus 1 Tablespoon Fresh Lemon Juice–1 average to large size lemon

1/2 teaspoon red-pepper flakes– obviously optional if you don’t like the pepper

Kosher Salt and Freshly Ground Black Pepper to taste

4 Garlic Cloves, minced

2 Tablespoons unsalted butter

1 cup orzo

1/3 cup dry white wine

2 cups boiling water, seafood stock, or chicken stock–I used Chicken

3 Tablespoons Finely chopped Parsley

Directions:

In a medium bowl, stir together the shrimp, 2 Tablespoons Olive Oil, the lemon zest, red-pepper flakes, 1/2 teaspoon kosher salt, 1/4 teaspoon black pepper, and half the minced garlic.

In a medium skillet sprayed with cooking spray, add the butter, the remaining oil and garlic and heat over low to medium heat. Don’t burn the garlic. When the butter starts to bubble, add the orzo and another 1/2 teaspoon kosher salt and cook by stirring around the pan as often as possible, toast the orzo in pan for about 2 minutes, adjusting the heat so as not to burn the orzo or the garlic. Carefully add the wine to the pan and stir in until it is absorbed for another minute or so. Stir in the chicken stock , reduce heat to low, cover and cook until the orzo is al dente, probably another 12- 15 minutes. This would be a good time to taste for salt and pepper .

Add the shrimp ( see photo) put them in a snug even layer on top of the orzo, cover and cook until the shrimp is pink and cooked through. This will all depend on the size of your shrimp. Remove from heat and let sit, covered for another few minutes till you’re ready to serve.

I poured the lemon juice over the finished shrimp — placed on a platter and sprinkled with chopped parsley.

Pasta with Sausage, Beans and Greens

I love pasta and am always on the lookout for new and delicious ways to prepare it. This recipe is the real deal and reminded me of many a pasta dish I enjoyed in Italy.  If Joel liked greens more I would have added more kale and as it is he always wonders why I contaminate the pasta with all the beans and green stuff. If I were making for myself I would have added more kale or whatever greens you like. It’s not the most simple recipe as it has a few steps but thoroughly worth the effort involved. I loved the way the beans gave it so much flavor. I used Paccheri Pasta — I was able to pick up a homemade version of this pasta.  It’s just a smooth, giant rigatoni with thinner walls . It soaked up the beans and broth ! I used a can of cannelinni beans but fava beans would be a nice change or chickpeas. I used Italian spicy sausage but you can try spicy lamb sausage as well or any sausage you would like.

Now if you leave out the sausage it can be made completely vegetarian!

Enjoy!!

Ingredients:

1/2 cup olive oil

8 oz. spicy Italian sausage, casings removed — if you don’t like spicy use sweet

1 15 oz. can cannellini beans (white kidney) rinsed and drained. You can use fava or chickpeas as well .

1/2 cup dry white wine if no wine in the house try chicken broth

12 oz. paccheri, rigatoni or any tubular pasta–try a homemade pasta from your local market

6 cups (lightly packed) torn escarole, baby kale, regular kale, Swiss chard leaves, regular kale even spinach will work–whatever you like

Kosher Salt

Freshly Ground Black Pepper

1/2 cup + 1/4 cup of finely grated Parmesan

Directions:

Heat the olive oil in a heavy bottomed pot over medium-heat. Add sausage to pot and cook breaking up with a wooden spoon, stir occasionally until browned and cooked through, app. 10 mins. Transfer with a slotted spoon to a separate plate.

Add white beans to pot (drained and rinsed) and cook tossing occasionally, I mashed some beans with the back of a wooden spoon. So about 1/2 the beans mashed and the rest I left whole. Cook beans till slightly browned for about 5 minutes. Transfer 1/2 of this mixture to plate with sausage. Leave the other 1/2 in pot. Add the wine to the pot, bring to a boil and cook until liquid is almost gone–about 2 minutes. I sprinkled a little kosher salt in to the bean mixture at this point. You’ll taste again for salt .

Meanwhile, cook your pasta in a large pot of boiling salted water, stirring occasionally, cook until very al dente, a few minutes less than you would normally cook. Don’t overcook!

I used a pasta insert to cook my pasta . I reserved a few cups of the cooking water –you’ll need it. Don’t throw it down the drain. Drain Pasta and then transfer pasta to pot with beans and add your greens and 1 cup of pasta water . Your heat should be on low under the pot just so it’s cooking without burning. Cook and stir often until greens are wilted , pasta is al dente and sauce is thickening up probably 5 minutes or so. Stir and Stir. Add another 1/4 cup of pasta water, then gradually add in 1/2 cup of grated cheese, tossing until melted and cheese dissolves into a beautiful glossy sauce. Thin out the sauce with more pasta water if too thick. Taste for salt  and I put a little freshly ground black pepper in at this point.

Now add in reserved sausage and beans. Delicious pasta right here right now in your pot! and so professional looking and tasting.

Sprinkle with extra cheese if you’d like and crushed red pepper if you’d like.

Pasta was rich and tasty served hot off the stove.

Classic Minestrone Soup

I have made this many different ways and the other night experimented with this recipe by adding fire-roasted diced tomatoes and it was ever so delicious. Feel free to use regular diced tomatoes but the fire roasted ones gave it an extra layer of flavor that was truly delicious. I made this on the stove top and even though it’s ready in an hour I let it sit for a while on a very low flame ( more like 2 hours or more) the flavors meld best this way. This can be frozen but I freeze without the pasta , I like to add my pasta separately to the soup. It’s vegan if you don’t top with parmesan cheese and this recipe should yield at least 6 bowls of soup if not a little more. It’s a delicious vegetarian hearty warm soup that happens to be very healthy and delicious. One of my favorites.

Ingredients:

3 Tablespoons extra virgin olive oil, divided

1 medium yellow onion , chopped

2 medium carrots, peeled and chopped

2 medium ribs celery, chopped

1/4 cup tomato paste

2 cups chopped seasonal vegetables, Potatoes, yellow squash, zucchini, green beans or peas will all work here

4 cloves garlic, minced

1/2 teaspoon dried oregano

1/2 teaspoon dried thyme

1 large can (28 oz.) diced tomatoes with their liquid, or 2 small cans –I used fire roasted diced tomatoes and they were ever so delicious

4 cups vegetable broth

2 cups water

1 teaspoon or more to taste of kosher salt

2 bay leaves

freshly ground black pepper

1 cup small pasta — like ditalini or elbows or small shells

1 can ( 15 oz) cannellini beans, rinsed and drained, or any beans 1 1/2 cups

2 cups chopped kale or baby spinach —

Freshly grated Parmesan Cheese, for garnishing

Warm 3 Tablespoons of the olive oil in a large stockpot or Dutch Oven over medium heat. Once oil is hot, add the onion, carrot, celery, tomato paste, minced garlic, and a little bit of kosher salt. Cook , stirring often until the vegetables soften and the onions are translucent, about 10 minutes. Don’t burn.

Add the seasonal vegetables you’re using and oregano and thyme, cook until fragrant while stirring frequently, about 4 minutes.

Pour in the diced tomatoes and their juices, broth and water. Add some salt now , bay leaves and a pinch of red pepper flakes if you like. And add black pepper.

Raise heat to medium-high and bring to a boil, then partially cover the pot leaving a small gap for steam to escape. Reduce heat to a gentle simmer — I honestly let it simmer for up to 2 hours.

I cook my pasta in a separate small pan and set aside.

I add the beans and you can add the greens now if you like and continue simmering uncovered now, probably another 20 minutes or so till greens are tender. If you want a more classic soup omit the kale /spinach but I love it so I add it to mine —

Remove the bay leaves from the pot, taste for salt and pepper. Put some pasta into bottom of each bowl ( doesn’t matter if it’s cold because soup will heat it right up) Garnish bowls with cheese if you like or put on table for everyone to add their own.

Perfection in a bowl and may be frozen for up to 3 months — it’s better to freeze without the pasta and you’ll probably add some vegetable broth or water to it when it defrosts.