Category Archives: cookies

My Favorite Cookie Dough–2 ways

photo 1 (22) photo 1 (23)
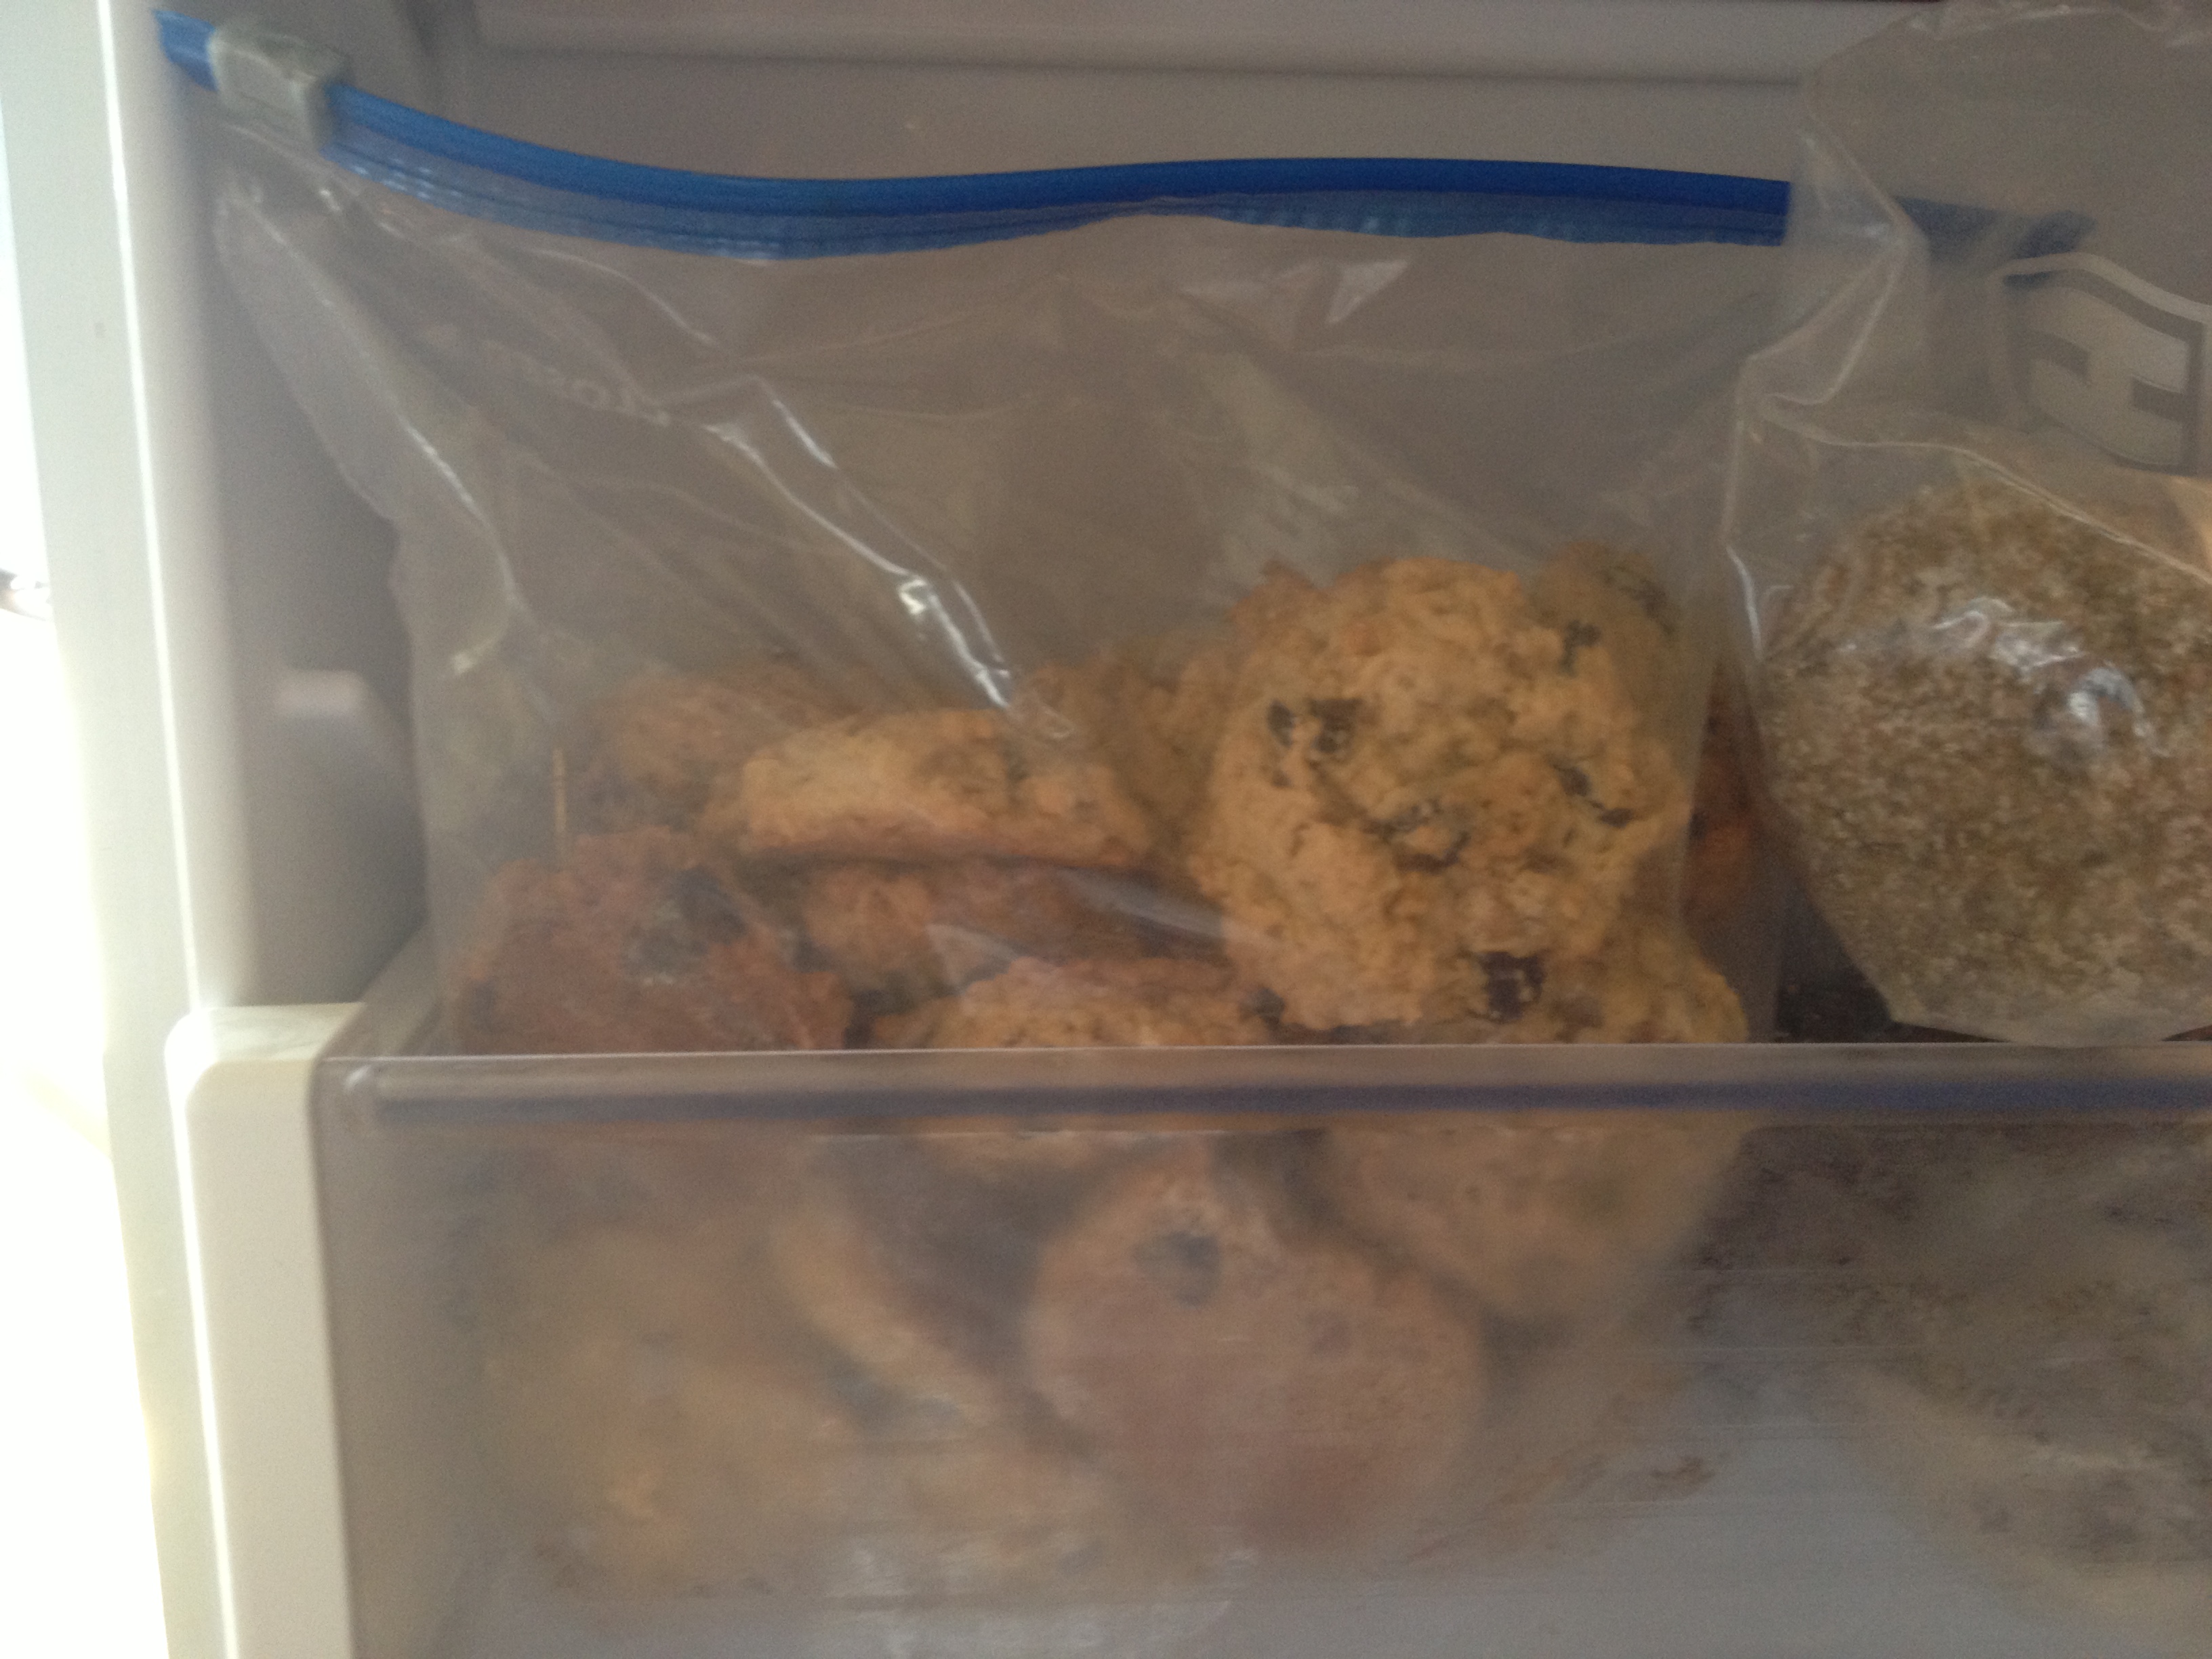
Ummm…..one of my most favorite cookie dough recipes. I was wondering how it would turn out if I just spread it in a baking pan and made Blondie type cookie bars. It came out so absolutely perfect !   You can even freeze the dough and take it out when you want to bake cookies or blondies ! These are a little deadly so I made a big tray and froze about 75% of them and of course we ate the rest of them. It was New Years and couldn’t resist. These are great to bake with the kids or grandkids. Perfect dessert for anytime. Super Easy.

I prefer these with the chopped walnuts, it gives it a lot of extra flavor and crunch. I understand that there are many people out there with nut allergies however. If it’s not a nut allergy thing I would keep nuts in the recipe. I also love using chunks of chocolate and not chips in this. Very important is to leave butter and eggs out at room temperature. You will spoil your dough if you put cold ingredients into the batter.

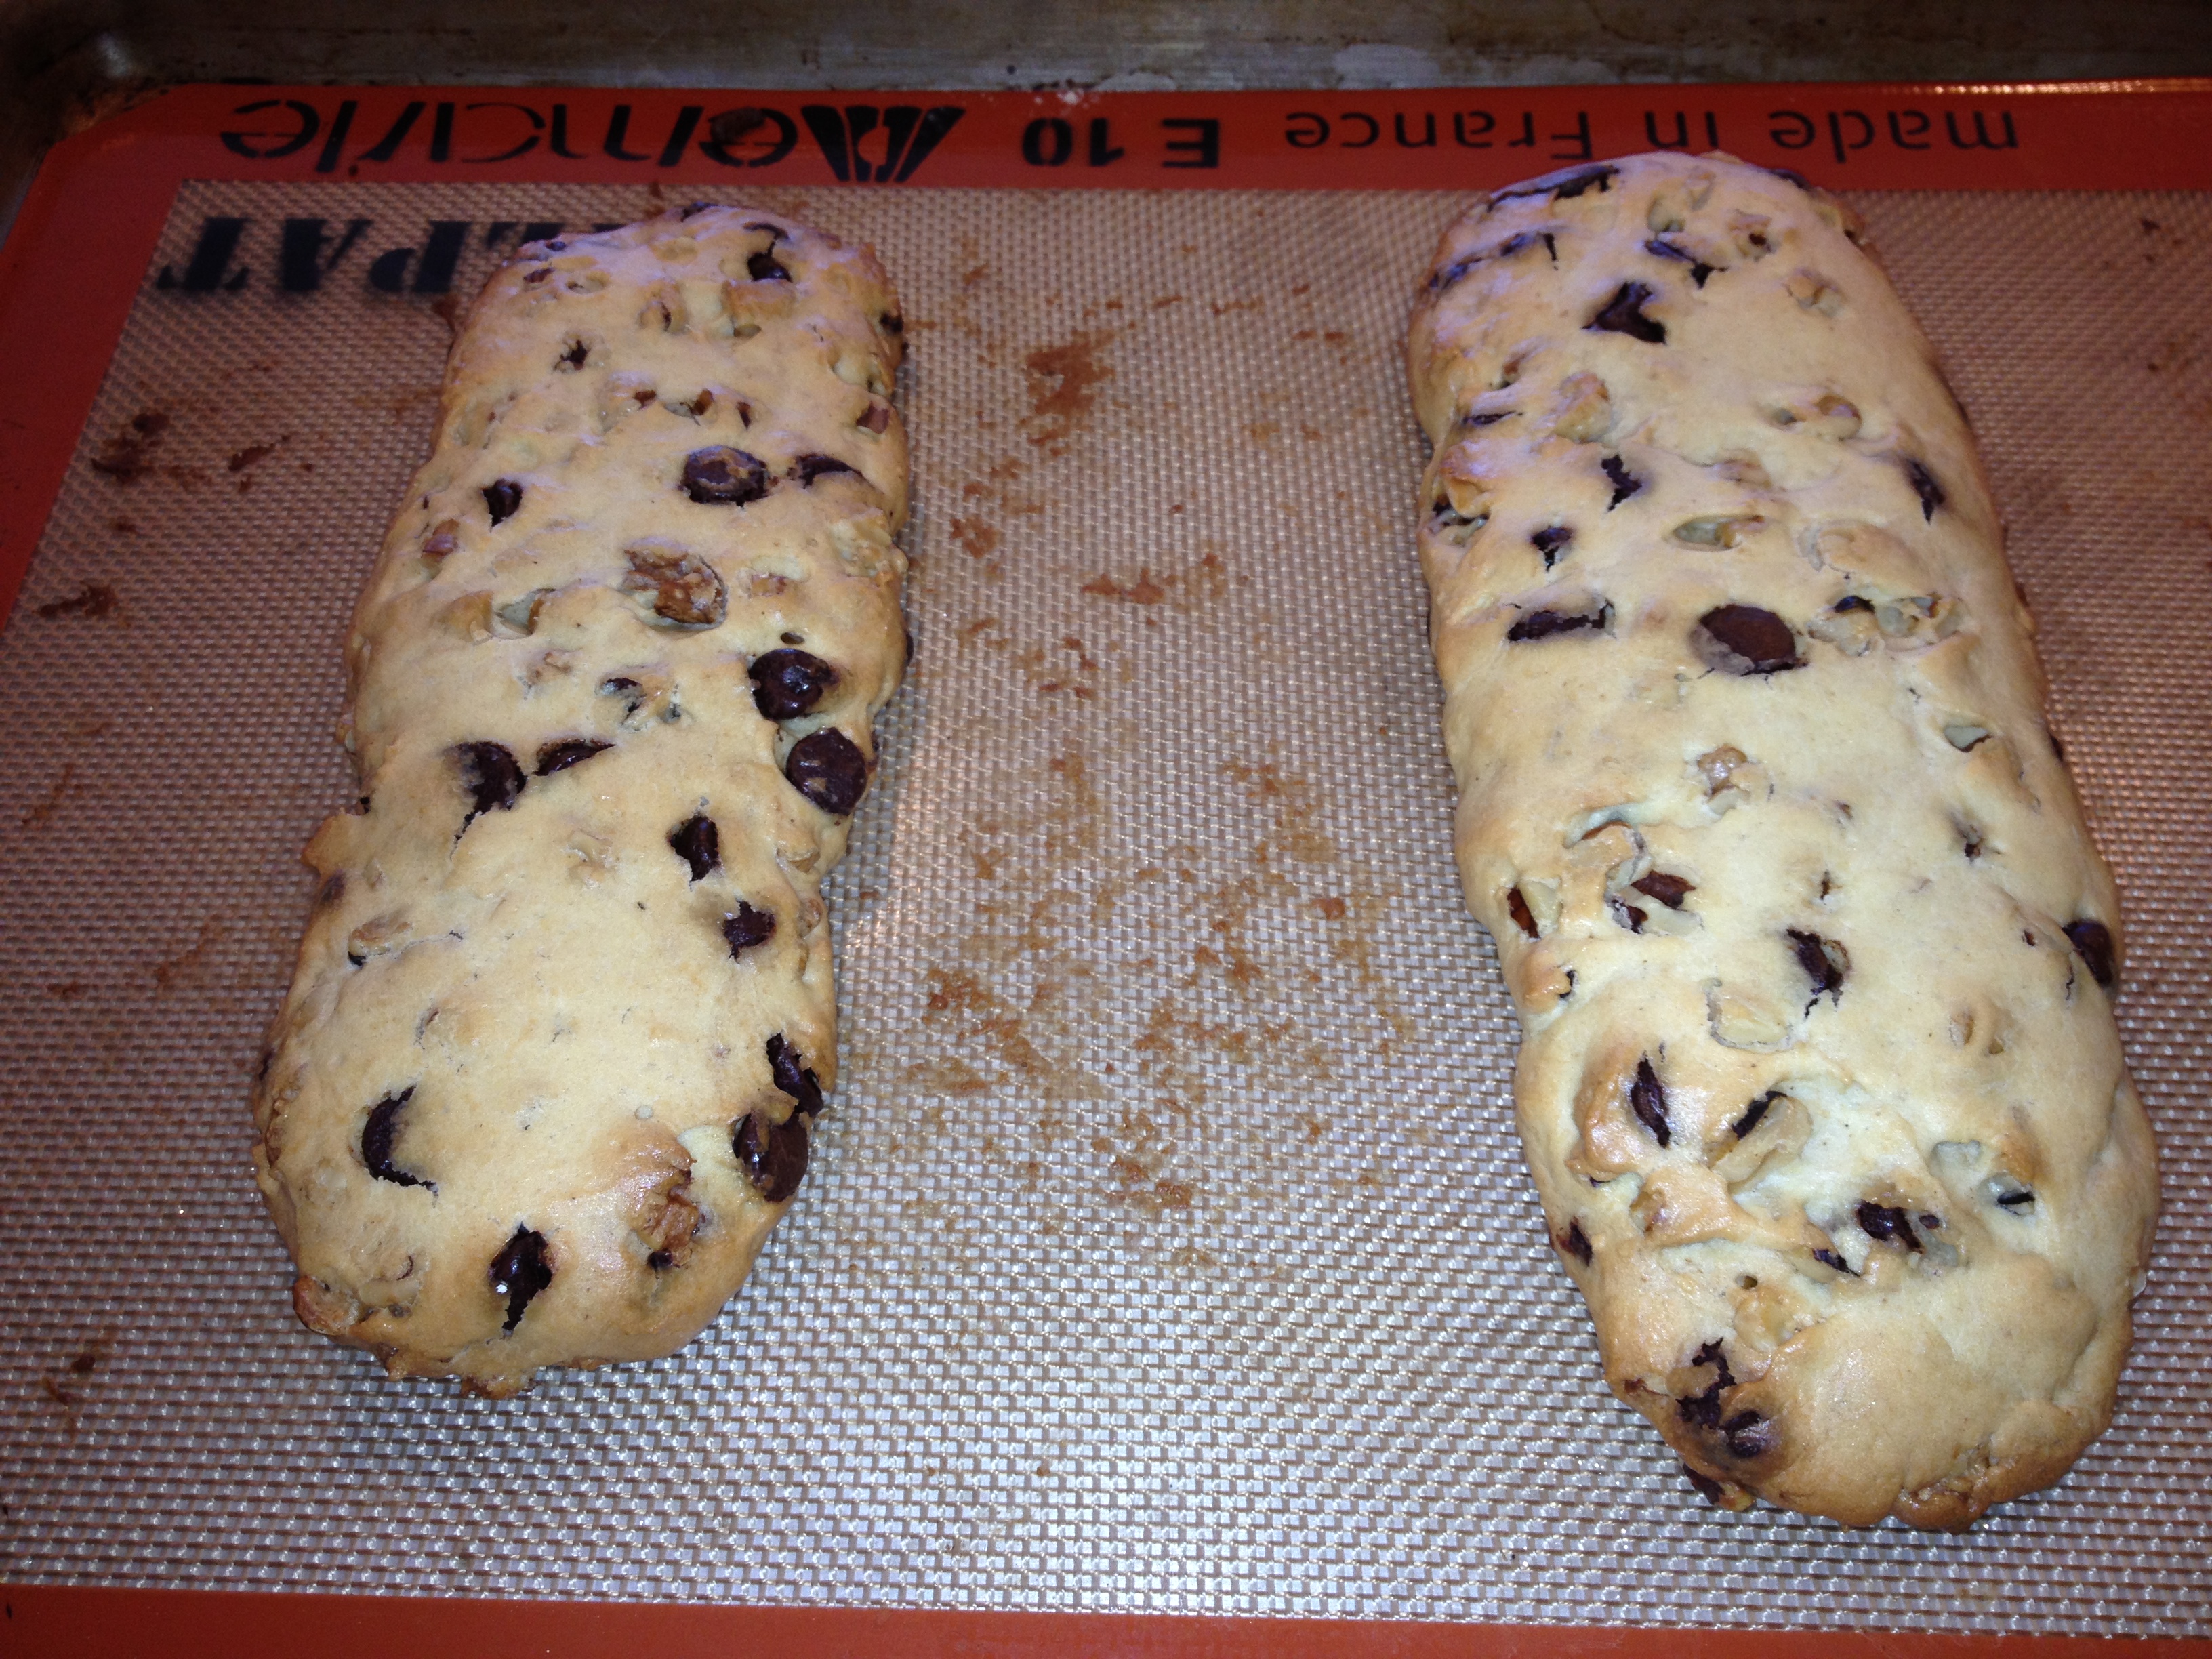
These blondies were a little darker than usual because I used dark brown sugar which is what I had in my pantry when I set out to try this. I would use light brown sugar though because they will look lighter and more Blondie. The taste is the same however and they weren’t all that dark but I am still recommending “Light” Brown Sugar here.

*you’ll need an electric mixer for this
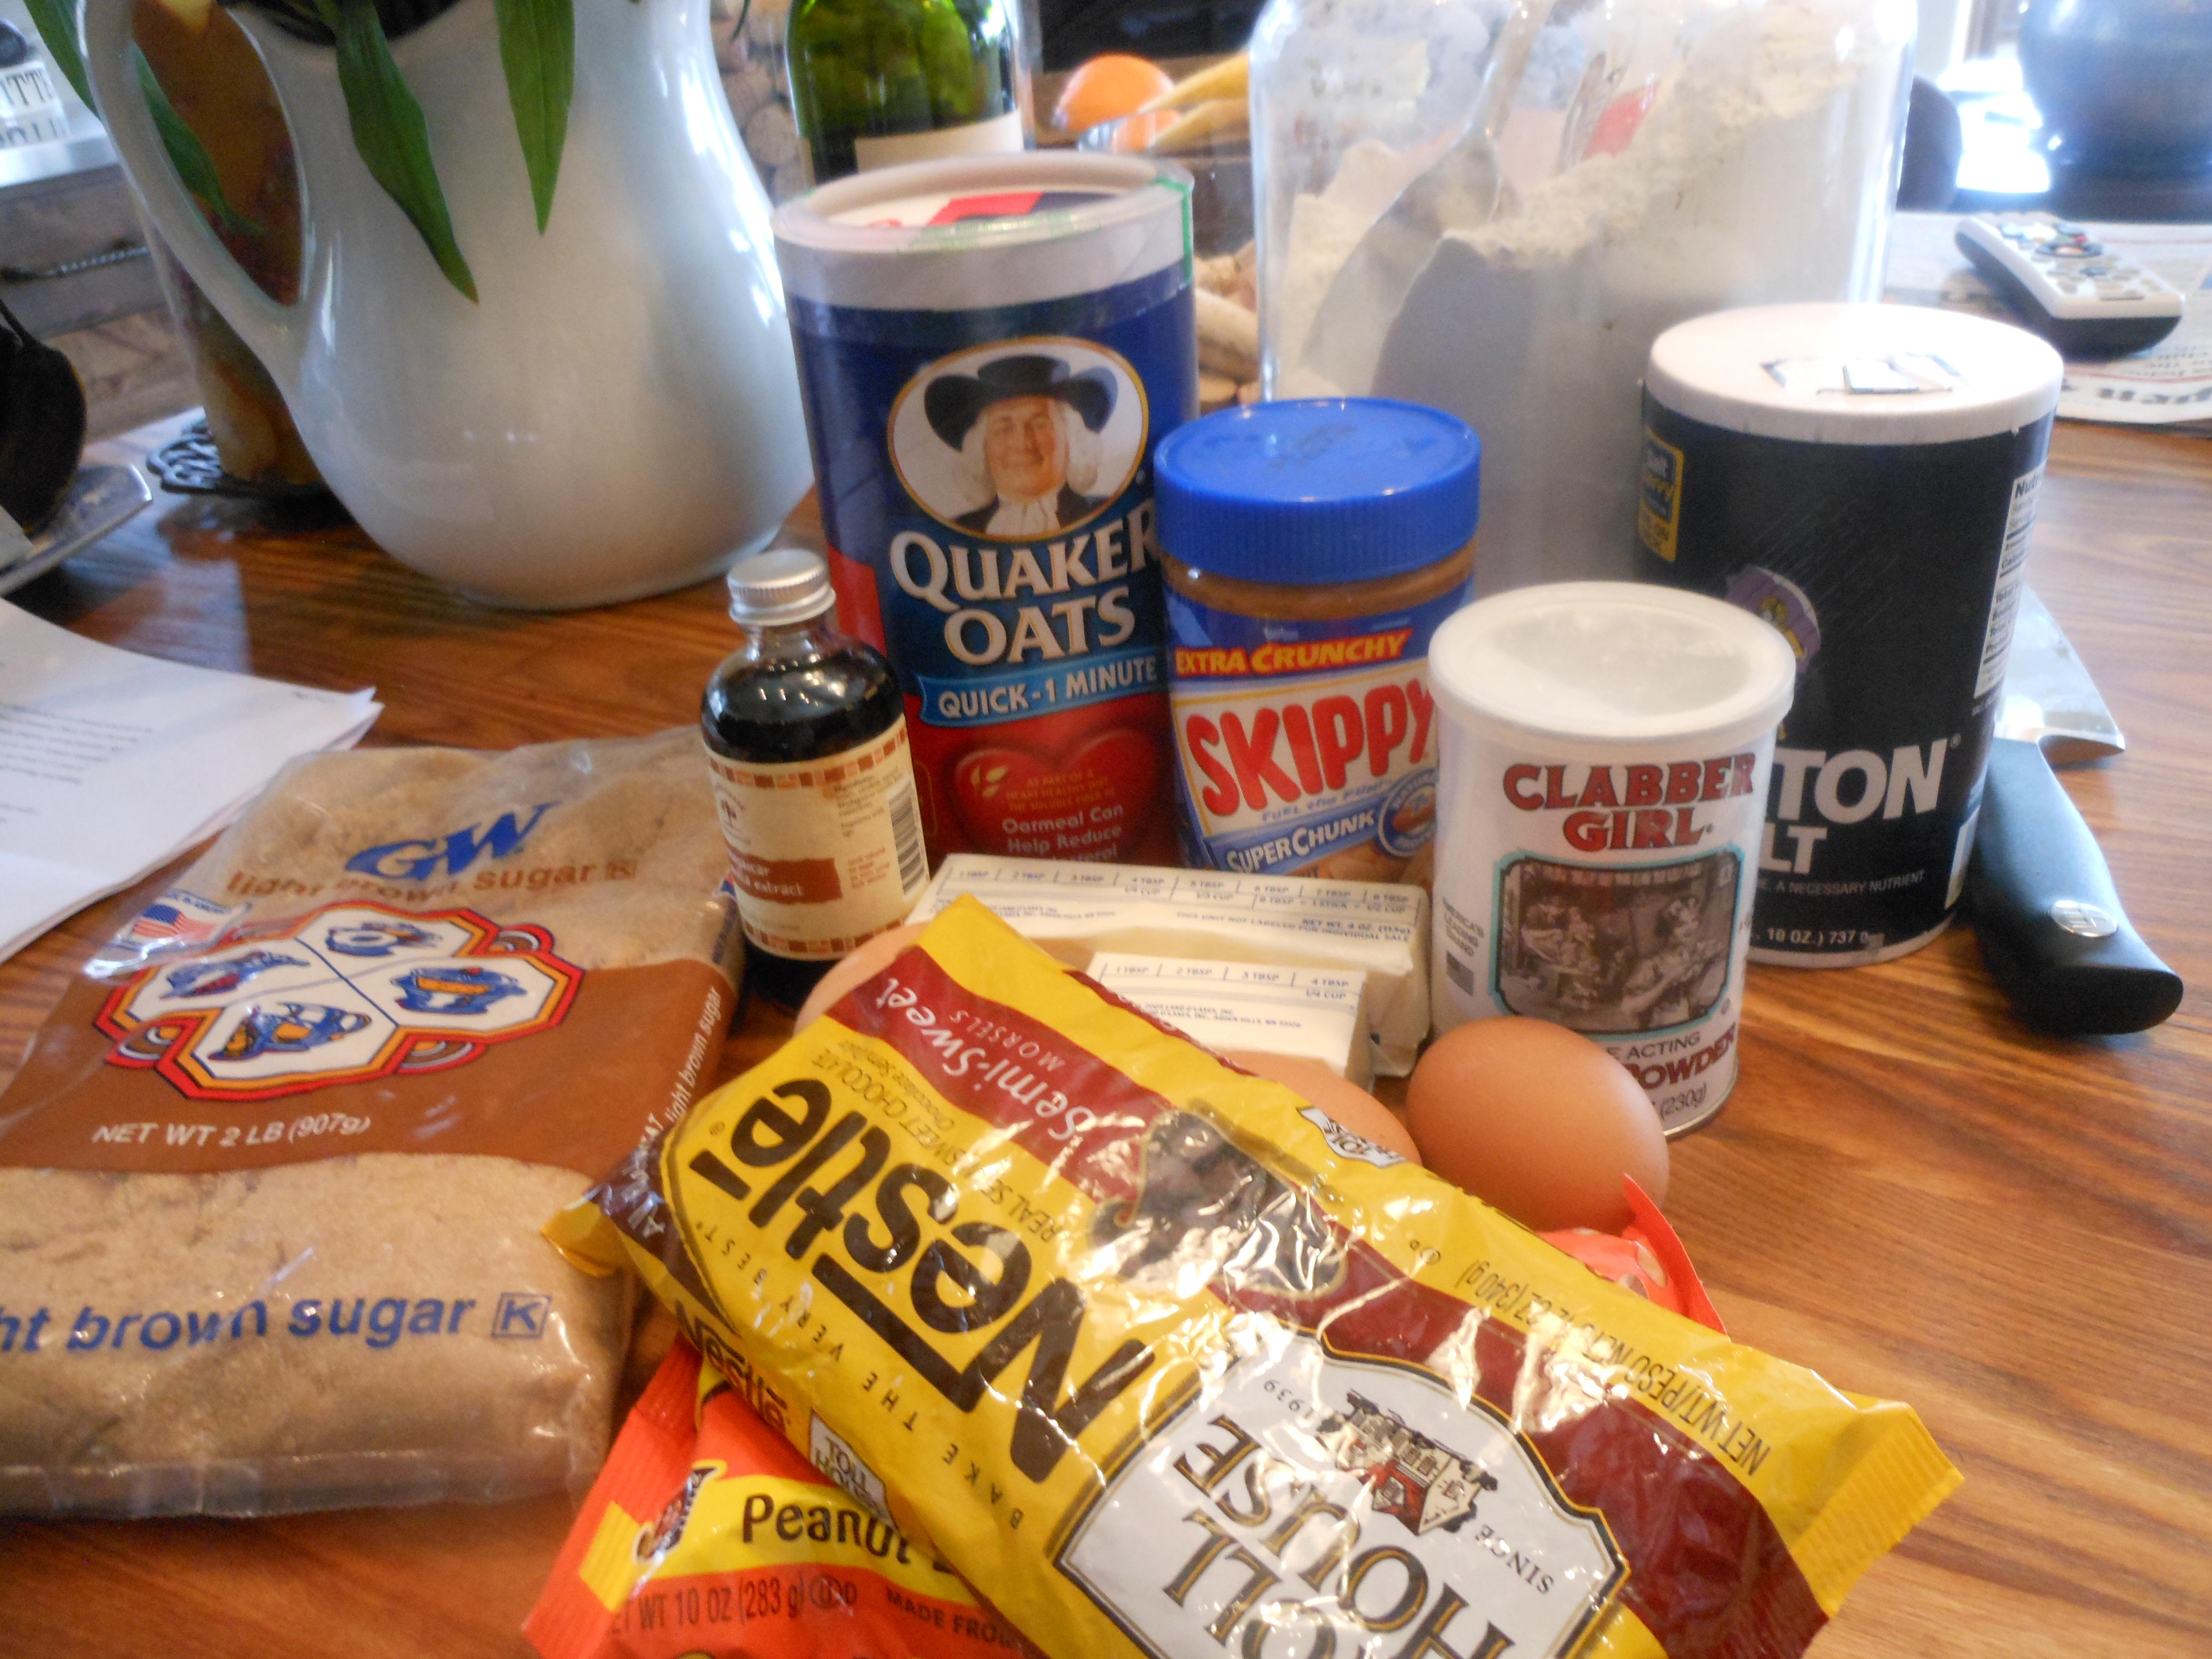
Ingredients:

2 sticks of unsalted butter (softened at room temperature) I left out of fridge for about 4 hours

2 extra-large eggs, at room temperature

1 cup light brown sugar, lightly packed

1/2 cup granulated sugar

2 teaspoons vanilla extract

2 cups all-purpose flour

1 teaspoon baking soda

3/4 teaspoon kosher salt

1 1/2 cups chopped walnuts

1 1/4 pounds semi-sweet chocolate chunks

Directions:

Preheat oven to 350 degrees. I sprayed an 8 x 12 inch baking pan with Baking Spray. ( I love Bakers Joy )

In the bowl of an electric mixer fitted with the paddle attachment, cream the butter with both of the sugars on high speed for about 3 minutes till it’s light and fluffy.

With the mixer on low, add the vanilla, then the eggs one at a time, and mix well. Scrape down the sides of the bowl.

In a small bowl , sift together the flour, baking soda and salt and with the mixer still on low, slowly add in the dry ingredients to the butter mixture.

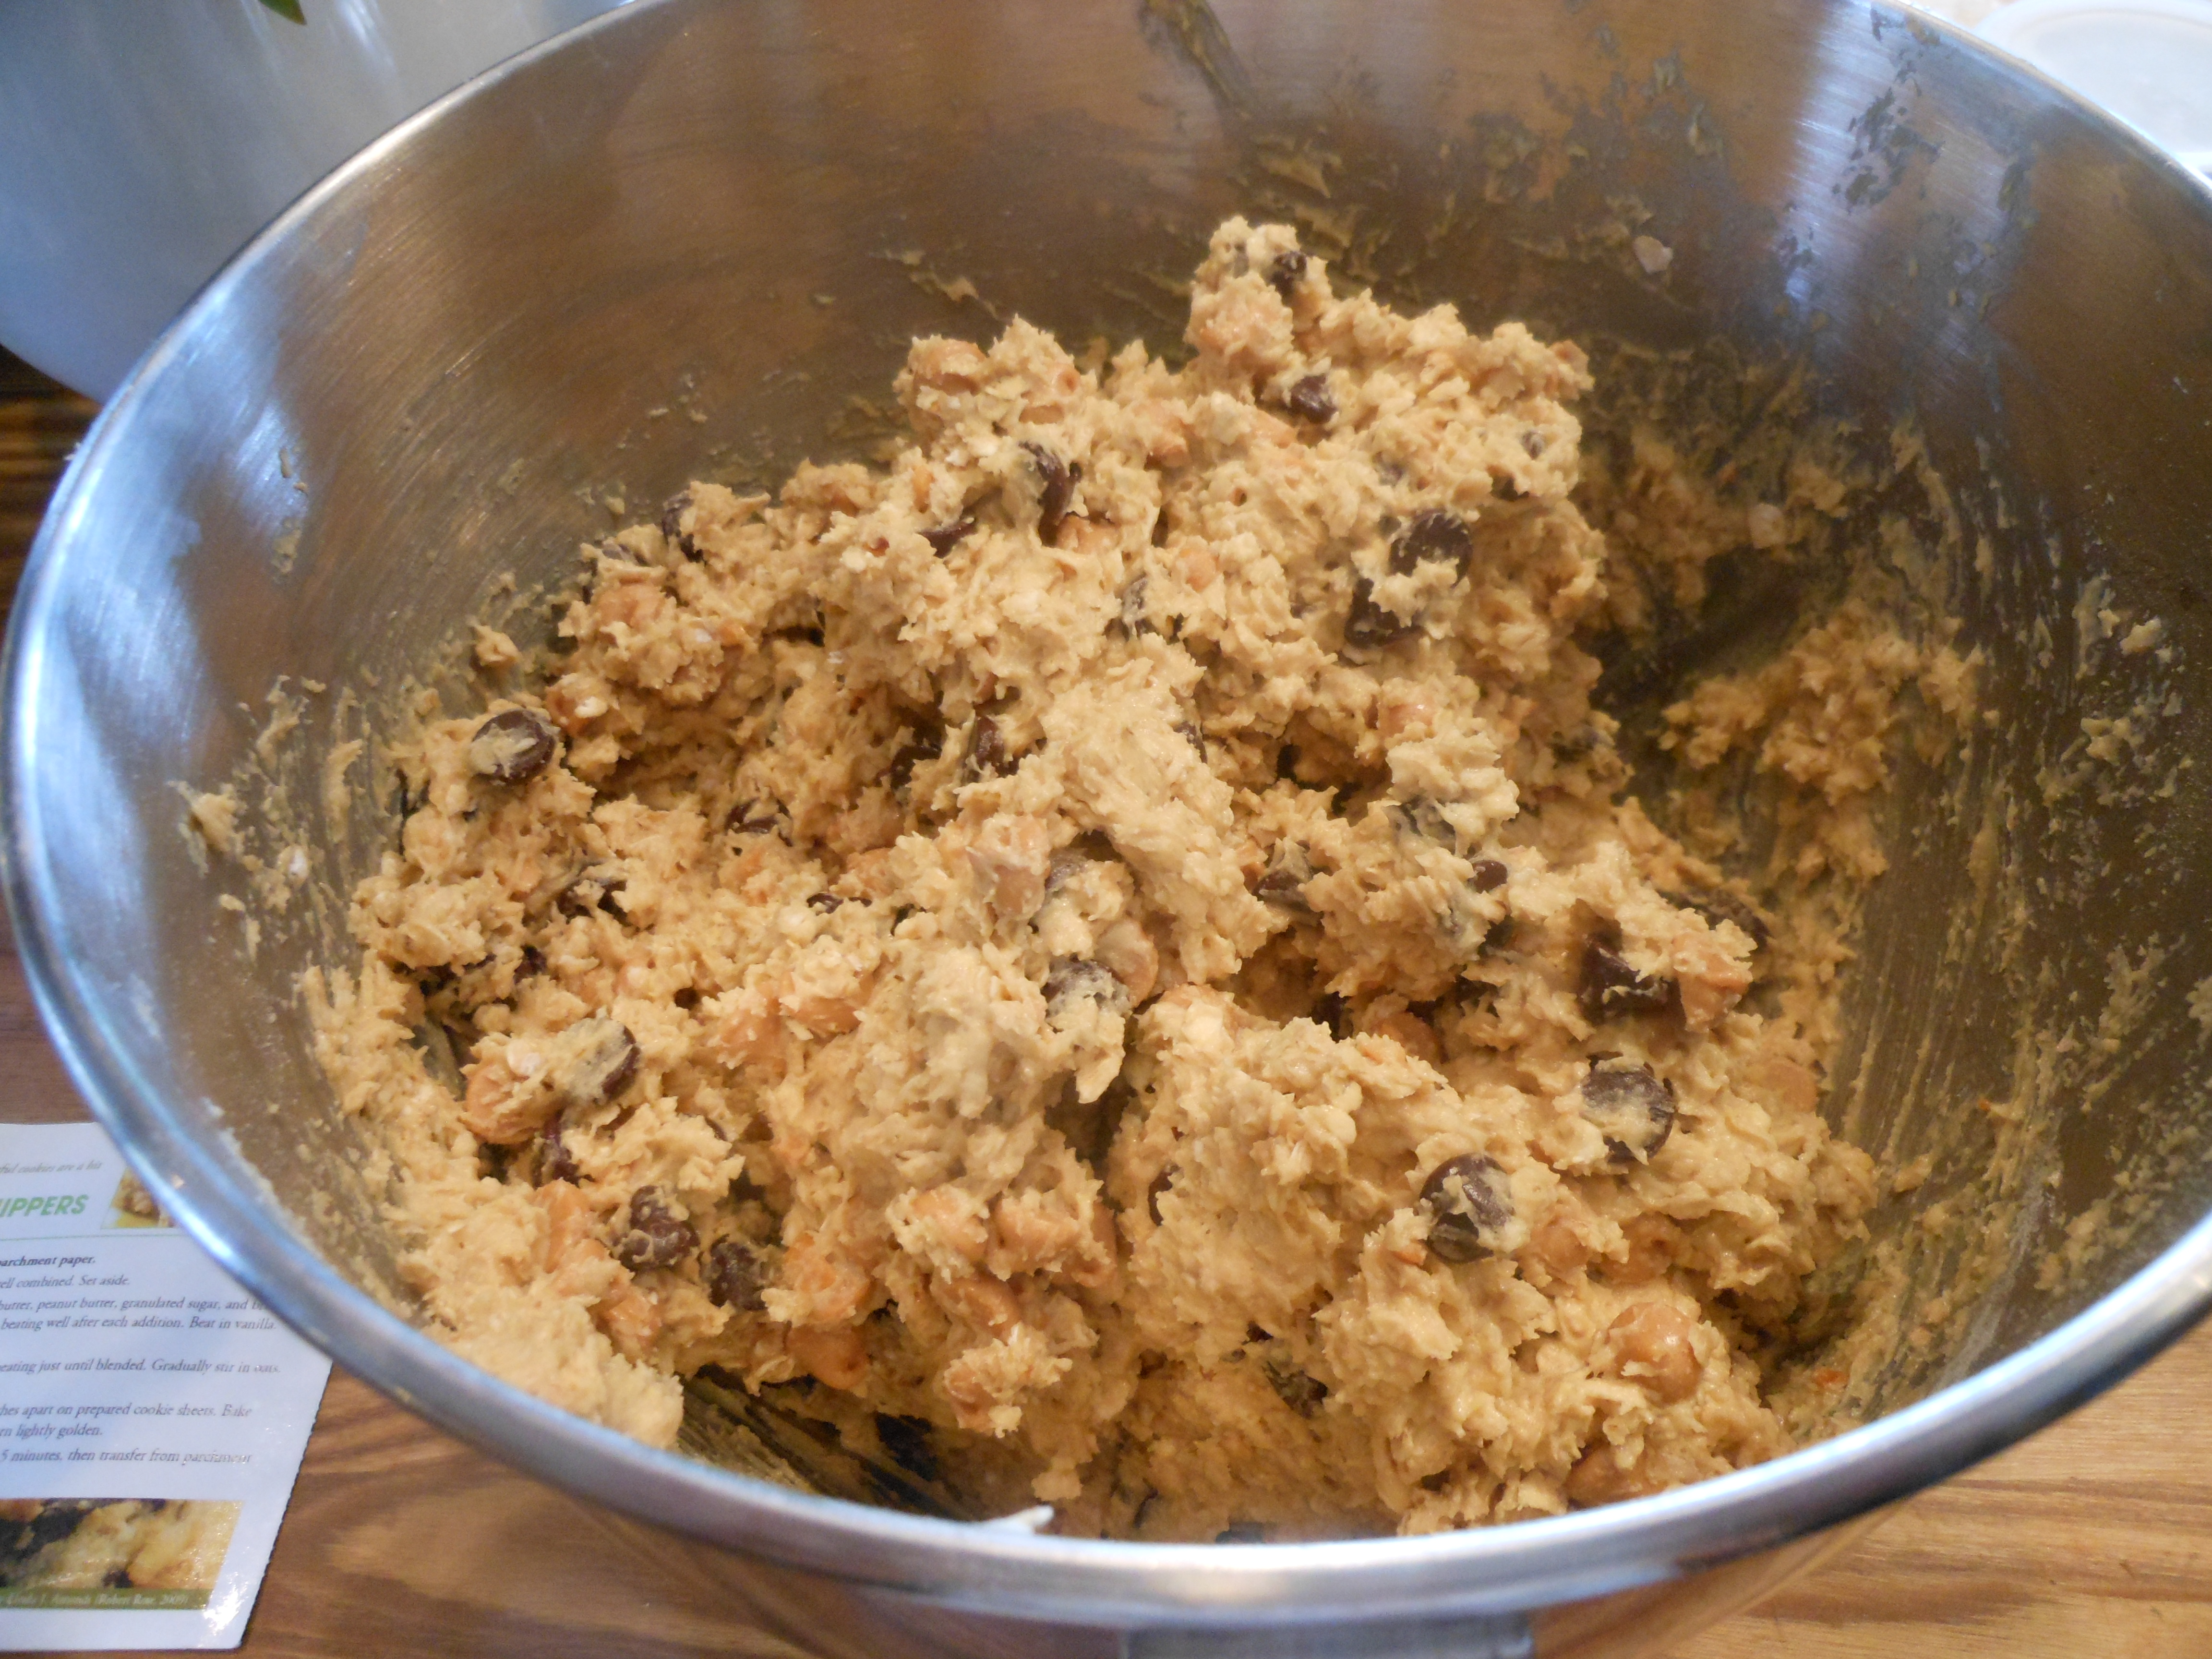
Remove the bowl from the electric mixer stand and fold in walnuts and chocolate chunks with a rubber spatula.

Spread the batter into the prepared pan and smooth the top so it’s all even. Bake for exactly 30 minutes. Don’t overbake. A toothpick or cake tester will NOT come out clean. Let cool completely in the pan before you cut into bars.

I actually put them in fridge overnight and cut into pieces the next day.

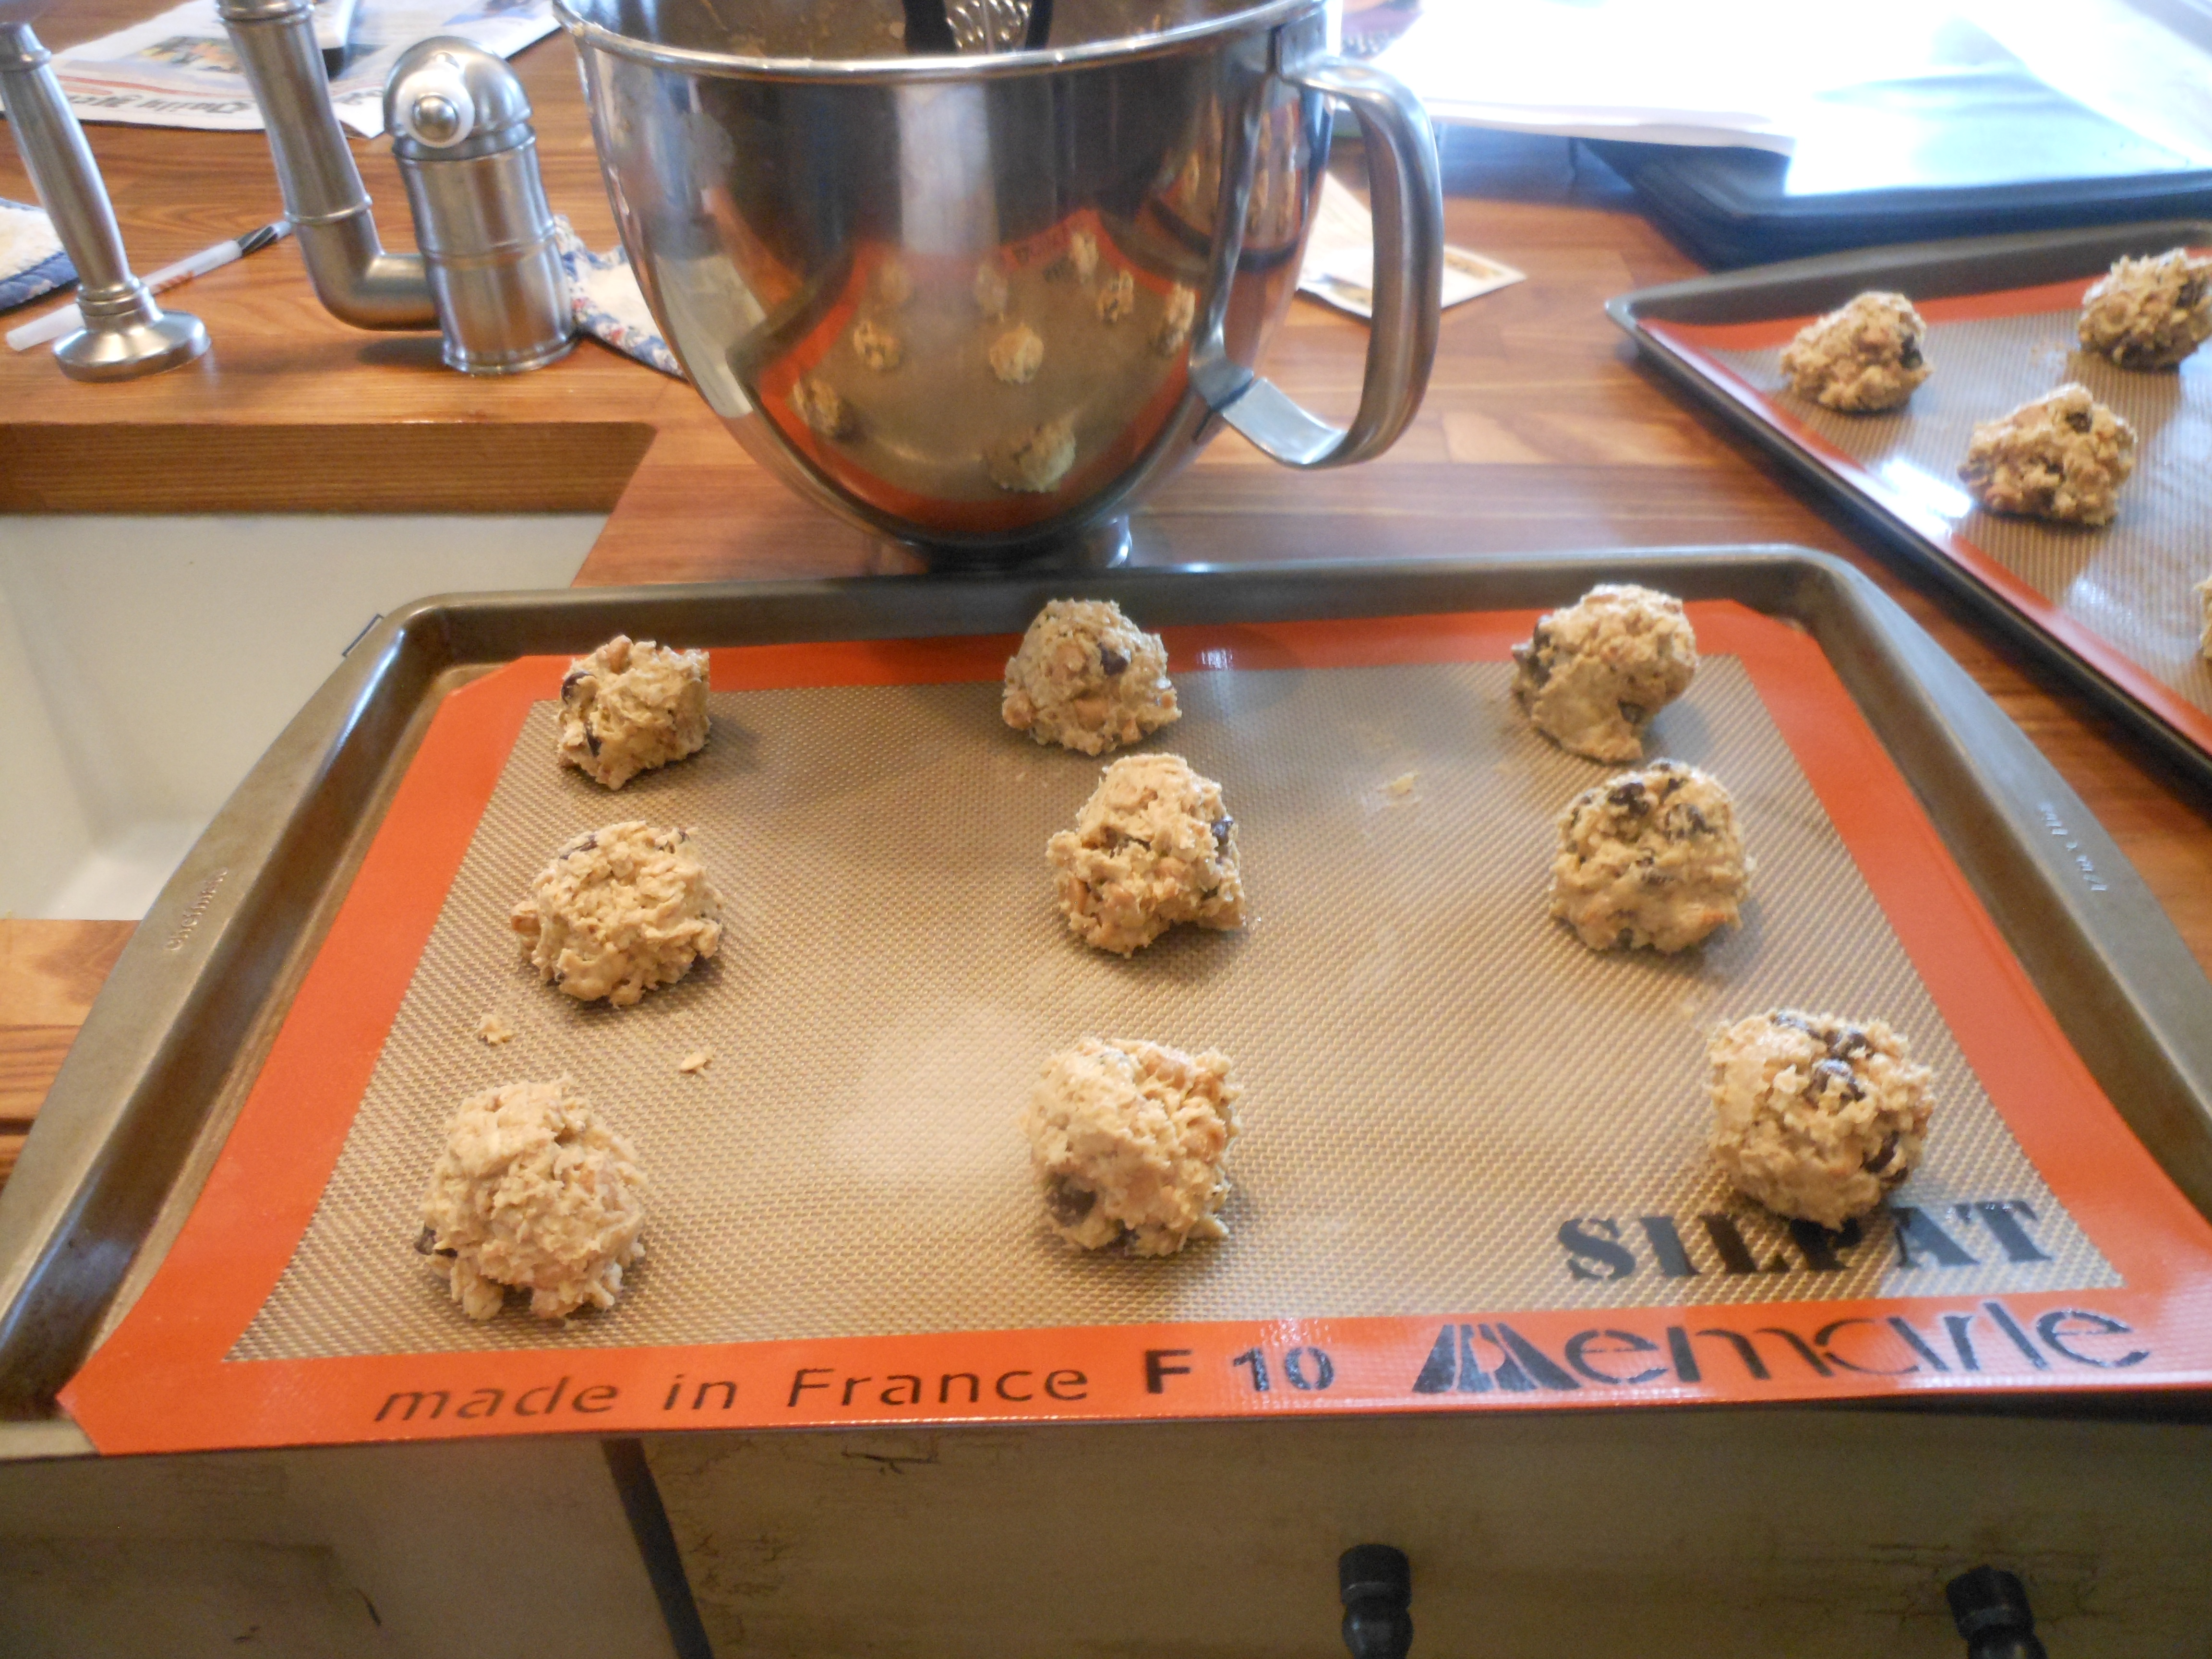
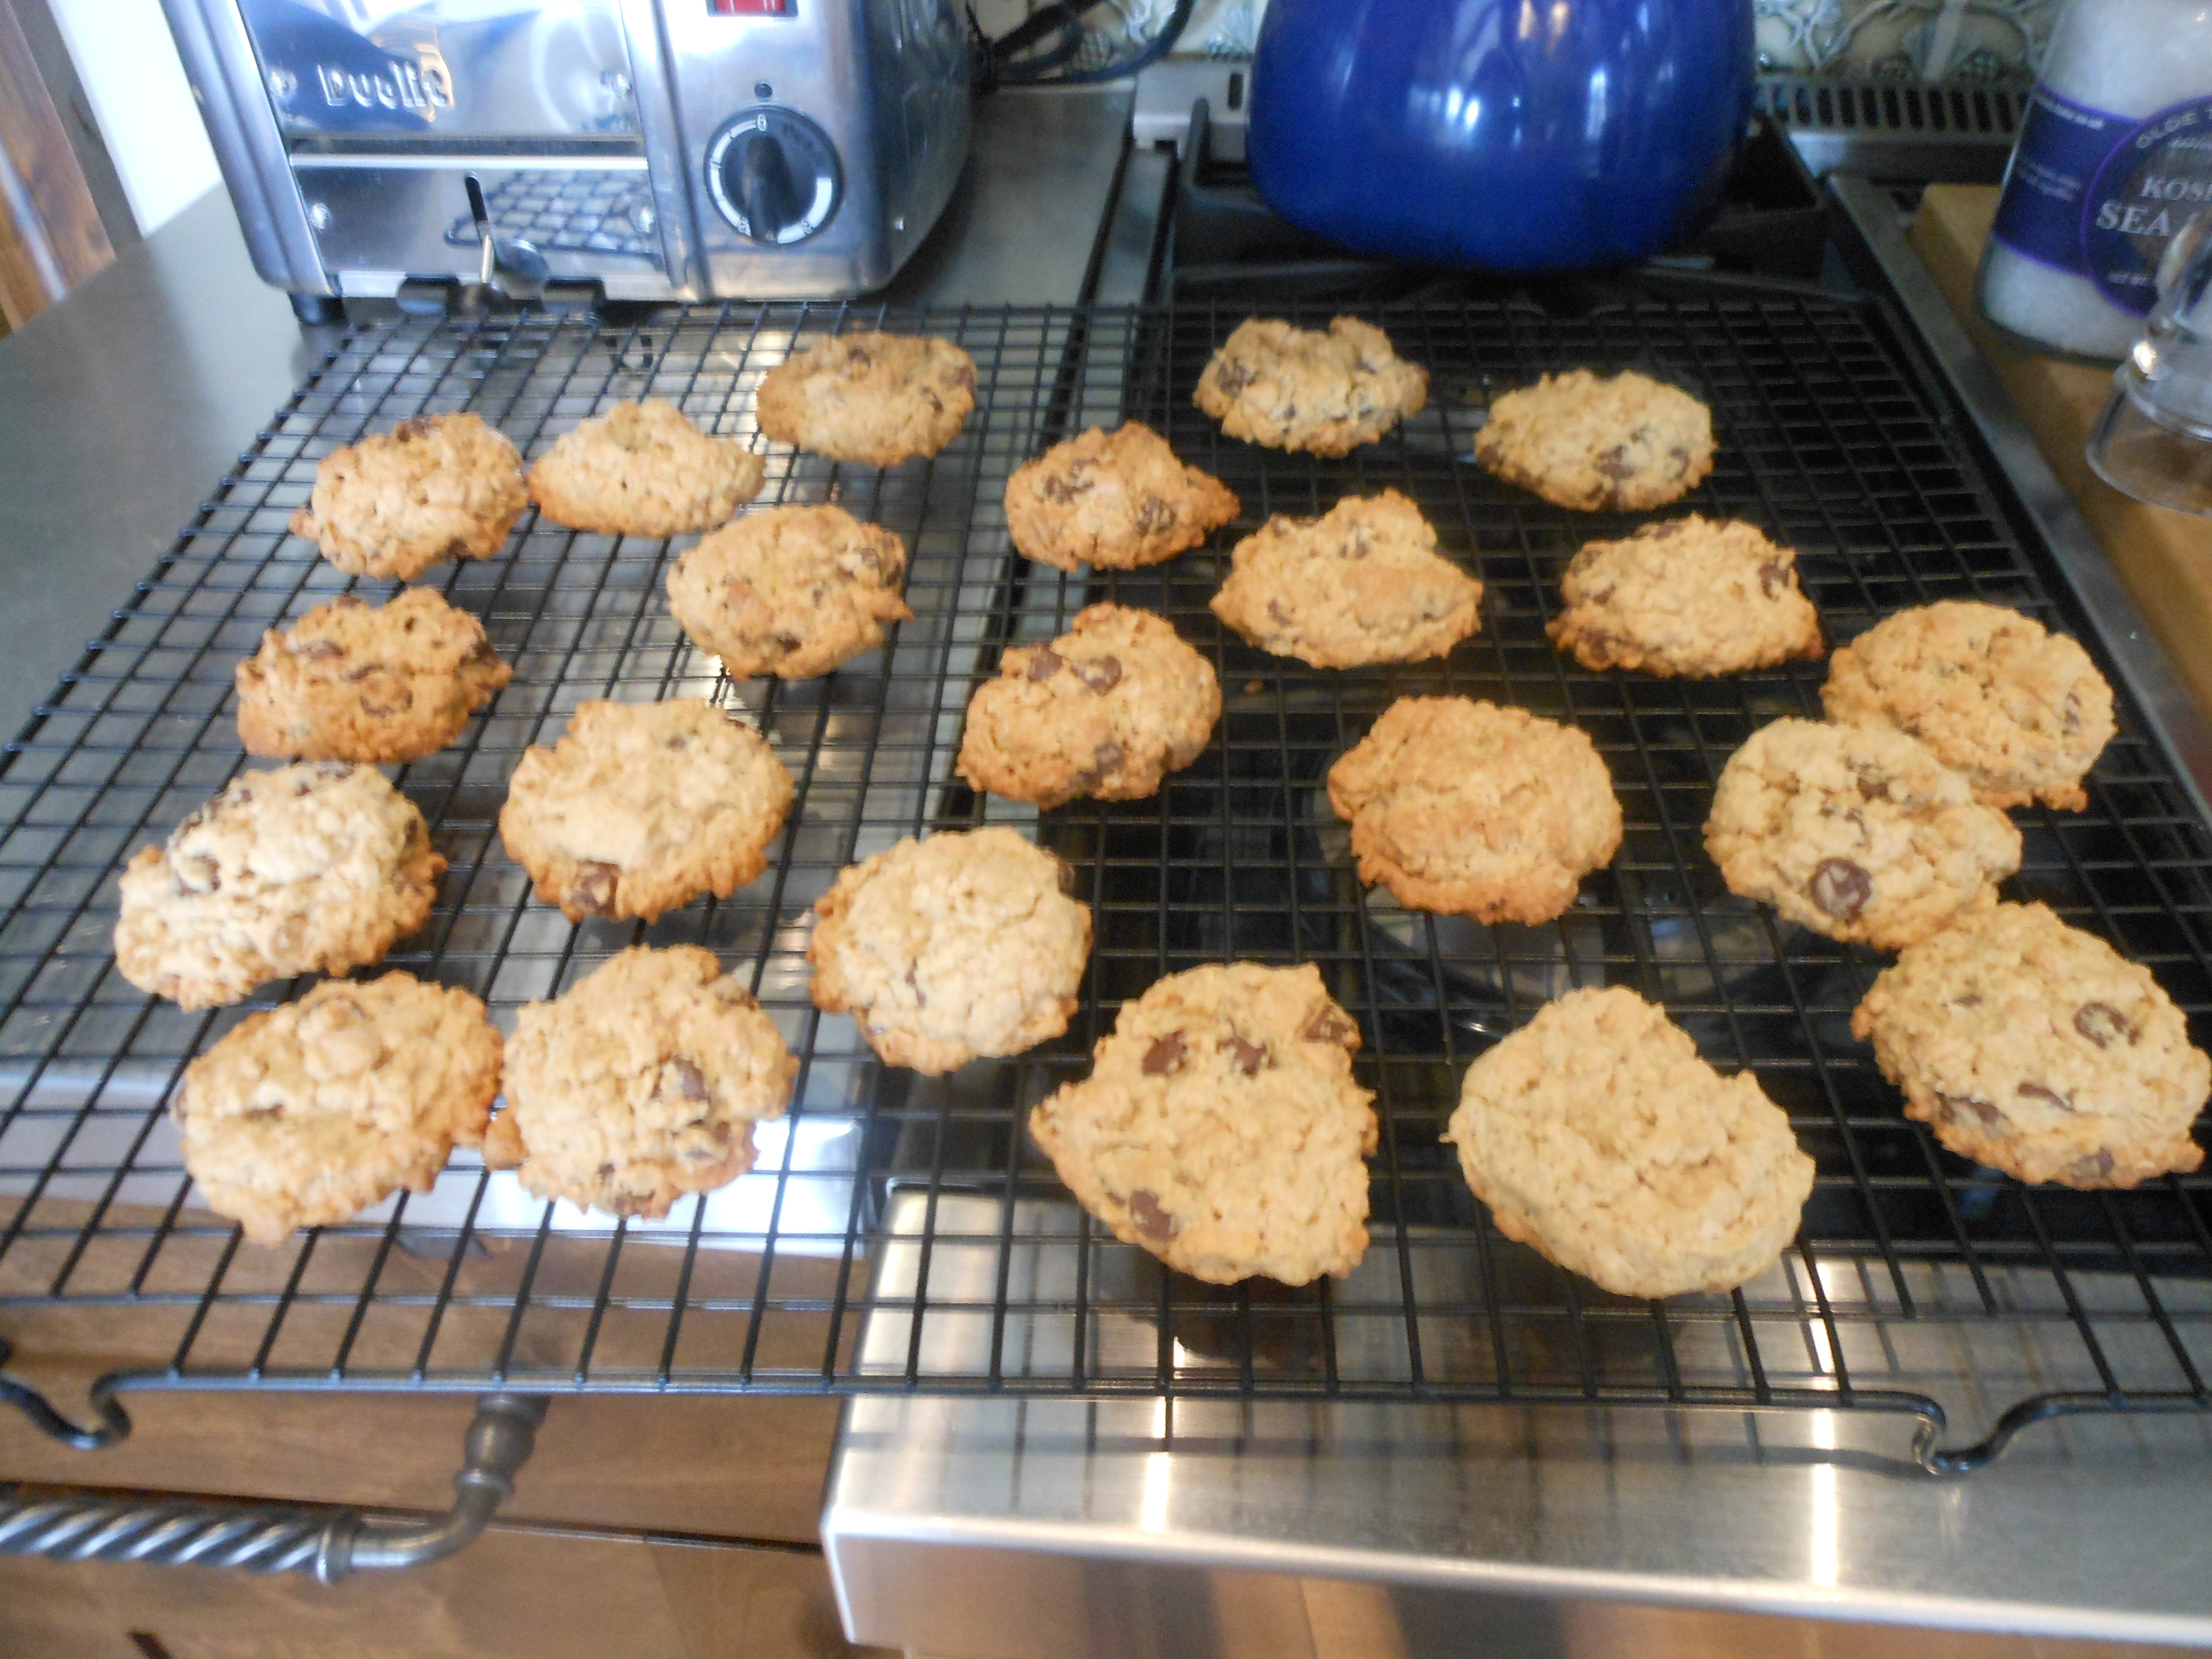
If you would like you can also bake as cookies. Putting spoonfuls of dough on prepared sheets ( I love Silpat) and with your hands just press down each ball of dough to flatten the top a little bit. Makes a great chocolate chip cookie.

Grandma Sally’s Mandel Bread

photo (2) photo (4) photo (5) photo (6) photo (8) photo (9) photo (11) photo (12) photo (13)Now Grandma Sally was not my Grandma but she was my friend Joy’s Grandma. Joy is a friend of mine and has been such a great supporter of Cooking with Candi. I know what a good cook she is and she sent me this recipe and was kind enough to share her family’s secret to an awesome mandel bread. She sent it to me a while back and I haven’t been able to test it out until now. I highly recommend this delicious treat for anytime but why not for the New Year? Thanks again Joy for all your support, it is so appreciated and of course to Grandma Sally for this delicious recipe. Perfect for Break Fast during Yom Kippur.

You can make 2 different mandel breads, one with nuts and one with chocolate or just mix them together . If you use them together use a little less nuts and a little less chocolate. If you like you can add the raisins as well . Use whatever you prefer. I used both chocolate and nuts.

If you love biscotti this is almost identical. There are so very many ways to make Mandel Bread but this one  was really worth the effort. Give it a try and let me know what you think. I think Joy gave me this recipe last year and I promised myself I would make it for this Rosh Hashana .  I did make a few tweeks to the actual baking but the ingredients and most of the recipe stayed the same as Grandma Sally’s . I love to dunk these crunchy cookies in tea or coffee. Yum!

P.S. woke up to these sitting in my kitchen and did a little dunking during breakfast with my morning coffee! They are hard to resist.

Ingredients:

2 heaping tablespoons of Crisco vegetable shortening

3/4 cup of sugar

3 eggs–always room temperature for baking unless otherwise stated

1 tsp. vanilla

2 1/2 cups of all-purpose flour

1 tsp. baking powder

2/3 cup of chopped walnuts* optional

2/3 cup of chocolate bits , chocolate chips are fine here , if using alone without nuts you may want a little more . You can always use raisins as well. Whatever you like will work. Raisins and Nuts are great.

For topping:

2 tablespoons granulated sugar and 3/4 teaspoon cinnamon, mix together for a cinnamon/sugar mixture.  Set aside.

Directions:

Cream together the shortening and sugar to mix well and add 3 eggs one at a time and continue beating in electric mixer, add in the vanilla on low speed until creamy. Then add in the dry ingredients, the flour and the baking powder and mix on low speed until just incorporated. ( don’t overmix)  Then stir in chocolate, nuts, and or raisins to the mixture. I took out dough and refrigerated it over night, you don’t have to but I recommend refrigerating dough for at least 1-2 hours. ( I find dough is easier to handle and holds together better) I had a time constraint and that’s why I did overnight, but just do till it gets cold at least.)

To bake cookies:

Preheat the oven to 350 degrees. Line baking sheet with parchment paper or Silpat liners which I swear by ( awesome). Shape the dough into 2 or 3 logs about 2 inches wide ( see photos) making sure logs aren’t too close together because they will spread. So 2″ from edges from each other and 2″ from the edges. I used 2 baking sheets for 3 logs, you can just use 1 for 2 longer ones. If dough is super sticky , dust your hands with a little flour.

Bake for 25-30 minutes at 350 degrees. Now lower the oven to 250 degrees. Let the baked logs cool down for about 15 minutes, then slice them diagonally about every 3/4 inch ( see picture) Flip the cookies on their sides back on baking sheet. Sprinkle 1/2 of the cinnamon-sugar mixture over top of cookies with a spoon. Flip the cookies over and repeat with the remaining cinnamon-sugar mixture. Place the cookies back in the oven ( be certain you turned temp. down to 250 degrees) I cooked for about 45 minutes ,you can cook anywhere from 45 minutes to an hour till they were golden and crisp. Let the cookies cool down, then store in an airtight container.

*cookies will get crunchier as they cool

Peanut Butter Cookies with Oats and Chocolate Chips

Winter cont'd 028Winter cont'd 030Winter cont'd 034Winter cont'd 039How can anything with these ingredients be bad? I suppose you have to love Peanut Butter and Chocolate Chips and the way that rolled oats makes almost any cookie taste better. I actually froze these and ate them right out of the freezer, and they tasted awesome. They of course taste delicious at room temperature, but I made so many and the bag is right there on the door of the freezer that I couldn’t resist. Bit into it frozen and it was so good with a hot cup of tea! Awesome snacking going on here. If you’re so inclined go for this recipe, there are a lot of ingredients but if you’re a cookie baker this one’s worth trying.

Ingredients:

1 1/2 cups all purpose flour

1 tbsp. baking powder

1/2 tsp. salt

3/4 cup unsalted butter, softened at room temperature

3/4 cup chunky peanut butter

2/3 cup granulated sugar

2/3 cup packed light brown sugar

3 eggs ( always room temperature )

2 tsp. vanilla extract

3 1/2 cups. quick-cooking rolled oats

1 1/2 cup chopped semi-sweet chocolate or semi-sweet chocolate chips ( I used chips)

1 1/2 cup peanut butter chips

*now this recipe yields one hell of a lot of cookies so feel free to cut recipe in half. I made full recipe which is why I have so many in my freezer. Why not make whole recipe? then you have cookies in your freezer for whenever you may want them. They do defrost super quickly.photo

Directions:

Preheat oven to 350 degrees. Line cookie sheets with parchment paper or silpat sheets.

In a bowl, whisk together flour, baking powder and salt, until well combined. Set aside.

In another large bowl, using an electric mixer on medium speed, cream butter, peanut butter, sugar and brown sugar until light and fluffy, about 3- 4 minutes. Add eggs one at a time, beat well after each egg. Beat in vanilla. Scrape down the side of the bowl.

On low-speed or using a wooden spoon, gradually add flour mixture , beating until just combined (don’t overbeat) gradually stir in oats. By hand, fold in chocolate and peanut butter chips.

Using a cookie scoop or spoons, drop tablespoonfuls of dough about 2 inches apart on prepared cookie sheets. Bake one sheet at a time in preheated oven for between 12- 15 minutes or until edges start to turn lightly golden.

I removed cookies to wire cooling rack to cool completely. As I continued to bake other sheets of cookies.

*makes betweenn 4 – 5 dozen cookies, depending on size of cookies you make. They freeze very well .

Oatmeal Raisin Cookies – Old Fashioned Goodness

Oatmeal Raisin Cookies

Oatmeal Raisin Cookies

Misc. dinners and New Years Eve 054Misc. dinners and New Years Eve 061Oatmeal Raisin 002

I have made many oatmeal raisin cookies in my day, but this one just suited me perfectly. I like a crispy cookie and I really think the secret behind this one was refrigerating the dough. This is a combination of many years of baking oatmeal raisin cookies. No chocolate in this one and no nuts, I do it differently when I add chocolate to my oatmeal cookies. I made this for New Years Eve because if you just want a little something sweet , it’s perfect. Who doesn’t like a cookie? I actually had this dough in my freezer from another time. I just put dough into a freezer bag, if you put it in smaller amounts you’ll be able to take dough out for a dozen cookies at a time. If you would like you can double this recipe ( this recipe should make 2 dozen) This cookie bakes up in about 12 minutes, but you’ll have to check after 10 minutes. Edges are crispy and cookie is soft at the same time. Perfection!

Ingredients:

1/2 cup ( 1 stick) unsalted butter softened

2/3 cup light brown sugar , I have to admit I only had dark brown sugar and they were perfectly fine. I think they look better with light brown sugar though.

1 large egg ( room temperature)

1/2 teaspoon vanilla extract

3/4 cup all-purpose flour

1/2 teaspoon baking soda

1/2 teaspoon ground cinnamon

1/2 teaspoon table salt ( I know it’s a lot but I like how it comes out)

1 1/2 cups rolled oats ( not instant)

3/4 cup raisins

*optional 1/2 cup chopped walnuts

Directions:

In bowl of mixer, (or electric hand beater) cream together the butter, brown sugar, egg and vanilla until smooth. In another bowl, whisk the flour, baking soda, cinnamon and salt. Add to the butter/sugar mixture, and stir in the oats , raisins and walnuts with a spoon by hand.

I usually chill my dough for a while at this point, clean up the kitchen and go about my business. When I’m ready I scoop cookies using a small ice cream scooper , and I am now addicted to the Silpat liners which I use for baking . If you haven’t bought these use parchment paper. ( I highly recommend making the investment in Silpat liners they are worth every penny)  Preheat oven to 350 degrees and when oven is ready bake for 10 – 12 minutes. I baked for about 12 minutes actually. You’ll have to check at 10 minutes depending on your oven and how cold the dough was when it went into the oven.

Cookies should be at least 2 inches apart, or they will melt into one another. They should be golden at the edges but still a little undercooked on the tops. Let them sit on the baking sheet till they cool down ( at least 5 minutes) .

Yummy! Joel loves Oatmeal Raisin Cookies, and he loved these. Great with a glass of milk, tea or coffee.

Joy’s Banana Chocolate Chip Cookies

Fall NY 2012 020Fall NY 2012 022Fall NY 2012 023Fall NY 2012 026One of the best things to come out of my writing this blog has been a connection to all the people in my life who truly love to cook . Joy is one of those people, she has been a loyal subscriber and has supported me since I started this blog. She also has wonderful recipes that she’s willing to share . This recipe was sent to me on the heels of Hurricane Sandy. Joy was going to make them for me but then Hurricane Sandy hit and she had no power etc. I decided to make these for my family since they are coming to me for dinner this Sunday night. I will make ahead and freeze them. Joy says they are so good she eats them right out of the freezer! My plan is to make a few days ahead and serve for dessert. I must do something with the rotten bananas and I want to do something new! Thanks again to Joy for your endless support and recipes.  I know Joel will love them.

Ingredients:

3/4 cup granulated sugar

3/4 cup shortening ( Crisco)

2 over ripe bananas, mashed

1 large egg ( room temperature always best for baking)

1 teaspoon pure vanilla extract

2 1/4 cup rolled oats

1 cup whole wheat flour

1/2 tsp. baking soda

1/2 tsp. ground cinnamon

1/2 tsp. salt

1/4 tsp. ground nutmeg

1 cup semi-sweet chocolate chips ( app. 1/2 of the 12 ounce bag)

Directions:

Preheat oven to 350 degrees

In a large mixing bowl cream sugar and shortening until light and fluffy. ( Electric Mixer like Kitchen Aid with paddle attachment) Mix in bananas and egg and mix well, scraping down the sides of the bowl. Mix in vanilla . In a separate bowl combine oats, flour, baking soda, cinnamon, salt , nutmeg and chips. Mix until thoroughly combined. Add wet ingredients and mix until combined. It will be a wet cookie dough. Using a small ice cream scooper or spoon to spoon dough on to greased cookie sheets ( I use Silpat on my cookie sheets, they make it oh so easy) make sure they are even proportions. If not even sized they will not cook at the same time, this is very important. So whatever size you prefer just make them all the same. Bake until golden brown about 30 – 40 minutes. Joy likes them well done so she usually cooks for 40 minutes. When baking on 2 sheets swap the sheets halfway through the cooking so they cook evenly. Great to freeze!

* I only cooked for about 30 minutes, I would set timer for 40 and check them at 30 minutes depending on the size of your cookies.

Michele’s White Chocolate Macadamia Jumbos -winner of CWC contest!!!!!

Michele sent me this as her entry for my CWC Thanksgiving Contest. Wow! they are amazing and before I keep eating them they are going in the freezer for Thanksgiving. Michele always makes these for her fabulous Christmas party. They will keep in the freezer for up to 3 months, so the plan is to make ahead for Thanksgiving, because these have to be on my table.  I didn’t get dried cherries, but I had craisins so I used them. They cooked up in 17 minutes at 325 degrees and were just beautiful. I am happy that I went to the gym this morning that’s all I can say. Thanks Michele for participating and for your support of my blog :). These are going on my Thanksgiving dessert table without a doubt.  These are decadent, but if you’re eating a cookie shouldn’t it be? These were so amazing that everyone who ate them fell in love with them, so I must give this prize to Michele. Thanks to everyone else who participated, and I loved Shelly’s muffins and Julie’s Pie which may find it’s way on to my Thanksgiving table.

*P.S. they never did stay in our freezer because of Hurricane Sandy.  Alot of people got to eat these delicious cookies and everyone agreed they were some kind of wonderful.

Ingredients:

2 1/2 cups all purpose flour

3/4 cup butter or margarine ( 1 1 2/ sticks softened)

3/4 cup granulated sugar

1/2 cup dark brown sugar

3 Tblsp. corn syrup

2 tsps. vanilla extract

1 tsp. baking soda

1 tsp. salt

2 large eggs ( room temperature please)

12 oz. bag white chocolate chips

1 jar ( 6 1/2 oz) macadamia nuts chopped about 1 1/3 cups

1 1/2 cups dried tart cherries or cranberries, I actually used craisins

Directions:

Preheat oven to 325 degrees. In a large bowl, I placed flour, baking soda and salt  and mixed together. In bowl of kitchen aid mixer I placed softened butter, sugars, corn syrup , vanilla, butter and eggs, mixed at medium speed while adding the flour in. When it’s all combined scrape bowl with rubber spatula, and stir in white chocolate chips , nuts and cherries.

Drop by slightly rounded 1/4 cups, 3 inches apart onto ungreased cookie sheet, I used a Silpat and an ungreased cookie sheet. These cookies are large so be sure to space 3 inches apart. Transfer to a wire rack and cool. Can be frozen up to 3 months.

I baked for 17 minutes, check them after 15 depending on your oven.

These cookies are amazing. Enjoy!

Cookie Dough with Nutella and Peanut Butter

Fall is in the air , there is that little bit of crispness in the morning and for some unknown reason I feel like baking cookies.  This is a great cookie dough which is easy to prepare and contains  Nutella and Peanut Butter, so really how bad can this be? anything with Nutella and Peanut butter has to be good in my book. As I said I was in  a bit of a mood for baking cookies and made this recipe, baked up some of the dough and left the rest in freezer. Luckily I am not a cookie dough eater because this dough is pretty good. You can make this dough and leave it in the freezer for when you’re ready to use it.  Original recipe is from The Pioneer Woman. I left out the M&M’s but will add when I make for the kids. This is just simply a great little cookie. Perfect Halloween cookie, and the beauty of this is that whenever I feel the urge to bake up some cookies, I take out the dough and slice off what I need and return the dough to freezer! I love it! 🙂 Make them as small or large as you like. M&M’s make them more festive. Should store in freezer for a few months. (wrapped tightly)

Ingredients:

2 1/2 cups all-purpose flour

1 teaspoon instant coffee granules

1 teaspoon baking soda

1 teaspoon salt

1 cup ( 2 sticks ) Salted Butter, softened at room temperature

1 1/4 cup Packed Brown Sugar ( I used light brown sugar)

1/4 cup Granulated Sugar

2 whole eggs (room temperature)

1 tablespoon Vanilla

2 Tablespoons Creamy Peanut Butter

2 Tablespoons Nutella

*1/2 cups very finely chopped Pecans

*3/4 cups M&M’s roughly chopped or mini M&M’s which would not require chopping

Directions:

Combine flour, instant coffee, baking soda and salt in a bowl. Stir together and set aside.

Cream together the butter with the sugars, scraping the bowl once down while mixing. Add eggs, mixing in one at a time, and add vanilla. Add peanut butter and Nutella and mix. Add in dry ingredients in stages, mixing gently after each addition. Scrape the bowl once and mix again. (Don’t overmix)

Add chopped pecans and M&M’s if you’re using them and mix gently with spatula (rubber) to combine.

Spoon dough on a long piece ( or 2 shorter pieces) of waxed paper or plastic wrap. Carefully roll the dough inside the wrap, pressing gently to get it to form into a firm cylinder. Refrigerate for at least 3 to 4 hours or place into the freezer for 20 – 30 minutes.

To bake the cookies:

when you are ready to bake preheat the oven to 375 degrees . Slice off as many cookies as you’d like and lay the slices on a baking sheet, I love the silicone mats. Thicker slices will need to be placed further apart. The cookies will bake up flat. Bake for 10 minutes, or until nice and golden brown. I sliced off rather thin slices and only baked for about 7 minutes, you’ll have to check depending on how thick you slice dough. These are just such nice cookies to serve made delicious by the chocolate/peanut butter flavor. How awesome to  have the dough in your freezer to slice off whenever you’re in the mood for a home baked cookie?

Enjoy!

Palm Beach Lemon Cookies

This recipe is from my Cookies Unlimited Class.  This recipe should yield about 100 small thin cookies (but it depends on how thin you make them). I would use 2 large lemons for zesting so you get a real zing from the lemon. It is very important that you make sure to refrigerate the dough long enough. This is a nice, plain cookie; very light and perfect for dessert alongside something chocolate. I am also a sucker for anything lemony. They are also a light, perfect summer cookie and they can be frozen , then take out when you need a light perfect cookie.

Ingredients:

3 cups all-purpose flour

1/2 teaspoon baking powder

1/2 teaspoon baking soda

1/4 teaspoon table salt

10 tablespoons (or 1 1/4 sticks) of unsalted butter, softened at room temperature

1 cup sugar (plus a little extra for sprinkling on top of cookies)

Finely grated zest of 2 large lemons (make sure you use all the zest!)

4 tablespoons strained lemon juice (use zested lemons)

3 egg yolks (save the whites for brushing the cookies)

*you will need 3 or 4 cookie sheets or jelly roll pans lined with parchment, or you will have to wait ’til cookies cool off and reuse them

Directions:

In a bowl, combine the flour, baking powder, baking soda and salt, and mix well.

In the bowl of a standing electric mixer fitted with the paddle attachment, beat the butter and sugar together on medium speed until well mixed (about a minute), then beat in the lemon zest.

Beat in the egg yolks, one at a time, beating until smooth after each addition. Lower mixer speed and beat in half the flour mixture, then all the lemon juice. Scrape bowl and add remaining flour mixture, beat till well mixed. (Don’t overbeat; just till mixed well.)

Scrape the dough onto a lightly floured work surface and shape and squeeze it into 2 long rolls about 8 inches long and 2 inches in diameter (they may be a bit longer).

Cover rolls of dough and refrigerate. Chill the dough until very firm. You can freeze dough for up to a few weeks if you prefer for up to several weeks. Or just use 1 roll and save the other, but remember dough must be very firm.

When you are ready to bake the cookies, sets racks in the upper and lower thirds of the oven and preheat to 350 degrees.

In a small bowl, beat the reserved egg whites with a fork. Cut each log into approximately 48 cookies (approx. 6 slices per inch) and make sure to rotate the roll of dough often so it doesn’t flatten from the weight of the knife.

Arrange the cookies on the prepared pans about an inch apart in all directions. Brush the surface of each cookie with the egg white, then sprinkle each cookie with a pinch of sugar. Bake the cookies for about 12 minutes, but check them after 10 minutes.  They may need more time but check at 10 and gauge from there. It was hard for me to tell the timing because in class everyone kept opening the oven doors! The cookies will spread slightly and have a very pale golden color when finished.

Slide the papers from the pans and cool on racks.

After the cookies have cooled, store them in a plastic container with a tight-fitting lid.

Chocolate Chip Cookies

Silpat

These are my go to chocolate chip cookies . I make these because I almost always have all of the ingredients on hand. I keep sticks of salted butter in the freezer just for these.  These are your basic chocolate chip cookie, I would say they are more crispy than soft. Unlike my other chocolate chip cookies  (cookies and milk which was published back on Feb. 28 ) which are very very crispy made with vegetable oil and super fine sugar.  These are an old fashioned chocolate chip cookie and if you don’t have dark brown sugar use light brown sugar . I think they’re meant to be made with dark brown sugar but sometimes I only have light brown sugar in the house so it will have to do. If you’re going out shopping for ingredients buy the dark brown sugar. Enjoy with coffee, tea or my favorite  a cold glass of milk. I didn’t make with nuts this time  but you can add some chopped walnuts if you’d like . If cookies spread into one another, while warm cut and when they cool just seperate . Perfect for freezing, I just put them in a freezer bag, and they defrost super fast.

Ingredients: 

2 cups all purpose flour

1 teaspoon baking soda

1 teaspoon salt ( regular table )

1 cup Salted butter ( yep salted butter as per recipe) softened

3/4 cup sugar

3/4 cup firmly packed dark brown sugar or light brown sugar if no dark brown sugar on hand

1 teaspoon water

1 teaspoon vanilla

2 large eggs ( always bake with eggs at room temperature unless it specifies otherwise)

2 cups semisweet chocolate chips

*1 cup chopped walnuts

Directions:

Preheat oven to 350 degrees. Grease 2 cookie sheets or use Silpat

In a large bowl, stir together the flour, baking soda and salt. (you don’t have to sift)

In another large bowl ( I used electric mixer) cream the butter and sugars. Add water and vanilla. Mix the ingredients until they are just combined. Add the eggs and mix them lightly ( don’t over mix the dough) just till combined

Drop the cookies 2 inches apart onto the prepared cookie sheets, I used a tablespoon measuring spoon to get the size I wanted.

Bake them for 13 minutes or until the edges and centers are brown. Remove the cookies to a rack to cool. I baked for 13 minutes and they were just right.

Espresso Brownies from ICE Class

These brownies are very moist with a hint of espresso flavor–the perfect ending to any meal. This recipe comes from my Cookies Unlimited class at ICE (Institute of Culinary Education) in NYC. I thought these brownies came out great. Our chef/teacher, Victoria, said that if we wanted, we could double the recipe and get a higher brownie. I made it as is and it was delicious. I cut them into small little pieces because these are super rich and a little goes a long way. I don’t think I would double this recipe. Maybe I’d make 2 batches but prefer it baked this way .  It is super gooey and super dense with a coffee flavor from the espresso powder. These brownies stand out from any other brownie I’ve ever made. Enjoy! Also, if you’d like, you can add 1 cup of chopped walnuts…totally up to you.

Ingredients: 

Use a 9 x 13 inch pan (will yield approx . 24 2-inch brownies)

8 tablespoons (1 stick) unsalted butter

4 ounces unsweetened chocolate

4 large eggs

2 tablespoons instant espresso powder (I used Medaglia d’Oro, which is available almost everywhere)

1/2 teaspoon salt (regular table salt)

1 teaspoon vanilla extract

2 cups sugar

1 cup all-purpose flour

*1 cup chopped walnuts

Directions:

I learned a little trick here: first spray your pan with Pam cooking spray, then cut parchment paper to fit your pan and place it in there. Next, turn over parchment paper and the side up is nicely greased! Great trick for baking.

Preheat oven to 350 degrees and set rack in the middle of the oven.

Melt the butter in a saucepan over medium heat. Off the heat, add the chocolate. Let stand 2 minutes, then whisk smooth. If the chocolate has not all melted by this time, return the pan to very low heat and stir constantly until it melts.

In a large bowl, whisk the eggs with the espresso powder, salt and vanilla, just until mixed. Whisk in the sugar in a stream, then whisk in the chocolate and butter mixture. Switch to a rubber spatula and fold in the flour.

Scrape the batter into the prepared pan and smooth the top with an offset spatula (worth buying). Bake for about 30 to 35 minutes, or until a toothpick or cake tester comes out clean. Cool completely before cutting. To really make the brownies easier to cut, allow them to solidify completely then refrigerate in the pan overnight.

When you are ready to take them out, transfer the whole cake to a cutting board and slide a long knife or spatula under it to loosen the paper from the brownies, then pull away paper. Cut brownies into 2 inch squares (you can actually use a ruler to mark for precision). As you can tell from the photo, we didn’t have time to refrigerate brownies and so cutting was not so great. The next time I make these, I would definitely refrigerate overnight before attempting to cut.

The brownies will keep in a plastic container for several days. For longer, freeze in cellophane.