 This recipe is from the NYT Cooking blog courtesy of Ali Slagle and a big thanks out to her . I always read the NYT Cooking it’s really got the most amazing recipes and some of the best chefs out there participate. This recipe caught my eye because of our love of Shrimp.
I also made changes which just worked out best for me. That’s the beauty of cooking you can make changes which better suit you. However the recipe is perfect as is. I used very large shrimp but you can use whatever size suits you and your budget. I used an under 10 Mexican White Shrimp. If you’re buying ask them to clean and de-vein them — Joel did mine.
It’s a spin on a scampi and I love cooking in one pan.
Ingredients:
1 – 1 1/2 lb large shrimp, peeled and de-veined
4 Tablespoons Extra Virgin Olive Oil
1 Tablespoon fresh Lemon Zest plus 1 Tablespoon Fresh Lemon Juice–1 average to large size lemon
1/2 teaspoon red-pepper flakes– obviously optional if you don’t like the pepper
Kosher Salt and Freshly Ground Black Pepper to taste
4 Garlic Cloves, minced
2 Tablespoons unsalted butter
1 cup orzo
1/3 cup dry white wine
2 cups boiling water, seafood stock, or chicken stock–I used Chicken
3 Tablespoons Finely chopped Parsley
Directions:
In a medium bowl, stir together the shrimp, 2 Tablespoons Olive Oil, the lemon zest, red-pepper flakes, 1/2 teaspoon kosher salt, 1/4 teaspoon black pepper, and half the minced garlic.
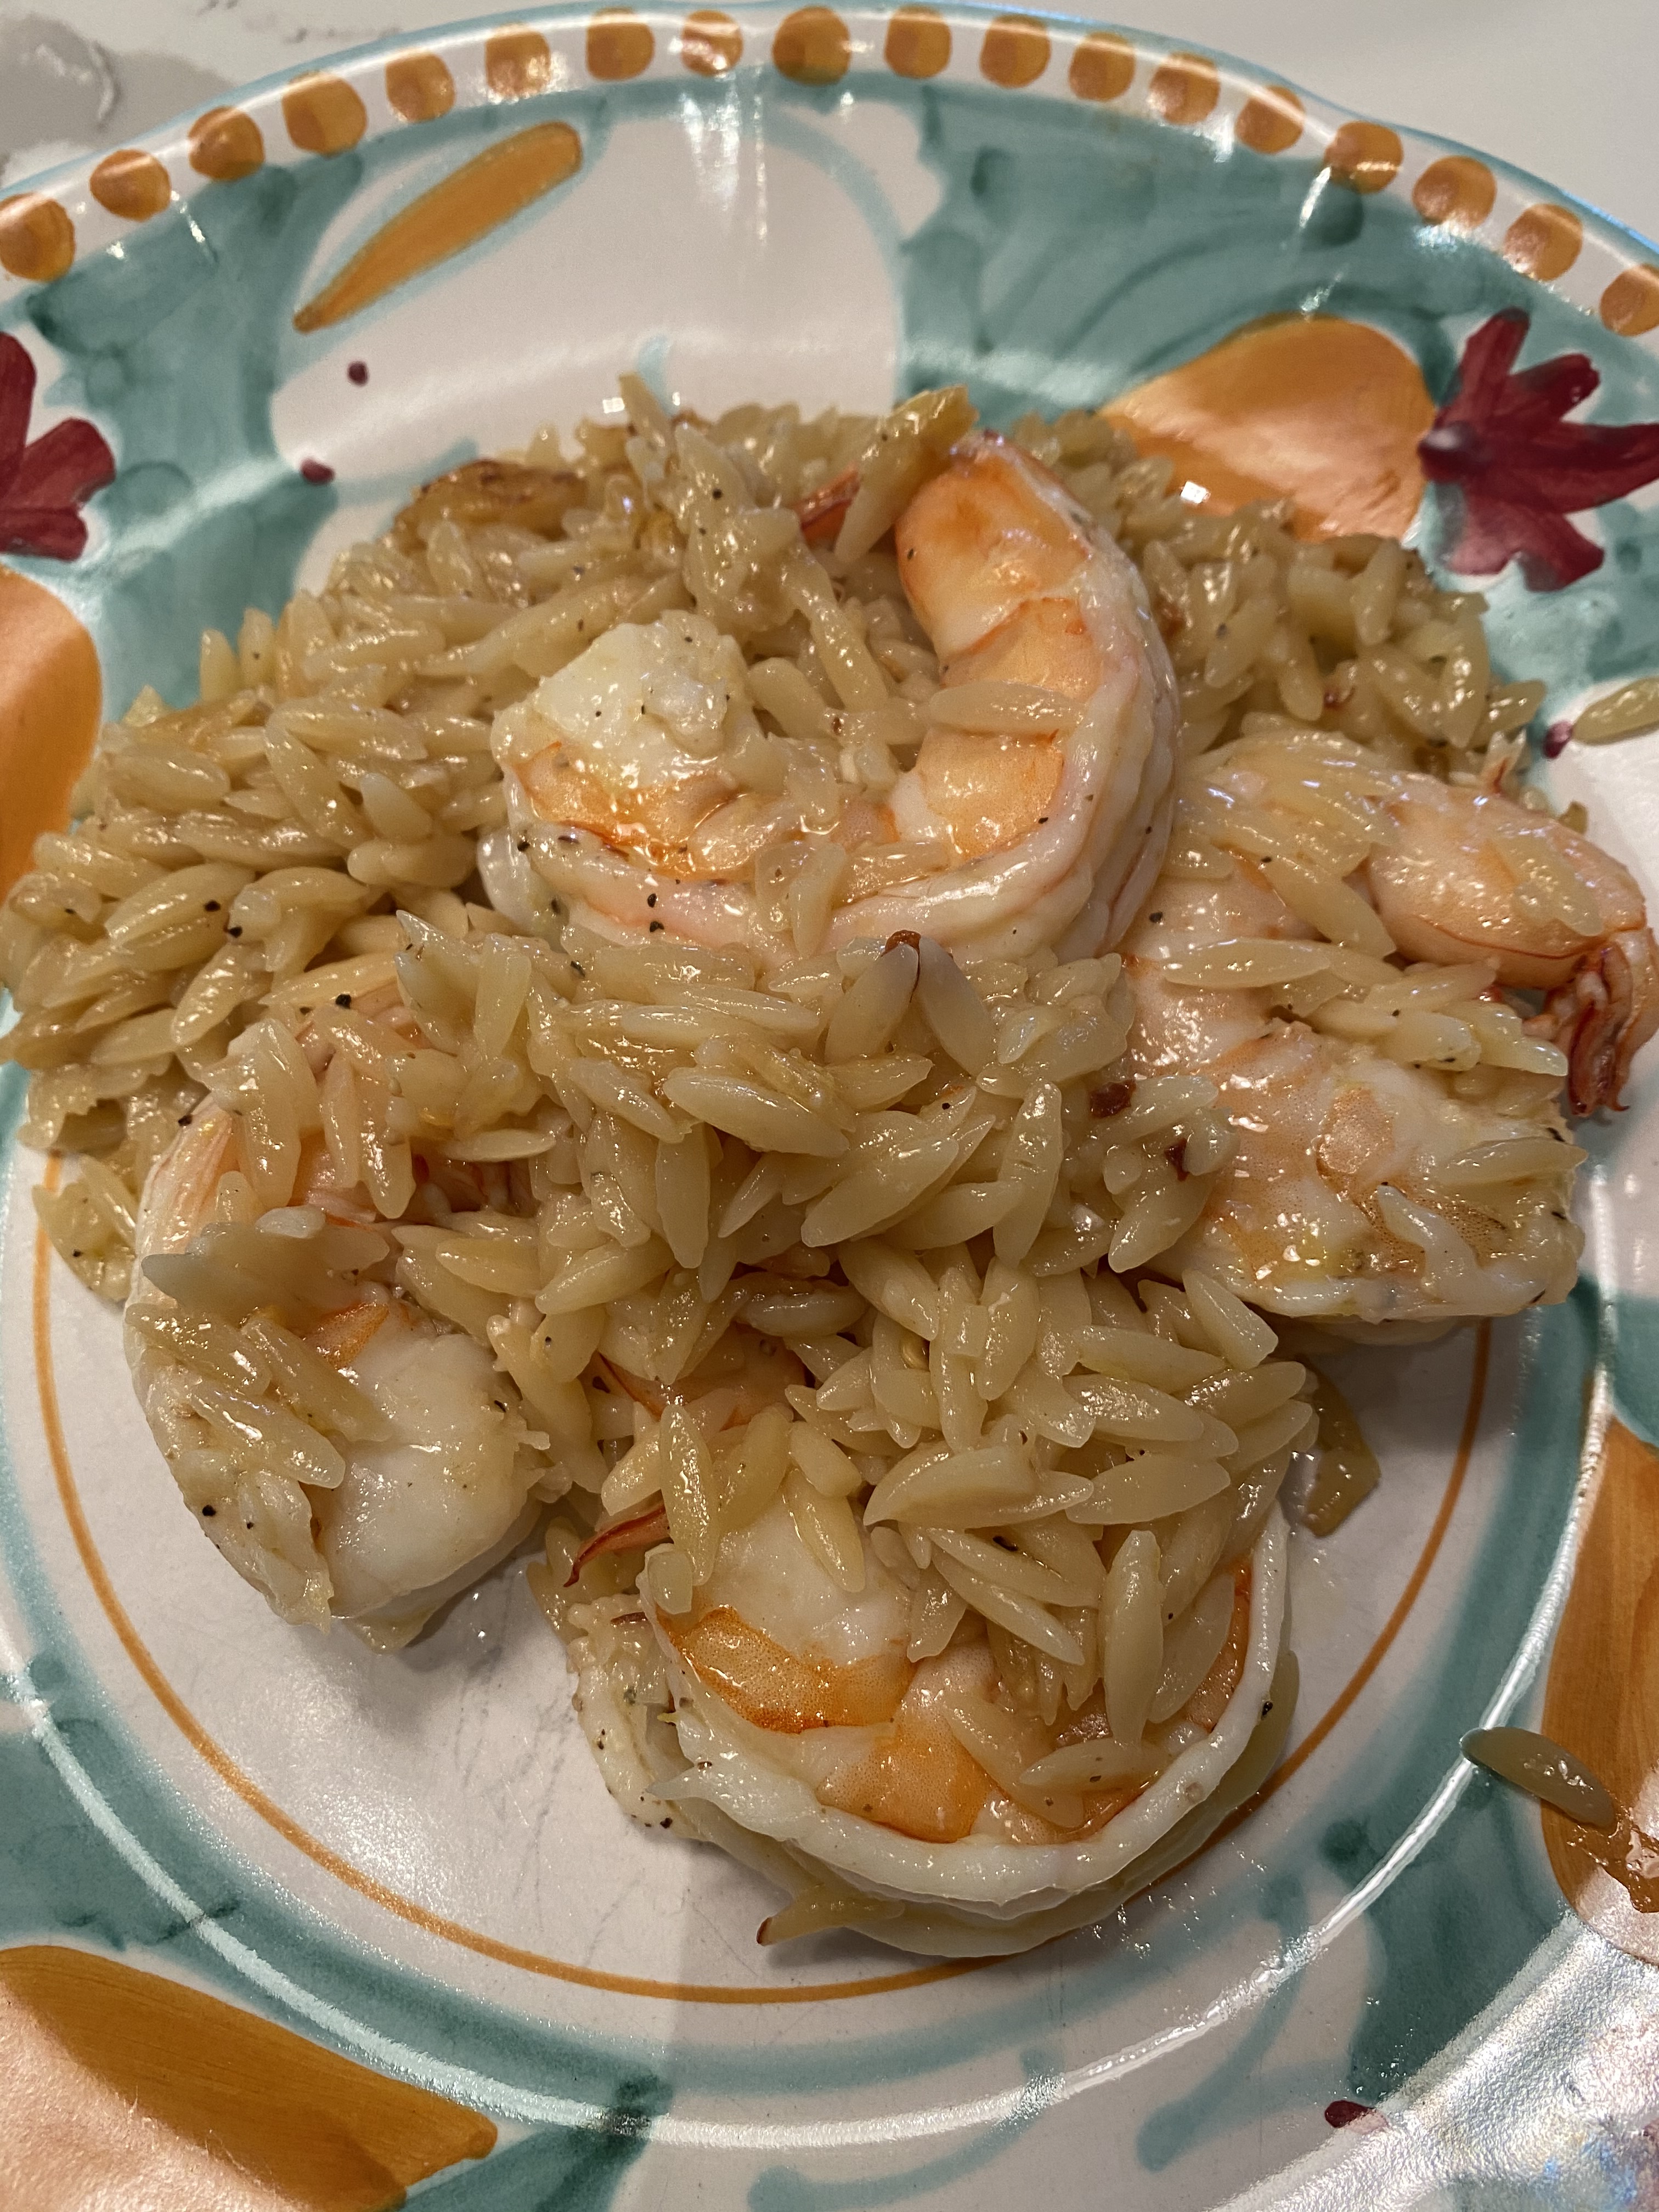
In a medium skillet sprayed with cooking spray, add the butter, the remaining oil and garlic and heat over low to medium heat. Don’t burn the garlic. When the butter starts to bubble, add the orzo and another 1/2 teaspoon kosher salt and cook by stirring around the pan as often as possible, toast the orzo in pan for about 2 minutes, adjusting the heat so as not to burn the orzo or the garlic. Carefully add the wine to the pan and stir in until it is absorbed for another minute or so. Stir in the chicken stock , reduce heat to low, cover and cook until the orzo is al dente, probably another 12- 15 minutes. This would be a good time to taste for salt and pepper .
Add the shrimp ( see photo) put them in a snug even layer on top of the orzo, cover and cook until the shrimp is pink and cooked through. This will all depend on the size of your shrimp. Remove from heat and let sit, covered for another few minutes till you’re ready to serve.
I poured the lemon juice over the finished shrimp — placed on a platter and sprinkled with chopped parsley.